Connect with us

Beginners Guides

How To Make Candle Labels

Published

on

An image showcasing a hands-on guide for making candle labels

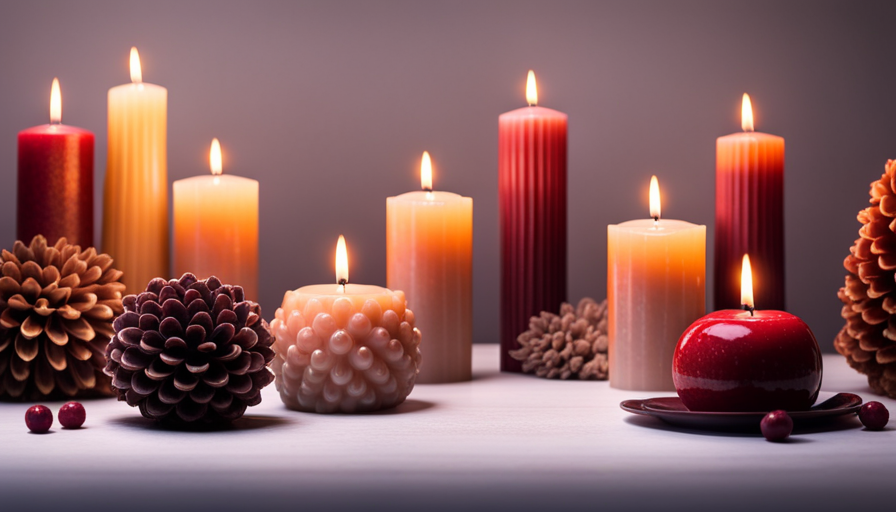
Step into the enchanting world of candle making, where shimmering lights dance and delicate scents transport you to another realm. But before you embark on your aromatic journey, there’s a crucial element that requires your focus – candle labels. Like a finely crafted spell, these labels have the power to captivate and enchant potential customers.

Creating exquisite candle labels is an art form in itself, requiring a careful balance of creativity and compliance with labeling regulations. In this article, I will guide you through the mesmerizing process of making your own candle labels. From selecting the perfect materials to showcasing your unique brand identity, we will explore every aspect of label creation.

So gather your imagination and let us delve into the magical realm of candle label design. With a touch of ingenuity and a dash of passion, you can create labels that not only adorn your candles but also beckon customers with their captivating charm.

Let’s begin this enchanting journey together!

Key Takeaways

  • Candle labels play a crucial role in captivating and enticing customers.
  • Creating exquisite candle labels requires creativity while also complying with labeling regulations.
  • Understanding labeling regulations is essential for ensuring safety and meeting legal obligations.
  • Vital information such as product name, manufacturer details, batch/lot number, hazard warnings, and fragrance/allergen information should be included on candle labels.

Understanding Labeling Regulations

Before diving into the creative process of designing your candle labels, it’s crucial to understand the intricate web of labeling regulations that govern this industry. Understanding labeling requirements and compliance with safety regulations is essential to ensure that your candles are safe for use and meet all legal obligations.

Labeling regulations vary from country to country, and even within different states or regions. It’s important to familiarize yourself with the specific rules and guidelines that apply to your location.

Advertisement

These regulations typically cover aspects such as product information, warning labels, ingredient disclosures, and proper usage instructions.

To comply with safety regulations, your candle labels should include vital information like the product name, manufacturer details, batch or lot number, net weight or volume, and any relevant hazard warnings. Additionally, you may need to provide information about the fragrance used in your candles or any potential allergens present.

Understanding these labeling requirements will help you design labels that not only look visually appealing but also convey necessary information accurately. By ensuring compliance with safety regulations through proper labeling techniques, you can instill confidence in consumers about the quality and safety of your candles.

Now that you have a good grasp on understanding labeling regulations for candle products, let’s move on to choosing the right materials for your labels without compromising on quality or aesthetics.

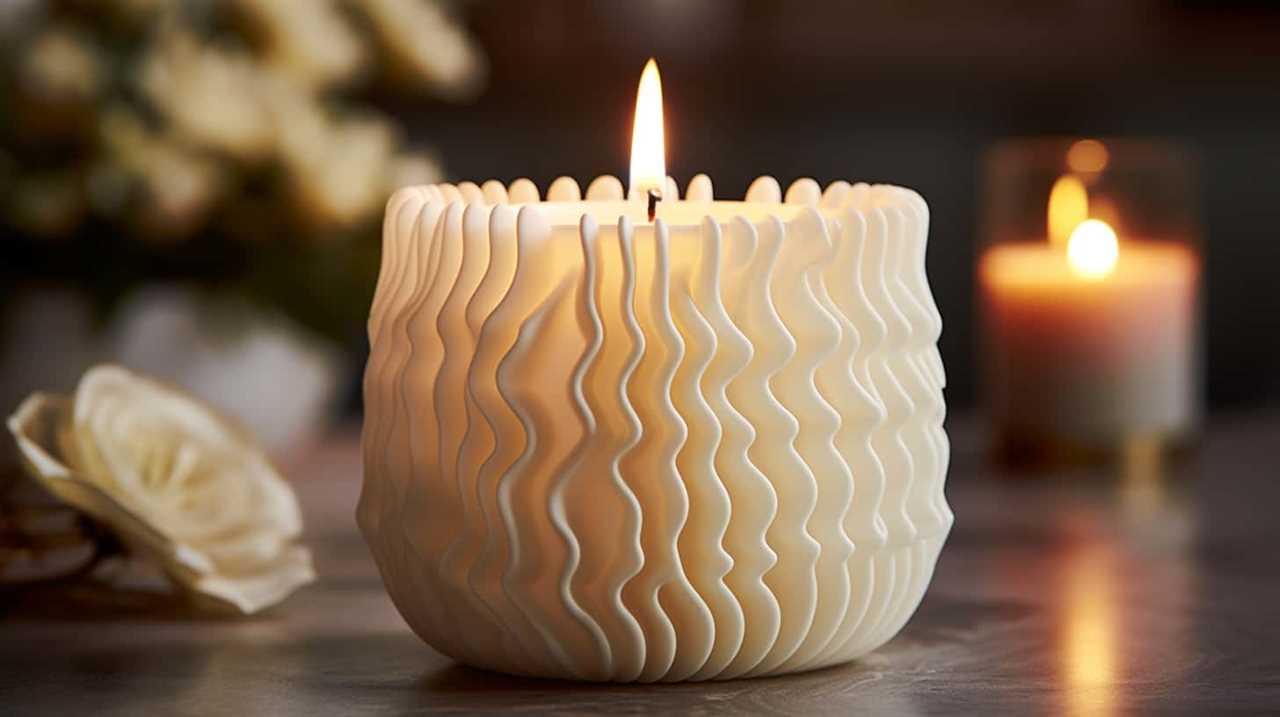
Choosing the Right Materials for Your Labels

When selecting the appropriate materials for your candle labels, it’s crucial to ensure they are as eye-catching as a shimmering flame. Choosing label colors that complement the scent and ambiance of your candles can make a significant impact on attracting customers. Bright and vibrant colors like reds, oranges, and yellows can evoke feelings of warmth and coziness, while soft pastel shades can create a sense of relaxation. A well-chosen color scheme can help convey the essence of your candles and entice potential buyers.

Advertisement

Finding a label supplier that offers high-quality materials is essential for creating professional-looking labels. Look for suppliers who specialize in candle labels and provide options such as waterproof or heat-resistant materials to ensure durability. Additionally, consider using eco-friendly materials like recycled paper or biodegradable options to align with sustainable practices.

Incorporating these elements into your candle labels will not only catch the eyes of consumers but also showcase your commitment to quality and aesthetics. With carefully chosen colors and reliable label materials, you can design captivating labels that reflect the unique character of your candles. In the next section about designing a captivating label, we’ll explore how to incorporate visual elements that capture attention without overwhelming the senses.

Designing a Captivating Label

Creating a captivating label involves combining visually striking elements that capture attention and convey the unique essence of your candles. To design label artwork that stands out, focus on creating a memorable visual impression.

Experiment with different fonts, colors, and graphics to find the right balance for your brand. Consider incorporating hand-drawn illustrations or intricate patterns to add an artistic touch.

Color psychology plays a crucial role in label design. Choose colors that evoke emotions associated with your candle’s purpose or fragrance. For example, calming blues and greens work well for relaxation candles, while warm oranges and reds can be used for energizing scents. Additionally, use contrasting colors to make key information pop and ensure readability.

Advertisement

Another effective way to captivate your audience is by adding unique features to your labels:

  • Texture: Embossing or using textured materials can create a tactile experience.
  • Metallic accents: Foil stamping or metallic inks can give your labels a luxurious feel.
  • Interactive elements: QR codes or hidden messages encourage engagement.

By incorporating these elements into your label design, you will create an eye-catching representation of your brand’s identity and values.

Transitioning into the next section about incorporating brand identity into your labels, it’s important to consider how each element of the design aligns with the overall image you want to project.

Incorporating Brand Identity into Your Labels

To truly captivate your audience, infuse your labels with the essence of your brand, showcasing its unique identity and values. Incorporating branding strategies and color psychology into your label design can help create a visual representation that resonates with customers on a deeper level.

One effective way to incorporate brand identity into your labels is by using colors that align with your brand’s personality. Colors have a psychological impact on people, evoking certain emotions and associations. For example, if your brand represents relaxation and tranquility, incorporating shades of blue in your label design can help convey this message to consumers.

Another important aspect to consider is typography. The font style and size you choose should reflect the overall aesthetic of your brand. If you are going for a modern and sleek look, opt for clean and minimalist fonts. On the other hand, if your brand has a more whimsical or vintage feel, consider using decorative or script fonts.

Advertisement

In addition to colors and typography, including symbols or icons that are associated with your brand can further enhance the visual appeal of your candle labels. These elements can serve as visual cues that reinforce the message you want to convey.

By incorporating these branding strategies into your label design, you can create candle labels that not only capture attention but also communicate the unique identity of your brand effectively.

Now let’s transition into adding important information to your labels without missing any crucial details

Adding Important Information to Your Labels

As you bring your brand to life through captivating label designs, don’t forget to infuse the necessary details that inform and engage your customers, like a secret ingredient adding depth to your creation. Adding important information to your candle labels is crucial not only for legal requirements but also for ensuring customer safety.

Here are three key elements you should consider including:

Advertisement
  1. Legal Requirements: Make sure to include all the mandatory information required by law, such as the product name, ingredients list, net weight, and contact information. This will not only keep you compliant with regulations but also establish trust with your customers.

  2. Safety Precautions: Candles can pose fire hazards if not used properly, so it’s essential to include safety precautions on your labels. Highlight instructions on how to safely burn the candle, warning signs of overheating or improper handling, and any additional precautions specific to your product.

  3. Unique Selling Points: Apart from legal requirements and safety precautions, use this space as an opportunity to highlight what sets your candles apart. Showcase any unique features or benefits that make your candles stand out from the competition.

Now that you have covered all the necessary details on your candle labels, let’s move on to selecting the right label size and shape for maximum impact.

Selecting the Right Label Size and Shape

Choose the perfect size and shape for your candle labels to make a lasting impact on customers. Label placement is crucial when it comes to catching the eye and conveying important information about your candles.

Consider the size and shape of your candle jars, as well as any other packaging elements, when selecting the right label size and shape. A label that is too small may get lost amidst other design elements, while a label that is too large can overwhelm the packaging.

Additionally, think about how you want your labels to be positioned on the jar. Do you prefer them centered or off-center? Experiment with different placements to find what works best for your brand.

In terms of label durability, choose materials that are resistant to heat and moisture since candles can create both. Opt for high-quality materials like vinyl or polyester that can withstand these conditions without fading or peeling. This will ensure that your labels stay intact throughout the life of the candle.

Advertisement

Now that you have chosen the perfect size and shape for your candle labels, it’s time to move on to printing and applying them without skipping a beat!

Printing and Applying Your Labels

After carefully selecting the perfect label size and shape for my candles, it was time to move on to the next step: printing and applying the labels. I wanted my labels to look professional and eye-catching, so I decided to explore different printing techniques.

  1. Inkjet Printing: I discovered that inkjet printers are great for printing vibrant colors and intricate designs on labels. The high resolution of these printers ensured that every detail would be sharp and clear.

  2. Thermal Transfer Printing: Another option I considered was thermal transfer printing, which uses a heated ribbon to transfer ink onto the label material. This method is ideal for creating durable and long-lasting labels.

  3. Label Application Tools: To ensure a smooth application process, I invested in a label applicator tool. This handy device helped me align the labels perfectly on each candle jar without any wrinkles or bubbles.

Now that my labels were ready, it was crucial to protect them from any potential damage during shipping or handling.

Protecting Your Labels from Damage

To ensure your labels stay pristine throughout shipping and handling, it’s essential to provide them with a sturdy shield against potential harm. One of the main concerns when it comes to protecting your candle labels is preventing label fading. After all, you want your customers to receive their candles with vibrant and eye-catching labels intact.

To achieve this, using waterproof label materials is highly recommended. Waterproof label materials are designed to withstand moisture and resist smudging or running. They provide an extra layer of protection for your labels, ensuring that they remain crisp and clear even if they come into contact with water or other liquids during transportation or storage. Additionally, these materials are more durable than regular paper labels, making them less prone to tearing or scratching.

Advertisement

By investing in waterproof label materials, you can have peace of mind knowing that your candle labels will maintain their high-quality appearance throughout the entire journey from production to the customer’s doorstep. This attention to detail not only reflects positively on your brand but also enhances the overall customer experience.

Now that you have learned how to protect your candle labels from damage, let’s move on to creating custom labels for special edition candles…

Creating Custom Labels for Special Edition Candles

Crafting unique labels for limited edition candles allows me to showcase my creativity and capture the essence of these special collections. With custom label design, I can create something truly remarkable that sets these candles apart from the rest. To ensure success in marketing these exclusive creations, I employ effective strategies that highlight their uniqueness.

  • Vibrant colors: Using a bold color palette on the labels instantly grabs attention and creates a sense of excitement.
  • Intricate patterns: Incorporating intricate designs adds an element of sophistication and elegance to the labels.
  • Luxurious materials: Opting for high-quality materials like textured paper or metallic finishes elevates the overall look and feel of the label.
  • Embellishments: Adding embellishments such as foil accents or embossed details brings a touch of luxury to the labels.
  • Limited edition numbering: Including a numbered badge on each label not only adds exclusivity but also creates a sense of urgency among customers.

By showcasing my unique label designs, I can attract customers who appreciate creativity and craftsmanship.

The next section will discuss how to effectively display these captivating labels to maximize customer engagement and sales conversion.

Showcasing Your Unique Label Designs to Attract Customers

After putting in the effort to create custom labels for your special edition candles, it’s time to showcase your unique designs and attract customers. This is where effective marketing strategies come into play.

Advertisement

Creating unique label designs is just the first step, but now you need to find ways to make them stand out from the competition. One way to do this is by utilizing eye-catching visuals that capture attention and pique curiosity. Consider using vibrant colors, intricate patterns, or even incorporating elements of nature or whimsy.

Once you have a visually appealing label design, it’s important to market it effectively. Utilize social media platforms like Instagram or Pinterest to showcase your candles in styled settings that highlight their beauty. Engage with your audience by sharing behind-the-scenes glimpses of the label creation process or offering exclusive discounts for followers.

Additionally, consider partnering with influencers or bloggers in the home decor or lifestyle niche who can help spread the word about your unique candle labels. Collaborate on content that showcases your candles in an authentic and relatable way.

By combining creative label designs with effective marketing strategies, you’ll be able to captivate potential customers and establish a strong brand presence in the candle market.

Frequently Asked Questions

How do I calculate the correct label size for my candle?

When calculating label dimensions for your candle, it’s important to consider both the aesthetic appeal and practicality.

Advertisement

For instance, imagine creating a luxurious scented candle with intricate designs and unique branding. You would want a label that not only complements the elegance of your product but also provides enough space for all necessary information.

By choosing high-quality materials like glossy paper or waterproof vinyl, you can ensure durability and enhance the overall presentation of your candles.

Can I use regular printer paper for my candle labels?

Yes, you can use regular printer paper for your candle labels. However, it may not give the same durability and professional finish as specialized label materials. To get the best results, consider using thicker paper or adhesive-backed paper made specifically for labels. Also, when printing on regular printer paper, make sure to adjust your printer settings for optimal print quality and to avoid smudging or fading.

Are there any restrictions on the type of font I can use for my candle labels?

When it comes to font design and selection for candle labels, there aren’t any specific restrictions. However, it’s important to choose a font that aligns with your brand image and enhances the overall aesthetic appeal of your product. Consider factors like readability, legibility, and the mood you want to convey. Experiment with different fonts to find the perfect one that captures the essence of your candles and entices customers.

How do I ensure that my candle labels are waterproof?

Ah, the eternal struggle of ensuring that my candle labels stay intact even in the face of water. Fear not, for I’ve discovered some waterproofing techniques that are simply divine.

Advertisement

One option is to use a waterproof coating spray or laminate to protect your labels from any unwanted moisture.

Another approach is to explore alternative label materials such as vinyl or synthetic paper, which are naturally water-resistant.

With these tricks up my sleeve, my candle labels shall remain impervious to the elements!

Can I use images or graphics from the internet for my candle labels?

Yes, you can use images or graphics from the internet for your candle labels. However, I highly recommend using custom illustrations for a more unique and personalized touch. Professional graphic design offers numerous benefits for candle labels, such as creating eye-catching visuals that effectively convey your brand’s message. With their expertise in color schemes and layout, professional designers ensure that your labels stand out and leave a lasting impression on customers.

Conclusion

In conclusion, making candle labels is a creative and rewarding process. By understanding labeling regulations and choosing the right materials, you can create captivating designs that showcase your brand identity.

Advertisement

Remember to include important information on your labels and protect them from damage. And don’t forget to let your imagination run wild when creating custom labels for special edition candles!

With unique label designs that catch the eye, you’ll be able to attract customers like bees to honey. So go ahead, light up your creativity and watch your candles shine!

I'm Amelia, and I love making candles. It all started when I was given a kit as a gift. I loved the process so much that I decided to make my own candles. I soon realized that I had a real talent for it. Before long, my friends and family were asking me to make candles for them too. Word spread, and soon I was inundated with orders. I love the creativity that goes into making each candle unique. And I love the satisfaction of knowing that people are using something I made with my own hands.

Advertisement

Beginners Guides

How To Get Candle Wax Off Of Wood

Published

on

By

An image featuring a wooden surface with spilled candle wax

Just when you believe you’ve created the ideal ambiance with your beloved scented candles, a disaster occurs. Your lovely wooden furniture is now blemished with unpleasant stains caused by melted candle wax. But have no fear, as I have the answer to this issue.

As an experienced wood enthusiast, I’ve encountered my fair share of wax mishaps, and I’m here to guide you through the meticulous process of removing candle wax from wood.

In this comprehensive article, I’ll share with you my tried and tested techniques for banishing wax stains from your beloved wooden surfaces. From freezing and scraping to applying heat and solvents, I’ll walk you through each step, ensuring that your furniture is restored to its former glory.

Additionally, I’ll reveal some natural remedies and preventive measures to ensure future wax stains are nothing but a distant memory.

So, grab your tools and join me on this journey to reclaim the beauty of your wood. Let’s dive into the world of DIY wax removal and bid farewell to those pesky candle wax stains once and for all.

Advertisement

Key Takeaways

  • Assess the damage by examining the affected area for discoloration or changes in texture caused by the wax.
  • The freeze and scrape technique is an effective method for removing wax from wood.
  • Solvents like rubbing alcohol or mineral spirits can dissolve the wax for easy removal.
  • Sanding and refinishing the wood after removing the wax helps to remove any remaining residue and restore the wood’s appearance.

Assess the Damage

Take a good look at the damage caused by that pesky candle wax on your beautiful wooden surface – it’s time to figure out how to make it vanish! As an experienced wood enthusiast, I understand the frustration of dealing with wax stains. Luckily, there are effective methods for assessing the damage caused by candle wax on wood and tips for identifying different types of wax stains on wood surfaces.

To assess the damage, start by examining the affected area closely. Look for any discoloration or changes in texture caused by the wax. Different types of wax, such as beeswax or paraffin wax, may leave different marks on the wood. Beeswax usually leaves a translucent stain, while paraffin wax can create a cloudy or opaque residue. Knowing the type of wax will help you choose the most appropriate removal method.

Now that you’ve assessed the damage, let’s move on to the next step.

Freeze and Scrape

Using the freeze and scrape technique, I’ve found that it’s an effective method for removing stubborn wax from wooden surfaces. However, there are alternative methods that can make this process even easier.

One such method is using a hairdryer to heat the wax and then wiping it away with a cloth. This can be especially useful for smaller areas or delicate wooden surfaces where freezing may not be ideal.

In addition to alternative methods, there are also prevention techniques that can help avoid wax buildup on wooden surfaces. One preventative measure is to use a protective barrier, such as a tablecloth or placemat, when using candles. This will catch any drips or spills and prevent them from seeping into the wood. Regular cleaning and dusting of wooden surfaces can also help to remove any wax residue before it has a chance to build up.

Advertisement

Moving on to the next section about using heat to remove wax, another effective way to remove stubborn wax from wood is by applying heat. This’ll soften the wax, making it easier to scrape off. By using the freeze and scrape technique alongside heat application, you can ensure a thorough removal of wax from your wooden surfaces.

Use Heat to Remove Wax

An effective method for effortlessly eliminating stubborn wax from wooden surfaces involves applying heat, which softens the wax and allows for easy removal. When it comes to using heat to remove wax from wood, there are two common tools that can be utilized: a heat gun or a hair dryer. Both options work by directing hot air onto the wax, causing it to soften and become pliable.

To begin, position the heat gun or hair dryer about six inches away from the wax-covered area. Move the tool back and forth, ensuring even distribution of heat across the wax. As the wax heats up, it’ll start to melt and become more liquid-like. Use a clean cloth or paper towel to carefully wipe away the softened wax.

It’s important to note that excessive heat can damage the wood surface, so it’s crucial to keep the heat gun or hair dryer moving and avoid applying heat for an extended period of time.

With the wax successfully removed, it’s now time to transition into the subsequent section about applying solvents or cleaners to further clean the wood surface. By following this method, you can easily remove wax from wood without any hassle.

Advertisement

Apply Solvents or Cleaners

When dealing with candle wax on wood, one effective method is to apply solvents or cleaners to dissolve the wax. Rubbing alcohol or mineral spirits are commonly used solvents that can break down the wax for easy removal.

However, it’s crucial to test the solvent on a small, inconspicuous area of the wood first to ensure it doesn’t damage or discolor the surface. I’ve found this technique to be highly effective in my experience and it allows for a meticulous and careful approach to removing wax from wood surfaces.

Use a solvent like rubbing alcohol or mineral spirits to dissolve the wax

To easily dissolve the candle wax on your wood surface, grab some rubbing alcohol or mineral spirits and watch as the wax disappears before your eyes. These solvents are highly effective in breaking down the wax and removing it from the wood.

Rubbing alcohol is a common household item that can be easily found in most homes, making it a convenient choice. Mineral spirits, on the other hand, are typically used for more stubborn wax stains.

When using these solvents, it’s important to be cautious and prevent damage to the wood. Avoid scrubbing too vigorously or using abrasive materials that can scratch the surface. Additionally, it’s advisable to test the solvent on a small, inconspicuous area of the wood first to ensure that it doesn’t cause any discoloration or damage.

Advertisement

Test the solvent on a small, inconspicuous area of the wood first

Before applying the solvent, it’s advisable to first test it on an inconspicuous area of the wood. This will ensure that it doesn’t cause any discoloration or damage. Testing the solvent on a small, hidden section of the wood allows you to determine its compatibility with the material. It’s essential to observe any adverse reactions, such as changes in color or texture, before proceeding with the full application.

Additionally, there are alternative methods using household items that you can try if you’re concerned about using solvents. Natural removers like vinegar or baking soda mixed with water can also be effective in removing candle wax from wood. These options provide a safer and more environmentally friendly approach.

Transitioning into the subsequent section about ‘try natural removers,’ it’s important to explore different methods to find the best solution for your specific situation.

Try Natural Removers

For an effective solution, try using natural removers to get candle wax off of wood. Natural removers are a great alternative to chemical solvents and can be just as effective.

When comparing natural versus chemical removers, there are pros and cons to consider. Natural removers are typically safer to use, as they don’t contain harsh chemicals that can potentially damage the wood or pose health risks. However, they may require more time and effort to remove the wax completely. On the other hand, chemical solvents are often quicker and more efficient, but they can be harmful to both the wood and your health if not used properly.

Advertisement

When using natural removers, there are a few options to consider. One popular method is using heat to melt the wax and then wiping it away with a soft cloth. Another option is using a mixture of vinegar and water to dissolve the wax. Simply apply the mixture to the affected area, let it sit for a few minutes, and then wipe it away. You can also use a mixture of baking soda and water to create a paste that can be applied to the wax and gently scrubbed away.

Once the wax has been removed using natural removers, you may notice that the wood has a dull appearance or some discoloration. In the subsequent section, we’ll discuss how to sand and refinish the wood to restore its original beauty.

Sand and Refinish

After using natural removers to remove candle wax from wood, the next step is to sand and refinish the affected area. This process helps to remove any remaining wax residue and restore the wood’s natural shine.

I highly recommend applying a new coat of finish or polish to protect and enhance the wood’s appearance. With my experience and attention to detail, I can assure you that sanding and refinishing will leave your wood looking good as new.

Sand the affected area to remove any remaining wax residue

To truly banish the lingering vestiges of wax, grab some sandpaper and give that affected area a gentle scrub. Sanding the wood is an effective technique for removing any remaining wax residue. Here’s how to do it:

Advertisement
  • Start with a medium-grit sandpaper and sand the affected area in a circular motion. This’ll help to remove any wax that’s still clinging to the wood.

  • Gradually switch to a finer grit sandpaper to smoothen the surface and remove any scratches left by the previous sanding.

  • Use a soft cloth to wipe away the dust created from sanding.

  • If there’re still stubborn wax stains, you can try using the freezing method. Place a plastic bag filled with ice cubes on top of the wax and let it harden. Then, carefully scrape off the hardened wax using a plastic scraper.

  • Finally, once the wax residue is completely removed, you can move on to applying a new coat of finish or polish to restore the wood’s shine.

Now, let’s discuss how to apply a new coat of finish or polish to restore the wood’s shine.

Apply a new coat of finish or polish to restore the wood’s shine

Now, let’s give your wood a fresh and glossy makeover by adding a brand new coat of finish or polish. This step is crucial in restoring the wood’s shine and protecting it from future wax stains.

There are various natural remedies and DIY restoration techniques you can use to achieve this. First, make sure the affected area is clean and free of any residue. Then, choose a high-quality wood finish or polish that matches the color and type of wood you have.

Apply a thin and even coat using a clean cloth or brush, following the manufacturer’s instructions. Allow it to dry completely before applying a second coat if necessary. This will not only enhance the appearance of your wood but also provide a protective layer against future stains.

Moving forward, let’s explore how you can prevent future wax stains from occurring.

Advertisement

Prevent Future Wax Stains

First things first, let’s figure out how to keep those pesky wax stains off our wood surfaces for good! Here are four best practices for preventing future damage and keeping your wood looking pristine:

  1. Use protective mats or coasters: Place mats or coasters underneath candles to catch any drips or spills. This will prevent the wax from coming into direct contact with the wood surface.

  2. Trim candle wicks: Long wicks can cause candles to produce excessive amounts of soot and smoke, which can settle on nearby surfaces, including wood. By trimming the wicks to a quarter of an inch, you can minimize the chances of wax stains and keep your wood surfaces clean.

  3. Opt for flameless candles: Flameless candles provide the ambiance of traditional candles without the risk of wax stains. These battery-operated alternatives eliminate the need for open flames, so you can enjoy candlelight without worrying about wax drips.

  4. Clean up spills immediately: Accidents happen, but it’s important to act quickly when wax spills occur. Use a plastic scraper or a credit card to gently remove any excess wax, then follow up with a gentle wood cleaner to remove any residue.

By following these best practices for preventing future wax stains, you can maintain the beauty of your wood surfaces. Now, let’s move on to regular cleaning and maintenance to keep your wood looking its best.

Regular Cleaning and Maintenance

To prevent future wax stains on your wood furniture, regular cleaning and maintenance are essential. It’s important to establish a routine to keep your wood looking its best and minimize the chances of wax buildup.

I’ve found that a gentle dusting with a soft cloth or a microfiber duster is a great first step. This removes any loose dirt or debris that could potentially mix with wax and create a stain. After dusting, I like to use a mild wood cleaner specifically formulated for my furniture. This not only removes any remaining dirt but also nourishes and protects the wood, preventing it from drying out or becoming damaged.

Regular maintenance not only helps in preventing wax stains but also has numerous benefits for your wood furniture. It keeps the wood looking vibrant and polished, enhances its natural beauty, and extends its lifespan. By taking the time to care for your wood furniture, you’re investing in its longevity and ensuring that it remains a cherished part of your home for years to come.

Advertisement

Transitioning into the next section, if you encounter stubborn wax stains that can’t be removed with regular cleaning, it may be time to seek professional help.

Seek Professional Help

If you find that the wax stain on your wood is particularly stubborn or if the wood itself is delicate, it might be best to consult a professional for assistance. They have the expertise and tools needed to effectively remove the wax without causing any damage to the wood.

Professional furniture refinishing services can also be a great option if you want to completely restore the wood’s original beauty, as they have the knowledge and experience to do so with meticulous care.

If the wax stain is stubborn or the wood is delicate, consult a professional

When dealing with a stubborn wax stain on delicate wood, it’s best to seek professional assistance. Professional wood restoration experts have the experience and knowledge to safely remove the wax without causing any damage to the delicate wood surface.

Here are three reasons why consulting a professional is the right choice:

Advertisement
  • Specialized Techniques: Professionals use specialized techniques that are specifically designed to remove wax from delicate wood without leaving any residue or causing any harm.

  • Customized Solutions: They understand that each piece of wood is unique and requires a tailored approach. They will assess the wood’s condition and choose the most suitable method for effective removal.

  • Preservation of Beauty: Professional wood restoration specialists are meticulous in their work. They not only remove the wax but also ensure that the wood’s original beauty is restored.

By entrusting your delicate wood to professional furniture refinishing services, you can be confident that they’ll bring back its original charm and elegance.

Professional furniture refinishing services can restore the wood’s original beauty

You’ll be amazed at how professional furniture refinishing services can breathe new life into the wood, restoring its original beauty and elegance. When it comes to restoring antique furniture, these services are invaluable. They have the knowledge and expertise to handle delicate wood and stubborn wax stains with precision.

The benefits of professional refinishing services are numerous. They have access to high-quality products and tools that can remove even the toughest wax stains without causing any damage to the wood. Additionally, they can also repair any scratches or dents, ensuring that your furniture looks as good as new.

With their meticulous attention to detail and years of experience, these professionals can transform your worn-out furniture into stunning pieces that you’ll be proud to display in your home.

Now, let’s move on to some DIY wax removal tips and tricks.

Advertisement

DIY Wax Removal Tips and Tricks

When it comes to removing wax from wood, I’ve found some additional hacks and techniques that have worked wonders for me. One alternative method is using a brown paper bag to absorb the wax. Simply place the bag over the wax and run a warm iron over it, allowing the wax to transfer onto the paper bag.

Another handy trick is using an iron and paper towel. Just place the paper towel over the wax and apply heat with the iron, causing the wax to melt and transfer onto the towel.

These methods have always been effective for me, and I hope they prove useful to you as well.

Share additional hacks and techniques for removing wax from wood

To tackle candle wax residue on wood, try out these clever hacks and techniques for effortlessly removing it. Here are some alternative methods and natural remedies that I’ve found to be highly effective:

  • Ice: Place ice in a plastic bag and place it on the wax. Once the wax hardens, gently scrape it off with a plastic card or your fingernail.

  • Hot water: Pour hot water over the wax and let it soften. Use a soft cloth to wipe away the residue.

  • Hairdryer: Set your hairdryer to a low heat setting and aim it at the wax. As the wax melts, wipe it away with a cloth.

  • Vinegar: Mix equal parts of vinegar and water, then dampen a cloth with the solution and rub it onto the wax. The wax should dissolve.

  • Baking soda: Make a paste using baking soda and water, apply it to the wax, and let it sit for a few minutes. Scrub it off with a cloth or brush.

These are just a few of the many techniques you can try. In the next section, I’ll provide alternative methods using household items like a brown paper bag or an iron and paper towel.

Advertisement

Provide alternative methods using household items like a brown paper bag or an iron and paper towel

Using common household items like a brown paper bag or an iron and paper towel, I’ve discovered effective methods for removing wax residue from wooden surfaces.

The brown paper bag technique involves placing a brown paper bag over the wax and applying heat from an iron on a low setting. The heat melts the wax, which is then absorbed by the paper bag. It’s important to move the iron in a circular motion and not leave it in one spot for too long to avoid damaging the wood.

Alternatively, you can place a paper towel over the wax and use the iron on a low setting to gently heat the area. The paper towel absorbs the melted wax, leaving the wood clean and free from residue.

These techniques are simple, inexpensive, and can be easily done at home.

Frequently Asked Questions

Can I use a hairdryer to melt the wax and remove it from the wood?

Using a hairdryer to melt candle wax off wood can be effective, but it’s crucial to use caution and keep the hairdryer on a low heat setting. Start by melting the wax with the hairdryer, then gently wipe it away with a cloth. If the hairdryer method doesn’t work, there are alternative methods to consider. For example, you can use an iron with a cloth or freeze the wax and scrape it off.

Advertisement

What type of solvents or cleaners can I use to remove candle wax from wood?

There are alternative methods for removing candle wax from wood without using harsh chemicals. One natural solvent that’s effective is white vinegar. Simply apply a small amount of vinegar to a cloth and gently rub the wax until it lifts off the wood.

Another option is using a hairdryer on low heat to melt the wax, then immediately wiping it away with a cloth.

To prevent wax from getting on your wooden surfaces, place a protective barrier like a tray or coaster underneath the candle.

Is it safe to use a credit card or a plastic scraper to scrape off the hardened wax?

Using a credit card or plastic scraper to scrape off hardened wax is generally safe for wood surfaces. However, it’s important to be cautious and gentle to avoid scratching the wood. Applying heat to the wax can also help soften it, making it easier to remove. Keep in mind that excessive heat can damage certain types of wood, so it’s important to use low heat and test in an inconspicuous area first.

Can I use rubbing alcohol to remove candle wax stains from wood furniture?

Yes, you can use rubbing alcohol to remove candle wax stains from wood furniture. However, I’d recommend using a heat gun as the primary method for removing the wax. The heat gun should be set at a low temperature and held a few inches away from the wax. This’ll melt the wax, allowing you to wipe it away with a clean cloth. Rubbing alcohol can be used as an alternative method if the heat gun isn’t available.

Advertisement

Will sanding and refinishing the wood surface completely remove all traces of candle wax?

Sanding and refinishing the wood surface can be an effective way to remove candle wax, but it may not completely eliminate all traces of it. While sanding can remove the top layers of the wood, it may not penetrate deep enough to remove wax that has seeped into the grain.

It’s essential to use caution and not apply too much pressure while sanding to avoid damaging the wood. Alternatively, there are other methods, such as using heat or using a solvent like mineral spirits, that can also help remove wax from wood surfaces.

Conclusion

After following these steps, I was able to successfully remove the candle wax from my wooden surface. It required careful assessment, freezing and scraping, and the use of heat and solvents.

I also learned about natural removers and the importance of regular cleaning and maintenance to prevent future stains. Seeking professional help is always an option for more stubborn cases.

Remember, just as we can remove wax from wood, we can also remove the burdens that weigh us down in life, revealing the beauty that lies beneath.

Advertisement

Continue Reading

Beginners Guides

How To Get Candle Wax Out Of Couch

Published

on

By

An image of a serene living room setting with a scented candle burning on a couch

Hey there! Imagine this scenario: You’re relaxing in a calm, comfortable evening at home, with the soft light of candles around you. Out of nowhere, a blob of candle wax lands on your beloved sofa! But no need to worry, I have the perfect solution for you.

In this article, I’m going to share my tried and tested method for getting candle wax out of your couch, and trust me, it works like a charm.

We’ll start by gathering all the necessary supplies, and then we’ll dive right into the process. I’ll guide you step by step, explaining everything in detail, so you’ll feel confident tackling this pesky problem on your own.

From scraping off excess wax to applying heat and using a cleaning solution, I’ve got you covered.

So, if you’re ready to save your couch from the clutches of candle wax, let’s get started! Follow my instructions, and before you know it, your couch will be wax-free and looking as good as new.

Advertisement

Let’s do this!

Key Takeaways

  • Gather necessary supplies such as a hairdryer, credit card or dull knife, paper towels, cleaning solution (dish soap, vinegar, rubbing alcohol, or commercial stain remover), soft brush, clean cloth or sponge, lukewarm water, protective cover or sheet, vacuum, plastic card or spatula, warm iron, and patience.
  • Use heat (hairdryer) or cold (ice) to remove wax stains from the couch.
  • Scrape off excess wax using a credit card or dull knife, then apply heat with a hairdryer and blot the melted wax with a paper towel.
  • Use a cleaning solution and a soft brush to tackle remaining residue, rinse with water, blot the area, and allow the couch to air dry before using it again.

Gather the Necessary Supplies

Now, you’re going to need a few things to tackle this candle wax disaster and save your beloved couch from ruin. The good news is, you don’t need any fancy or expensive supplies. In fact, you probably already have most of them at home.

First, let’s talk about alternative cleaning solutions to remove candle wax stains from upholstery. One effective option is to use a hairdryer. Set it to a low heat setting and aim it at the wax until it starts to melt. Then, use a paper towel or a clean cloth to gently blot the wax away.

Another option is to use a plastic bag filled with ice. Place the bag over the wax and let it freeze for a few minutes. Once the wax hardens, you can easily scrape it off with a plastic spatula or a credit card.

Now, let’s move on to some tips for preventing candle wax from staining your couch in the first place. One simple trick is to place a protective barrier, such as a heat-resistant mat or aluminum foil, under your candles. This will catch any dripping wax and prevent it from landing on your couch.

Additionally, you can try trimming the candle wick to a shorter length. This helps reduce the amount of wax that melts and drips onto your furniture.

Advertisement

By following these tips and using the right cleaning solutions, you can easily remove candle wax from your couch and keep it looking as good as new.

Next, let’s learn how to scrape off the excess wax without causing any damage.

Scrape off Excess Wax

First, you’ll need to carefully remove the excess wax from your couch using a credit card or a dull knife. Imagine the wax clinging stubbornly to the fabric, refusing to let go. To tackle this problem, you can use a hairdryer to melt the wax. Set the hairdryer to a medium heat and hold it a few inches away from the wax stain. As the wax heats up, it’ll start to soften and become easier to remove.

To make the process even more effective, you can use an ice cube to harden the wax before scraping. Simply place the ice cube directly on top of the wax stain and let it sit for a few minutes. The cold temperature will cause the wax to harden, making it less likely to spread or smear as you scrape it off.

Once the wax has hardened, take your credit card or dull knife and gently scrape it off the couch. Start at the edges of the stain and work your way towards the center, being careful not to damage the fabric. If there are any remaining bits of wax, repeat the hairdryer and ice cube method until the stain is completely gone.

Advertisement

With the excess wax removed, it’s time to move on to the next step: applying heat to the wax stain.

Apply Heat to the Wax Stain

To effectively tackle the wax stain on your couch, gently apply heat using a hairdryer to soften and loosen the stubborn residue. Heat’s a great alternative to using a cleaning solution, as it helps melt the wax and make it easier to remove. However, it’s important to take safety precautions when applying heat to your couch. Make sure to keep the hairdryer at a safe distance from the fabric to avoid any damage or burns.

Additionally, avoid using high heat settings, as this can also cause damage. Start by turning on the hairdryer to a low or medium heat setting and hold it a few inches away from the wax stain. Move the hairdryer in a circular motion over the stain, allowing the heat to penetrate the wax. As the wax begins to melt, you’ll notice it becoming more pliable. Once the wax’s softened, gently blot the area with a paper towel to absorb the melted wax and residue. This’ll help remove any remaining wax and prevent it from spreading further into the fabric.

Now, let’s move on to the next step of the process: blotting the area with a paper towel…

Blot the Area with a Paper Towel

You should gently press a paper towel onto the area to soak up the melted wax and residue. This will help to remove as much of the wax as possible before moving on to the next step. To do this, fold the paper towel into a square and place it over the stained area. Apply light pressure and blot the area, being careful not to rub or smear the wax further into the fabric.

Advertisement

As you blot the area, you will start to see the paper towel absorbing the melted wax. Continue blotting until no more wax transfers onto the paper towel. It may take a few passes to fully remove the wax stain. Once the majority of the wax is gone, you can move on to the next step of cleaning the remaining residue.

In order to evoke emotion in the audience, let me share a table that shows the potential consequences of not removing candle wax from a couch:

Neglecting Wax Stains Taking Action
Permanent Stain Clean Surface
Ruined Upholstery Preserve Fabric
Unpleasant Odor Fresh Smell
Difficult Removal Easy Cleanup

By taking immediate action and following these steps, you can successfully remove candle wax from fabric and prevent stains on your furniture. Now, let’s move on to the next section and learn how to use a cleaning solution to tackle any remaining residue.

Use a Cleaning Solution

Now, it’s time to tackle the remaining residue by using a cleaning solution. This step is crucial in completely removing the candle wax from your couch.

Here are some alternative cleaning methods you can try:

Advertisement
  1. Dish Soap Solution: Mix a few drops of dish soap with warm water to create a soapy solution. Dip a clean cloth into the solution and gently blot the wax stain. Be careful not to rub, as this can spread the wax further.

  2. Vinegar Solution: Create a mixture of equal parts white vinegar and water. Moisten a clean cloth with the solution and dab it onto the wax stain. Allow it to sit for a few minutes before gently blotting the area.

  3. Rubbing Alcohol: Moisten a clean cloth with rubbing alcohol and gently dab it onto the wax stain. The alcohol helps dissolve the wax, making it easier to remove.

  4. Commercial Stain Remover: If the above methods don’t work, you can try using a commercial stain remover specifically designed for upholstery. Follow the instructions on the product carefully.

Preventing future wax stains can be done by using candle holders or trays to catch any drips. Trim the candle wick to avoid excessive burning and dripping.

Now, let’s move on to gently scrubbing the stain to ensure all traces of wax are gone.

Gently Scrub the Stain

Start by delicately scrubbing the stain on your couch to ensure a thorough removal of any remaining residue. To tackle this task effectively, it is crucial to choose the right cleaning solution. Look for a solution specifically designed to remove wax stains from fabric, as using the wrong one may cause further damage. Once you have the appropriate cleaning solution, apply it to the stained area and allow it to sit for a few minutes to loosen the wax.

Next, take a soft brush and gently scrub the stain in circular motions. Be careful not to apply too much pressure, as this may push the wax deeper into the fabric and make it more difficult to remove. Imagine the stain gradually disappearing as you work, revealing the clean fabric underneath. Picture yourself using a brush with soft bristles, effortlessly gliding over the stain, and effortlessly lifting away the wax residue.

After you have finished scrubbing, transition into the next step of the process by rinsing the area with water.

Advertisement

Rinse the Area with Water

To continue removing candle wax from your couch, it’s important to rinse the area with water. This step is crucial in ensuring that all the wax residue is completely eliminated. When rinsing, it’s important to be cautious and avoid making common mistakes that could worsen the stain. Here are some tips to keep in mind:

  • Start by using a clean cloth or sponge to dampen the area with water.
  • Gently blot the stained area, avoiding excessive scrubbing or rubbing, which may push the wax deeper into the fabric or spread the stain.
  • Use lukewarm water instead of hot water, as hot water can set the stain and make it more difficult to remove.

By following these tips, you can effectively rinse the area without causing any damage to your couch. Additionally, it’s always better to prevent candle wax stains on your couch in the first place. To do so, consider the following:

  • Place a protective cover or sheet over your couch when burning candles nearby.
  • Opt for flameless candles or candle warmers to eliminate the risk of wax spills.

Once you’ve rinsed the area with water, the next step is to allow the couch to dry. This will ensure that any remaining moisture is evaporated and the fabric is back to its original state.

Allow the Couch to Dry

Once you’ve given your couch some time to air dry, you can cozy up and enjoy its pristine condition again. Allowing the couch to dry is an essential step in the process of removing candle wax from your couch. The drying time will depend on various factors, such as the material of your couch and the amount of wax that was spilled. Generally, it is recommended to wait at least 24 hours before using the couch again.

To keep your couch looking its best and prevent future stains, it is important to take some precautions. Consider using a protective cover or placing a blanket over the couch when using candles to minimize the risk of wax spills. Additionally, avoid placing candles directly on the couch surface to further reduce the chances of accidents.

To help you keep track of the drying time and other important details, here is a handy table:

Factors to Consider Time Required
Couch Material 24 hours
Amount of Wax Varies
Protective Measures Recommended

By following these guidelines and allowing the couch to fully dry, you can ensure that it remains in excellent condition. Once the drying process is complete, you can move on to the next step and vacuum the couch to restore its texture and remove any remaining debris.

Advertisement

Vacuum the Couch to Restore its Texture

Now, it’s time to bring back the soft and cozy texture of your couch by giving it a thorough vacuuming. Vacuuming is an essential step in the process of removing candle wax from your couch. Here are some effective ways to prevent wax stains on couches and alternative methods for removing candle wax from upholstery:

  • Use a protective cover: Placing a protective cover on your couch can help prevent wax from seeping into the fabric. This is especially useful if you enjoy burning candles near your couch regularly.

  • Freeze and scrape: If there’s still some wax residue on your couch, place an ice pack or ice cubes wrapped in a cloth over the wax. This will freeze it, making it easier to scrape off with a plastic card or spatula.

  • Use a hairdryer: Another method is to melt the remaining wax with a hairdryer on low heat. Once melted, blot the area with a clean cloth or paper towel to absorb the wax.

By vacuuming your couch after removing the wax, you’ll restore its texture and remove any loose debris. Remember to vacuum in all directions to ensure a thorough clean. If there are any remaining wax stains, don’t worry. In the next section, we’ll discuss how to repeat the process if necessary.

Repeat the Process if Necessary

If you find lingering remnants of the candle’s presence on your beloved sofa, don’t despair – your journey towards a spotless haven continues. Repeat the process for stubborn stains.

Sometimes, despite your best efforts, there may still be some wax residue left behind. In such cases, don’t give up just yet. You can repeat the process of removing candle wax from your couch to ensure that all traces are completely eradicated.

To begin, use the same method as before to scrape off any remaining wax from the surface of the couch. Be gentle yet thorough, making sure not to damage the fabric.

Advertisement

Next, lay a clean white cloth or paper towel over the stained area. Apply a warm iron on top of the cloth, moving it in circular motions. The heat will cause the wax to melt and transfer onto the cloth, effectively lifting it off the couch.

If the stain persists even after repeating the process, it may be time to seek professional help. There are professional upholstery cleaning services that specialize in removing tough stains from furniture. They have the knowledge, tools, and expertise to tackle stubborn wax stains effectively. Don’t hesitate to reach out to them if you find yourself struggling to get rid of the stubborn residue.

Remember, patience and persistence are key when dealing with candle wax stains on your couch. With the right approach and a little bit of effort, you can restore your couch to its former glory.

Frequently Asked Questions

Can I use a hairdryer to apply heat to the wax stain?

Yes, you can use a hairdryer to apply heat to the wax stain on your couch. It’s important to be cautious and use the hairdryer on a low heat setting to avoid damaging the fabric. Start by placing a clean cloth over the wax, then use the hairdryer to gently heat the area. As the wax melts, it will be absorbed by the cloth. Remember to always test a small, inconspicuous area first to ensure no damage occurs.

What type of cleaning solution should I use?

When it comes to removing candle wax from a couch, there are several alternative cleaning methods you can try. One effective option is to use a natural cleaning solution. You can create a mixture of equal parts white vinegar and water. Apply this solution to the wax stain and gently blot it with a clean cloth. The vinegar helps to break down the wax and lift it from the fabric, leaving your couch clean and wax-free.

Advertisement

Is it safe to scrub the stain vigorously?

Scrubbing the stain too hard can potentially damage the couch fabric. It’s important to be gentle and avoid using excessive force. Instead of scrubbing vigorously, consider using an alternative method to remove the wax from the couch.

One effective technique is to place a brown paper bag or a cloth over the wax and gently iron over it on a low heat setting. This will help to melt the wax, allowing it to be absorbed by the paper or cloth.

How long should I allow the couch to dry before using it again?

After removing candle wax from your couch, it’s important to allow sufficient drying time before using it again. This ensures that the fabric is completely dry and prevents any potential damage or stains.

The drying time can vary depending on factors such as the type of fabric and the amount of wax that was removed. It’s recommended to wait at least 24 hours to ensure the couch is fully dry.

To prevent future wax stains, always use protective covers or avoid placing candles directly on the couch.

Advertisement

Are there any specific types of vacuum cleaners that work best for restoring the texture of a couch?

In my experience, the best upholstery cleaners for restoring the texture of a couch are those specifically designed for fabric surfaces. When it comes to cleaning a couch, steam cleaning is generally more effective than dry cleaning. Steam cleaners use hot water vapor to penetrate deep into the fabric and remove dirt, stains, and odors. This method not only cleans the surface but also helps to restore the texture of the upholstery, leaving it looking and feeling fresh.

Conclusion

After following these steps, you should be able to successfully remove candle wax from your couch.

It may take some time and effort, but with the right supplies and techniques, your couch can be restored to its original state.

Just like a phoenix rising from the ashes, your couch will rise from the wax and shine once again.

Remember, patience is key, and if necessary, don’t hesitate to repeat the process for stubborn stains.

Advertisement

Now, go forth and conquer those wax stains!

Continue Reading

Beginners Guides

Why Soy Candle

Published

on

By

An image showcasing a serene scene of a cozy living room, adorned with a flickering soy candle casting a warm, gentle glow

I have always been a strong advocate for the idea of “burning the candle at both ends” when it comes to illuminating a space. However, recently, I have started exchanging my regular candles for a more environmentally friendly alternative – soy candles.

These little wonders are not only stylish and decorative, but they also come with a host of benefits that make them a better choice for both the environment and your health.

Soy candles are made from soybeans, a renewable and sustainable resource that supports local farmers. They burn cleaner than traditional candles, emitting less soot and toxins into the air, which makes them safer for indoor air quality. Plus, they have a longer burning time, so you can enjoy their delightful fragrances for longer periods.

What I love most about soy candles is that they are made with all-natural ingredients. They are biodegradable and non-toxic, which means you can feel good about using them in your home.

So, if you want to create a cozy and inviting atmosphere while being mindful of the planet, give soy candles a try. You won’t be disappointed!

Advertisement

Key Takeaways

  • Soy candles are a more eco-friendly alternative to traditional candles, as they are made from renewable and sustainable soybeans.
  • Soy candles burn cleaner and emit less soot and toxins into the air, making them safer for indoor air quality.
  • Soy candles have a longer burning time compared to traditional candles, providing a longer-lasting fragrance experience.
  • Soy candles are made with all-natural ingredients, are biodegradable, and come in eco-friendly packaging, reducing waste and supporting responsible farming practices.

Eco-Friendly Alternative to Traditional Candles

If you’re looking for a more environmentally friendly option, soy candles are the perfect alternative to traditional candles. Not only do they provide a soothing and aromatic ambiance, but they also come with a host of benefits for both your health and the planet.

One of the standout features of soy candles is their use of biodegradable packaging. Unlike traditional candles that often come in plastic or non-recyclable materials, soy candles are often packaged in eco-friendly materials such as recycled paper or glass. This reduces the amount of waste produced and contributes to a cleaner environment.

In addition to their eco-friendly packaging, soy candles also offer health benefits. Traditional candles are often made from paraffin wax, which can release harmful toxins and chemicals when burned. Soy candles, on the other hand, are made from natural soybean oil, which burns cleaner and produces less soot. This means that you can enjoy a clean and healthy atmosphere without worrying about inhaling harmful pollutants.

Transitioning into the subsequent section about ‘clean burning properties,’ it’s important to note that soy candles not only have eco-friendly packaging and health benefits, but they also have clean burning properties.

Clean Burning Properties

To ensure a healthier environment, you’ll be pleased to know that clean burning properties are a key reason why choosing a soy candle is beneficial. Soy candles are made from soybean oil, a renewable resource that burns cleaner than traditional paraffin wax candles. Here are four reasons why the clean burning properties of soy candles are advantageous:

  1. Reduced Indoor Air Pollution: Unlike paraffin candles, soy candles don’t release harmful toxins, such as benzene and toluene, when burned. This leads to improved indoor air quality, reducing the risk of respiratory issues and allergies.

  2. Non-Toxic and Safe: Soy candles are free from harmful chemicals and additives, making them a safe choice for your home and family. They don’t produce soot or emit harmful carcinogens, making them a healthier option for those with sensitivities or respiratory conditions.

  3. Longer Burn Time: Soy candles have a longer burn time compared to traditional candles. This means you can enjoy their clean fragrance for a longer period, reducing the need for frequent replacements.

  4. Biodegradable and Sustainable: Soy candles are environmentally friendly as they’re made from a renewable resource. They’re biodegradable, meaning they break down naturally without leaving a harmful residue.

With the numerous benefits of soy candles, including their clean burning properties, it’s no wonder that they’re gaining popularity as a healthier and more sustainable alternative to traditional candles. Transitioning to the next section, let’s explore another advantage of soy candles: their longer-lasting fragrance.

Advertisement

Longer Lasting Fragrance

With their captivating scents lingering in the air, the fragrant essence of soy candles extends far beyond the moment of ignition, creating an aromatic symphony that dances through space and time. Not only do soy candles provide a clean burn, but they also offer a longer lasting fragrance compared to other types of candles. This is due to the unique properties of soy wax, which allows it to hold and release fragrance oils more effectively.

To highlight the benefits of soy candles’ longer lasting fragrance, let’s take a look at the following table:

Candle Type Average Fragrance Duration
Soy Candle 50-60 hours
Paraffin Candle 35-45 hours
Beeswax Candle 30-40 hours
Coconut Wax Candle 40-50 hours
Palm Wax Candle 25-35 hours

As you can see, soy candles outshine other options in terms of fragrance longevity. This makes them an excellent choice for those seeking increased relaxation and an affordable luxury. The longer lasting fragrance allows you to enjoy the soothing scents for a longer period, creating a calming and serene atmosphere in your space.

Transitioning into the next section about ‘all-natural ingredients’, soy candles not only offer a longer lasting fragrance, but they also provide peace of mind knowing that they are made from all-natural ingredients.

All-Natural Ingredients

Immerse yourself in a world of pure tranquility and peace of mind as you indulge in the natural goodness of handcrafted soy candles. Made from soy wax, these candles offer a wide range of benefits that make them a popular choice among candle enthusiasts.

Advertisement

One of the key advantages of soy wax is its ability to hold and release fragrance for a longer period of time compared to other types of wax. This means that you can enjoy the alluring scent of your soy candle for many hours, creating a soothing and inviting atmosphere in your home.

But what sets soy candles apart is their all-natural composition. Unlike traditional candles that are often made from petroleum-based paraffin wax, soy candles are derived from soybeans, a renewable and sustainable resource. This makes them an eco-friendly choice that supports responsible farming practices. Additionally, soy wax burns cleaner with little to no soot, reducing the risk of indoor air pollution and ensuring a healthier environment for you and your loved ones.

Not only are soy candles better for the environment, but they also offer health benefits. Soy wax is non-toxic and does not release harmful chemicals or toxins when burned. This makes soy candles a safer option, particularly for individuals with respiratory sensitivities or allergies. By choosing soy candles, you can fill your living space with delightful scents while promoting a healthier indoor air quality.

Transitioning to the subsequent section about ‘safer for indoor air quality’, soy candles provide a natural and clean burning experience that can enhance your home environment.

Safer for Indoor Air Quality

Enhance the air quality in your home with the clean and natural burn of these handcrafted soy candles. Soy candles aren’t only a great way to create a cozy and inviting atmosphere, but they also offer several benefits for indoor air quality.

Advertisement

Unlike traditional paraffin candles, soy candles are made from all-natural ingredients, including soybean oil, which burns cleaner and produces less soot and toxins. This means that when you light a soy candle, you can breathe easier knowing that you’re not releasing harmful chemicals into the air.

In addition to being safer for indoor air quality, soy candles can also have a positive impact on your mood and overall well-being. The natural fragrance of soy candles can help improve your mood and reduce stress. Certain scents, such as lavender or vanilla, have been found to promote relaxation and calmness, making them perfect for creating a soothing environment in your home.

Transitioning into the next section about ‘no harmful toxins or chemicals’, soy candles are a great choice for those who are concerned about the potential health risks associated with burning candles. With their all-natural ingredients and clean burn, soy candles offer a safer alternative to traditional candles that may contain harmful toxins or chemicals. So, not only do soy candles enhance the air quality in your home, but they also provide peace of mind knowing that you’re creating a healthier environment for you and your loved ones.

No Harmful Toxins or Chemicals

Rest easy and breathe freely as you fill your home with the warm glow and inviting scent of these toxin-free, chemical-free candles. Soy candles are a great choice for sensitive individuals who want to create a cozy and relaxing atmosphere without compromising their health. Here are four reasons why soy candles are the best choice for those concerned about harmful toxins or chemicals:

  1. All-natural ingredients: Soy candles are made from 100% soybean oil, which is a renewable and sustainable resource. This means they don’t contain any harmful chemicals or toxins that could be released into the air when burned.

  2. Cleaner burning: Unlike paraffin candles, soy candles produce minimal soot and smoke. This makes them ideal for individuals with respiratory issues or allergies, as they won’t irritate the lungs or trigger any sensitivities.

  3. Longer burning time: Soy wax has a lower melting point than paraffin wax, which means soy candles burn slower and last longer. This allows you to enjoy the soothing scent and warm glow for a longer period of time.

  4. Variety of scent options: Soy candles come in a wide range of delightful scents, from calming lavender to invigorating citrus. Whether you prefer floral, fruity, or earthy fragrances, there’s a soy candle scent that’ll suit your personal taste and mood.

So, not only are soy candles safer for your indoor air quality, but they also offer a variety of scent options to enhance your home environment. Now, let’s delve into why soy is a renewable and sustainable resource.

Advertisement

Renewable and Sustainable Resource

When it comes to choosing a candle, there are many factors to consider. In my previous section, I discussed how soy candles are free from harmful toxins and chemicals, making them a healthier option for you and your home. Now, let’s delve into another important aspect of soy candles: their renewable and sustainable nature.

Soy candles are made from soybean oil, which is sourced from soybeans. Soybeans are a renewable resource, meaning they can be grown and harvested year after year without depleting the earth’s resources. This is in stark contrast to candles made from paraffin wax, which is derived from petroleum, a non-renewable fossil fuel.

Not only are soy candles renewable, but they also have a lower environmental impact compared to paraffin candles. The production of soy candles requires less energy and produces fewer greenhouse gas emissions. Additionally, soy candles have a longer burn time, meaning less waste and fewer candles needed overall.

To summarize, soy candles are not only healthier for you, but they also contribute to a more sustainable future. In the next section, we will explore how soy candles support local farmers without taking another "step".

Supports Local Farmers

Supporting local farmers is an important way to invest in the community and promote sustainable agriculture practices. By choosing soy candles, you’re actively supporting local farmers who grow soybeans. Here are four reasons why supporting local farmers through soy candles is beneficial:

Advertisement
  • Farmers’ market: Purchasing soy candles from local farmers’ markets creates a direct connection between consumers and farmers. It allows you to learn more about the farmers, their practices, and the quality of the soybeans they grow.

  • Community support: Buying soy candles from local farmers not only stimulates the local economy but also fosters a sense of community. It helps to create a strong bond between consumers and local farmers, encouraging a sustainable and mutually beneficial relationship.

  • Environmental impact: Soybean cultivation requires less land and water compared to other crops used for candle production. By supporting local soy farmers, you’re promoting environmentally friendly practices and reducing the carbon footprint associated with candle manufacturing.

  • Quality control: Local farmers often prioritize quality over quantity. They take pride in growing high-quality soybeans, resulting in superior soy candles. By supporting them, you’re ensuring that you receive a premium product.

Supporting local farmers through soy candles is just one step towards a more sustainable lifestyle. In the subsequent section, we’ll explore how soy candles are biodegradable and non-toxic, further highlighting their environmental benefits.

Biodegradable and Non-Toxic

As I mentioned earlier, supporting local farmers is one of the great reasons to choose soy candles. But that’s not all, there are many other benefits to using soy candles.

One of the most important advantages is that soy candles are biodegradable and non-toxic. Unlike traditional paraffin candles, which are made from petroleum, soy candles are made from natural soybean oil. This means that when you burn a soy candle, you’re not releasing harmful toxins into the air. This is particularly important for people with respiratory issues or allergies, as soy candles don’t produce the same level of soot or irritants as paraffin candles.

Additionally, soy candles are biodegradable, which means they’re environmentally friendly and won’t contribute to the buildup of waste in landfills. So not only are you improving the air quality in your home by using soy candles, but you’re also doing your part to protect the planet.

The health benefits of using soy candles can’t be overstated. They provide a cleaner and healthier alternative to traditional candles, making them a great choice for anyone concerned about their well-being.

Advertisement

Now, let’s move on to the next section and explore some stylish and decorative options for soy candles.

Stylish and Decorative Options

If you’re looking to add flair and pizzazz to your space, there are plenty of trendy and eye-catching options available for your home decor. When it comes to soy candles, not only do they offer a biodegradable and non-toxic alternative to traditional candles, but they also come in a variety of stylish designs and unique containers.

Soy candles are known for their versatility in design. From sleek and modern to rustic and vintage, there’s a soy candle style to suit every taste and aesthetic. Whether you prefer clean lines and minimalist designs or intricate patterns and vibrant colors, there’s a soy candle out there for you. These stylish designs can instantly enhance the visual appeal of any room, adding a touch of elegance and sophistication.

In addition to their stylish designs, soy candles also come in a wide range of unique containers. From mason jars and vintage tins to glass jars with wooden lids, the options are endless. These unique containers not only add to the overall aesthetic of the candle but also make them a great decorative piece for any space. They can be easily incorporated into your existing home decor, adding a touch of charm and personality.

Soy candles not only offer a biodegradable and non-toxic option for your home, but they also provide a variety of stylish designs and unique containers to choose from. With their ability to add flair and pizzazz to any space, soy candles are a must-have for anyone looking to elevate their home decor.

Advertisement

Frequently Asked Questions

Are soy candles more expensive than traditional candles?

Soy candles can be more expensive than traditional candles due to the higher cost of soy wax compared to paraffin wax. However, the cost comparison should also consider the environmental impact.

Soy candles are made from natural soybean oil, a renewable resource, and produce less soot and toxins when burned. This makes them a more eco-friendly choice. Although they may cost more upfront, their long burn time and cleaner burn make them a worthwhile investment for many.

How do soy candles compare to other eco-friendly candle options?

When comparing soy candles to other eco-friendly candle options, one popular alternative is beeswax candles. Soy candles are made from soybean oil, while beeswax candles are made from the wax produced by bees. Both options have their benefits, but soy candles are often favored for their lower carbon emissions during production.

Additionally, soy candles are a renewable resource, as soybeans can be replanted and grown again, making them a sustainable choice for the environment.

Can soy candles be used outdoors?

Soy candles can be used outdoors, but it’s important to prioritize outdoor candle safety. According to a study conducted by the National Fire Protection Association, candles are responsible for an average of 8,200 home fires annually. However, soy candles have certain benefits that make them a safer option for outdoor use.

Advertisement

Soy wax burns at a lower temperature, reducing the risk of accidents. Additionally, soy candles emit less soot and toxins, making them a healthier choice for the environment.

Do soy candles emit any smoke or soot?

Soy candles don’t emit smoke or soot when burned properly, making them a healthier alternative to traditional paraffin candles. This is because soy wax is derived from soybeans and doesn’t contain the same toxins as paraffin wax.

Additionally, soy candles have benefits such as a longer burning time, cleaner burning with less soot buildup, and a more natural fragrance.

Overall, soy candles are a safer and more eco-friendly choice for your home.

Are there any specific precautions to take when using soy candles?

When using soy candles, it’s important to take certain precautions to ensure safety. First, always trim the wick to 1/4 inch before lighting to prevent excessive flame and soot.

Advertisement

Place the candle on a heat-resistant surface and away from flammable objects.

Never leave a burning candle unattended and keep it out of reach of children and pets.

Finally, extinguish the candle completely before leaving the room or going to sleep. These safety measures will help prevent accidents and ensure a pleasant candle experience.

Conclusion

In conclusion, choosing soy candles not only benefits the environment but also enhances your living space. By opting for this eco-friendly alternative, you’re supporting local farmers and contributing to a renewable and sustainable resource.

Not only do soy candles burn cleaner and longer, but they also provide a safer option for indoor air quality. They offer a stylish and decorative way to add warmth and fragrance to your surroundings with their all-natural ingredients and biodegradable properties.

Advertisement

So why settle for anything less when you can have all these benefits in one glowing package?

Continue Reading

Trending

Copyright © 2024 Just Candles Affiliate disclaimer As an affiliate, we may earn a commission from qualifying purchases. We get commissions for purchases made through links on this website from Amazon and other third parties.