
Imagine the enchanting glow of a candle gently flickering on the surface of the water, creating a celestial ambiance that captivates all who behold it. With just a few simple steps, you can create mesmerizing floating candles on your own, adding a magical touch to any occasion.
In this article, I will guide you through the process of making these exquisite creations, combining the art of candle making with the allure of floating decor. From gathering your materials and preparing your workspace to adding fragrance and color, every detail will be meticulously explained. You’ll learn how to set the wick and allow the candles to cool and set properly for optimal performance.
Finally, we’ll explore various ways to decorate and display your homemade floating candles, ensuring they become a stunning focal point in any setting.
So let us embark on this journey together as we unleash our creativity and enjoy the beauty of our handmade floating candles.
Key Takeaways
- Safety precautions are important when making floating candles, including using protective gear and working in a well-ventilated area.
- Pay attention to the size and placement of the wick for proper floating and even burning.
- Leave space at the top of the container or mold when pouring melted wax to allow the candle to float and prevent spills.
- Experiment with different fragrances, colors, and containers to create personalized and unique floating candles.

Syntic 40 Pack Small Glass Jars with Cork Lids, 7oz Empty Mason Jars for Making Candles, Yogurt Container with PE Lids for Wedding Favors, Baby Shower, Candy, Spices with Twine, Labels
Candy Bottles with 6 Kinds of Accessories - Perfectly satisfying your daily lifestyle demands. 40 PE lids +...
As an affiliate, we earn on qualifying purchases.
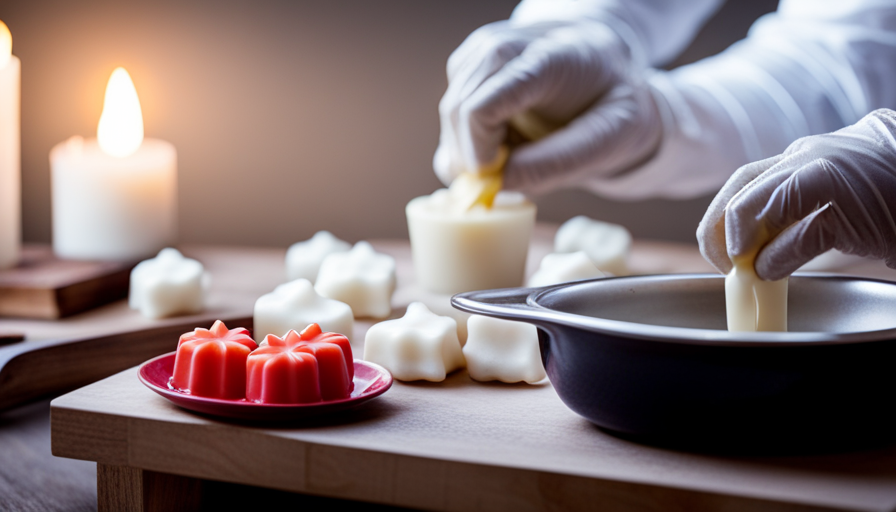
Gather Your Materials and Tools
Now, it’s time to gather all the stuff you’ll need to make your very own floating candle.
The first thing you’ll want to do is ensure that your workspace is organized and free from any clutter. This will not only make it easier for you to find the materials you need but also reduce the risk of accidents or mishaps.
To start off, you’ll obviously need a candle-making kit, which typically includes wax, wicks, and molds specifically designed for floating candles. You can easily find these kits at craft stores or order them online. Additionally, be sure to have a heat-resistant container or pot for melting the wax and a thermometer to monitor its temperature.
Candle safety is crucial throughout this process, so don’t forget to grab some protective gear like gloves and goggles. These will shield your hands and eyes from potential burns or splatters. It’s always better to be safe than sorry!
Once you’ve gathered all your materials and tools together, it’s time to move on to the next step: preparing your workspace.

YJHSS 24-Pack 8oz Candle Tins with Lids, Metal Candle Jars for Candle Making, Bulk Empty Containers for Beginners & DIY Storage -Black
Capacity: 8oz =235ml; Dimensions : 3.15" (Diameter) x 2.35" (Height); Each candle tins are made of premium tinplate,...
As an affiliate, we earn on qualifying purchases.
Prepare Your Workspace
Before you start, it’s important to set up your workspace in a clutter-free area to ensure safety and efficiency. Workspace organization is key when it comes to making floating candles.
Make sure you have enough space to spread out all your materials and tools without any obstructions. Clear away any unnecessary items from your work area so that you can easily access everything you need.
In addition to workspace organization, it’s crucial to take proper safety precautions. Keep a fire extinguisher nearby in case of emergencies and make sure there are no flammable objects near your workspace. Wear protective gloves and goggles to shield yourself from potential hazards. It’s also a good idea to cover your work surface with newspaper or a plastic sheet for easy cleanup.
By setting up a well-organized workspace and taking necessary safety precautions, you’ll be ready to move on to the next step: melting the wax. This will allow you to create beautiful floating candles that are both safe and efficient.
EricX Light 100 Piece Natural Candle Wick, Low Smoke 6" Pre-Waxed & 100% Natural Cotton Core,For Candle Making,Candle DIY
Pre-waxed and tabbed
As an affiliate, we earn on qualifying purchases.
Melt the Wax
To achieve the perfect ambiance, your first step is to melt the wax for your enchanting creation. When it comes to melting wax for floating candles, there are a few different alternatives you can consider.
The most common method is using a double boiler system, where you place a heat-resistant container with the wax inside another pot filled with water. This indirect heat ensures that the wax melts slowly and evenly without any risk of overheating or burning.
However, if you don’t have a double boiler, you can also use a microwave or a hot plate. Just be extra cautious when using these methods as they can heat up quickly and may require more attention to ensure safety.
Regardless of which method you choose, it’s essential to take proper safety precautions. Always work in a well-ventilated area and keep an eye on the temperature of the wax to prevent it from becoming too hot. Remember to never leave melting wax unattended!
Now that we’ve covered how to melt the wax safely, let’s move on to adding fragrance and color into our delightful floating candles.

buluker 300Pcs Functional Smokeless Candle Wicks - Pre Waxed Cotton Wick with Metal Sustainer Tabs for Pillar Candle Making and DIY, 9cm/3.5in, 15cm/6in, 20cm/8in
value pack:There are 3 different sizes of 4 "+6"+8 ", each with 100 pieces, including 10pcs of wooden...
As an affiliate, we earn on qualifying purchases.
Add Fragrance and Color
I begin by selecting my desired fragrance and color for the floating candle. It’s important to choose scents that complement the occasion or mood I want to create.
Once I have chosen my fragrance, I carefully stir it into the melted wax, ensuring an even distribution. Next, I add a few drops of liquid dye to achieve the desired color, stirring again until fully incorporated.
The fragrance and color will enhance the overall ambiance of the floating candle, creating a delightful sensory experience for all.
Choose your desired fragrance and color
Deciding on the perfect fragrance and color for your floating candle is like selecting the most exquisite aroma and hue to bless your senses with a touch of whimsical enchantment.
When it comes to fragrance selection, you have a wide array of options to choose from. You can go for soothing scents like lavender or chamomile for a calming ambiance, or opt for invigorating fragrances such as citrus or eucalyptus for an uplifting atmosphere.
As for color options, the possibilities are endless. You can create a romantic ambiance with soft pastel shades like blush pink or baby blue, or add a pop of vibrancy with bold colors like red or purple.
Once you’ve made your choices, it’s time to stir in the fragrance and color seamlessly into the candle mixture, creating an enticing blend that will captivate both sight and smell.
Stir in the fragrance and color
Enhance your sensory experience as you gently swirl in the captivating fragrance and vibrant color, infusing the mixture with an alluring charm that’ll transport you to a world of enchantment.
To create the perfect floating candle, it’s crucial to master fragrance mixing techniques and choose the right candle color. Here’s how:
-
Fragrance Mixing Techniques: Experiment with different scents to find your desired aroma. Mix essential oils or fragrance oils into melted wax, ensuring a well-balanced blend that isn’t overpowering.
-
Choosing the Right Candle Color: Consider the ambiance you want to create when selecting a color. Opt for soothing blues for a tranquil atmosphere or fiery reds for an energetic vibe.
With these fragrance mixing techniques and by choosing the right candle color, you can customize your floating candles to suit any mood or occasion.
Now, let’s move on to setting the wick for our beautiful creation.
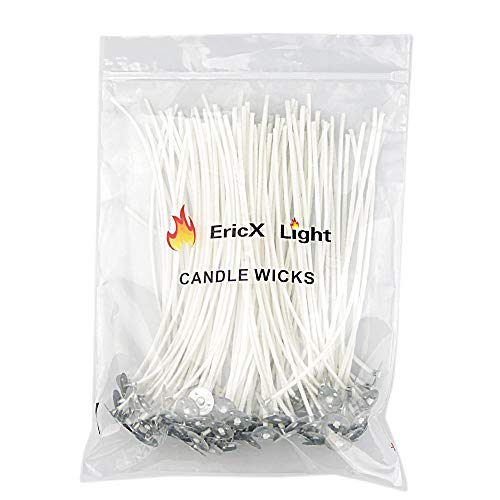
Set the Wick
To properly set the wick for your floating candle, begin by carefully positioning it in the center of the mold. This step is crucial to ensure that your candle burns evenly and floats perfectly.
First, choose a wick that’s appropriate for the size of your mold. If the wick is too thin, it may not provide enough heat to melt the wax evenly. On the other hand, if it’s too thick, you risk having a candle that burns too quickly.
Once you’ve selected the right wick, gently insert it into the bottom of your mold and secure it in place using a small piece of tape or a wick holder. Make sure that the top end of the wick sticks out about an inch above the mold’s rim. This’ll allow you to trim it later to achieve optimal burning conditions.
Proper wick placement is essential for creating a functional and beautiful floating candle. Once you’ve set the wick securely in place, you can move on to pouring the wax into your mold without any worries about its position affecting your final product.
Now, let’s move on to pouring the wax and completing our exquisite floating candles!
Pour the Wax
To pour the wax for a floating candle, I slowly poured the melted wax into the container or mold. It’s important to leave a small space at the top for the candle to float.
As I carefully poured, I made sure not to overfill and spill any wax outside of the container.
Slowly pour the melted wax into the container or mold
After melting the wax, carefully pour it into the container or mold, allowing it to flow like a gentle river filling its banks. To ensure a flawless pouring technique, remember these key points:
- Slow and steady: Pour the melted wax slowly into the container to prevent any spills or air bubbles.
- Alternative options: If you don’t have a specific candle mold, get creative! Try using unconventional containers such as teacups or seashells for unique floating candle designs.
- Mixing it up: Experiment with different colored waxes or add fragrances to create personalized floating candles that suit your style.
Once you have poured the wax into the container, make sure to leave a small space at the top for the candle to float. This will allow for proper airflow and ensure that your floating candle burns evenly.
Leave a small space at the top for the candle to float
Remember to leave a little room at the top for your candle to gracefully float, creating an enchanting ambiance in any space.
This step is crucial in ensuring that your floating candle design works effectively and safely. By leaving a small space, you allow the candle to move freely on the surface of the water without getting submerged or extinguished. It also prevents any hot wax from overflowing when the candle is lit, which could pose a fire hazard.
Keeping this in mind will not only enhance the aesthetic appeal of your creation but also ensure candle safety.
Now that we’ve prepared our containers and poured the melted wax, let’s move on to the next section about letting the candles cool and set properly.
Let the Candles Cool and Set
Once the candles have had a chance to chill and solidify, you’ll be ready to add a touch of enchantment to your surroundings with these mesmerizing floating creations.
To ensure that your floating candles turn out perfectly, it’s important to follow proper candle making techniques. Troubleshooting floating candles can be frustrating, but with the right approach, you can overcome any challenges that arise.
To start, make sure you’re using the correct type of wax for floating candles. Beeswax or paraffin wax are commonly used and work well for this purpose. Additionally, pay attention to the wick size and placement. Using a larger wick will help the candle stay afloat better.
Next, allow the candles to cool and set completely before testing them in water. This will ensure that they’re fully solidified and won’t break apart when placed in water. Once they’re cooled down, carefully place them in a container filled with water and observe how they float.
Testing your floating candles is an essential step in ensuring their success. By following these candle making techniques and troubleshooting tips, you can create stunning floating candles that’ll add an enchanting ambiance to any space without worrying about them sinking or not staying lit properly.
Test Your Floating Candles
To test the floating candles, I fill a container with water and carefully place the candles in it.
As soon as they touch the water, I observe their buoyancy. It’s fascinating to see how effortlessly they float on the surface, creating a serene and magical ambiance.
Fill a container with water
First, you’ll need to grab a container and fill it with water. When choosing floating candle containers, make sure they’re wide enough to accommodate the size of your candles and deep enough to hold a sufficient amount of water. A glass or clear plastic container works best as it allows for better visibility of the candles once they’re lit.
Fill the container with clean, room temperature water, leaving some space at the top to prevent overflow when placing the candles in. The amount of water needed will depend on the size and number of floating candles you plan to use.
Once your container is filled, you can proceed to place the floating candles in the water and observe their buoyancy. This step will allow you to check if your chosen containers are suitable for creating a beautiful water candle decoration.
Place the floating candles in the water and observe their buoyancy
Now, take those mesmerizing little orbs of light and gently lower them into the water, watching as they effortlessly dance upon its surface like ethereal fireflies. It’s truly a captivating sight to observe the buoyancy of these floating candles.
As you experiment with different shapes and sizes, you’ll notice that some candles float more gracefully than others. The secret lies in finding the perfect balance between weight and shape. Round-shaped candles tend to have better buoyancy due to their even distribution of weight, while irregularly shaped ones may require some adjustments to maintain their stability on the water’s surface.
By carefully observing their behavior, you can fine-tune your arrangement for an enchanting display.
And now, let’s move on to the next step: decorating and displaying your floating candle masterpiece.
Decorate and Display
Get creative and show off your floating candles with unique and eye-catching displays! Here are three display techniques to make your homemade floating candles truly stand out:
-
Floral Delight: Place the floating candles in a large glass bowl filled with water, and add some fresh flower petals or blooms. This elegant arrangement will create a romantic ambiance for any occasion.
-
Nature’s Beauty: Take advantage of nature by using alternative candle containers such as hollowed-out fruits like oranges or apples. Simply cut off the top, scoop out the flesh, and fill it with water before adding the floating candle. This rustic touch will bring a natural charm to your display.
-
Magical Glow: Create an enchanting atmosphere by placing your floating candles in tall glass vases filled with colorful marbles or pebbles. The light reflecting through the translucent materials will give a mesmerizing effect, captivating everyone’s attention.
With these display techniques and alternative candle containers, you can personalize your floating candle arrangements to match any theme or event.
Now that you’ve learned how to decorate and display your homemade floating candles, let’s move on to the next section where we’ll discuss how to enjoy them fully in various settings without missing any step.
Enjoy Your Homemade Floating Candles
Immerse yourself in the enchanting glow and ambiance of your homemade floating candles, allowing their warm light to transport you to a world of pure relaxation and bliss. Creating these beautiful candles not only adds a touch of elegance to your home decor but also allows you to indulge in the satisfaction of making something with your own hands.
To fully enjoy your homemade floating candles, it is important to set up an inviting display that showcases their beauty. Place them in a decorative bowl filled with water, add some flower petals or greenery for an extra touch of sophistication. The flickering flames dancing on the water’s surface will create a mesmerizing effect that will captivate anyone who lays eyes upon them.
Now, let’s take a moment to appreciate the craftsmanship behind these DIY home decor pieces. Below is a table displaying the materials needed and the steps required for creating your own floating candles:
| Materials Needed | Steps |
|---|---|
| Wax | 1. Melt the wax in a double boiler |
| Wicks | 2. Attach wicks to small metal disks |
| Fragrance oil | 3. Add fragrance oil for scented candles |
| Color dye | 4. Mix in color dye for desired hue |
By following these precise instructions, you can ensure that each candle is crafted with utmost care and attention to detail. So go ahead, light up your space with these homemade floating candles and bask in their warm glow as they effortlessly elevate your surroundings into a haven of tranquility and style
Frequently Asked Questions
How long does it take for the floating candles to cool and set?
Ah, the crucial question of cooling and setting time for floating candles. Well, my friend, I must say it’s a delicate dance of patience and anticipation.
After carefully crafting your exquisite floating candles, you’ll need to allow them to cool for a good few hours.
Now, setting time can vary depending on factors like size and ambient temperature. But fear not! Generally speaking, you can expect your floating beauties to set within 24 hours.
Can I use any type of wax to make floating candles?
Yes, you can use different types of wax to make floating candles. However, it’s important to choose a wax that’s specifically designed for candle making and safe for floating candles. Some popular wax types include paraffin wax, soy wax, and beeswax. Each type has its own melting point and characteristics, so it’s crucial to follow proper safety guidelines when using them. Always ensure you’re using the appropriate type of wax for floating candle making to ensure the best results and safety.
How can I make my floating candles last longer?
To increase the burn time of floating candles and prevent them from melting too quickly, there are a few tips to keep in mind. Firstly, use a high-quality wax that has a higher melting point. This can help prolong their burn time. Additionally, add stearic acid or beeswax to the wax mixture. This can make the candles more resistant to heat. Lastly, keep the candles away from direct sunlight or drafts. This can also help them last longer.
What are some creative ideas for decorating and displaying floating candles?
When it comes to creative centerpiece ideas and unique candle holder designs for floating candles, the possibilities are endless. You can create a stunning display by placing floating candles in glass bowls filled with water and adding flower petals or colorful stones for an added touch.
Another idea is to use tall cylindrical vases and fill them with water, then add floating candles of different sizes to create a visually pleasing arrangement. Get creative with materials like seashells, beads, or even fruits to make your display truly unique.
Can I use essential oils instead of fragrance oils to scent my floating candles?
Yes, you can use essential oils instead of fragrance oils to scent your floating candles. One benefit of using essential oils is that they’re derived from natural sources, such as plants, and often have therapeutic properties. They can add a lovely aroma to your candles while also providing potential health benefits. However, it’s important to note that essential oils may have a slightly different scent profile than fragrance oils, so be sure to test them before making a large batch of scented floating candles.
Conclusion
In conclusion, making your own floating candles is a rewarding and enjoyable DIY project. With just a few materials and some creativity, you can create beautiful and fragrant candles that will add ambiance to any space.
So why not give it a try? You’ll be amazed at the results and the satisfaction of creating something with your own hands. Plus, who doesn’t love relaxing in the soft glow of a candlelit room?
So what are you waiting for? Start making your own floating candles today!