
To create layered scents in a two-stage candle at home, start by choosing contrasting or complementary wax colors and scent pairs. Melt each wax separately, pouring the first layer when it’s slightly cooled and letting it set completely before adding your second layer. Use smooth pouring techniques to avoid cracks and blend scents thoughtfully for an aromatic experience. For more tips on perfecting your layered candle craft, continue exploring the steps that follow.
Key Takeaways
- Select contrasting or complementary wax colors and pour the first layer when slightly cooled for smooth, distinct layers.
- Add scent oils after removing wax from heat, stirring thoroughly before pouring each layer for balanced aroma.
- Allow each wax layer to cool and set completely before pouring the next to prevent blending or cracking.
- Use smooth edges and even heating to ensure a professional, visually appealing layered candle.
- Trim the wick after cooling, creating a beautiful, aromatic candle perfect for decoration or gifting.

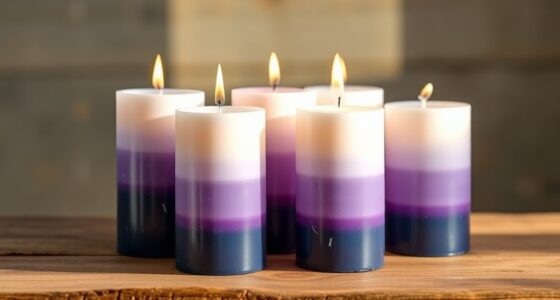
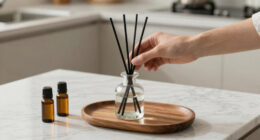
Layered candle art transforms simple candles into stunning, multidimensional displays that captivate the eye. When you master the art of pouring a two-stage candle at home, you’re creating a visual and sensory experience that’s both beautiful and personalized. The key to a successful layered candle lies in thoughtful scent pairing and color coordination. These elements work together to produce a harmonious look and aroma, elevating your candle-making from a craft to an art form.
Transform simple candles into stunning, personalized art with thoughtful scent pairing and color coordination.
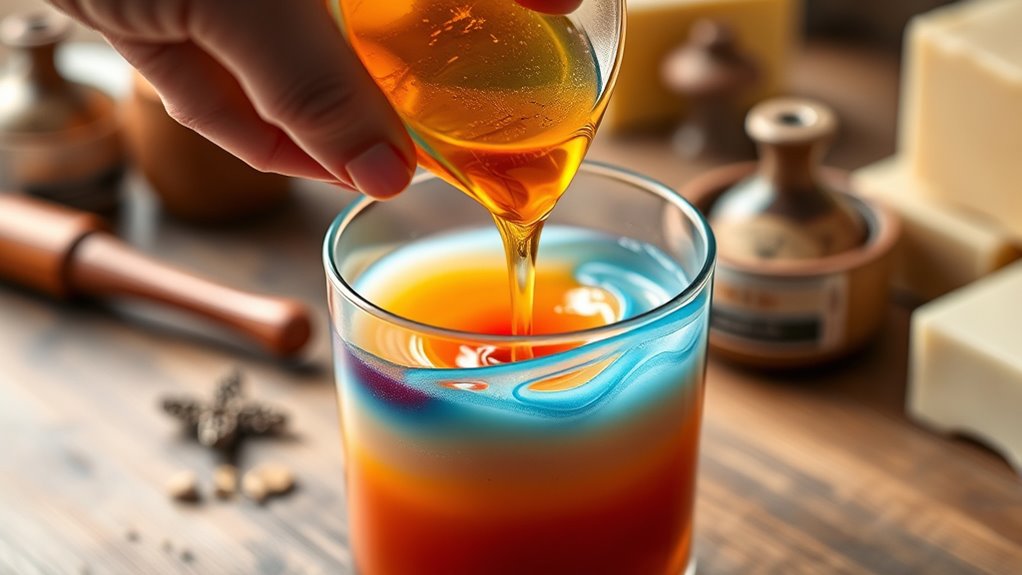
Start by selecting your wax colors carefully. You want contrasting or complementary shades that will stand out when layered. For example, deep blue and white evoke a calming ocean vibe, while warm reds and oranges create a cozy, inviting atmosphere. Once you’ve chosen your color scheme, melt your wax in separate containers, ensuring each batch is heated evenly. When pouring the first layer, make sure it’s slightly cooled but still liquid enough to adhere well to the next layer.
Scent pairing is equally important. Decide on your primary fragrance for the bottom layer and a complementary scent for the top. For instance, a vanilla base pairs beautifully with a hint of citrus or lavender on top. This combination enhances the sensory journey, making each burn more engaging and layered in aroma. When pouring each layer, add your fragrance oils after removing the wax from heat, stirring thoroughly to distribute the scent evenly.
Pour the first layer into your mold and allow it to set completely before adding the next. Patience is vital here because rushing the process can cause the layers to blend or crack. To reinforce color coordination, pour the second layer in a contrasting or matching hue, ensuring the edges are smooth. The visual contrast will give the illusion of depth and dimension, making your candle stand out when lit. Additionally, understanding the importance of layering techniques can help you achieve cleaner and more professional-looking results.
When the second layer is poured and the candle has cooled completely, trim the wick and enjoy your craft. The result is a striking two-tone candle with layers that are both visually appealing and aromatically layered. This technique not only showcases your creative skills but also creates a multi-sensory experience for anyone who lights it. Whether you’re making a gift or decorating your space, the art of layered scents and color coordination allows you to craft candles that are truly one-of-a-kind, adding beauty and aroma to any environment.
Scented Candles Gift Set for Women, 4 Pack Soy Wax Candles in Classic Bohemian Tins, Aromatherapy Candle Set, Birthday Gifts for Mom, Thank You Gifts
SCENTED CANDLES GIFT SET FOR WOMEN: This 4 pack scented candles gift set comes in colorful decorative tins,...
As an affiliate, we earn on qualifying purchases.
Frequently Asked Questions
How Do I Prevent Colors From Mixing Between Layers?
To prevent colors from mixing between layers, you should focus on proper layering techniques and maintaining temperature control. Allow each layer to cool slightly but stay liquid enough to pour smoothly. Pour the next layer carefully and slowly to avoid disturbing the previous one. Using contrasting colors and pouring at the right temperature helps achieve distinct color separation, ensuring your candle layers stay crisp and visually appealing.
What Tools Are Best for Creating Precise Candle Layers?
Think of creating precise candle layers as sculpting with delicate tools. To master layering techniques and guarantee color separation, use a fine-tipped pour spout or pipette for controlled flow. A thermometer helps monitor temperature to prevent colors from blending. Steady hands and a heat-resistant surface keep your layers crisp. These tools allow you to build each layer with precision, ensuring vibrant, distinct colors in your layered candle masterpiece.
How Long Should I Wait Between Pouring Each Layer?
When it comes to layer timing, patience is key. You should wait about 5 to 10 minutes after pouring each layer, or until the surface cools and firms up. This layering patience guarantees each layer sets properly, preventing mixing or sinking. Rushing the process can ruin your design, so take your time. Proper layer timing results in a beautifully layered candle with distinct, crisp sections.
Can I Add Fragrance Oils to Each Layer?
You might think adding fragrance oils to each layer is a brilliant idea, but it’s not always that simple. It’s a matter of layering techniques and fragrance compatibility. If you add different scents, they might clash or fade unevenly. To get the best effect, choose complementary fragrances and wait for each layer to cool just enough before pouring. Patience and mindful layering make your candle truly aromatic.
How Do I Fix Mistakes if a Layer Doesn’t Set Properly?
If a layer doesn’t set properly, don’t worry. First, identify the cause, like temperature issues or pouring too early. To fix it, carefully reheat the problematic layer to a safe temperature and add a small amount of wax or fragrance oil if needed. Use proper layering techniques next time, like cooling each layer before pouring, to improve candle aesthetics and prevent future mishaps.

Yankee Candle Home Sweet Home Scented Candle, 22oz Large Jar, Up to 150 Hour Burn Time, Giftable
Home Sweet Home: Home, where you always feel welcome and at ease; it's where the heart is. This...
As an affiliate, we earn on qualifying purchases.
Conclusion
As you master the delicate dance of layered scents, you’ll find your home transforming into a haven of refined elegance. Each carefully poured layer whispers subtle sophistication, inviting a gentle curiosity from all who enter. With patience and practice, you’ll discover that the true art lies not just in the candle itself, but in the quiet serenity it imparts. Embrace this craft, and let your creations quietly elevate your space to new heights of serenity.

Yankee Candle Pink Sands Scented Candle, 22oz Large Jar with up to 150 Hour Burn Time, Giftable, Birthdays
Pink Sands: Pink Sands is the exotic island escape you've always dreamed of. Juicy melon scents are softened...
As an affiliate, we earn on qualifying purchases.

Scented Candles for Home,8 Pack Soy Wax Candle Set,Scented Candles Gift Set,Aromatherapy Candles, Amber Jar Vintage Apothecary Style, 8 Scents Gift Set
8 Pack Scented Candle Set – Great Value & Variety:Enjoy 8 different scented candles in one set, offering...
As an affiliate, we earn on qualifying purchases.