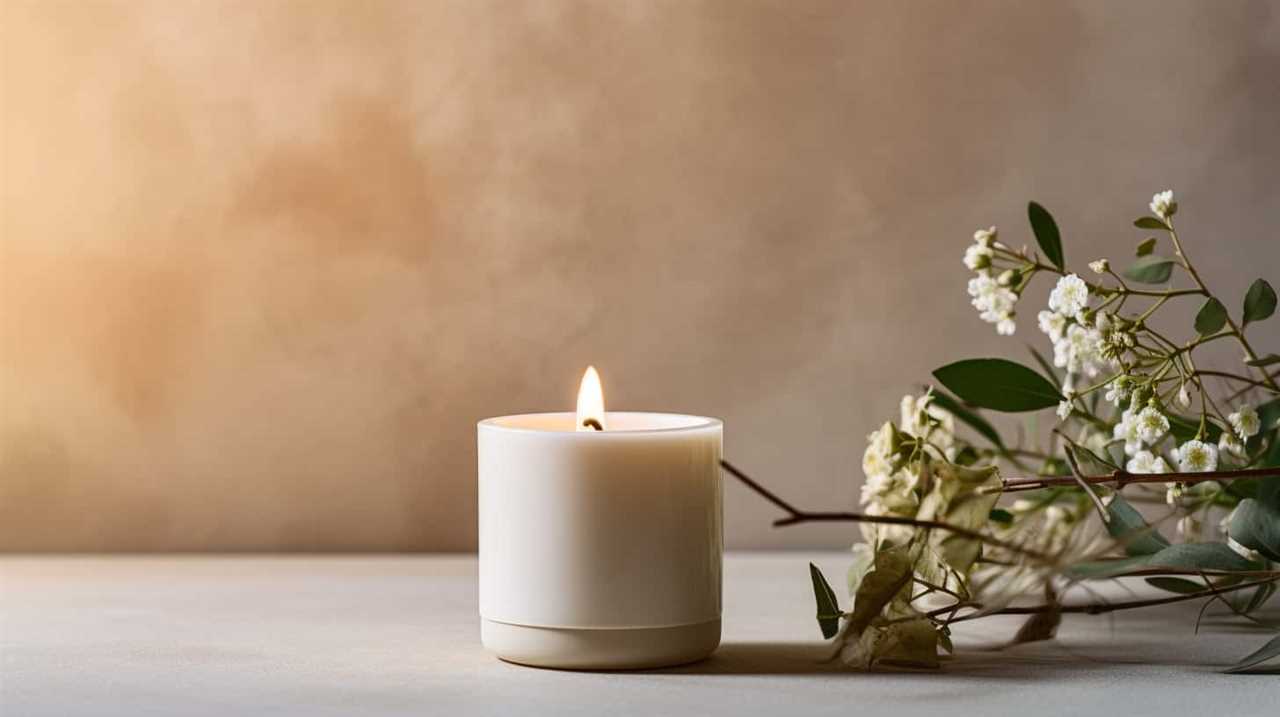
Connect with us

Candles

Why Should You Cut the Wick of a Candle

Published

on

You might wonder, why is it necessary to trim the wick of a candle?

Well, for those of us who strive to serve others, there are a multitude of reasons to do so. Trimming the wick not only prevents excessive smoke, but also enhances the distribution of that lovely scent we all enjoy.

By doing this simple task, we can extend the burn time of our candles, maintain a desirable flame height, and increase overall candle safety.

Not to mention, it promotes even wax melting and reduces soot build-up, resulting in a cleaner burn.

Advertisement

interesting facts about candles

So, let’s grab our trusty wick trimmers and take a few moments to care for our candles. Your nose, your home, and those around you will surely thank you!

Key Takeaways

  • Trimming the wick prevents excessive smoke and reduces fire hazards.
  • It promotes even melting and prevents tunneling.
  • Trimming the wick enhances fragrance distribution throughout the room.
  • It increases burning time and extends the lifespan of the candle.
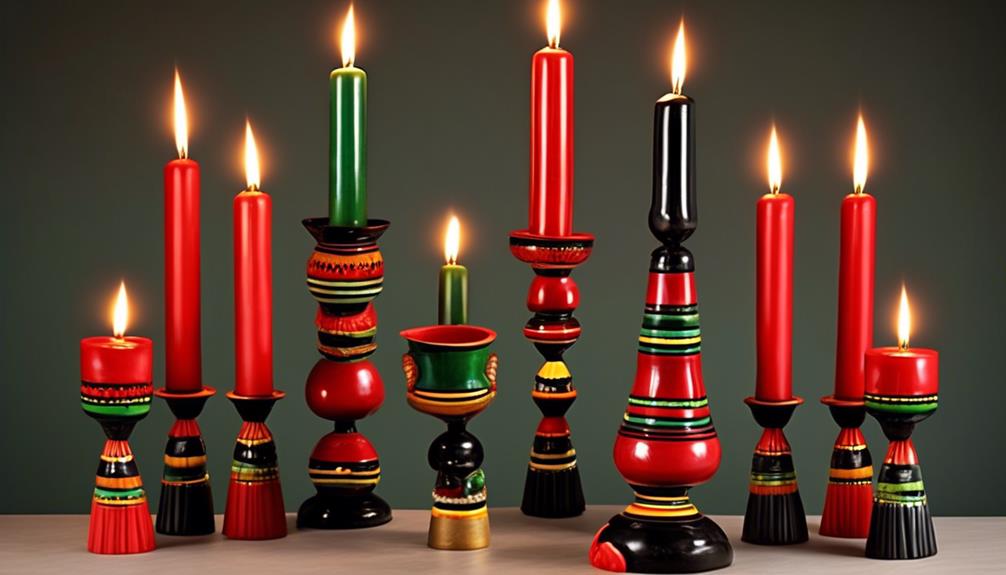
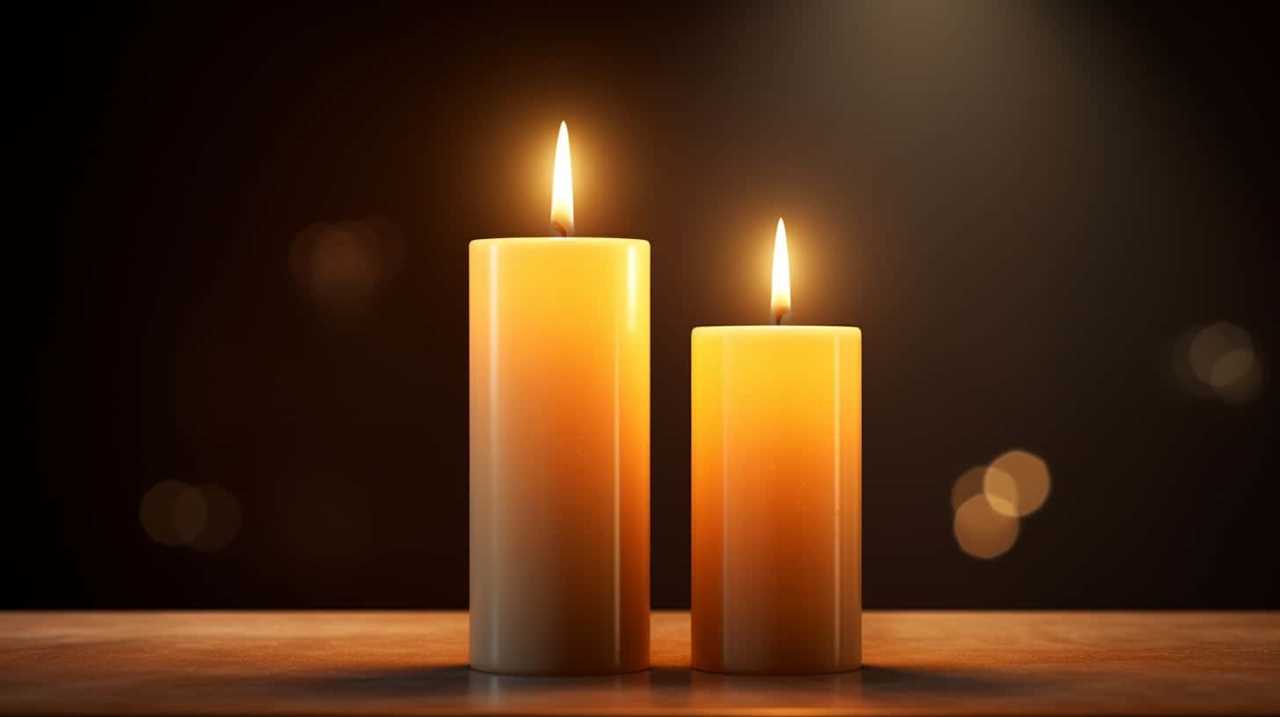
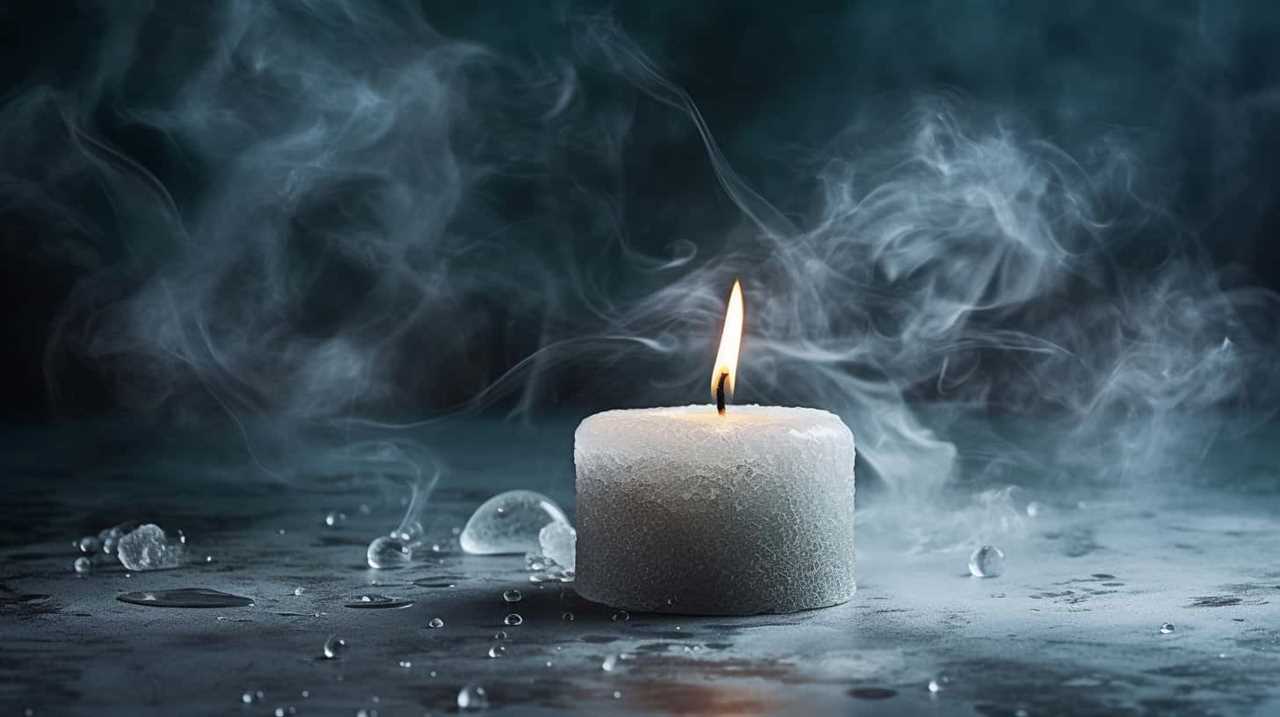
Prevent Excessive Smoke

To prevent excessive smoke, we should cut the wick of a candle before lighting it. This simple step can make a significant difference in improving the performance of the candle and preventing wax drips.

When a candle is lit with a long wick, it tends to produce more smoke, which can be both irritating and harmful. By trimming the wick to about a quarter of an inch, the flame will burn more steadily and emit less smoke. This not only enhances the ambiance of the room but also ensures a safer and healthier environment for everyone.

Additionally, cutting the wick promotes a more efficient and even burn, allowing the candle to last longer. So, remember to trim your candle wick before each use for a more enjoyable and long-lasting experience.

candle salad

Enhance Scent Distribution

Our experience has shown that trimming a candle’s wick enhances the scent distribution.

When the wick is too long, it creates a larger flame that burns the wax at a faster rate, leading to a stronger but shorter-lived fragrance.

Advertisement

By trimming the wick to the recommended length of about ¼ inch, you ensure a controlled flame that allows for a slower, more even burn.

This controlled burn helps improve fragrance distribution throughout the room, resulting in a long-lasting scent that lingers in the air.

candle meaning

Trimming the wick also prevents excessive smoke, which can mask the scent and diminish the overall experience.

Extend Burn Time

When it comes to extending the burn time of a candle, there are several important points to consider.

First, cutting the wick prevents uneven burning, ensuring that the candle lasts longer.

Advertisement

Additionally, a trimmed wick reduces smoke and soot, creating a cleaner and more efficient burn.

candle shack europe

Lastly, by keeping the wick at the recommended length, you maximize the release of fragrance, allowing you to enjoy the scent for a longer period of time.

Prevents Uneven Burning

Regularly trimming the wick of a candle promotes even burning and extends its burn time. When a candle burns unevenly, it can lead to unsightly tunneling, where the wax burns down the center, leaving a thick wall of wax around the edges. This not only affects the aesthetics of the candle but also reduces its burn time. By trimming the wick to the recommended length of about ¼ inch, the flame burns steadily and evenly, allowing the wax to melt and burn uniformly. This helps prevent tunneling and ensures that the candle lasts longer, providing more hours of beautiful illumination. To visualize the importance of wick trimming, refer to the table below:

Untouched Wick Trimmed Wick
Uneven burning, tunneling Even burning, extended burn time
Diminished aesthetics Improved aesthetics
Shorter burn time Longer burn time

Regular wick trimming is a simple and effective way to enhance the performance and aesthetics of your candles, allowing you to enjoy their warm glow for longer periods.

Reduces Smoke and Soot

To further enhance the performance and longevity of our candles, we can reduce smoke and soot by trimming the wick regularly. By doing so, we not only extend the burn time but also improve air quality and prevent respiratory issues.

Advertisement

boy smells candles australia

Here’s why it’s important to keep the wick trimmed:

  • Reduces Smoke: Trimming the wick ensures that it doesn’t burn too long, preventing excessive smoke production. This not only keeps the air clean but also prevents any respiratory discomfort caused by inhaling the smoke.
  • Reduces Soot: A long, untrimmed wick can produce excess soot, which can stain surfaces and decrease the overall aesthetic appeal of your space. By regularly cutting the wick, we can minimize the amount of soot produced, keeping our candles cleaner and fresher for longer.

Maximizes Fragrance Release

By trimming the wick of a candle, we can maximize fragrance release and extend the burn time. Trimming the wick to about 1/4 inch before each use ensures a controlled and steady flame, allowing the fragrance to disperse evenly and last longer. This simple step not only maximizes fragrance longevity but also improves candle aesthetics.

When the wick is too long, it can create a larger flame that burns through the wax quickly, resulting in a shorter burn time and less fragrance release. A well-trimmed wick prevents black soot from forming on the edges of the container and keeps the flame from flickering or smoking.

Maintain Flame Height

To maintain the flame height of a candle, there are two key points to consider.

candlesticks hotel stamford

First, trimming the wick helps to prevent the flame from becoming too large and potentially causing a fire hazard.

Second, a properly trimmed wick allows the candle to burn more slowly and evenly, resulting in a longer burning time.

Advertisement

Safety and Fire Prevention

Maintaining a safe flame height is essential for fire prevention when using candles, which involves regularly cutting the wick. Proper flame management and candle maintenance play a crucial role in ensuring a safe and enjoyable candle experience.

Here are two reasons why maintaining a safe flame height is important:

interesting facts about candles

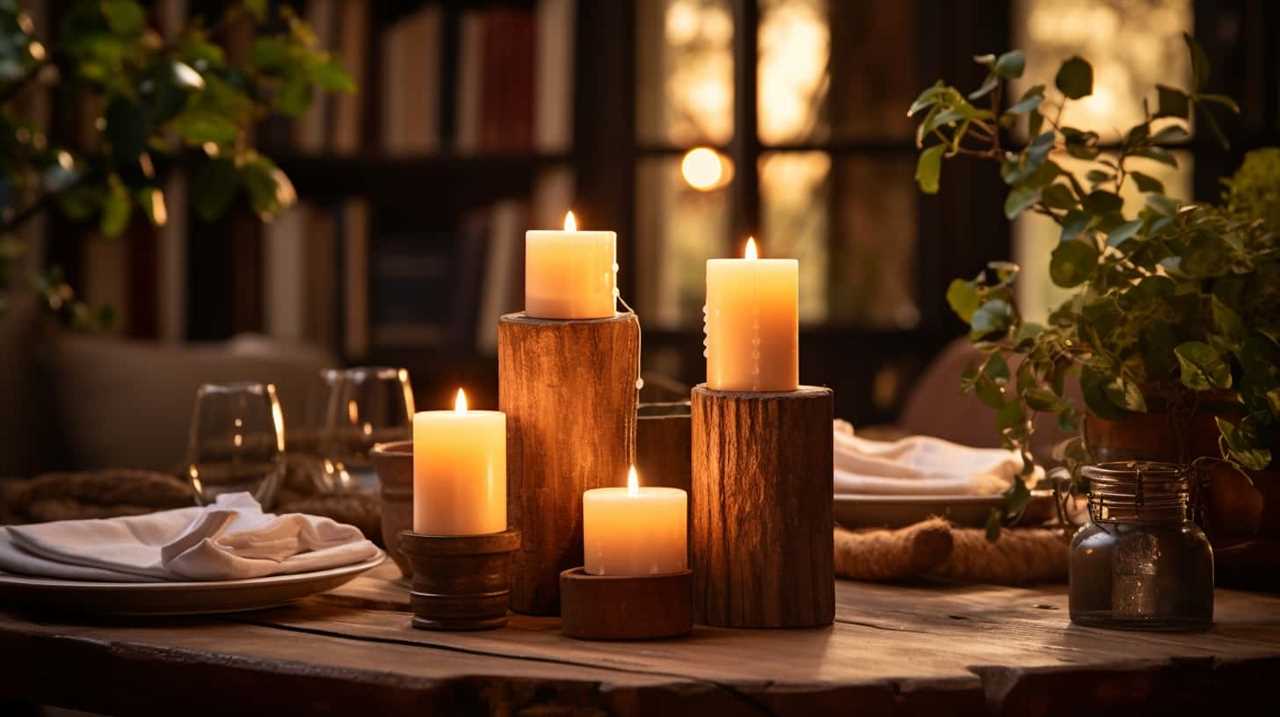
  • Prevents accidents: Keeping the flame at an appropriate height reduces the risk of accidents, such as tipping over the candle or igniting nearby objects. This helps protect your home and loved ones from potential fire hazards.
  • Avoids excessive smoke: Trimming the wick helps control the amount of smoke produced by the candle. Excessive smoke can be irritating to the respiratory system and can also leave behind unpleasant odors in your living space.

By maintaining a safe flame height, you can create a cozy and secure ambiance while minimizing any potential risks.

Now, let’s explore how trimming the wick can also contribute to a longer burning time.

Longer Burning Time

Achieving a longer burning time for your candle involves properly managing the flame height. By maintaining the flame at an optimal level, you can increase the efficiency of the candle and ensure it burns for a longer period.

To do this, it’s important to regularly trim the wick to a recommended length of about ¼ inch. This prevents the flame from becoming too large or flickering excessively, which can lead to uneven burning and wasted wax.

Advertisement

decorative candle

By keeping the flame at a controlled height, you not only extend the burning time of your candle but also promote even melting and minimize soot production. This simple act of candle maintenance can greatly enhance your candle’s performance and ensure its longevity.

Now, let’s move on to the next section about how to increase candle safety.

Increase Candle Safety

Ensuring candle safety is paramount for a peaceful and worry-free ambiance. To increase fragrance and prevent accidents, here are some important safety measures to consider:

  • Keep candles away from flammable materials:
  • Place candles on a sturdy, heat-resistant surface.
  • Keep them at least 12 inches away from curtains, furniture, and other combustible items.
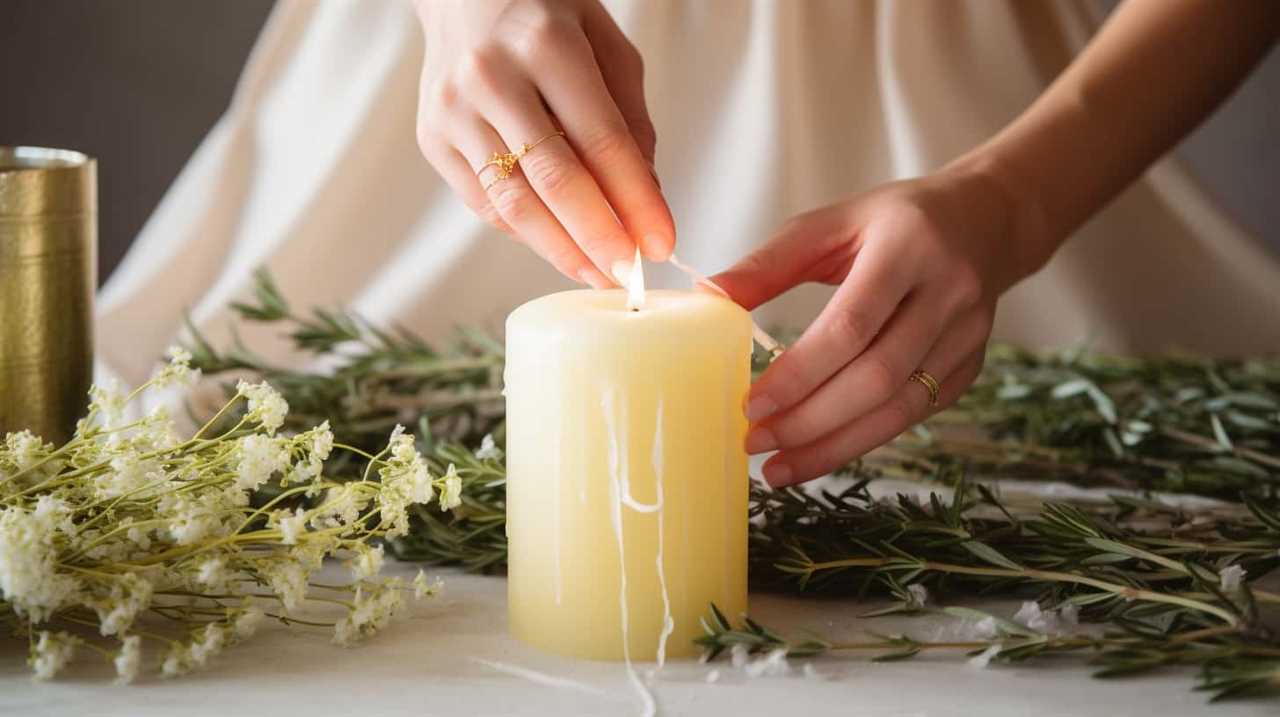
  • Trim the wick:
  • Cut the wick to ¼ inch before lighting the candle.
  • This helps control the flame size and reduces the risk of the candle overheating or causing a fire.

Following these simple steps won’t only enhance the fragrance of your candles but also provide a safe environment for you and your loved ones. Remember, a little precaution can go a long way in creating a calming and worry-free atmosphere.

the candle library stockists

Promote Even Wax Melting

To ensure even wax melting, we need to consistently monitor the candle’s burn time and adjust the wick as necessary. By trimming the wick, we can enhance the wax melting efficiency and improve the overall performance of the candle. When the wick is too long, it can create a larger flame that burns the wax unevenly, resulting in wasted wax and an inconsistent burn. Trimming the wick to the recommended length of about ¼ inch helps the candle burn evenly, maximizing its wax melting efficiency. This not only ensures a longer burn time but also reduces the risk of tunneling, where the wax around the edges of the candle remains unburned. By promoting even wax melting through wick trimming, we can enjoy a longer-lasting and more efficient candle experience.

To reduce soot build-up, let’s explore the next subtopic.

Advertisement

Reduce Soot Build-Up

To decrease the amount of soot emitted, we diligently maintain a trimmed wick throughout the candle’s burn time. By reducing soot build-up, we can contribute to a cleaner and healthier environment. Here’s why trimming the wick helps:

  • Reduce carbon emissions
  • Trimming the wick prevents excessive burning, which reduces the release of carbon into the air.
  • This helps minimize your carbon footprint and contributes to a more sustainable future.
  • Improve air quality
  • When a candle burns with a long, untrimmed wick, it produces more soot particles that can pollute the air.
  • By keeping the wick trimmed, you can minimize the amount of soot released, improving the air quality in your home.

Achieve a Cleaner Burn

For a cleaner burn, we need to focus on maintaining a trimmed wick throughout the candle’s burn time. By doing so, we can increase candle longevity and improve air quality.

candles direct reviews

When the wick is too long, it can produce excessive smoke and soot, which can stain walls, ceilings, and furniture. Trimming the wick to about 1/4 inch before each burn ensures a more even and controlled flame, reducing the risk of smoke and soot. This not only keeps the candle burning cleaner but also extends its lifespan.

Additionally, a cleaner burn means less harmful particles are released into the air, leading to improved air quality in your home. So, remember to regularly trim the wick for a cleaner and healthier candle experience.

Frequently Asked Questions

How Often Should I Trim the Wick of My Candle?

We trim the wick of a candle regularly to ensure proper burning. It helps the candle last longer, prevents excessive soot, and promotes a clean, steady flame. Regularly trimming the wick is key for a well-maintained candle.

Can I Use Any Type of Scissors or Trimmers to Cut the Wick?

Yes, you can use any type of scissors or trimmers to cut the wick of a candle. However, it’s important to regularly trim the wick to maintain an optimal length for a clean and even burn.

Advertisement

candles direct ireland

We trim the wick of a candle to maintain a proper length and ensure a clean, even burn. The recommended frequency for wick trimming is before each use, and the proper length is about 1/4 inch.

Is It Necessary to Trim the Wick Every Time Before Lighting the Candle?

Yes, it is necessary to trim the wick before lighting the candle. Trimming the wick promotes better burning, ensuring a steady flame and preventing excessive smoke. It also improves candle performance and safety.

Can I Use the Candle Without Trimming the Wick?

Sure, you can use a candle without trimming the wick, but it’s not recommended. Proper wick maintenance is crucial for a clean and safe burn. Trimming the wick helps prevent excessive smoke, soot, and uneven burning.

Conclusion

Cutting the wick of a candle is a small act with big benefits. Like a skilled conductor, it orchestrates a symphony of advantages.

candle holders uk

By preventing excessive smoke, enhancing scent distribution, and extending burn time, it ensures a harmonious experience. Additionally, it maintains flame height, increasing safety, and promotes even wax melting, reducing soot build-up.

Advertisement

In the end, this simple act allows the candle to burn cleanly, illuminating our surroundings with its gentle glow.

I'm Jane and I love candles. I have candles everywhere in my house--in every room, on every surface. I love the smell of candles, and I love how they make my place feel warm and cozy. Candles are really important to me. They help me relax and de-stress after a long day. They remind me of happy memories, and they make me feel calm and peaceful. I can't imagine my life without candles!

Continue Reading
Advertisement

Candles

How to Remove Candle Wax From Wood Coffee Table

Published

on

By

Ever experienced an unfortunate incident with candle wax spilling on your elegant wood coffee table? Don’t worry, because we’ve got you covered! In this guide, we’ll demonstrate how to effortlessly clean candle wax off your wooden coffee table.

By following our step-by-step instructions, you will gain mastery over this pesky problem and restore your table to its former glory.

We will teach you how to:

  • Gather the necessary materials
  • Scrape off excess wax
  • Apply heat to soften the wax
  • Blot the softened wax
  • Remove any remaining residue
  • Sand the area for deeper stains
  • Apply a wood stain to match the original color
  • Finally, buff the area for a smooth finish.

So let’s get started and rescue your wood coffee table from the clutches of candle wax!

candlelight concerts

Key Takeaways

  • Scrape off excess wax using a plastic scraper or credit card
  • Use a hairdryer to melt the wax and gently scrape it off
  • Blot the softened wax using paper towels or a clean cloth
  • Sand the area for deeper stains and apply wood stain to match the original color

Gather Necessary Materials

First, we’ll gather the necessary materials to remove candle wax from a wood coffee table. To effectively remove the wax, we’ll need a few key items.

Firstly, we’ll require a hairdryer or an iron. Using heat is an effective method to remove wax as it helps to melt and loosen it from the surface of the wood.

Advertisement

Secondly, we’ll need a plastic scraper or a credit card. This will aid in gently scraping off the softened wax without causing any damage to the wood.

Lastly, we’ll need ice cubes or an ice pack. By using ice, we can freeze the wax, making it easier to chip away.

candle online

These materials will enable us to effectively remove the candle wax from the wood coffee table.

Scrape off Excess Wax

To remove excess wax from a wood coffee table, there are two effective methods: heating and scraping, and using the ice method.

In the heating and scraping method, use a hairdryer to heat the wax, then scrape it off with a plastic scraper.

Advertisement

Alternatively, for the ice method, place a plastic bag filled with ice cubes on top of the wax to harden it, then gently scrape it off.

candle making supplies

Both methods can help remove excess wax from your wood coffee table without causing damage.

Heat and Scrape

We can start by using a hairdryer to heat the candle wax and then scrape off the excess wax from the wood coffee table. Here are three steps to follow for this process:

  1. Apply heat: Hold the hairdryer a few inches away from the wax and turn it on to its highest setting. Move the hairdryer back and forth over the wax, allowing the heat to melt it.
  2. Scrape off the excess wax: Once the wax has melted, take a plastic scraper or a credit card and gently scrape off the softened wax. Be careful not to scratch or damage the wood surface.
  3. Wipe clean: After removing the excess wax, use a soft, lint-free cloth to wipe away any remaining residue. You may need to apply a small amount of wood cleaner or rubbing alcohol to remove any stubborn wax.

Use Ice Method

How can we effectively scrape off the excess candle wax from a wood coffee table using the ice method?

First, let’s gather the necessary tools: a plastic scraper and ice cubes.

Candle

Begin by placing a few ice cubes in a plastic bag and sealing it.

Advertisement

Next, place the bag of ice directly on top of the wax spill.

Allow the ice to sit on the wax for a few minutes until it hardens.

Once the wax is frozen, take the plastic scraper and gently scrape off the hardened wax. Be careful not to scratch the wood surface.

dusk candle holder

If there are any stubborn wax remnants, you can use a hairdryer on a low heat setting to soften the wax and then scrape it off with the plastic scraper.

Repeat these steps until all the wax is removed.

Advertisement

Apply Heat to Soften the Wax

Once softened, the wax can be easily removed from the wood coffee table. Applying heat is an effective method for loosening the wax and making it easier to eliminate. Here are three steps to follow when using the hairdryer method for removing wax from furniture:

  1. Set the hairdryer to a low or medium heat setting: This ensures that the heat is gentle and won’t damage the wood surface of the coffee table.
  2. Hold the hairdryer close to the wax: Position the hairdryer about 2-3 inches away from the wax to direct the heat effectively.
  3. Move the hairdryer in a circular motion: This helps evenly distribute the heat and encourages the wax to soften and melt.

Remember to be patient and allow the wax to melt gradually. Once the wax has softened, gently wipe it away with a clean cloth or paper towel.

boy smells candles australia

Blot the Softened Wax

Now that the wax has been softened, it’s time to move on to the next step: blotting.

This is an effective method for removing any remaining wax residue from your wood coffee table.

In this process, you’ll use materials such as paper towels or a clean cloth to absorb the softened wax.

Heat and Scrape

After the wax has been softened with heat, we can begin the process of removing it by blotting the softened wax. This step is crucial to ensure that the wax is completely lifted from the wood coffee table.

Advertisement

dusk meditation candle

Here are three techniques to effectively scrape off the softened wax:

  1. Plastic scraper: Gently glide a plastic scraper over the surface of the wax, applying light pressure to avoid scratching the wood. The softened wax will easily come off in small flakes.
  2. Credit card: Utilize an old credit card or a similar plastic card to scrape off the wax. Hold the card at a slight angle and scrape in a controlled motion to remove the wax without damaging the wood.
  3. Rubber eraser: If there’s any residue left after scraping, use a rubber eraser to gently rub away the remaining wax. The eraser’s texture will help lift the wax particles without harming the wood’s finish.

Use Ice Method

Using the ice method, we can effectively blot the softened wax from the wood coffee table. This method is particularly useful when dealing with hard-to-remove wax stains.

To begin, place a few ice cubes in a plastic bag and seal it. Next, gently rub the ice-filled bag over the wax stain, allowing the cold temperature to harden the wax. As the wax hardens, it will become easier to remove.

Once the wax has solidified, take a plastic scraper or a credit card and carefully scrape off the hardened wax, being cautious not to scratch the wood surface. If any residue remains, use a soft cloth dampened with warm water to wipe away the remaining wax.

ecoya candles myer

This ice method is an effective alternative to the hairdryer method and can help restore the natural beauty of your wood coffee table.

Apply Rubbing Alcohol

We can effectively remove the softened wax from the wood coffee table by using rubbing alcohol and blotting the wax. Here’s how you can do it:

Advertisement
  1. Rubbing alcohol alternatives: If you don’t have rubbing alcohol on hand, you can use other household items such as nail polish remover, vinegar, or even hand sanitizer. These alternatives contain similar properties that can break down the wax and make it easier to remove.
  2. Blotting the wax: Once you have the rubbing alcohol or alternative, saturate a clean cloth or paper towel with it. Gently blot the softened wax, being careful not to rub it into the wood surface. The alcohol will help dissolve the wax, allowing it to transfer onto the cloth.
  3. Removing wax from other surfaces: The rubbing alcohol method can also be used to remove wax from other surfaces like fabric, glass, or tile. Simply apply the alcohol and blot the wax until it comes off. Remember to test the alcohol on a small, inconspicuous area first to ensure it doesn’t damage the material.

Remove Any Remaining Residue

To remove any remaining residue, gently scrape the candle wax off the wood coffee table using a plastic credit card. Be sure to do this carefully to prevent scratching or damaging the surface of the table. Apply gentle pressure and move the card in a scraping motion to lift off the wax.

If there are any stubborn residue spots, you can try using a hairdryer on a low heat setting to melt the wax slightly, making it easier to scrape off.

yankee candle

Once you have removed all the wax, use a clean cloth or paper towel to wipe away any remaining residue. Avoid using harsh chemicals or abrasive cleaning techniques as they can damage the wood.

Clean the Area With a Wood Cleaner

Now let’s talk about how to clean the area with a wood cleaner.

When it comes to removing candle wax from a wood coffee table, it’s important to use gentle cleaning methods to avoid damaging the surface.

We’ll also discuss how to protect the wood while cleaning and how to tackle stubborn wax residue.

Advertisement

candlestick patterns

Gentle Cleaning Methods

After carefully scraping off any excess wax, gently clean the area of the wood coffee table with a wood cleaner. Here are three steps to follow for effective gentle cleaning:

  1. Apply a small amount of wood cleaner onto a soft, lint-free cloth. Make sure the cloth is damp, not soaking wet.
  2. Begin by gently wiping the affected area in a circular motion. This will help remove any remaining wax residue and dirt without damaging the wood surface.
  3. Continue to wipe the area until it’s clean and free from any wax or stains. If necessary, repeat the process using a fresh cloth and more wood cleaner.

Using a wood cleaner is a great alternative cleaning method for removing candle wax from a wood coffee table. It’s an eco-friendly cleaning option that’s safe for both the wood surface and the environment.

Remember to always test the wood cleaner on a small, inconspicuous area of the table before applying it to the entire surface. This will ensure that the cleaner doesn’t cause any damage or discoloration.

Protecting the Wood Surface

To protect the wood surface of your coffee table, we use a wood cleaner to clean the affected area. Cleaning the area with a wood cleaner not only removes any residue from the candle wax but also helps to prevent scratches and maintain the integrity of the wood.

candlesticks hotel stamford

When applying the wood cleaner, it’s important to follow the instructions on the product label and use a soft cloth or sponge to gently wipe the surface. Avoid using abrasive materials or harsh chemicals that can damage the wood.

Additionally, to further protect the wood surface, it’s recommended to use coasters under hot or cold beverages to prevent any moisture or heat from directly contacting the table. This simple step can help maintain the beauty and longevity of your wood coffee table.

Advertisement

Removing Stubborn Wax

We begin by applying a wood cleaner to the affected area to remove stubborn wax from the wood coffee table. Here are three steps to effectively clean the area:

  1. Spray the wood cleaner directly onto the wax residue. Make sure to cover the entire affected area.
  2. Let the wood cleaner sit for a few minutes to penetrate the wax and loosen its grip on the wood surface.
  3. Gently scrub the area with a soft cloth or sponge, using circular motions. If the wax is particularly stubborn, you may need to use a scraping technique with a plastic scraper or credit card to carefully lift it off the wood.

If the wood cleaner alone doesn’t fully remove the wax, there are alternative cleaning methods you can try, such as using a mixture of warm water and mild dish soap or using a hairdryer to melt the wax and then wipe it away.

jo malone candle

By following these steps and using the appropriate cleaning techniques, you can effectively remove stubborn wax from your wood coffee table.

Now, let’s move on to the next step of applying a wax or polish to restore shine.

Apply a Wax or Polish to Restore Shine

To restore the shine of the wood coffee table, we recommend using a wax or polish. Applying a wax or polish not only helps to restore the luster of the wood, but also adds a layer of protection to prevent further damage.

Before applying the wax or polish, make sure to clean the surface of the table thoroughly to remove any dirt or residue. Once the table is clean and dry, apply a small amount of wax or polish to a soft cloth and gently rub it into the wood in a circular motion. Make sure to cover the entire surface evenly.

Advertisement

candle making supplies uk

Allow the wax or polish to dry completely, then buff the table with a clean, dry cloth to bring out the shine.

Now that we’ve restored the shine, let’s move on to the next step: using a hairdryer for stubborn wax.

Use a Hairdryer for Stubborn Wax

To effectively remove stubborn wax from a wood coffee table, use a hairdryer. This hairdryer technique is a quick and efficient way to tackle those tough wax stains. Here’s how to do it:

  1. Set your hairdryer to a low heat setting. High heat can damage the wood surface, so it’s important to use a gentle setting.
  2. Hold the hairdryer a few inches away from the wax stain and aim the hot air directly at it. The heat will melt the wax, causing it to soften and become more pliable.
  3. Once the wax is melted, use a soft cloth or paper towel to gently blot and lift the wax from the wood surface. Be careful not to rub the wax, as this can spread it further.

While the hairdryer technique is effective, there are alternative methods you can try if you don’t have a hairdryer on hand.

yankee candle

Try Using Ice to Harden the Wax

Using ice is an effective method for hardening the wax on a wood coffee table. If you don’t have ice readily available, you can also try using hot water instead.

Simply place a plastic bag filled with ice or a towel soaked in hot water directly on top of the wax spill. Allow the ice or hot water to sit on the wax for a few minutes until it hardens. This will make the wax easier to remove.

Advertisement

Once the wax has hardened, you can use a plastic scraper or a credit card to gently scrape off the wax from the wood surface. Be careful not to scratch or damage the wood.

In the next section, we’ll discuss how to use a plastic scraper for delicate surfaces.

candle gift

Use a Plastic Scraper for Delicate Surfaces

After the wax has hardened, we can easily remove it from delicate surfaces using a plastic scraper. Here are three alternatives to using a plastic scraper for those who want to try different wax removal methods:

  1. Credit Card: A sturdy credit card can be a great alternative to a plastic scraper. Gently slide the edge of the card under the hardened wax and use it to scrape off the wax without damaging the wood surface.
  2. Rubber Spatula: A rubber spatula is another handy tool for removing wax from delicate surfaces. Its flexible rubber edge allows you to scrape off the wax without scratching or gouging the wood.
  3. Plastic Putty Knife: If you don’t have a plastic scraper or a credit card, a plastic putty knife can be a suitable alternative. Its flat, wide blade allows for efficient wax removal while being gentle on the delicate surface.

Remember to always use gentle pressure and be cautious when using any alternative wax removal method to avoid any potential damage to your wood coffee table.

Sand the Area for Deeper Stains

We can address deeper stains on the wood coffee table by sanding the affected area. Sanding is a technique that involves using a fine-grit sandpaper to remove the top layer of the wood, exposing a fresh surface. This method is effective for deep stain removal because it not only removes the stain but also helps to smooth out any rough or uneven areas.

To begin, choose a sandpaper with a grit appropriate for your wood type and the severity of the stain. Gently sand the affected area in a circular motion, applying even pressure. Be careful not to sand too aggressively, as this can damage the wood.

Advertisement

candle & co

Once you have successfully removed the stain, you can then proceed to the next step of applying a wood stain to match the original color. This will help to restore the appearance of your wood coffee table and create a seamless finish.

Apply a Wood Stain to Match the Original Color

To achieve a seamless finish, we need to apply a wood stain that matches the original color of the coffee table. Here are some wood stain application techniques to help you achieve the desired result:

  1. Preparation: Start by ensuring the area is clean and free from any wax residue. You can use heat to remove any remaining wax by gently heating the surface with a hairdryer and wiping it away with a soft cloth.
  2. Test the stain: Before applying the wood stain to the entire table, it’s essential to do a patch test on a small, inconspicuous area of the table to determine if the color matches the original finish.
  3. Apply the stain: Using a clean brush or cloth, apply the wood stain evenly, following the grain of the wood. Allow the stain to penetrate for the recommended time, typically indicated on the product label.

Buff the Area for a Smooth Finish

To achieve a smooth finish, we’ll need to buff the area on the wood coffee table. Buffing is a process that involves using a soft cloth or buffing pad to gently rub the surface of the wood. This helps to remove any remaining wax residue and restore the shine of the wood.

There are different buffing techniques that you can use, depending on the severity of the wax buildup. For light wax residue, you can simply use a clean, dry cloth and gently rub the affected area in circular motions.

dusk candles careers

For more stubborn wax buildup, you may need to use a buffing pad attached to a drill or a buffing machine. When using these tools, it’s important to apply gentle pressure and work in small, controlled motions to avoid damaging the wood.

Remember to always test the buffing technique on a small, inconspicuous area of the table first to ensure it doesn’t cause any harm.

Advertisement

If buffing doesn’t fully remove the wax, there are alternative cleaning methods you can try.

Maintain Your Wood Coffee Table to Prevent Future Wax Spills

To prevent future wax spills on your wood coffee table, there are a few tips you can follow.

candle brand

First, always use candle holders or trays to catch any dripping wax.

Second, avoid placing lit candles directly on the table surface and instead use candlesticks or holders with a protective base.

Lastly, if a spill does occur, clean it up promptly using the methods mentioned earlier to ensure the wax doesn’t seep into the wood and cause damage.

Advertisement

Taking these preventative measures will help keep your coffee table wax-free and in great condition.

voluspa

Preventing Wax Spills: Tips

One important tip for preventing wax spills on your wood coffee table is to regularly maintain it. By taking proper care of your wooden furniture, you can effectively protect it from wax damage. Here are three essential tips to help you maintain your wood coffee table and prevent future wax spills:

  1. Keep your wood coffee table clean: Regularly dust your table with a soft cloth to remove any buildup that could trap wax. Avoid using abrasive cleaners or harsh chemicals that can damage the wood.
  2. Use coasters and placemats: Place coasters under hot or cold drinks and use placemats for meals to prevent any wax spills from directly coming into contact with the table surface.
  3. Trim candle wicks: Before lighting candles on or near your coffee table, make sure to trim the wicks to a quarter of an inch. This will help prevent excessive dripping and reduce the risk of wax spills.

Cleaning Spills Effectively: Methods

To effectively clean spills on your wood coffee table and prevent future wax spills, we can employ various methods that will help maintain the quality of the table.

When it comes to cleaning spills, it’s crucial to use gentle cleaning techniques to avoid damaging the wood. Start by blotting the spill with a clean cloth or paper towel to remove as much liquid as possible. Then, dampen another cloth with a mild wood cleaner and gently wipe the affected area, following the direction of the wood grain. Avoid using harsh chemicals or abrasive materials that can scratch or strip the wood’s finish.

To prevent future spills, consider using coasters or placemats to protect the table’s surface from spills and stains. Additionally, placing a tray or a protective cover on the table can provide an extra layer of defense against accidental spills.

candle online

Regularly inspect and maintain the table to ensure its longevity and prevent any potential damage.

Advertisement

Frequently Asked Questions

Can I Use a Different Type of Heat Source Other Than a Hairdryer to Soften the Wax?

We can try using alternative heat sources like an iron or a warm towel to soften the wax. However, it’s important to note that these methods may carry potential risks, such as damaging the wood or causing burns.

Are There Any Alternative Methods to Removing Candle Wax From a Wood Coffee Table?

There are alternative methods to remove candle wax from a wood coffee table. By using ice or a plastic bag filled with ice, you can freeze the wax and then scrape it off. Preventing wax buildup is key to avoiding this problem.

How Long Should I Let the Wood Cleaner Sit on the Area Before Wiping It Off?

We recommend letting the wood cleaner sit on the area for at least 10-15 minutes before wiping it off. As for using a different heat source, a hairdryer is the safest option to avoid damaging the wood.

candle holder

Can I Use a Different Type of Cleaner Other Than Wood Cleaner?

Yes, you can use a different type of cleaner, such as rubbing alcohol or vinegar, to remove candle wax from a wood coffee table. However, be cautious as these alternative cleaning methods may have potential risks, such as damaging the wood finish.

How Often Should I Apply a Wax or Polish to My Wood Coffee Table to Maintain Its Shine?

To maintain the shine of our wood coffee table, we apply wax or polish every 3-6 months. We also make sure to use coasters and placemats to prevent wax buildup and protect the surface.

Advertisement

Conclusion

In conclusion, removing candle wax from a wood coffee table is a simple process that can be done using common household materials. By following these steps, you can restore your table to its original beauty.

For example, imagine you accidentally spilled hot wax on your coffee table during a romantic dinner. By using the techniques outlined in this article, you can easily remove the wax and enjoy your table without any visible damage.

candle holders decorative

Continue Reading

Candles

How to Re-Wick a Candle

Published

on

By

Are you prepared to discover the mastery secrets of candles? Come along as we explore the craft of re-wicking a candle, a technique that revives your cherished wax lights.

Like a surgeon replacing a vital organ, we will guide you through each step, ensuring your candle burns brightly once more. With our expert techniques, you’ll never have to part with your favorite scented companions again.

So, gather your supplies and prepare to embark on this journey of revival. Together, we will:

  • Remove the old wick
  • Prepare the new one
  • Secure it in place

All while mastering the art of trimming for the perfect burn. Get ready to light up your world with a newly re-wicked candle!

candles direct sale

Key Takeaways

  • Choose an appropriate wick for the size and type of candle
  • Remove the old wick carefully and ensure it is completely removed
  • Select the right wick size, material, and placement for optimal burning
  • Regularly trim the wick to 1/4 inch and properly secure it for a perfect burn

Gather Your Supplies

To gather our supplies for re-wicking a candle, we’ll need to gather a few necessary items.

First and foremost, we must ensure that we have a new wick on hand. It’s important to choose a wick that’s appropriate for the size and type of candle we’re working with.

Advertisement

Additionally, we may want to consider wick alternatives, such as cotton or hemp, which can provide a cleaner burn and reduce soot buildup.

Next, we’ll need a pair of scissors or a wick trimmer to cut the wick to the desired length. This step is crucial for proper wick maintenance and ensuring an even burn.

candle brand

Finally, a candle wick holder or a pencil can be useful to keep the wick centered while we pour in the melted wax.

With these supplies in hand, we’re ready to begin the process of re-wicking our candle.

Remove the Old Wick

Now that we’ve gathered our supplies, it’s time to proceed with removing the old wick.

Advertisement

To successfully remove the old wick, follow these wick removal techniques:

candle holders decorative

  1. Use tweezers or a wick trimmer: Gently grip the base of the wick with tweezers or a wick trimmer. Slowly pull upwards, being careful not to break the wick. This method works well for wicks that are still intact.
  2. Scrape the wax: If the wick has burned down and is buried in the wax, use a small knife or spoon to carefully scrape away the surrounding wax. Once you can grasp the wick, use the tweezers or wick trimmer to remove it.
  3. Repurpose old wicks: Don’t throw away those old wicks just yet! You can repurpose them by using them in DIY projects like making fire starters or crafting candles with new wax.

Prepare the New Wick

Now that we’ve removed the old wick, let’s move on to preparing the new one.

When it comes to wick size options, it’s important to choose the right size for your candle diameter to ensure a proper burn.

Additionally, selecting the appropriate wick material is crucial for achieving a clean and efficient burn.

Wick Size Options

We researched wick size options and selected the most suitable one to prepare the new wick for re-wicking the candle. Choosing the right wick size is crucial for optimal burning and longevity of your candle. Here are three key factors to consider when selecting the wick size:

yankee candle coupon

  1. Candle Diameter: Measure the diameter of your candle container and choose a wick size that matches it. Using a wick that’s too small may lead to a weak flame, while a wick that’s too large can cause excessive smoke and sooting.
  2. Wax Type: Different waxes require different wick sizes. For example, soy wax typically requires a larger wick compared to paraffin wax. Consider the type of wax you’re using and consult wick size charts provided by candle-making suppliers.
  3. Desired Burn Rate: If you prefer a longer burning time, opt for a smaller wick size. Conversely, if you want a stronger fragrance throw and faster burn, choose a larger wick size.

With the appropriate wick size selected, we can now move on to discussing the wick materials to use.

Wick Materials to Use

To prepare the new wick for re-wicking the candle, it’s important to carefully choose the appropriate materials. There are several wick material options available, each with its own unique characteristics and performance qualities.

Advertisement

Cotton wicks are a popular choice, known for their clean burn and minimal soot production. They come in different sizes to accommodate various candle diameters.

Another option is hemp wicks, which are known for their excellent performance in candles with natural waxes.

candle brand

Wood wicks, on the other hand, offer a crackling sound and a unique aesthetic appeal.

When selecting a wick material, it’s essential to consider factors such as the type of wax used, the desired burn time, and the fragrance load of the candle. By carefully evaluating wick performance, you can ensure a successful re-wicking process.

Now that we’ve discussed the different wick material options, let’s move on to the next step: inserting the new wick into the candle.

Advertisement

Insert the New Wick Into the Candle

Now that we’ve prepared the new wick, it’s time to insert it into the candle.

candlelight inn

The first thing to consider is the size and compatibility of the wick with the candle. Make sure the wick is the appropriate length and thickness for the size of the candle to ensure proper burning.

Next, carefully place the wick in the center of the candle, ensuring it’s straight and aligned.

Wick Size and Compatibility

Inserting the new wick into the candle involves carefully selecting the appropriate wick size and ensuring compatibility with the candle. Here are three important considerations when it comes to wick size and compatibility:

  1. Wick material options: Different wick materials have different burn rates and performance characteristics. Cotton wicks are commonly used and work well with most candles. However, if you’re using a highly fragranced or soy-based wax, you may want to consider using a braided or double-ply wick for optimal performance.
  2. Troubleshooting wick issues: If you notice that your candle is burning too quickly or producing excessive smoke, it may be a sign that your wick is too large. On the other hand, if your candle is tunneling or not producing a consistent flame, your wick may be too small. Adjusting the wick size can help resolve these issues and improve the overall burn quality of your candle.
  3. Testing and experimentation: It’s important to note that wick size can vary depending on factors such as candle diameter, wax type, and fragrance load. To find the perfect wick size for your specific candle, it may require some trial and error. Conducting burn tests with different wick sizes will help you determine the optimal wick size for a clean, efficient, and long-lasting burn.

Wick Placement and Alignment

We carefully insert the new wick into the candle, ensuring proper placement and alignment. Wick placement is crucial for a well-functioning candle. When inserting the new wick, make sure it’s centered and straight, allowing for an even burn.

candlelight concerts belfast

Misaligned wicks can cause uneven melting and poor fragrance distribution. To ensure proper placement, you can use a wick centering device or simply eyeball it.

Advertisement

Additionally, if you’ve had previous wick problems, it’s important to troubleshoot and address them during the re-wicking process. Look for signs of mushrooming, excessive smoking, or tunneling, as these indicate issues with the wick.

Wick Trimming Techniques

To ensure a proper burn and fragrance distribution, it’s crucial to trim the wick before inserting it into the candle. Wick maintenance plays a significant role in maximizing the lifespan and performance of your candles. Here are three wick trimming techniques to follow:

  1. Trim to the recommended length: Check the candle manufacturer’s instructions for the ideal wick length. Using a pair of sharp scissors, trim the wick to this specified length. Be careful not to trim it too short, as this may result in a weak flame or poor burn.
  2. Remove any debris: Before inserting the new wick, make sure to remove any leftover wick or debris from the candle. This will ensure a clean and efficient burn.
  3. Follow wick safety precautions: Always exercise caution when handling the wick. Use proper tools to trim it, and avoid touching the hot wax or flame. Additionally, keep flammable materials away from the candle while inserting the new wick.

Secure the Wick in Place

To secure the wick in place, firmly grasp the base of the wick with a pair of tweezers. Gently pull the wick upwards, making sure it’s straight and centered in the candle.

candle shack calculator

Next, use a wick securing method such as a wick sticker or wick bar to hold the wick in place. Wick stickers are adhesive tabs that can be placed at the base of the wick, sticking it to the bottom of the container. Alternatively, you can use a wick bar, which is a metal or wooden device that sits across the top of the container and holds the wick in place.

Another option is to use alternative wick materials such as cotton or hemp wicks, which can provide a different burn rate or scent throw.

Remember to trim the wick to the desired length before securing it in place to ensure optimal performance.

Advertisement

Trim the Wick to the Desired Length

To ensure optimal performance, it’s essential to trim the wick to the desired length. Proper wick maintenance is crucial for a safe and efficient burning experience. Here are three key steps to follow when trimming your candle wick:

candle salad

  1. Gather the necessary tools: You’ll need a pair of sharp scissors or a wick trimmer designed specifically for candles. These tools will ensure a clean and precise cut.
  2. Determine the ideal wick length: It’s recommended to trim the wick to about ¼ inch before lighting the candle. This length promotes a steady flame and prevents excessive smoking or flickering.
  3. Trim with caution: Hold the candle steady and trim the wick, removing any burnt or mushrooming parts. Be careful not to cut the wick too short, as it may affect the candle’s performance.

Light Your Newly Re-Wicked Candle

First, we carefully light our newly re-wicked candle using a long-reach lighter or a matchstick. When lighting a candle, it’s important to use proper techniques to ensure a safe and effective burn. To begin, make sure the wick is trimmed to the desired length, as discussed in the previous subtopic.

Next, hold the flame to the base of the wick, allowing it to catch fire. Avoid touching the flame directly to the wax to prevent any damage. Once the wick is lit, let it burn for a few minutes to establish a good melt pool. This ensures an even burn and maximizes the fragrance release.

The benefits of using newly re-wicked candles include a stronger scent throw and a longer burn time. By following these lighting techniques and re-wicking your candles, you can enjoy a more enjoyable and longer-lasting candle experience.

Frequently Asked Questions

How Often Should I Re-Wick My Candle?

We typically re-wick our candles when we notice signs of reduced burn time, uneven melting, or excessive soot. Re-wicking techniques involve carefully removing the old wick, trimming the new one, and securing it in place for optimal burning.

candlelight orchestra

Can I Reuse the Old Wick for Another Candle?

Reusing the old wick for another candle may seem like a clever idea, but let’s weigh the pros and cons. While it could save money, the wick may not burn as efficiently, affecting the quality of the new candle.

Advertisement

What Type of Wick Should I Use for Different Candle Sizes?

When it comes to choosing the right wick size for different candle sizes, it’s important to consider factors such as the diameter and type of wax used. Troubleshooting common wick problems in candles requires careful observation and adjustment.

Is It Necessary to Trim the Wick Before Re-Wicking the Candle?

Before re-wicking a candle, it is vital to trim the wick. This maintenance step ensures a clean and even burn, preventing issues like soot and uneven melting. Proper wick length is key for a masterful candle experience.

Can I Re-Wick Scented Candles or Only Unscented Ones?

When re-wicking scented candles, it is important to follow certain tips for successful re-wicking. We have found that both scented and unscented candles can be re-wicked effectively, as long as the process is done correctly.

voluspa

Conclusion

After following these simple steps, you can confidently re-wick your candle and enjoy its warm glow once again.

  1. Start by removing the old wick from your candle. Carefully pull it out, making sure to discard it properly.
  2. Take your new wick and insert it into the empty wick hole. Push it down until it is securely in place.
  3. Once the new wick is in place, it’s important to trim it to your desired length. Use a pair of scissors or wick trimmers to cut the wick to the recommended length for optimal burning.
  4. With the new wick securely in place and trimmed to the correct length, your candle is ready to be lit.

Now sit back, relax, and bask in the cozy ambiance of your newly re-wicked candle.

Advertisement

Continue Reading

Candles

How to Remove Wax From Candle Sticks

Published

on

By

Interested in figuring out how to get rid of wax on candle holders? Allow us to pass on our proven techniques to you. We’re experts in the process of eliminating wax and look forward to leading you step-by-step. Don’t worry, we have everything under control!

In this guide, we’ll show you step-by-step how to remove stubborn wax from your precious candle sticks. From freezing to scraping, melting to absorbing, we’ll leave no wax residue behind. With our expert tips, you’ll have your candle sticks looking good as new in no time.

So, let’s dive in and get rid of that pesky wax, shall we?

Key Takeaways

  • Gather the necessary supplies for wax removal.
  • Consider the surface of the candlestick when choosing removal alternatives.
  • Use the hairdryer or ice method to remove hardened wax.
  • Consider using a citrus solvent as a natural alternative.

Prepare Your Supplies

To efficiently remove wax from candle sticks, we begin by gathering our supplies.

decorative candle

When it comes to wax removal alternatives, there are a few options to consider depending on the surface of the candlestick.

Advertisement

For wooden candlesticks, start by scraping off as much of the hardened wax as possible using a plastic scraper or the edge of a credit card. Then, dampen a clean cloth with warm water and mild soap and gently wipe the remaining wax away.

For metal or glass candlesticks, place the candlestick in the freezer for a few hours until the wax becomes brittle. Once frozen, use a plastic scraper or your fingers to easily peel off the wax. Be careful not to scratch the surface.

With these techniques, you can effectively remove wax from different surfaces and restore the beauty of your candlesticks.

ecoya candles sale

Now, let’s move on to the next step: freezing the candlestick.

Freeze the Candlestick

To freeze the candlestick, we’ll place it in the freezer for a few hours until the wax becomes brittle. Freezing the candlestick is an effective method for removing wax residue.

Advertisement

Here are the steps to freeze the candlestick:

  1. Prepare the candlestick: Ensure that the candlestick is clean and free from any debris. Remove any excess wax that can easily be scraped off using a plastic scraper or your fingernail.
  2. Choose an alternative freezing method: If you don’t have access to a freezer or want to try a different approach, you can also use an ice pack or a bag filled with ice cubes to cool the wax.
  3. Place the candlestick in the freezer: Carefully place the candlestick in the freezer, making sure it’s upright and stable. Leave it inside for a few hours until the wax hardens and becomes brittle.
  4. Remove the candlestick and the wax: Take the candlestick out of the freezer and gently tap it on a hard surface to dislodge the frozen wax. Use a plastic scraper or your fingers to remove any remaining wax residue.

Pros and cons of freezing:

candle making workshop

Pros:

  • Freezing is a simple and cost-effective method.
  • It hardens the wax, making it easier to remove.
  • It doesn’t require any harsh chemicals.

Cons:

  • Freezing can take several hours, requiring some patience.
  • It may not be suitable for delicate or heat-sensitive candlestick materials.

Scrape off the Hardened Wax

Now let’s talk about the different methods you can use to scrape off the hardened wax from your candlesticks.

One option is to heat the wax with a hairdryer or hot water, then wipe it away with a cloth.

candle holders

Alternatively, you can try the ice method by placing the candlestick in the freezer, allowing the wax to harden even more, and then gently scraping it off with a plastic scraper.

If you prefer a more natural approach, you can use a citrus solvent as an alternative to remove the hardened wax.

Advertisement

Heat and Wipe

We can start by heating the candlestick and then wiping off the hardened wax. Here’s how to effectively remove wax residue from candlesticks:

  1. Heat the wax: Use a hairdryer on a low heat setting to gently warm the hardened wax. Move the hairdryer around the candlestick to evenly distribute the heat.
  2. Softening the wax: Once the wax begins to soften, use a soft cloth or paper towel to wipe away the softened wax. Be careful not to apply too much pressure, as this may damage the candlestick’s surface.
  3. Repeat if necessary: If there’s still wax residue remaining, repeat the heating and wiping process until the candlestick is completely clean.
  4. Final touch-up: For any stubborn residue, use a cotton swab dipped in rubbing alcohol to remove the remaining wax.

Use Ice Method

First, we’ll use ice to scrape off the hardened wax from the candlesticks. This method provides an alternative to the heat and wipe technique.

ecoya hand cream set

To begin, place a plastic bag filled with ice cubes on top of the hardened wax. Allow the ice to sit for a few minutes, causing the wax to become brittle and easier to remove.

Next, gently scrape the hardened wax off the candlesticks using a plastic card or a dull knife. Be careful not to scratch the surface of the candlesticks.

The advantages of using ice include the fact that it doesn’t require any heat, minimizing the risk of damaging the candlesticks or causing a fire. However, one disadvantage is that it may take longer to remove the wax compared to using heat.

Citrus Solvent Alternative

How can we effectively scrape off the hardened wax from candlesticks using a citrus solvent alternative?

Advertisement

candlesticks forex

When it comes to removing wax from candlesticks, using a citrus solvent can be a natural and effective method. Here are the benefits of using a citrus solvent and some steps to follow:

  1. Choose a citrus solvent: Look for a citrus-based cleaner or solvent specifically designed for removing wax. These solvents are effective in breaking down the wax and are safe to use on various surfaces.
  2. Apply the solvent: Use a soft cloth or sponge to apply the citrus solvent to the hardened wax. Allow it to sit for a few minutes to penetrate and loosen the wax.
  3. Scrape off the wax: Use a plastic scraper or a credit card to gently scrape off the softened wax. Be careful not to scratch the surface of the candlestick.
  4. Repeat if necessary: If there’s still residual wax, reapply the citrus solvent and repeat the scraping process until all the wax is removed.

By using a citrus solvent alternative, you can effectively remove hardened wax from candlesticks without damaging the surface.

Now, let’s move on to the next method, which involves using a hairdryer to melt the wax.

Use a Hairdryer to Melt the Wax

Using a hairdryer, we can easily melt the wax from candle sticks. Before we begin, it’s important to ensure hairdryer safety. Make sure the hairdryer is plugged into a safe outlet and positioned away from any flammable materials. Additionally, keep a safe distance between the hairdryer and your hands to avoid burns.

boy smells candles australia

Now, let’s get started. Set the hairdryer to a medium heat setting and aim it at the wax on the candle stick. Move the hairdryer in a back-and-forth motion to evenly distribute the heat. As the wax begins to melt, you may notice it dripping or pooling. Be careful not to touch the hot wax.

Once the wax has melted, we can transition into the next step of absorbing the melted wax with paper towels.

Advertisement

Absorb the Melted Wax With Paper Towels

Now that the wax has been melted using a hairdryer, it’s important to absorb the melted wax to ensure a clean and residue-free candlestick.

One effective method is to use paper towels to soak up the melted wax. Simply press the paper towel against the wax, allowing it to absorb the liquid.

candle shack clp tool

This method is quick, easy, and leaves no trace of wax behind.

Alternative Wax Removal Methods

We can easily remove melted wax from candle sticks by absorbing it with paper towels. Here are some alternative wax removal methods to consider:

  1. Using a vinegar solution: Mix equal parts of white vinegar and water in a bowl. Dampen a clean cloth or paper towel with the solution and gently dab the wax residue. The acidity of vinegar helps dissolve the wax, making it easier to remove.
  2. Steam cleaning method: Fill a pot with water and bring it to a boil. Hold the candlestick above the steam, allowing the heat and moisture to soften the wax. Once softened, use a paper towel to blot and absorb the melted wax.
  3. Freezing method: Place the candlestick in a plastic bag and put it in the freezer for a few hours. The cold temperature will cause the wax to harden and shrink, making it easier to scrape off with a plastic card or your fingernail.
  4. Heat gun or hairdryer: Apply heat to the wax residue using a heat gun or hairdryer on a low setting. As the wax melts, use a paper towel to absorb it. Be careful not to overheat the candlestick or the surrounding area.

Preventing Wax Buildup

To prevent wax buildup on candle sticks, it’s important to regularly absorb the melted wax with paper towels. By promptly removing the melted wax, you can prevent it from hardening and causing unsightly stains on your candle sticks.

To do this, simply place a few layers of paper towels around the base of the candle stick and allow them to absorb the melted wax. Gently press down on the paper towels to ensure maximum absorption.

Advertisement

bell book and candle

If there are any residual wax stains left behind, you can use a clean cloth or sponge dampened with warm soapy water to remove them. Remember to always use gentle motions and avoid scrubbing too vigorously, as this can damage the surface of your candle sticks.

Now, let’s move on to the next step: applying heat to remove any remaining wax residue.

Apply Heat to Remove Residual Wax

After the wax has been scraped off the candlestick, it’s important to apply heat in order to remove any residual wax that may still be present. Here is a step-by-step guide on how to properly apply heat to remove residual wax from your candlestick:

  1. Use a heat gun: A heat gun is a powerful tool that emits hot air, making it ideal for melting and removing stubborn wax. Hold the heat gun about 6 inches away from the candlestick and move it in a circular motion to evenly distribute the heat.
  2. Apply candle wax remover: For more delicate candlesticks, you can use a specialized candle wax remover. Apply the remover to a clean cloth and gently rub it onto the residual wax until it starts to dissolve.
  3. Wipe away the wax: Once the wax has softened or dissolved, use a clean cloth or paper towel to wipe away the residual wax. Be sure to wipe in the direction of the grain to avoid scratching the surface of the candlestick.
  4. Repeat if necessary: If there’s still residual wax remaining, repeat the process until the candlestick is completely free of wax.

Clean the Candlestick With Soapy Water

After removing the residual wax, we can proceed to clean the candlestick with soapy water. Soapy water is an effective cleaning agent that can help remove any remaining dirt or residue on the candlestick. It’s important to use a mild dish soap and warm water for this process. The soap will help break down any greasy or sticky residue, while the warm water will help dissolve it.

candlelight concerts edinburgh

To clean the candlestick with soapy water, follow these steps:

  1. Fill a sink or basin with warm water.
  2. Add a few drops of mild dish soap to the water.
  3. Place the candlestick in the soapy water and let it soak for a few minutes.
  4. Use a soft brush or sponge to gently scrub the candlestick, paying extra attention to any stubborn stains or residue.
  5. Rinse the candlestick thoroughly with clean water and dry it with a soft cloth.

Using soapy water is a simple and effective way to clean your candlestick. However, if you prefer alternative cleaning methods, you can also try using vinegar or rubbing alcohol to remove any wax or residue.

Polish and Restore the Shine

Now let’s polish and restore the shine of the candlestick. To bring back the luster and remove stubborn stains, follow these expert tips:

Advertisement
  1. Create a homemade polishing paste by combining equal parts baking soda and water. Apply the paste to the candlestick using a soft cloth and gently rub in circular motions. Rinse with warm water and dry thoroughly.
  2. For brass or copper candlesticks, mix lemon juice and salt to form a paste. Apply it to the surface and let it sit for a few minutes. Then, scrub with a soft-bristled brush and rinse with water. Dry the candlestick with a clean cloth.
  3. Use a commercial metal polish specifically designed for candlesticks. Apply a small amount to a soft cloth and buff the surface until the shine is restored. Follow the manufacturer’s instructions for best results.
  4. Consider using a clear lacquer or metal wax to protect the candlestick and maintain its shine. Apply a thin, even layer according to the product instructions and allow it to dry completely.

Prevent Future Wax Buildup

To prevent future wax buildup, we can regularly clean and maintain our candlesticks. By implementing a few simple candlestick maintenance tips, we can ensure that our candlesticks remain in pristine condition for years to come.

myer

Firstly, it’s important to trim the wick before each use to prevent excessive wax drippings.

Additionally, placing a small amount of cooking spray or oil on the inside of the candlestick can create a barrier that makes it easier to remove wax residue in the future.

Another helpful tip is to periodically wipe down the candlestick with a soft cloth to remove any dust or debris that may accumulate.

Lastly, storing the candlesticks in a cool, dry place can further prevent future wax damage.

candle price

Frequently Asked Questions

How Do I Prevent Wax From Dripping Down the Candlestick in the First Place?

To prevent wax from dripping down the candlestick, we can try a few methods. Placing the candle in a draft-free area, trimming the wick to 1/4 inch, or using a dripless candle are all effective ways to minimize wax drips.

Advertisement

Can I Use an Alternative Method to Freezing the Candlestick to Remove Wax?

Sure, there are alternative methods to remove wax from candlesticks. We’ve discovered some effective techniques that don’t involve freezing. Let us share our expertise and detailed guidance on this matter.

What Type of Soap Should I Use to Clean the Candlestick?

We recommend using a gentle, non-abrasive soap when cleaning candlesticks. Look for soaps specifically designed for delicate surfaces or antiques. To remove wax, try freezing or using a hairdryer on low heat.

Can I Use a Different Type of Cloth Instead of Paper Towels to Absorb the Melted Wax?

We’ve found that while paper towels are effective at absorbing melted wax, we’ve also had success using other cloth alternatives such as microfiber or cotton rags. Experiment to see what works best for you.

candlelight concerts manchester

Is There a Specific Type of Polish I Should Use to Restore the Shine of the Candlestick?

To restore the shine of the candlestick, we recommend using a high-quality, specialized polish. This type of polish is specifically designed to enhance the appearance and luster of metal surfaces, bringing back their original shine and brilliance.

Conclusion

In conclusion, removing wax from candlesticks is a simple process that can be done with common household items. By following the steps outlined in this article, you can easily restore the beauty and shine of your candlesticks.

Advertisement

Just like removing wax from candlesticks can bring new life to them, remember that with a little effort and care, we can also rejuvenate and restore other aspects of our lives. Let this be a reminder to take the time to nurture and preserve the things that bring us joy.

Continue Reading

Trending