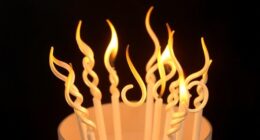
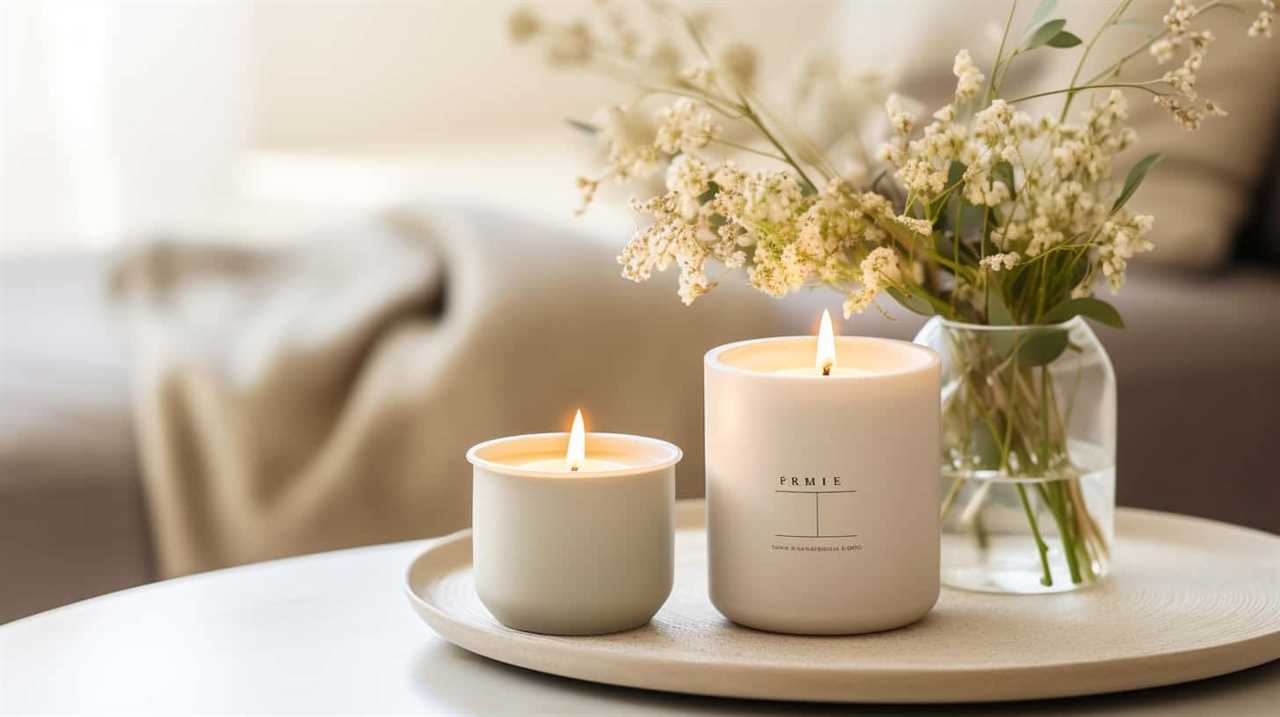
Connect with us

Candles

When to Pour Candle Wax

Published

on

When to pour candle wax can be a crucial decision in achieving the perfect candle. We understand that some may question the significance of timing when it comes to pouring wax. However, mastering this skill is essential for candle makers who strive for excellence.

By carefully considering the temperature at which we pour our wax, we can ensure optimal results and create candles of superior quality. In this guide, we will explore the ideal temperature for pouring, the factors that can affect it, and methods for testing wax consistency.

With our expertise, you will gain the knowledge needed to confidently pour candle wax and enhance your candle-making skills.

Key Takeaways

  • The ideal pouring temperature is crucial for achieving optimal results in candle making.
  • Factors such as wax type, desired finish, and ambient temperature impact the ideal pouring temperature.
  • Wax melting point and ambient room temperature play a significant role in determining the pouring temperature.
  • Testing wax consistency is essential for determining the right pouring temperature and ensuring a smooth and even finish.

Importance of Temperature

To ensure the perfect candle, we must understand the importance of temperature when pouring candle wax. The ideal pouring temperature plays a crucial role in achieving optimal results. When the wax is too hot, it can cause the fragrance to evaporate or the color to fade. On the other hand, if the wax is too cool, it may not fill the mold evenly, resulting in uneven burning or surface imperfections.

candlesticks

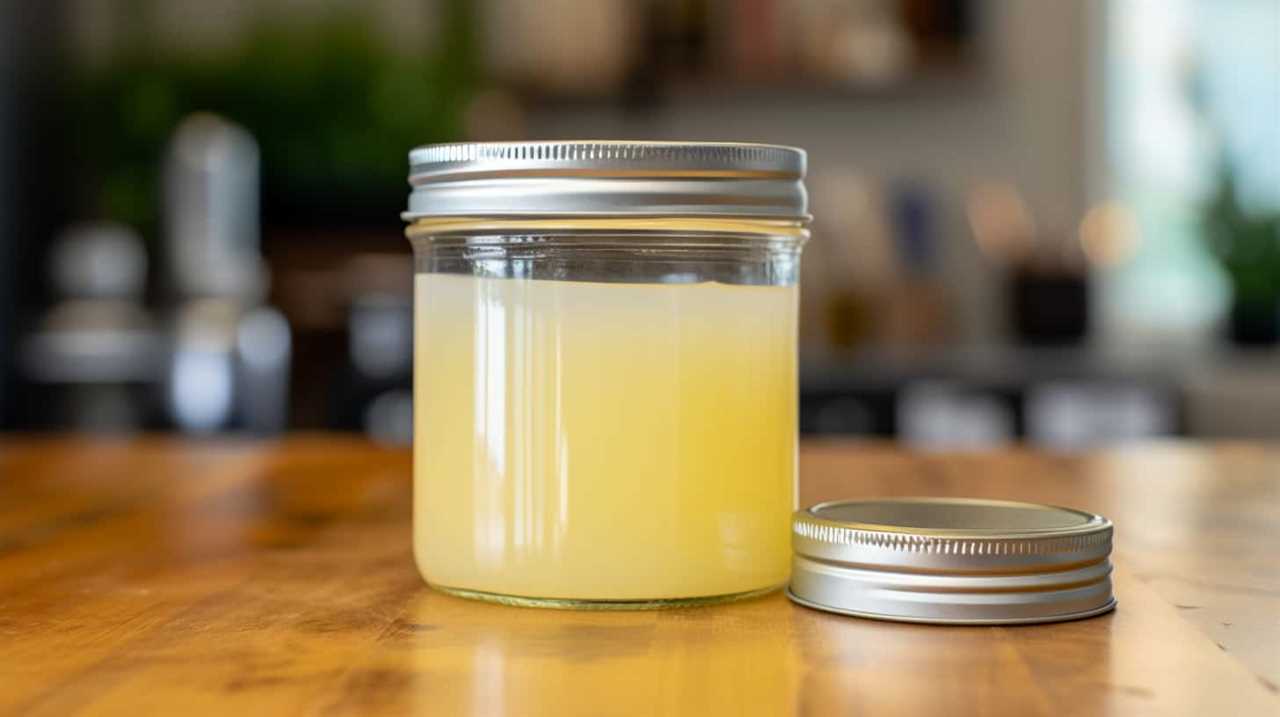
To determine the ideal pouring temperature, it’s essential to test the wax consistency. This can be done by dipping a spoon into the melted wax and observing how it runs off. The wax should have a smooth and steady flow, indicating that it’s at the right temperature for pouring.

Advertisement

Transitioning into the subsequent section about the ‘ideal temperature for pouring’, we’ll explore specific temperature ranges that yield the best results.

Ideal Temperature for Pouring

We have determined that the ideal pouring temperature for candle wax is crucial in achieving optimal results. The temperature at which you pour your wax can greatly affect its consistency and overall quality. Factors such as the type of wax, desired finish, and ambient temperature can all impact the ideal pouring temperature. To help you understand the importance of temperature in candle making, here is a table outlining the factors that affect consistency and the recommended pouring temperatures for different types of wax:

Factors Affecting Consistency Recommended Pouring Temperature (°F)
Type of Wax 120-150
Desired Finish 150-180
Ambient Temperature 70-80

Testing pouring techniques at different temperatures can help you determine the best temperature for your specific candle making process. By paying attention to these factors and experimenting with different pouring temperatures, you can ensure that your candles have a smooth and even finish.

candles

Factors Affecting Pouring Temperature

When it comes to pouring candle wax, there are several factors that can affect the pouring temperature.

One important factor is the wax melting point, as different types of wax have different melting points.

Advertisement

Another factor to consider is the ambient room temperature, as a colder room may require a higher pouring temperature to ensure proper adhesion and smoothness.

Lastly, the desired candle consistency also plays a role, as a softer consistency may require a lower pouring temperature to prevent cracking or sinking.

candle brand

Considering these factors is crucial for achieving the desired results when pouring candle wax.

Wax Melting Point

One important factor that affects the pouring temperature of candle wax is the melting point of the wax. The melting point is the temperature at which the wax changes from a solid to a liquid state. Understanding the melting point significance is crucial for achieving the ideal pouring temperature for your candles.

Here are five factors that can influence the melting point of candle wax:

Advertisement
  • Wax Type: Different types of wax, such as paraffin, soy, and beeswax, have different melting points.
  • Additives: The addition of fragrance oils, colorants, or other additives can alter the melting point of the wax.
  • Container Size: The size and shape of the container can affect the rate of heat transfer, thereby influencing the melting point.
  • Heating Method: The method used to heat the wax, whether it’s a double boiler or microwave, can impact the melting point.
  • Ambient Temperature: The surrounding environment temperature can affect the melting point of the wax.

Ambient Room Temperature

Considering the impact of ambient room temperature is essential in determining the pouring temperature for candle wax. The ideal pouring temperature is typically recommended by candle-making experts and varies depending on the type of wax being used.

candles uk

Room temperature has a significant effect on the pouring temperature of candle wax. If the room is too cold, the wax may solidify too quickly, resulting in uneven and bumpy surfaces. On the other hand, if the room is too warm, the wax may take longer to cool and harden, potentially causing shrinkage and cracking.

It’s crucial to maintain a consistent room temperature when pouring candle wax to achieve the desired candle consistency.

Transitioning into the subsequent section about ‘desired candle consistency’, let’s now explore how pouring temperature affects the overall quality of the candle.

Desired Candle Consistency

To achieve the desired candle consistency, we need to take into account the factors that affect the pouring temperature. Factors influencing consistency play a crucial role in achieving the desired results. Here are five key factors to consider:

cheap candles online australia

  • Wax Type: Different types of wax have different melting points, which affects the pouring temperature. Soy wax, for example, has a lower melting point compared to beeswax.
  • Fragrance Load: Adding fragrance oils to the wax can impact its consistency. Higher fragrance loads can increase the pouring temperature, while lower fragrance loads may require a lower pouring temperature.
  • Dye or Color Additives: The addition of color additives can affect the pouring temperature. Some dyes may require a higher temperature to achieve the desired color intensity.
  • Container Material: The material of the candle container can influence the rate at which the wax cools. Glass containers, for instance, retain heat longer than metal containers, which can affect the pouring temperature.
  • Desired Texture: The desired texture of the finished candle can also impact the pouring temperature. Smooth, glossy candles may require a higher temperature, while textured or rustic candles may need a lower temperature.

Testing Wax Consistency

When testing wax consistency, there are several key points to consider.

First, the wax melting temperature is crucial as it determines how easily the wax will melt and pour.

Advertisement

Secondly, variations in setting time can affect the final texture of the candle, so it’s important to test different pouring temperatures to achieve the desired results.

Lastly, understanding the desired texture results will help determine the ideal consistency for the wax before pouring.

candles direct sale

Wax Melting Temperature

We determine the wax melting temperature to ensure the consistency of the wax before pouring it for candle making. The ideal temperature for melting wax depends on the type of wax being used. Here are some key points to consider when testing wax consistency:

  • Type of Wax: Different waxes have different melting points. It’s important to know the melting temperature range for the specific wax you’re using.
  • Pouring Techniques: The pouring technique can also affect the consistency of the wax. It’s crucial to pour the melted wax at the right temperature to achieve the desired outcome.
  • Thermometer: Using a reliable thermometer is essential for accurately measuring the wax temperature.
  • Heat Source: The heat source used for melting the wax can impact the melting temperature. It’s important to use a consistent and controlled heat source.
  • Testing: Conducting a small test batch before pouring larger quantities can help determine if the wax is melting at the desired temperature.

By understanding and controlling the wax melting temperature, we can ensure consistent results in our candle making process.

Now, let’s delve into the next section, which discusses setting time variations.

Setting Time Variations

After determining the wax melting temperature, our focus now shifts to testing wax consistency through setting time variations. Testing the ideal pouring time is crucial to ensure that your candles set properly and avoid any troubleshooting pouring issues.

Advertisement

candle shack clp

The setting time of the wax can vary depending on several factors such as the type of wax used, the container size, and the ambient temperature. To determine the ideal pouring time, it’s recommended to conduct small test batches using different pouring times and observe the results.

Pay close attention to how the wax sets and any issues that may arise, such as uneven cooling or sinkholes. By carefully testing and adjusting the pouring time, you can achieve consistent and high-quality candle results.

Desired Texture Results

To achieve the desired texture results and test the consistency of the wax, we recommend experimenting with different pouring techniques. Here are some testing methods and troubleshooting tips to help you achieve the perfect texture for your candles:

  • Temperature Testing: Start by pouring the wax at different temperatures to determine the ideal pouring temperature for your desired texture. This will help you avoid issues such as cracking or uneven surfaces.
  • Adding Additives: Try adding different additives, such as stearic acid or microcrystalline wax, to alter the texture of the candle wax. These additives can help improve hardness, gloss, and smoothness.
  • Cooling Time: Allow the candles to cool for different lengths of time to see how it affects the texture. Longer cooling times can result in a smoother finish, while shorter cooling times may create a more rustic look.
  • Pouring Techniques: Experiment with various pouring techniques, such as slow and steady pouring or pouring from different heights. This can affect the texture and appearance of the finished candle.
  • Testing Different Waxes: If you’re not satisfied with the texture of your current wax, consider trying different waxes. Some waxes have different melting points and properties that can result in varying textures.

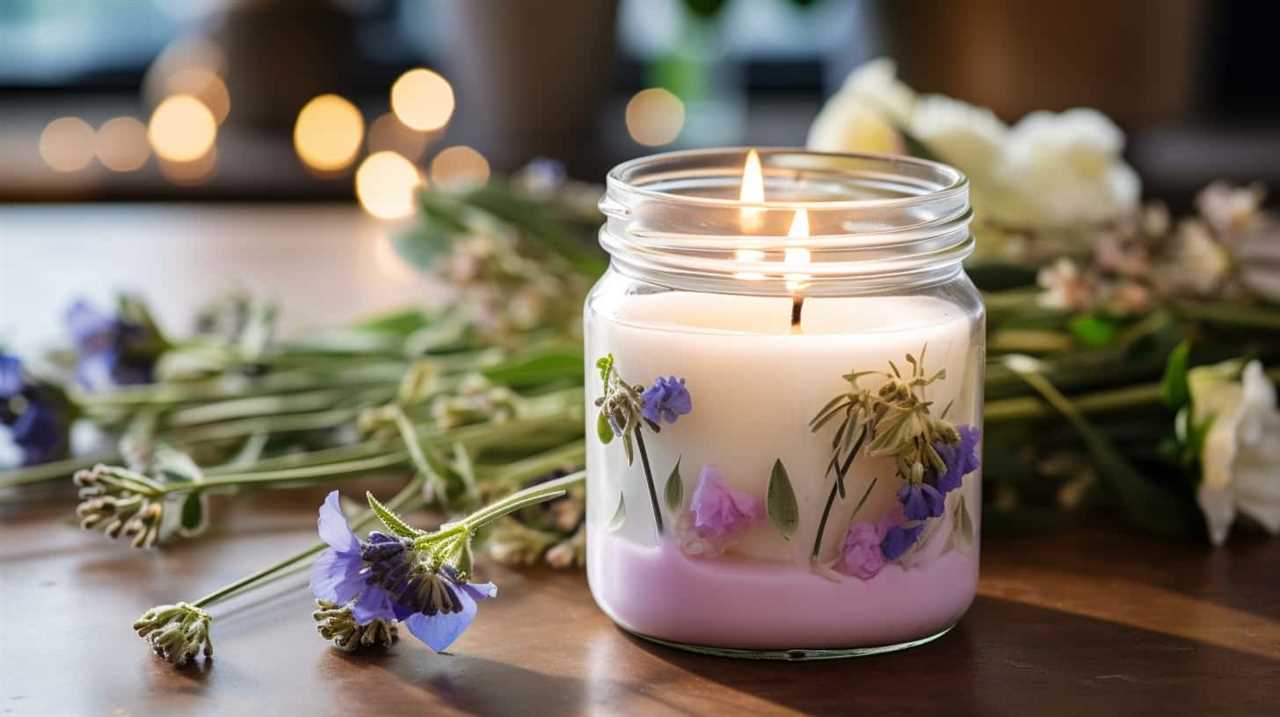
Incorporating Fragrance Into Wax

Sometimes, we add fragrance to the wax when pouring candles. Incorporating oils into the wax is a crucial step in creating beautifully scented candles.

candles uk

When it comes to fragrance blending techniques, there are several options to consider. One method is to use pre-blended fragrance oils, which are ready-made combinations of different scents. These oils are convenient and easy to use, especially for beginners.

Another option is to create custom blends by combining different fragrance oils together. This allows for a more personalized and unique scent profile. When blending fragrances, it’s important to consider the scent strength and compatibility of the oils. Experimenting with different ratios and combinations will help achieve the desired fragrance intensity.

Advertisement

Best Time to Add Fragrance

When incorporating fragrance into wax for candle making, we carefully consider the best time to add the scent to ensure optimal aroma diffusion. Properly timing the addition of fragrance is crucial in achieving a well-balanced and long-lasting scent in your candles.

Here are some factors to consider when deciding the best time to add fragrance:

candlesticks stamford

  • Incorporating essential oils: Essential oils are highly concentrated and can be sensitive to heat. It’s recommended to add essential oils at a lower temperature, around 125°F, to preserve their therapeutic properties.
  • Choosing fragrance oils: Fragrance oils are synthetic oils specifically formulated for candle making. They’re more heat-resistant and can be added at a higher temperature, typically around 185°F.
  • Wax cooling rate: Adding fragrance too early in the cooling process can cause it to evaporate quickly, resulting in a weaker scent. It’s best to wait until the wax has cooled to around 140°F before adding fragrance.
  • Stirring or blending: To ensure proper distribution of the fragrance, gently stir or blend the wax after adding the scent. This will help evenly distribute the fragrance throughout the candle.
  • Testing and adjusting: It’s always recommended to test the scent strength before pouring your candles. If the fragrance is too weak, you can add a little more to achieve the desired scent.

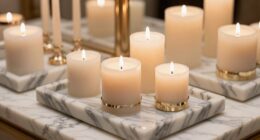
Types of Wax for Pouring

When it comes to candle making, choosing the right type of wax is crucial.

Two popular options are soy and paraffin wax. Soy wax is derived from soybean oil and is known for its clean burn and eco-friendly properties.

On the other hand, paraffin wax is petroleum-based and offers a longer burn time.

Another option to consider is beeswax, which not only produces a beautiful, natural scent but also has air-purifying qualities.

Advertisement

candle homewares

Lastly, palm wax is a sustainable choice that creates unique, marbled effects in candles.

Soy Vs. Paraffin

We prefer using soy wax over paraffin for pouring candles. Soy wax is a natural and renewable resource, making it a more sustainable choice. Here are some key reasons why soy wax is ideal for candle pouring:

  • Lower melting point: Soy wax has a lower melting point than paraffin, which means it can be poured at a lower temperature, reducing the risk of overheating and potential damage to the fragrance or color of the candle.
  • Cleaner burn: Soy wax burns cleaner than paraffin, producing less soot and toxins. This makes soy candles a healthier option for both you and the environment.
  • Longer burn time: Soy candles tend to have a longer burn time compared to paraffin candles of the same size, providing you with more hours of enjoyment.
  • Better scent throw: Soy wax has superior scent throw, meaning it carries and releases fragrance more effectively, resulting in a stronger and longer-lasting scent experience.
  • Versatility: Soy wax is compatible with a wide range of fragrances and essential oils, allowing for endless possibilities in creating unique and personalized candles.

With all these benefits, it’s clear why we prefer using soy wax for pouring candles.

Now, let’s move on to discuss the benefits of using beeswax.

candles direct reviews

Beeswax Benefits

To further explore the benefits of different types of wax for pouring candles, let’s delve into the advantages of using beeswax. Beeswax is a popular choice among candle makers due to its numerous benefits. It is a natural wax produced by bees and offers several advantages over other types of wax.

Benefits of Using Beeswax
1. Natural and Sustainable Beeswax is a renewable resource that is obtained from beeswax combs. It is a more environmentally-friendly option compared to paraffin wax, which is derived from petroleum.
2. Clean and Non-Toxic Beeswax candles produce very little soot or smoke when burned, making them ideal for people with respiratory sensitivities. They also do not release harmful toxins or chemicals into the air.
3. Long Burn Time Beeswax candles burn slower and last longer than other types of candles. This means you can enjoy the warm glow and pleasant fragrance of beeswax candles for an extended period.
4. Natural Honey Scent Beeswax has a natural, subtle honey scent that adds a touch of warmth and coziness to any space. It creates a soothing and inviting ambiance when lit.

These benefits make beeswax an excellent choice for candle pouring. However, if you’re looking for beeswax alternatives, soy wax and coconut wax are also popular options that offer their own unique advantages.

Advertisement

Choosing Palm Wax

The benefits of using palm wax for pouring candles are worth considering. Palm wax is a popular choice among candle makers due to its unique properties and advantages. Here are some reasons why palm wax is a great option:

  • Sustainable: Palm wax is derived from the palm tree, which is a renewable resource.
  • Clean Burning: Palm wax has a low soot and smoke production, resulting in cleaner air quality.
  • Long Burn Time: Candles made from palm wax tend to burn longer compared to other types of wax.
  • Excellent Scent Throw: Palm wax has the ability to hold and release fragrance effectively, resulting in a strong and long-lasting scent.
  • Versatile: Palm wax can be easily colored and molded into various shapes and sizes.

While palm wax has its advantages, it’s also good to explore palm wax alternatives to find the best fit for your candle pouring needs.

decorative candle

Choosing the Right Wax

Selecting the appropriate wax is crucial when pouring candle wax. The type of wax you choose will affect the quality, burn time, and overall performance of your candles. There are several factors to consider when choosing the right wax, such as the ideal pouring temperature and the significance of melting point.

The ideal pouring temperature refers to the temperature at which the wax should be poured into the candle container. This temperature ensures that the wax adheres properly to the container and minimizes the risk of surface imperfections or cracking. Different waxes have different ideal pouring temperatures, so it is important to follow the manufacturer’s guidelines.

The melting point significance refers to the temperature at which the wax melts completely. This affects the burn time of the candle. A higher melting point wax will burn slower, resulting in a longer-lasting candle, while a lower melting point wax will burn faster.

In order to help you make an informed decision, here is a table comparing different types of candle waxes:

Advertisement

candlestick holders

Wax Type Ideal Pouring Temperature Melting Point
Soy Wax 110-125°F 120-180°F
Beeswax 145-175°F 144-147°F
Paraffin Wax 160-180°F 130-150°F
Coconut Wax 120-130°F 120-150°F
Palm Wax 175-185°F 140-160°F

Preparing the Wax for Pouring

For preparing the wax to be poured, we gather the necessary materials and equipment. Here are the steps to follow:

  • Wax: Choose the appropriate wax for your candle, considering factors such as fragrance load and burn time.
  • Double Boiler: Set up a double boiler to melt the wax gently and evenly, using a heat-resistant container for the wax.
  • Thermometer: Use a thermometer to monitor the wax temperature. The ideal pouring temperature varies depending on the type of wax being used.
  • Stirring Tools: Have stirring tools, such as a heat-resistant spoon or whisk, ready to mix in any additives or fragrance oils.
  • Consistency Test: Before pouring, perform a consistency test by dipping a spoon into the melted wax and observing how it drips off. The wax should be smooth and flow easily.

Tips for Successful Pouring

To ensure a successful pour, we recommend checking the consistency of the melted wax before proceeding with the candle-making process. Testing the fragrance is an important step to ensure that the scent is at its desired strength.

Simply pour a small amount of the melted wax into a heat-safe container and add the fragrance oil according to the recommended percentage. Mix well and let it cool. If the scent is too weak, add more fragrance oil. If it’s too strong, dilute it with some additional melted wax.

Once you’re satisfied with the fragrance, it’s time to focus on pouring techniques. Make sure to pour the wax slowly and steadily to avoid any air bubbles. Start pouring from the center and move towards the edges of the container in a circular motion. This helps to ensure an even distribution of the wax and a smooth finish. Remember to pour at the recommended temperature for the specific type of wax you’re using.

candle light

Frequently Asked Questions

Can I Pour Candle Wax at Any Temperature?

We can pour candle wax at any temperature, but ideal pouring conditions depend on the type of wax. Proper temperature ensures even distribution and proper adhesion. Optimal conditions vary, so research and experimentation are key.

How Long Should I Wait for the Wax to Cool Before Pouring?

We’ve learned that testing wax consistency and using a thermometer are essential. It’s important to wait until the wax cools to the perfect temperature before pouring, ensuring a successful candle-making experience.

Advertisement

Is It Necessary to Test the Consistency of the Wax Before Pouring?

Testing wax consistency is crucial before pouring. It ensures the right texture for optimal burning and fragrance release. We highly recommend conducting a simple test to achieve excellent results and avoid wasting time and resources.

Can I Mix Different Fragrances Into the Wax?

Yes, we can mix different fragrances into the wax. However, it’s crucial to choose the right wax temperature for optimal blending. Experiment with different combinations to create unique and delightful scents.

candle salad

What Are Some Common Mistakes to Avoid When Pouring Candle Wax?

To ensure successful candle pouring, we must avoid common mistakes. Some tips include using a double boiler, monitoring the temperature, and pouring at the right time. These techniques will help achieve mastery in candle-making.

Conclusion

In conclusion, knowing the ideal temperature for pouring candle wax is crucial for successful candle making. By considering factors such as the type of wax, fragrance incorporation, and testing wax consistency, one can achieve excellent results.

Choosing the right wax and properly preparing it for pouring are also essential steps.

Advertisement

With these tips and techniques, you can ensure a smooth and successful candle pouring process.

candle making supplies uk

Happy candle making!

I'm Jane and I love candles. I have candles everywhere in my house--in every room, on every surface. I love the smell of candles, and I love how they make my place feel warm and cozy. Candles are really important to me. They help me relax and de-stress after a long day. They remind me of happy memories, and they make me feel calm and peaceful. I can't imagine my life without candles!

Continue Reading
Advertisement

Candles

How to Use a Money Candle

Published

on

By

Are you prepared to discover the keys to generating wealth and abundance? Allow us to demonstrate how employing a money candle can draw financial success into your existence.

Imagine this: you light a beautiful green candle, infused with powerful energies of abundance, and watch as its flame dances with magic. As we guide you through the steps, you will learn how to choose the perfect money candle, set a clear intention for wealth, and create a sacred space to enhance the candle’s energy.

Through meditation and visualization, you will tap into the limitless potential of financial abundance. Get ready to ignite your wealth manifestation journey with the power of a money candle.

Let’s begin!

Advertisement

candlesticks patterns

Key Takeaways

  • Choose a money candle based on financial goals and personal preferences, considering candle color, size, shape, and decorations.
  • Set clear intentions for wealth and align them with a chosen money candle.
  • Create a sacred space by clearing clutter, visualizing goals, incorporating symbols of abundance, and invoking divine presence.
  • Light the money candle with a calm and focused state of mind, visualizing the flame as a symbol of financial blessings.

Choosing the Right Money Candle

When selecting a money candle, we should consider our specific financial goals and personal preferences. Finding the best color for the candle is an important aspect to consider. The color of the candle symbolizes different aspects of wealth and abundance. For example, green is often associated with financial prosperity and growth, while gold represents wealth and success. Understanding the symbolism behind each color can help us align our intentions and desires with the energy of the candle.

Additionally, we should also consider the size and shape of the candle, as well as any additional decorations or symbols that resonate with our financial goals. By carefully choosing a money candle that speaks to us on a personal level, we can set the stage for a powerful intention-setting ritual in the next section.

Setting the Intention for Wealth

To set the intention for wealth, we need to focus on our specific financial goals and align our desires with the energy of the chosen money candle. Here are four steps to help you manifest wealth and abundance:

  1. Clarify your financial goals: Take the time to define what wealth means to you. Is it achieving a certain income level, owning a home, or being debt-free? Clearly identify your goals to create a clear intention.
  2. Choose the right money candle: Look for a candle specifically designed for wealth manifestation. Consider candles infused with ingredients like green aventurine or citrine, which are believed to attract prosperity.
  3. Practice affirmations for abundance: Use positive affirmations that align with your financial goals. Repeat phrases like ‘I am worthy of wealth and abundance’ or ‘Money flows easily and effortlessly into my life’ while lighting the money candle.
  4. Visualize your desired outcome: Close your eyes and visualize yourself already achieving your financial goals. Imagine the feeling of wealth and the abundance it brings. Allow this visualization to fill you with positive energy and belief in your ability to manifest wealth.

Cleansing and Preparing the Candle

To cleanse and prepare the money candle, we gather the necessary materials. Before beginning any money manifestation ritual, it’s crucial to cleanse the candle of any negative or stagnant energy. This ensures that the candle is a pure channel for your intentions and desires.

candle salad

There are various methods for cleansing, such as smudging the candle with sacred herbs like sage or palo santo, or passing it through the smoke of incense. Visualizing the candle being cleansed by a stream of white light is also effective.

Once the candle is cleansed, it’s ready to absorb the energy of your intentions and amplify your desires.

With the candle cleansed and prepared, we can now move on to creating a sacred space for the money manifestation ritual.

Advertisement

Creating a Sacred Space

Once the money candle is cleansed and prepared, we create a sacred space to enhance the energy and focus of our money manifestation ritual. Creating a sacred space is essential to cultivating the right atmosphere for abundance to flow into our lives.

floral candle

Here are four key elements to consider when creating a sacred space:

  1. Clear the space: Remove any clutter or negative energy that may be present. Use sage or other cleansing tools to purify the area.
  2. Set intentions: Clearly state your intentions for creating abundance in your life. Visualize your goals and desires as already manifesting.
  3. Use sacred symbols: Incorporate symbols that represent abundance and prosperity, such as money signs, green candles, or images of wealth.
  4. Invoke divine presence: Call upon the energy of the universe, your higher self, or any deity or spirit guide that resonates with you to bless and support your money manifestation ritual.

Lighting the Money Candle

We light the money candle to activate its energy and begin our manifestation process. The lighting technique for a money candle is simple yet important.

Before lighting the candle, ensure that you’re in a calm and focused state of mind. Take a moment to ground yourself and set your intention for attracting abundance and prosperity.

Use a match or a lighter to ignite the wick of the candle, and as you do so, visualize the flame as a symbol of the financial blessings that are coming your way.

candlesticks charts

The benefits of money candles are twofold. Firstly, the act of lighting the candle helps to shift your mindset and align your energy with abundance. Secondly, the candle itself serves as a powerful tool for manifestation, amplifying your intention and attracting financial prosperity.

Advertisement

With the candle lit, we can now move on to the next step: meditating with the money candle.

Meditating With the Money Candle

Now, let’s delve into the practice of meditating with the money candle as we harness its energy to attract abundance and prosperity. Meditation techniques can help us focus our intentions and tap into the power of the candle’s symbolism.

Here are four techniques to enhance your money manifestation meditation:

candlesticks trading

  1. Set your intention: Before starting your meditation, clearly state your intention to attract wealth and abundance into your life. Visualize yourself surrounded by financial prosperity and feel the positive energy flowing towards you.
  2. Use affirmations: Repeat affirmations related to money and abundance during your meditation. For example, you can say, ‘I am open to receiving unlimited wealth and prosperity’ or ‘Money flows to me effortlessly and abundantly.’
  3. Visualize your goals: Imagine yourself achieving your financial goals. See yourself living a life of abundance, enjoying financial freedom, and fulfilling your dreams. Visualize the steps you need to take to manifest these goals.
  4. Practice gratitude: Express gratitude for the money and abundance that already exists in your life. Focus on the blessings and opportunities that money has brought you. This attitude of gratitude attracts more abundance into your life.

Visualizing Financial Abundance

When it comes to achieving financial abundance, visualization plays a crucial role.

By visualizing wealth and abundance, we can manifest our desires into reality.

The power of a positive mindset can’t be underestimated, as it attracts prosperity and opens the door to financial opportunities.

Advertisement

With intention and focus, we can use visualization techniques to attract wealth and create a life of financial abundance.

candle making supplies

Manifesting Wealth Through Visualization

To manifest wealth through visualization, one key step is to clearly envision our ideal financial abundance. Visualization techniques can be a powerful tool in attracting prosperity into our lives. Here are four effective strategies to help us develop an abundance mindset and manifest wealth:

  1. Create a vivid mental picture: Close your eyes and imagine yourself living the life of financial abundance. See yourself achieving your financial goals, surrounded by luxury and comfort.
  2. Use affirmations: Repeat positive affirmations that reinforce your belief in abundance. Affirmations like ‘I am deserving of wealth and success’ or ‘Money flows effortlessly into my life’ can help reprogram your subconscious mind.
  3. Visualize specific financial goals: Focus on visualizing specific financial goals, such as paying off debts, buying a dream house, or starting a successful business. See yourself achieving these goals and experiencing the joy and fulfillment that comes with it.
  4. Practice gratitude: Cultivate a sense of gratitude for the wealth and abundance you already have. By appreciating what you have, you attract more positive experiences and opportunities for financial growth.

By mastering these visualization techniques and adopting an abundance mindset, we can harness the power of our thoughts to manifest wealth and create a life of financial abundance.

Transitioning to the subsequent section about the power of a positive mindset, let’s explore how our mindset can shape our financial reality.

Power of Positive Mindset

As we explore the power of a positive mindset in visualizing financial abundance, we can see how our thoughts and beliefs shape our financial reality. By adopting an abundance mindset and utilizing positive affirmations, we can attract wealth and prosperity into our lives. Positive affirmations are statements that reinforce positive beliefs about ourselves and our financial situation. When repeated daily, they help to reprogram our subconscious mind and align our thoughts with our desired financial outcomes. Here is a table that illustrates the power of positive affirmations in transforming our mindset:

doji candle

Affirmation Belief Outcome
I am deserving of financial abundance Believing in my worthiness for wealth Attracting opportunities for financial success
Money flows freely into my life Trusting in the abundance of the universe Manifesting financial prosperity
I am grateful for the wealth I have Cultivating gratitude for current financial blessings Opening doors for more abundance

Attracting Prosperity With Intention

By intentionally visualizing financial abundance, we can attract prosperity into our lives. It’s important to harness the power of our thoughts and beliefs to manifest our desired financial outcomes. Here are four key strategies for attracting abundance and manifesting money:

Advertisement
  1. Set clear intentions: Clearly define your financial goals and visualize yourself already achieving them. This helps to align your subconscious mind with your desires and signals to the universe what you want to attract.
  2. Practice gratitude: Express gratitude for the abundance that already exists in your life, no matter how small. Gratitude shifts your focus from lack to abundance, attracting more of what you appreciate.
  3. Create a vision board: Compile images and words that represent your financial goals and aspirations. Visualize yourself living your desired lifestyle, focusing on the positive emotions associated with financial abundance.
  4. Take inspired action: Combine visualization with purposeful action towards your financial goals. This shows the universe your commitment and dedication, increasing the likelihood of attracting abundance.

Repeating the Practice for Continued Results

After we have successfully used a money candle to manifest abundance, it is important to continue the practice for sustained and consistent results. Repeating the practice ensures long-term effectiveness, allowing us to harness the full potential of the money candle’s energy. By consistently utilizing this powerful tool, we can cultivate a mindset of abundance and attract financial prosperity into our lives.

To illustrate the importance of repetition, let’s consider the following table:

Week Candle Ritual Affirmations Results
1 Lighting the money candle and visualizing abundance "I am open to receiving wealth and financial success" Increased job opportunities
2 Repeating the ritual with gratitude for current abundance "I am grateful for the money that flows into my life" Unexpected financial windfall
3 Consistently using the money candle to reinforce positive beliefs "I attract wealth effortlessly and easily" Promotion at work
4 Continuing the practice to maintain financial abundance "I am a magnet for prosperity in all areas of my life" Consistent increase in income

Frequently Asked Questions

Can I Use Any Type of Candle for This Money Manifestation Practice?

When selecting a candle for money manifestation, it’s important to consider the type and size. Not just any candle will do. The right candle can enhance the energy and intention behind your practice.

candle drawing

How Long Should I Meditate With the Money Candle?

When meditating with a money candle, it is important to focus on the duration and visualization techniques. We recommend meditating for at least 15 minutes to fully immerse yourself in the manifestation process.

Can I Use the Same Candle for Multiple Money Manifestation Sessions?

Yes, you can reuse candles for multiple money manifestation sessions. However, it’s important to consider the type of candle you’re using. Some candles are specifically designed for one-time use, while others can be used multiple times.

Is There a Specific Time of Day or Phase of the Moon That Is Best for Lighting the Money Candle?

The best time of day to light a money candle and whether the moon phase is important for money manifestation depends on personal preference and belief. Experiment to find what works best for you.

Advertisement

How Often Should I Repeat This Money Manifestation Practice for Optimal Results?

For optimal results in our money manifestation practice, we should repeat it regularly. By consistently engaging in techniques that enhance our manifestation abilities, we can increase the likelihood of achieving our financial goals.

candlescience

Conclusion

In conclusion, using a money candle can be a powerful tool for attracting wealth and abundance into your life. By carefully choosing the right candle, setting clear intentions, and creating a sacred space, you can enhance the effectiveness of this practice.

Through meditation and visualization, you can align your energy with financial abundance. By repeating this practice regularly, you can experience continued results and manifest the financial prosperity you desire.

Start using a money candle today and watch your financial fortunes change.

Advertisement

Continue Reading

Candles

How to Turn on a Candle Without a Lighter

Published

on

By

Are you prepared to learn how to light a candle without using a lighter? In this tutorial, we’ll demonstrate different techniques for kindling a candle through alternative means.

No longer will you be at the mercy of a missing lighter. By following these steps, you will be able to light up your candle with confidence and ease.

From using matches to harnessing the power of the sun, we have got you covered. So, let’s delve into the world of candle lighting mastery and explore these ingenious methods.

Get ready to ignite your candle in ways you never thought possible!

Advertisement

how does a candle burn

Key Takeaways

  • Lighting a candle with matches requires holding the matchstick firmly, striking it against the matchbox, and transferring the flame to the candle wick.
  • When using a stove or gas burner, ensure it is clean and in working condition, trim the candle wick, and hold the candle above the flame to melt the wax and ignite the wick.
  • Using a magnifying glass, focus the sun’s rays onto the wick or use a powerful flashlight with a magnifying glass to ignite the candle.
  • In emergency situations or without a lighter or matches, a makeshift fuse can be created using thick paper rolled tightly into a cylinder, which burns slowly and steadily to ignite the candle flame. Alternatively, a small battery and thin wire can be used to create a circuit and heat up the wire to ignite the wick.

Use Matches to Light the Candle

First, we’ll grab a few matches to light the candle. To safely light a candle using matches, it’s important to ensure that the matchstick is long enough to prevent any accidental burns. Hold the matchstick firmly between your thumb and index finger, striking it smoothly against the matchbox, igniting the tip. Be cautious not to exert too much force, as it may break the match.

Once the match is lit, carefully bring it closer to the wick of the candle, allowing the flame to transfer. Ensure that the match is completely extinguished before discarding it.

Now, let’s move on to the next section where we’ll discuss how to utilize a stove or gas burner for lighting a candle.

Utilize a Stove or Gas Burner

To continue lighting a candle without a lighter, we can also utilize a stove or gas burner. This method should be approached with caution, as it involves open flames and can pose safety risks. Here are some steps to follow:

bell book and candle

  1. Ensure stove safety: Make sure the stove or gas burner is clean and in proper working condition. Check for any gas leaks and ensure good ventilation in the area.
  2. Prepare the candle: Place the candle in a heat-resistant container and remove any packaging or labels. Trim the wick to about 1/4 inch to ensure a clean burn.
  3. Light the candle: Hold the candle above the stove or gas burner flame, allowing the heat to gradually melt the wax and ignite the wick. Be careful not to let the flame come into contact with the container.

Now that we’ve explored the use of a stove or gas burner, let’s move on to another alternative method – lighting the candle with a magnifying glass.

Light the Candle With a Magnifying Glass

After utilizing a stove or gas burner, we can now explore another method to light a candle without a lighter – using a magnifying glass.

When it comes to using a magnifying glass to ignite a candle, there are a few alternatives to consider.

Advertisement

One option is to use the sun’s rays as a natural source of light. Find a sunny spot, hold the magnifying glass between the sunlight and the candle, and focus the light onto the wick until it ignites.

the candle library stockists

Another alternative is to use a powerful flashlight. Position the flashlight close to the magnifying glass, aligning the light beam through the magnifying glass and onto the candle’s wick.

Finally, if you don’t have access to sunlight or a flashlight, you can use the reflection off a shiny surface, such as a mirror or a reflective metal object. Angle the magnifying glass to reflect the light onto the candle’s wick.

To ensure successful magnifying glass ignition, here are a few tips to keep in mind:

  1. Choose a magnifying glass with a large lens to maximize the concentration of light.
  2. Hold the magnifying glass steadily and at the right distance from the candle.
  3. Position the magnifying glass at the correct angle to focus the light onto the wick.
  4. Be patient and allow the concentrated light to heat the wick until ignition occurs.

Create a Makeshift Fuse With a Piece of Paper

As we explore alternative methods to light a candle without a lighter, let’s now consider creating a makeshift fuse with a piece of paper. This simple yet effective technique can be a lifesaver in emergency situations or when you find yourself without a lighter or matches. Here’s how you can make a homemade firestarter using just a piece of paper:

candlestick

  1. Gather your materials: You’ll need a piece of paper, preferably thicker like cardstock or construction paper, to ensure it burns slowly and steadily.
  2. Roll the paper tightly: Start by rolling one corner of the paper tightly towards the opposite corner. Keep rolling until you have a long, thin cylinder.
  3. Light one end: Hold the rolled paper by one end and use a flame source, like a candle or even a lit matchstick, to ignite the other end.

Use a Battery and Wire to Ignite the Candle

Using a battery and wire to ignite a candle is a practical and efficient alternative fire-starting method. With this technique, you can quickly and easily light a candle without the need for a lighter or matches.

It provides a reliable solution when you find yourself without traditional ignition tools.

Advertisement

Battery-Powered Candle Ignition

We can ignite the candle using a battery and wire. This innovative candle lighting method provides an alternative to traditional lighters or matches. Here’s how you can use a battery and wire to light your candle:

  1. Gather the materials: You’ll need a small battery, such as a AA or AAA, and a thin wire, like a paperclip or a stripped electrical wire.
  2. Prepare the wire: Bend the wire into a U shape, leaving a small gap between the ends. This will allow you to create a spark.
  3. Light the candle: Hold one end of the wire against the negative terminal of the battery and touch the other end to the wick of the candle. The spark created between the wire and the wick will ignite the candle.

By using a battery and wire, you can successfully light your candle without a lighter or matches.

candlewood suites

Now let’s explore an alternative fire-starting method.

Alternative Fire-Starting Method

To ignite the candle without a lighter, we can employ an alternative fire-starting method by utilizing a battery and wire. This unconventional ignition method is a useful technique to have in your arsenal of fire-starting techniques.

Here’s how it works:

  1. Gather the following materials:
  • A battery (preferably a 9-volt battery)
  • A thin wire or paperclip
  1. Bend the wire or paperclip into a U-shape, making sure the ends touch each other.
  2. Place one end of the wire on the positive terminal of the battery and the other end on the wick of the candle.
  3. The connection between the wire and the battery will create a small electrical current, causing the wire to heat up and ignite the wick.
  4. Once the wick catches fire, carefully remove the wire and enjoy your candlelit ambiance.

Quick and Easy Candle Lighting

With just a battery and wire, we can easily light a candle in a quick and efficient manner. Here are three creative ways to ignite a candle using alternative candle lighting methods:

candle holders uk

  1. Battery and Steel Wool: Take a piece of steel wool and gently rub it against the positive and negative terminals of a battery. The friction will create sparks, which can be used to light the candle wick. Be careful not to touch the wire ends while the steel wool is connected to the battery.
  2. Battery and Foil: Fold a small piece of aluminum foil into a thin strip and attach one end to the positive terminal of the battery. Hold the other end of the foil near the candle wick. As the foil heats up, it will ignite the wick and light the candle.
  3. Battery and Wire: Connect a wire to both terminals of the battery, creating a circuit. Touch the wire to the candle wick, and the current will cause the wire to heat up, igniting the wick.

These alternative methods provide quick and easy ways to light a candle when a lighter isn’t available. Remember to exercise caution and ensure proper safety measures while using these techniques.

Generate a Spark With Steel Wool and a Battery

Using steel wool and a battery, we can generate a spark to light a candle without a lighter. However, if you don’t have steel wool on hand, there are alternative materials you can use. Fine-grade sandpaper or the rough side of a matchbox can also work.

Advertisement

To start, gather the necessary materials: a small piece of steel wool, a 9-volt battery, and the candle you want to light. First, take the steel wool and rub it against the positive and negative terminals of the battery. This creates a circuit and causes the steel wool to heat up, producing sparks.

Hold the steel wool close to the wick of the candle, and the sparks will ignite the candle. Remember to exercise caution and supervise the process closely to avoid accidents.

yankee candle malaysia

Light a Candle With a Flint and Steel

Flint and steel is a classic method for lighting candles, and understanding the basics is key.

To start, you’ll need a piece of flint and a steel striker. Hold the flint firmly in one hand and strike the steel against it with a quick and forceful motion, aiming for the edge of the flint.

This will create sparks that can ignite the candle wick.

Advertisement

Flint and Steel Basics

We can easily light a candle using a small piece of flint and steel. Flint and steel have been used for centuries as a reliable method to create fire. Here are the basics of using flint and steel to light a candle:

candlesticks charts

  1. Gather your materials: You’ll need a small piece of flint and a steel striker. Alternatively, you can use a ferrocerium rod or a magnesium fire starter as modern alternatives to flint and steel.
  2. Prepare the candle: Place the candle on a stable surface and remove any obstructions around it. Ensure that the wick is trimmed and ready to be lit.
  3. Striking the sparks: Hold the flint firmly in your non-dominant hand and the steel striker in your dominant hand. Position the flint close to the candle wick and strike the steel against the flint at a downward angle, creating sparks that land on the wick and ignite it.

Lighting Technique Variations

Once we’ve mastered the basics of lighting a candle with flint and steel, it’s important to explore various lighting technique variations.

When it comes to lighting methods, there are unconventional approaches that can be highly effective. One such technique is to use charred cloth as tinder. This involves charring a piece of cloth using the flint and steel, creating an ember that can be used to ignite the candle.

Another unconventional approach is the use of charred punkwood. This type of wood is highly flammable and can be easily ignited with the sparks from the flint and steel.

Safety Precautions When Using Flint and Steel

To ensure safety while using flint and steel to light a candle, it’s essential that we take certain precautions. Here are three important safety measures to keep in mind:

candle making kits for adults

  1. Flint and steel maintenance: Regularly inspect the flint and steel for any signs of damage or wear. Replace them if necessary. Keeping the flint sharp and the steel free from rust or corrosion will ensure a reliable spark for lighting the candle.
  2. Proper storage of flint and steel: Store the flint and steel in a dry and secure location. Moisture can degrade the flint and steel, making them less effective. Additionally, keeping them in a dedicated container or pouch will prevent accidental damage or injury.
  3. Use caution when striking: When striking the flint and steel, be mindful of your surroundings. Make sure there are no flammable materials nearby. Hold the steel at a safe distance from your body and others to avoid accidental injuries. Always strike the flint away from your body, directing sparks away from yourself and the candle.

By following these safety precautions, you can enjoy the benefits of using flint and steel to light your candles without compromising your well-being.

Now, let’s transition into the next section, where we’ll explore another alternative method to light a candle – harnessing the power of the sun.

Advertisement

Harness the Power of the Sun to Ignite the Candle

The sun’s radiant energy can be harnessed to ignite a candle without the need for a lighter. Harnessing solar power to light a candle not only eliminates the need for flammable materials, but also carries many benefits.

Solar power is a renewable and sustainable energy source, reducing our reliance on fossil fuels and minimizing environmental impact. By utilizing the sun’s energy, we can create a flame without the risk of accidental fires caused by traditional lighters or matches.

bath and body works candle day

However, it’s important to take fire safety precautions when using solar power to ignite a candle. Ensure the candle is placed on a stable surface, away from flammable objects, and never leave it unattended. Additionally, keep a fire extinguisher or water source nearby in case of emergencies.

Employ a Hairdryer or Heat Gun to Light the Wick

Now let’s explore alternative heat sources that can be used to light the wick of a candle when a lighter isn’t available.

We’ll discuss different techniques for lighting the wick using a hairdryer or a heat gun, and we’ll also cover important safety precautions that need to be taken when using these heat sources.

Advertisement

Alternative Heat Sources

We successfully lit the candle using a hairdryer as an alternative heat source, allowing the wick to ignite without the use of a lighter. When employing unconventional lighting methods, it’s important to consider alternative fuel sources to ensure a successful outcome.

candles myer

Here are three alternative heat sources you can use to light a candle without a lighter:

  1. Hairdryer: Set the hairdryer to its highest heat setting and aim it directly at the candle’s wick. The hot air will provide enough heat to ignite the wick and start the candle.
  2. Heat gun: Similar to a hairdryer, a heat gun can be used to generate enough heat to light the candle. Point the heat gun towards the wick and gradually increase the temperature until the wick catches fire.
  3. Stove burner: If you don’t have access to a hairdryer or heat gun, you can place the candle on a stove burner set to a low heat. Be careful not to melt the candle or ignite any surrounding objects. Once the wick catches fire, remove the candle from the burner and enjoy the warm glow.

These alternative heat sources can be handy when you find yourself without a lighter or matches. Remember to exercise caution and prioritize safety when using unconventional methods to light a candle.

Wick Lighting Techniques

To successfully light the candle without a lighter, we can utilize a hairdryer or heat gun to ignite the wick. This technique is particularly useful when the wick is difficult to reach or when we want to avoid using matches or a lighter.

Before attempting this method, it’s important to ensure proper wick maintenance. Trim the wick to about 1/4 inch before lighting to prevent excessive smoke and soot.

candle & co

When using a hairdryer or heat gun, set it to the lowest heat setting to avoid damaging the candle or causing it to melt. Hold the hairdryer or heat gun about 6 inches away from the candle and direct the hot air towards the wick.

Advertisement

Once the wick catches fire, carefully remove the hairdryer or heat gun and let the candle burn safely.

Remember to always exercise caution and follow candle safety guidelines when using alternative heat sources.

Safety Precautions Involved

After understanding the proper wick lighting techniques, it’s important to be aware of the safety precautions involved when employing a hairdryer or heat gun to light the wick. Fire safety and candle maintenance are crucial when using alternative methods to light a candle. Here are three important safety precautions to keep in mind:

candle birthday

  1. Keep a safe distance: When using a hairdryer or heat gun, ensure that you maintain a safe distance from the candle. This will prevent any accidental contact or damage to the candle.
  2. Avoid flammable materials: Make sure there are no flammable materials nearby when using a hairdryer or heat gun. Keep your surroundings clear of any combustible items that could potentially catch fire.
  3. Use caution with heat: Remember that both hairdryers and heat guns generate heat. Exercise caution when handling them, and avoid touching the heated parts to prevent burns or accidents.

Create a Fire Starter With Cotton Balls and Petroleum Jelly

To create a fire starter with cotton balls and petroleum jelly, gather the necessary materials and follow these simple steps.

First, you’ll need cotton balls, which can be easily substituted with alternative options such as dryer lint or shredded paper.

Next, gather petroleum jelly as your accelerant, as it’s a highly effective choice due to its flammability and ability to burn for an extended period.

Advertisement

Begin by taking a cotton ball and coating it thoroughly with petroleum jelly. Make sure to spread the jelly evenly on the cotton ball to ensure a consistent burn.

candle making workshop

Once coated, store the fire starters in a waterproof container for safekeeping.

When you’re ready to use them, simply ignite the coated cotton ball and place it under your kindling or fuel to start your fire.

Use a Fire Striker or Firesteel to Light the Candle

We can use a fire striker or firesteel to light the candle when we don’t have a lighter. These fire starter alternatives are great for those who want to master the art of candle lighting hacks. Here’s how you can do it:

  1. Prepare your materials: Make sure you have a fire striker or firesteel and a candle ready.
  2. Hold the fire striker: Grip the fire striker firmly in one hand, ensuring a secure hold.
  3. Strike the fire striker: Using a quick and forceful motion, strike the fire striker against the firesteel. This will create sparks that can ignite the candle wick.

Remember to be careful and aim the sparks towards the candle. With practice, you’ll become adept at using fire striker or firesteel as a reliable alternative to light your candle.

uses of candles in daily life

Frequently Asked Questions

Can I Use a Lighter Instead of Matches to Light the Candle?

Yes, we can use a lighter instead of matches to light the candle. However, it’s important to note that there are alternative methods to light a candle without a lighter. Safety precautions must be taken when doing so.

Advertisement

What Is the Best Type of Paper to Use for Creating a Makeshift Fuse?

When it comes to creating a makeshift fuse, there are several alternative materials to consider. However, it is crucial to prioritize safety precautions. Proper knowledge and understanding of homemade fuses is necessary to avoid any potential hazards.

How Long Does It Take for the Sun to Ignite the Candle?

To ignite a candle without a lighter, we can explore alternative ignition methods. However, the ignition time using the sun is dependent on various factors such as sunlight intensity and the candle’s composition.

Can I Use a Blow Dryer Instead of a Hairdryer or Heat Gun?

A blow dryer can be used as an alternative heat source instead of a hairdryer or heat gun. It provides the necessary heat to ignite a candle, making it a viable option in the absence of a lighter.

candle holders uk

Is It Safe to Use Petroleum Jelly as a Fire Starter for Lighting the Candle?

Using petroleum jelly as a fire starter can be safe and effective for lighting a candle. However, there are alternative methods to consider, such as using matches or a stove lighter.

Conclusion

In conclusion, there are numerous creative ways to turn on a candle without a lighter. From using matches, stoves, or magnifying glasses to harnessing the power of the sun or employing a hairdryer, the possibilities are endless.

Advertisement

You can even create a makeshift fuse or utilize a battery and wire for ignition. With these inventive methods at your disposal, lighting a candle becomes an enjoyable and resourceful endeavor.

So go ahead, let your imagination ignite and explore the world of candle lighting beyond the traditional lighter.

candle holders decorative

Continue Reading

Candles

How to Save a Candle Wick

Published

on

By

Have you ever been in a position where your candle wick is nearly at its end? Well, you’re in luck because we have the perfect solution for you!

In this guide, we will show you how to save a candle wick and bring it back to life. Whether it’s a crooked wick, excess wax buildup, or even a detached wick, we’ve got you covered.

With our step-by-step instructions, you’ll be able to master the art of candle wick revival. So grab your scissors and get ready to rescue those flickering flames.

It’s time to save the day and save your candle wick!

Advertisement

candlesticks hotel stamford

Key Takeaways

  • Regularly assess and trim the wick to prevent damage, fraying, and buildup of soot or debris.
  • Trim the wick to about 1/4 inch before each use for longer burn time, more efficient flame, reduced soot, and a safer burn.
  • Properly center the wick before lighting the candle to avoid uneven burn and wasted wax.
  • In case of a detached or drowned wick, reattach or trim the wick to revive it and ensure proper burning.

Assess the Wick’s Condition

First, we need to assess the condition of the wick. Proper wick maintenance is crucial for a well-functioning candle. When troubleshooting wick issues, it’s important to examine the wick closely. Look for any signs of damage, such as fraying or splitting. A damaged wick can prevent the candle from burning evenly or even extinguish the flame altogether.

Additionally, check for any buildup of soot or debris on the wick. This can hinder the wick’s ability to draw up the wax and maintain a steady flame. If you notice any of these issues, it’s time to save the wick. Trim away any damaged portions and gently clean off any buildup.

This will help restore the wick’s functionality and ensure a longer-lasting, more enjoyable candle experience.

Trim the Wick Properly

When it comes to trimming the wick properly, there are two key points to consider: wick length and burn time.

dusk gifts

Keeping the wick trimmed to about 1/4 inch before each use ensures a controlled flame and prevents excessive smoke or soot.

Additionally, proper trimming promotes a longer burn time, allowing you to enjoy your candle for hours on end.

Advertisement

Wick Length and Burn Time

To ensure a longer burn time and optimal performance, we should regularly trim the candle wick to the recommended length. Proper wick maintenance is crucial for achieving maximum burning efficiency. When a wick becomes too long, it can cause a larger flame, excessive smoke, and uneven burning. Trimming the wick to the right length helps control the size of the flame, allowing the candle to burn more evenly and efficiently. The recommended length for a candle wick is typically around 1/4 inch to 1/8 inch. This ensures a steady burn and minimizes the risk of the flame becoming too large or flickering excessively. By following these simple steps, we can prolong the life of our candles and enjoy their warm glow for longer periods.

Wick Length (in inches) Burn Time
1/4 6 hours
1/8 4 hours
3/16 5 hours

Benefits of Proper Trimming

Properly trimming the candle wick offers us numerous benefits, including a longer burn time and a more efficient and even flame. By implementing the right maintenance techniques, we can maximize the performance and lifespan of our candles.

candle shack discount code

Here are some key benefits of trimming the wick properly:

  • Longer burn time: Trimming the wick to the recommended length ensures that the flame burns at an optimal rate, preventing excessive soot and carbon buildup. This allows the candle to burn for a longer duration, giving us more enjoyment.
  • Efficient flame: A properly trimmed wick creates a more efficient flame, resulting in a steady and consistent burn. This means less wasted wax and a more even distribution of fragrance throughout the room.
  • Reduced soot and smoke: Trimming the wick prevents excessive smoke and soot from forming, keeping the air cleaner and healthier to breathe.
  • Safer burn: A well-trimmed wick reduces the risk of the flame becoming too large or flickering excessively, minimizing the chances of accidents or fire hazards.

By understanding the benefits of proper wick trimming, we can ensure an enhanced candle experience.

Now, let’s delve into the next section and explore how to remove excess wax buildup.

Remove Excess Wax Buildup

We can easily remove excess wax buildup from a candle wick by gently scraping it off with a butter knife or a similar tool.

Advertisement

candlesticks patterns

When a candle burns, wax tends to accumulate on the wick, obstructing the flame and preventing it from burning properly. This can lead to a weak or flickering flame, reducing the overall performance of the candle.

To revive an old wick, it’s essential to remove this excess wax buildup. By carefully scraping the wick, we can eliminate the accumulated wax and restore the wick’s functionality.

This step is crucial in preventing wick breakage, as excessive wax buildup can make the wick brittle and prone to breaking. Therefore, it’s important to regularly inspect and clean the wick to ensure optimal burning conditions and extend the life of the candle.

Straighten a Crooked Wick

By gently manipulating the wick, straightening its crooked shape is an effective way to ensure a steady and even burn. To help you master the art of straightening a crooked wick, here are some expert techniques to prevent wick damage:

candle holders amazon

  • Tweezers Method: Use a pair of tweezers to carefully straighten the wick by gently pulling it in the desired direction.
  • Poke and Push Technique: Use a toothpick or a small stick to poke the wick and push it back into a straight position.
  • Heat and Mold Approach: Light the candle and allow the wax to slightly melt. Then, use your fingers to mold the wick into a straight shape before the wax hardens.
  • Rotate and Adjust: Rotate the candle periodically while it’s burning to ensure an even burn and prevent the wick from becoming crooked.

Re-center a Displaced Wick

To re-center a displaced wick, gently guide it back into the center of the candle using a toothpick or small stick.

When a candle is burned, the heat can sometimes cause the wick to shift or move away from the center, which can lead to an uneven burn and wasted wax.

Advertisement

To prevent wick displacement, it’s important to ensure that the wick is properly centered before lighting the candle.

If you notice that the wick has been displaced during burning, it’s relatively easy to reposition it. Simply insert the toothpick or small stick next to the wick and gently push it back towards the center until it’s in the desired position.

candle holders amazon

This will ensure that the candle burns evenly and efficiently, prolonging its lifespan.

Reattach a Detached Wick

Sometimes, candle wicks can become detached from the wax, requiring a simple method to reattach them and continue enjoying a beautiful candle. Here are some effective techniques to reattach a detached wick:

  • Hot glue method: Use a hot glue gun to apply a small amount of hot glue to the base of the detached wick. Press the wick firmly onto the wax, holding it in place until the glue sets.
  • Double-sided tape method: Cut a small piece of double-sided tape and stick it to the base of the detached wick. Press the wick firmly onto the wax, ensuring it’s securely attached.
  • Wick sticker method: Purchase wick stickers, which are adhesive discs specifically designed for reattaching wicks. Place the sticker on the base of the detached wick and press it firmly onto the wax.
  • Wick sustainer method: If the wick sustainer is still intact, slide it back into the base of the detached wick, ensuring it’s secure.

Revive a Drowned Wick

To revive a drowned wick, we can follow a simple method that will help restore its functionality and keep your candle burning brightly. When a wick becomes submerged in melted wax, it can lose its ability to draw up fuel and ignite properly.

To prevent wick drowning in the first place, always trim your wick to about 1/4 inch before lighting your candle. If your wick does end up submerged, there’s no need to despair.

Advertisement

candles uk

First, extinguish the candle and allow it to cool completely. Then, carefully remove any excess wax around the wick using a toothpick or a small knife.

Next, relight the candle and observe if the wick is drawing up the melted wax and burning properly. If not, repeat the process until the wick is fully revived.

Store Candles Properly for Future Use

When it comes to storing candles for future use, there are a few key techniques that can help preserve their quality.

First, it’s important to trim the wick before storing to prevent any potential damage or soot buildup.

candlesticks forex

Additionally, keeping candles in a cool, dry place away from direct sunlight can help extend their lifespan.

Advertisement

Lastly, if you have any old candles with worn-out wicks, there are methods to revive them and make them usable again.

Wick-Saving Techniques

We always store our candles properly to ensure the wicks remain intact for future use. Here are some wick-saving tips that can help prolong the life of your candles:

  • Trim the wick before each use: Trimming the wick to around ¼ inch prevents excessive smoking and mushrooming, which can shorten the lifespan of the wick.
  • Avoid drafts: Placing candles in draft-free areas reduces the likelihood of the wick flickering and burning unevenly, which can lead to wick damage.
  • Use a snuffer: Snuffing out the candle with a snuffer instead of blowing it out helps prevent the wick from getting damaged or displaced.
  • Store candles in a cool, dark place: Extreme temperatures and exposure to sunlight can cause the wax to melt or discolor, affecting the overall quality of the candle.

By following these wick-saving techniques, you can ensure that your candles remain in good condition for future use.

ecoya candles myer

Now, let’s move on to the next section about long-lasting candle storage.

Long-Lasting Candle Storage

Proper candle storage ensures the longevity of our candles for future use. To preserve the fragrance and maximize the lifespan of your candles, follow these longevity tips.

Firstly, store your candles in a cool, dry place away from direct sunlight, as heat can cause them to melt or warp.

Advertisement

Secondly, keep them in airtight containers or bags to prevent dust and dirt from settling on the wax surface. This will help preserve their fragrance and prevent any unwanted odors from seeping in.

candle making supplies

Additionally, make sure to store your candles upright to maintain their shape and prevent any bending or breakage.

Reviving Old Candle Wicks

To bring old candle wicks back to life and ensure their future use, we can revive them through simple yet effective techniques. Here are some ways to revive old candle wicks and preserve their quality:

  • Trim the wick: Use a pair of scissors to trim the burnt or charred part of the wick. This will expose a fresh section of the wick, allowing it to burn more efficiently.
  • Soak the wick: If the wick is dry and brittle, you can soak it in a bowl of warm water for a few minutes. This will help soften the wick and make it more pliable for future use.
  • Use wick alternatives: If the wick is completely unusable, you can consider using wick alternatives such as cotton string, wooden sticks, or even dried herbs like lavender stems. These alternatives can still provide a lovely and fragrant candle experience.
  • Store candles properly: To preserve wick quality for future use, store candles in a cool and dry place away from direct sunlight. This will prevent the wick from drying out or becoming brittle over time.

Frequently Asked Questions

Can I Reuse a Candle Wick That Has Already Been Burned Down Completely?

Yes, you can reuse a candle wick that has been burned down completely. By salvaging burnt wicks, you can trim them and attach them to a new candle. It’s a resourceful way to extend the life of your wicks.

How Often Should I Trim the Wick of a Candle?

When it comes to properly handling a lit candle, it’s essential to know how often to trim the wick. We’ve learned that trimming it to the right size prevents excessive smoking and ensures a clean, even burn.

dusk catalogue 2017

What Can I Do if I Accidentally Break the Wick While Trimming It?

If the wick of a candle accidentally breaks while trimming it, there are a few options. First, you can repair the broken wick by using a wick holder or by tying a new piece of cotton string around it. Alternatively, you can use an alternative wick, such as a wooden or hemp wick, to continue enjoying your candle.

Advertisement

Is It Possible to Save a Wick That Has Been Completely Submerged in Wax?

Recovering submerged wicks can be challenging, but with patience and care, we can save them. Reusing burnt wicks, however, is not recommended as they may not burn evenly or emit a strong fragrance.

What Is the Best Way to Store Candles to Ensure Their Longevity?

Proper candle storage techniques are crucial for extending the lifespan of your candles. By keeping them in a cool, dark place and away from heat sources, you can ensure they burn evenly and last longer.

Conclusion

In conclusion, by following these simple steps, you can easily save a candle wick and prolong the life of your beloved candles.

candle making workshop

Remember to assess the wick’s condition, trim it properly, remove any excess wax buildup, and straighten or re-center it if needed.

In case of a detached or drowned wick, you can reattach or revive it with ease.

Advertisement

By storing your candles properly, you can ensure their future use.

So don’t let a faulty wick dim your candle’s glow, take action and let your light shine bright!

the candle library stockists

Continue Reading

Trending