
- Heat resistance of different types of plastic spoons for melting candle wax
- Alternatives to using a plastic spoon for stirring melted candle wax in the microwave
Keywords related to the question “Is it safe to leave the microwave unattended while melting wax?”:
microwave safety, precautions for melting wax.
Auto keywords for "How long does it typically take for the melted wax to cool and harden?":
how to speed up the cooling process of melted candle wax, tips for preventing the wax from hardening too quickly
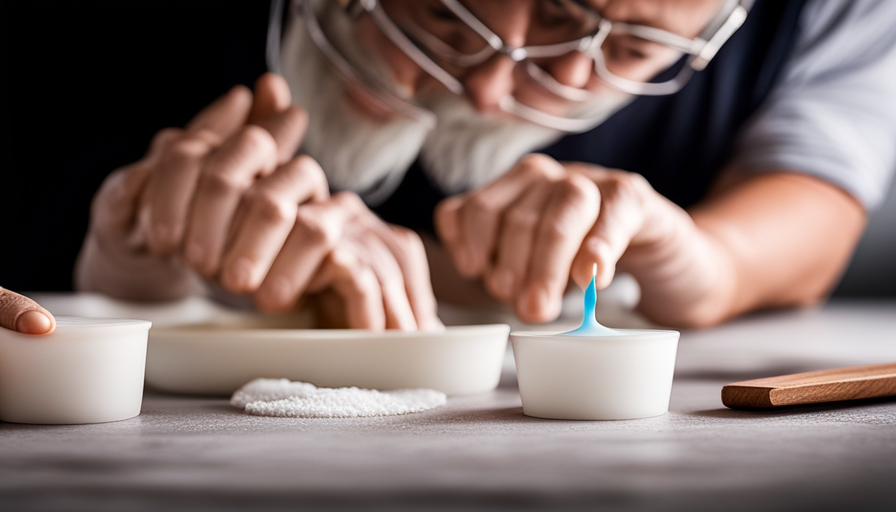
How To Melt Candle Wax In Microwave
In the world of candle making, there are various methods to melt wax and unleash its aromatic potential. One such technique that offers convenience and efficiency is melting candle wax in the microwave. By following a few simple steps, you can transform solid chunks of wax into a molten masterpiece ready for crafting or scenting your home.
To embark on this journey, we must gather our materials and prepare our work area meticulously. With precision and care, we break or chop the candle wax into small pieces, ensuring even heat distribution during the melting process. These fragments find their new home in a microwave-safe container, where they will undergo a transformation like no other.
As we set the stage for this scientific endeavor, it is crucial to remember that patience is key. We must utilize short intervals while microwaving and monitor the wax with unwavering attention. Once melted to perfection, we remove the container from its radiant chamber and allow the liquid gold to cool and harden.
With clean-up complete and satisfaction in our hearts, we are now ready to embrace the wonders of melted wax in all its glory!
Key Takeaways
- Microwave melting is a convenient and efficient method for melting candle wax.
- Safety precautions such as using a microwave-safe container and removing metal objects should be taken.
- Breaking or chopping the candle wax into small pieces helps to speed up the melting process.
- Proper monitoring and heating in short intervals with stirring are important to prevent overheating or hazards.

American Soy Organics Freedom Coconut Soy Wax Beads for Candle Making - Natural Candle Making Supplies - Paraffin-Free,Beeswax-Free Coconut Candle Wax for Container Candles,Tealights,Wax Melts 10 lbs
NATURAL COCONUT SOY WAX BEADS - Best candle making supplies make the best natural candles! Our safe, ethically...
As an affiliate, we earn on qualifying purchases.
Gather Your Materials
Now, it’s time to gather all of the materials you’ll need to transform your solid candle wax into a mesmerizing, molten masterpiece in the microwave. Before we begin, let’s go over some important microwave safety precautions.
Make sure you’re using a microwave-safe container that can withstand high temperatures. It’s also crucial to remove any metal objects like wicks or clips from the wax before melting it in the microwave as they can cause sparks and damage your appliance.
In terms of alternative methods for melting candle wax, there are a few options to consider. One popular method is using a double boiler on the stovetop. This involves placing a heat-resistant bowl filled with wax inside a larger pot filled with water and heating it slowly over low heat. Another option is using an electric wax melter specifically designed for this purpose.
Now that you understand the safety precautions and alternatives, let’s move on to preparing your work area. By ensuring your workspace is clean and free from any potential hazards, you can create an optimal environment for melting candle wax in the microwave.

American Soy Organics Freedom Soy Wax Beads for Candle Making - Natural Candle Making Supplies - Paraffin-Free, Beeswax-Free Candle Wax for Container Candles, Tealights and Wax Melts, 10 lbs
NATURAL SOY WAX BEADS - Best candle making supplies make the best soy candles! These safe, ethically produced,...
As an affiliate, we earn on qualifying purchases.
Prepare Your Work Area
First things first, make sure you’ve got your workspace all set up and ready to go! Organizing supplies and taking safety precautions are vital before melting candle wax in the microwave. Here’s what you need to do:
-
Clear the area: Remove any clutter or flammable items from your work surface to prevent accidents.
-
Use a heat-resistant container: Select a microwave-safe glass or ceramic container that can withstand high temperatures without cracking or melting.
-
Protect your surfaces: Place a heat-resistant mat or tray underneath the container to catch any spills or drips.
Next, gather all the necessary materials for breaking or chopping the candle wax into small pieces. This will ensure even melting and help speed up the process.
Now that you have your workspace prepared, it’s time to move on to the next step of breaking or chopping the candle wax into small pieces…

Mity rain Silicone Wax Melts Mold, 2pcs 12-Cavities Square Baking Molds Set for Candle-Making and scented wax melts, Baby Food Chocolate Truffles, Ganache, Jelly, Candy, Praline.
Food -Grade Quality: The wax melts containers mold is made of top quality, food grade silicone. Temperature resistant...
As an affiliate, we earn on qualifying purchases.
Break or Chop the Candle Wax into Small Pieces
To ensure a smooth and efficient melting process, you’ll want to begin by breaking or chopping the candle wax into small, manageable pieces. This step is crucial as it increases the surface area of the wax, allowing for faster and more even melting.
There are several candle wax melting techniques you can employ when breaking or chopping the wax. One common method is using a sharp knife to slice the wax into thin strips. Another approach is to use a grater or cheese shredder to create smaller, uniform shavings. Alternatively, you can also place the candle in a plastic bag and gently hit it with a hammer or mallet to break it into chunks.
Breaking or chopping candle wax may seem like an extra step, but it significantly aids in speeding up the overall melting process.
Once you have successfully broken down your candle wax into smaller pieces, it’s time to move on to the next step: placing the wax in a microwave-safe container.

Wax Melts Molds Silicone, 3 Pack Mini Heart Molds with Dropper, Silicone Mold for Heart Candy Gummies Chocolate Ice Cube Jelly Cake Soap Candle DIY Valentine Gift
【Package Include】:3Pcs pink heart mold and 1Pc 5ML dropper,each mold has 55 cavities, so you can make 165...
As an affiliate, we earn on qualifying purchases.
Place the Wax in a Microwave-Safe Container
Once you’ve successfully broken down the candle wax into smaller pieces, it’s time to transfer it into a container that’s safe to use in the microwave. This ensures a convenient and hassle-free melting process. To maintain microwave safety and prevent any mishaps, follow these guidelines:
-
Choose a microwave-safe container: Opt for a glass or ceramic container that can withstand high temperatures without melting or releasing harmful chemicals. Avoid using plastic containers as they may warp or emit toxins when exposed to heat.
-
Consider alternative melting methods: If you don’t have a suitable microwave-safe container, consider using a double boiler on the stovetop instead. This method involves placing the wax in a heat-resistant bowl over simmering water until it melts completely.
-
Handle with caution: When transferring the broken candle wax into the chosen container, ensure you do so carefully to avoid any spills or burns. Use oven mitts or heat-resistant gloves to protect your hands from hot wax and always be mindful of not overfilling the container.
Now that your candle wax is securely placed in a microwave-safe container, it’s time to move on to melting it in short intervals…
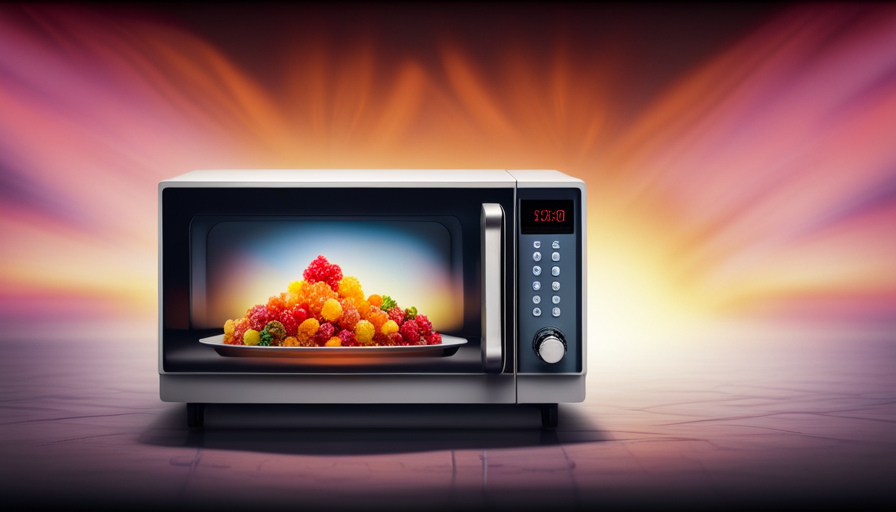
Microwave in Short Intervals
Now, it’s time for me to carefully heat up the wax in the microwave, taking short intervals to ensure a smooth melting process.
When using the microwave to melt candle wax, it’s important to prioritize safety. Always use a microwave-safe container that can withstand high temperatures without melting or releasing harmful chemicals. Additionally, be cautious of overheating the wax as this can lead to fire hazards.
To begin, place the container with the wax in the center of the microwave and cover it loosely with a lid or paper towel. Start by microwaving on low power for 30-second intervals. This gradual approach allows for better control over the temperature and minimizes any potential risks associated with rapid heating.
After each interval, carefully remove the container from the microwave using oven mitts or hot pads as it may become hot. Give the wax a gentle stir to distribute heat evenly and check its consistency. If needed, continue microwaving at short intervals until the desired melting point is reached.
Remember, there are alternative methods available for melting candle wax if you don’t have access to a microwave or prefer not to use one. However, when done correctly and safely, microwaving offers a convenient and efficient way to melt candle wax quickly.
Transitioning into stirring between intervals: Stirring is an essential step in ensuring even heating throughout the entire batch of wax during this process.
Stir the Wax Between Intervals
As you heat up the wax in short intervals, don’t forget to give it a gentle stir between each round in the microwave. This simple step is crucial for ensuring that the wax melts evenly and prevents any potential splatters. By stirring the wax, you’re promoting uniform heat distribution, allowing it to melt consistently throughout.
To evoke a sense of caution and anticipation in our audience, let’s explore an unordered list of alternative methods for melting candle wax:
-
Using a double boiler: This traditional method involves placing a heat-resistant container with the wax inside another pot filled with water. The indirect heat from boiling water gently melts the wax without direct exposure to intense microwave energy.
-
Using a slow cooker: By setting your slow cooker on low or warm temperature settings, you can slowly melt the candle wax without risking overheating or burning.
-
Using an electric melting pot: These specialized pots are designed specifically for melting candle waxes and offer precise temperature control.
Remember that these alternative methods may require additional time and attention compared to using a microwave.
Now that we’ve covered how to stir the melted wax properly, let’s move on to monitoring it carefully as it continues to heat up.
Monitor the Wax Carefully
Keep a watchful eye on the molten substance, like a hawk hovering over its prey, making sure it reaches the desired consistency without any mishaps. Monitoring the wax carefully is crucial to ensure that it melts evenly and doesn’t overheat or become hazardous.
To monitor the wax effectively, there are a few techniques you can employ. Firstly, use short intervals of heating and stirring in between. This allows for better heat distribution and helps prevent hot spots from forming. Additionally, visually inspect the wax after each interval to check for any signs of overheating or burning.
During this monitoring process, it’s important to be aware of potential hazards. Wax can reach high temperatures and may cause burns if mishandled. Always use oven mitts or heat-resistant gloves when handling the container or wax itself. Moreover, keep flammable materials away from the microwave to avoid any accidents.
By closely monitoring the wax throughout the melting process, you can ensure that it reaches the desired consistency safely and efficiently. Once you’ve achieved this state, it’s time to move on to removing the container from the microwave without causing any spills or accidents.
Remove the Container from the Microwave
Once you’ve achieved the desired consistency, it’s time to safely extract the container from the microwave. Handling hot wax requires caution to avoid burns or spills. Follow these steps to ensure a safe and successful removal:
| Step 1: | Use oven mitts or heat-resistant gloves to protect your hands from the hot container. Safety should always be a priority when working with heated materials. |
| Step 2: | Open the microwave door slowly to allow any steam to escape before fully removing the container. This prevents sudden bursts of hot air and potential splattering of molten wax. |
| Step 3: | Carefully grasp the container using a towel or oven mitts, ensuring a firm grip while avoiding direct contact with the heated surface. |
By following these steps, you can handle hot wax safely and prevent any accidents or injuries. It is important to note that microwaving is not the only method for melting candle wax; alternative methods such as double boiling or using a dedicated wax melter are also effective options.
Now that you have successfully removed the container from the microwave, let’s move on to letting the wax cool and harden for further use or shaping into your desired form.
Let the Wax Cool and Harden
After safely removing the container from the microwave, it’s time to allow the wax to cool and solidify before moving forward. Cooling techniques are essential in this step to ensure that the melted wax reaches its desired consistency.
One effective cooling method is air cooling, where you simply let the container sit at room temperature until it naturally cools down. If you’re looking for a quicker option, you can place the container in a refrigerator or freezer for faster solidification.
During this waiting period, it’s important not to disturb or agitate the wax as it cools. Doing so may result in uneven hardening or unwanted air bubbles forming within your candle. Additionally, avoid any direct exposure to sunlight or heat sources during this time.
If you’re interested in alternative melting methods, there are several options available. Double boiling is a common technique where you place a heat-resistant container holding the wax inside another pot filled with water and gently heat on a stove until melted. Another method involves using a candle warmer or electric tart burner specifically designed for melting wax without an open flame.
Once the wax has cooled and hardened completely, you can proceed with clean up and enjoy your melted wax!
Clean Up and Enjoy Your Melted Wax!
Now that the wax has solidified, it’s time to tidy up and savor the delightful aroma of your melted creation! Cleaning up after melting candle wax in the microwave is a crucial step to ensure safety and maintain a clean workspace.
Start by carefully removing any remaining wax from the container or dish you used for melting. Use a paper towel or cloth to wipe away any residue, making sure to avoid getting any water near the melted wax.
Next, it’s important to dispose of the used wax properly. One way to repurpose melted wax is by creating beautiful candle wax art. Simply pour the cooled and hardened wax into silicone molds or ice cube trays and let it solidify again. These unique shapes can be used as decorative accents for future candles or even as standalone pieces.
If you prefer not to repurpose the melted wax, it can be safely discarded in your regular household trash. However, make sure it has completely cooled before disposing of it.
Lastly, take a moment to enjoy the fruits of your labor! Light one of your newly created candles and bask in its warm glow while relishing in the soothing scent that permeates your space. The process may have been technical and precise, but now you can sit back and appreciate the beauty that comes with repurposing melted candle wax.
Frequently Asked Questions
Can I use any type of container to melt the candle wax in the microwave?
I wouldn’t recommend using any type of container to melt candle wax in the microwave. It’s best to use glass containers specifically designed for this purpose. Using metal containers can be dangerous as they can create sparks and cause a fire hazard. Glass containers are safe because they’re heat-resistant and don’t conduct electricity.
It’s important to prioritize safety when melting candle wax in the microwave.
How long should each interval be when microwaving the wax?
The ideal interval length when microwaving candle wax depends on the amount of wax and the power of the microwave. Generally, it’s recommended to start with short intervals, around 30 seconds to 1 minute, and then check the progress. This helps prevent overheating and allows for better control over the melting process.
Additionally, it’s important to stir the wax between intervals to ensure even heating and avoid hot spots.
Can I use a plastic spoon to stir the wax?
Using a plastic spoon to stir the wax while melting it in the microwave can be dangerous and should be avoided. Plastic spoons aren’t designed to withstand high temperatures, and they can melt or release harmful chemicals when exposed to heat. It’s important to use utensils made of heat-resistant materials such as silicone, glass, or stainless steel when working with melted candle wax. These alternatives will ensure your safety and prevent any potential hazards.
Is it safe to leave the microwave unattended while melting the wax?
Microwave safety is crucial when melting wax. It’s not recommended to leave the microwave unattended during this process due to potential hazards. The heat generated can cause the wax to overheat, leading to fires or even explosions. Wax melting precautions must be followed to ensure a safe environment. Stay near the microwave while melting the wax and monitor it closely to prevent any accidents from occurring.
How long does it typically take for the melted wax to cool and harden?
Typically, the melted wax takes a considerable amount of time to cool and harden. The cooling process can be compared to a lethargic snail, moving at its own pace. However, there are ways to expedite this process and prevent premature solidification.
One tip is to place the container of melted wax in a cool environment or use a fan to create airflow. Another technique is adding small amounts of mineral oil or vegetable oil to slow down the hardening process.
Conclusion
In conclusion, melting candle wax in the microwave is a convenient and efficient method. By gathering the necessary materials and preparing your work area, you can easily break or chop the wax into smaller pieces.
Placing it in a microwave-safe container and microwaving in short intervals allows for careful monitoring of the process. Once the wax has melted, removing it from the microwave and allowing it to cool and harden completes the procedure.
Clean up afterwards to enjoy your perfectly melted wax!