Congrats on becoming an expert in candle making! It’s time to advance your skills by delving into the world of creating candle molds. Let’s explore this thrilling new territory together.
This essential skill will allow you to create unique and stunning candle designs that are sure to impress.
In this guide, we’ll walk you through the steps of creating your own molds using simple materials and techniques.
From gathering the necessary materials to troubleshooting common issues, we’ve got you covered.
So, let’s roll up our sleeves and get ready to make some molds that will take your candle game to new heights!
Key Takeaways
- Consider the material options for the mold, such as silicone, metal, plastic, or glass.
- Determine the appropriate mold size based on the type of candle, desired burn time, and any additional decorative elements.
- Choose a mold design that aligns with your vision and desired aesthetic, allowing for customization.
- Take proper steps to mix, pour, cure, and remove the mold material, while also cleaning and maintaining the mold for reuse.

Cylinder Candle Molds for Candle Making,4 Pcs Pillar Casting Silicone Molds for Resin Casting, Soap, Flower Specimen, Insect Specimen, Clay Craft
- Set of 4 Different Sizes: Various size cylinder molds included
- Durable Silicone Material: High-quality, non-stick, glossy interior
- Versatile Casting Use: Suitable for resin, soap, candles, and more
As an affiliate, we earn on qualifying purchases.
As an affiliate, we earn on qualifying purchases.
Gather Necessary Materials
To begin, we’ll gather all the necessary materials for making our own candle mold. Material selection is crucial in ensuring a successful mold-making process. For this project, we’ll need a heat-resistant container, such as a metal or silicone mold, which will serve as the outer shell of our candle mold.
Additionally, we’ll require a release agent, such as silicone spray or vegetable oil, to prevent the candle from sticking to the mold.
Next, we need to choose a suitable material for the inner core of our mold. Common options include rubber, latex, or silicone, which can be easily shaped and will withstand the heat of the melted wax.
Lastly, we’ll need tools like scissors, a knife, and a measuring cup to aid in our mold-making techniques.
With these materials in hand, we’re ready to move on to the next step.
Choose a Mold Design
When choosing a mold design for your candle-making project, there are several points to consider.
First, you’ll need to decide on the material for your mold, with options including silicone, metal, or plastic.

Next, consider the size of the mold, ensuring it’s appropriate for the desired candle size.
Finally, think about customization possibilities, such as using a pre-made mold or creating your own unique design.
These points will guide you in selecting the perfect mold for your candle-making venture.
Material Options for Molds
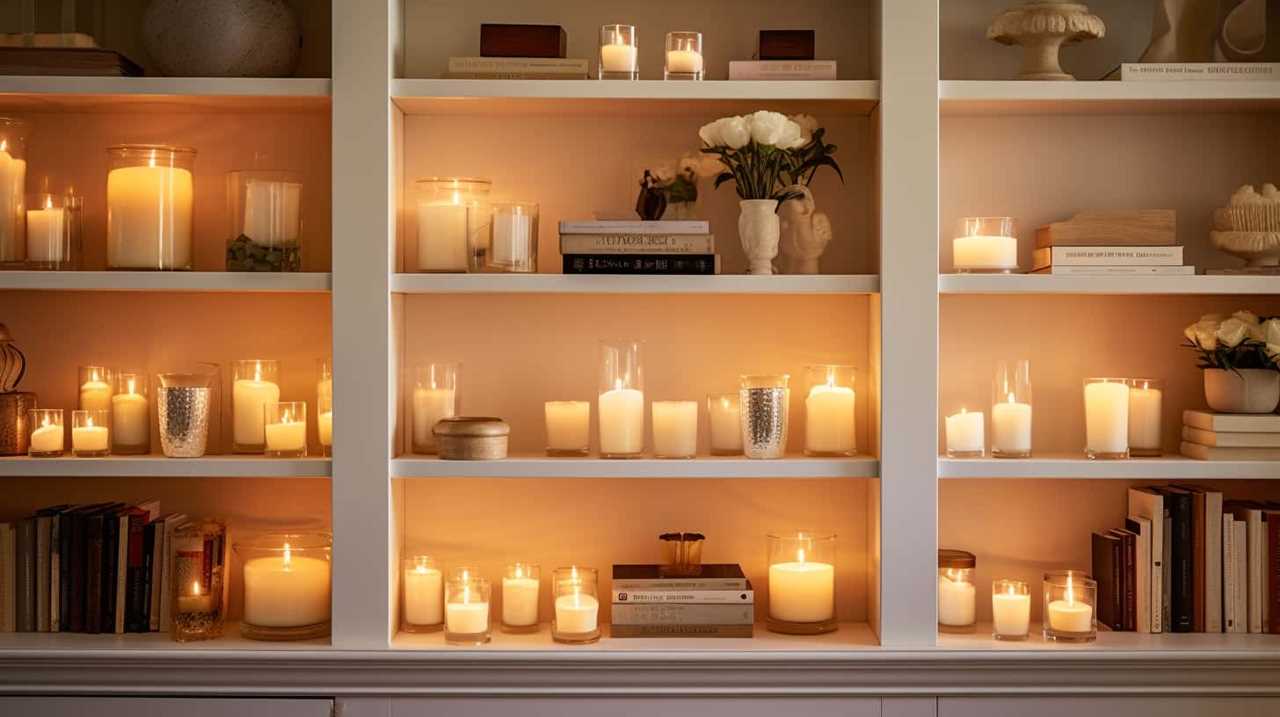
We prefer using silicone molds for our candle-making process due to their flexibility and durability. However, there are several other materials available for making candle molds, each with their own pros and cons.
One common option is plastic molds, which are affordable and easy to find. They’re also reusable and provide a smooth finish to the candles. However, they can be prone to warping and may not withstand high temperatures.
Another option is metal molds, which are known for their durability and heat resistance. They can withstand high temperatures and produce a shiny finish on the candles. However, they can be more expensive and may require additional tools for releasing the candles from the mold.
Lastly, there are glass molds, which are ideal for creating unique and decorative candles. They provide a transparent finish and can withstand high temperatures. However, they can be fragile and require careful handling.
Size Considerations for Molds
For choosing a mold design, we take into consideration the size of the candle we want to create. Mold size considerations are important as they determine the final dimensions of the candle. Adjusting mold dimensions allows us to create candles of various sizes and shapes. To assist in this process, consider the following factors:

| Factor | Description | Considerations |
|---|---|---|
| Candle Type | Determine the type of candle you want to create. | Different candle types require different mold sizes. |
| Burn Time | Decide on the desired burn time for your candle. | Longer burn times may require larger molds. |
| Decorative Elements | Consider any additional decorative elements you wish to include. | Intricate designs may require larger molds. |
Mold Customization Possibilities
To explore the various options for mold customization, let’s delve into the realm of choosing a mold design for our candles. Customization techniques allow us to create unique and eye-catching candles that stand out from the rest.
When it comes to choosing a mold design, the possibilities are endless. You can opt for classic shapes like pillars or votives, or get creative with unconventional designs like animals, flowers, or even geometric patterns. Consider the overall theme or aesthetic you want to achieve with your candles, and let your imagination run wild. Whether you prefer elegant and sophisticated designs or fun and whimsical ones, the key is to choose a mold design that aligns with your vision.
Now, let’s move on to the next step and prepare the mold base.
Prepare the Mold Base
Now let’s talk about preparing the mold base for your candle.

There are a few material options you can choose from, such as silicone, metal, or plastic.
It’s important to ensure proper sealing of your mold to prevent any wax leaks.
Additionally, it’s crucial to choose the right size mold that will accommodate the amount of wax you plan to use for your candle.
Material Options for Molds
We have multiple material options available when preparing the mold base for making a candle mold. Here are some options to consider:

- Silicone: This material is flexible, durable, and perfect for creating intricate details in your candle mold.
- Latex: Latex molds are known for their elasticity and ease of use. They’re great for making multiple candle molds at once.
- Plastic: Plastic molds are affordable and easy to work with. They’re ideal for beginners or those on a budget.
- Glass: Glass molds provide a unique and elegant look to your candles. They’re heat-resistant and can withstand high temperatures.
- Metal: Metal molds are sturdy and long-lasting. They’re great for making pillar or votive candles.
When working with any mold material, it’s important to take safety precautions. Make sure to wear protective gloves and goggles, work in a well-ventilated area, and follow the manufacturer’s instructions for proper handling and cleaning.
Importance of Proper Sealing
One important aspect to consider when preparing the mold base for making a candle mold is ensuring proper sealing. Proper sealing techniques are crucial in preventing mold leaks, which can result in uneven candles or even complete mold failure. Here are some steps to follow to achieve a well-sealed mold base:
| Steps | Explanation |
|---|---|
| 1. Clean the mold base | Before starting, make sure the mold base is clean and free from any dust or debris. This will ensure a tight seal. |
| 2. Apply a release agent | Coat the inside of the mold base with a release agent, such as silicone spray or vegetable oil. This will prevent the candle wax from sticking to the mold base. |
| 3. Seal any gaps | Check for any gaps or cracks in the mold base. Use mold putty or clay to seal these areas and create a smooth surface. |
Choosing the Right Size
What factors should be considered when determining the appropriate size for our candle mold? Choosing the right size for your candle mold is crucial to ensure that your finished candles turn out just the way you want them. Here are some key considerations to keep in mind:
- Candle type: Consider the type of candle you want to make. Different candle types require different mold sizes. For example, pillar candles will require a mold with a larger diameter, while taper candles will need a thinner and longer mold.
- Desired candle size: Think about the size of the candle you want to create. Do you want a small tea light or a large centerpiece candle? The size of your desired candle will determine the size of the mold you should use.
- Mold material: Consider the material of the mold you’ll be using. Some materials, like silicone, allow for more flexibility in size customization, while others may have fixed dimensions.
- Available space: Take into account the space you have available for your candle making setup. Ensure that the mold size fits comfortably in your workspace without any restrictions.
- Personal preference: Ultimately, your personal preferences and artistic vision should play a role in choosing the size of your candle mold. Consider the overall aesthetic you want to achieve and select a mold size that aligns with your creative vision.
Create a Mold Box
To create a mold box, gather all the necessary materials and tools. While there are mold box alternatives available, constructing your own mold box is a cost-effective and customizable option. Here’s a step-by-step guide on how to create a mold box:
- Materials needed: plywood or melamine board, screws, drill, saw, measuring tape, and sandpaper.
- Measure and cut the plywood or melamine board into four equal-sized panels for the sides of the mold box.
- Assemble the panels into a rectangular shape, ensuring that the corners are aligned.
- Drill pilot holes and secure the panels together with screws.
- Sand the edges of the mold box to remove any roughness.
- Your mold box is now ready to use! Place it around your mold to contain the liquid wax and ensure a clean and even pour.
Mix and Pour the Mold Material
We mix and pour the mold material to create the desired shape for our candle. This step is crucial in achieving custom mold designs and exploring alternative mold materials.
Here’s a step-by-step guide on how to mix and pour the mold material:
- Prepare the mold material: Depending on the type of mold you’re using, follow the manufacturer’s instructions to mix the mold material. This can involve combining liquid components or mixing a powder with water.
- Stir thoroughly: Use a stir stick or spatula to mix the mold material until it reaches a smooth and consistent texture. Make sure there are no lumps or clumps in the mixture.
- Pour into the mold box: Slowly pour the mold material into the mold box, ensuring that it fills the entire space and covers the prototype or object you want to create a mold of.
- Eliminate air bubbles: Tap the sides of the mold box gently to release any trapped air bubbles. This will help prevent imperfections in the final mold.
- Allow the mold material to cure: Follow the recommended curing time specified by the mold material manufacturer. This can vary depending on the type of material used.
Allow the Mold to Cure
After pouring the mold material into the mold box, we need to allow it to cure. Curing time is an essential step in the mold-making process as it ensures that the mold material sets properly and becomes solid. The curing time can vary depending on the type of mold material used. It’s crucial to follow the manufacturer’s instructions for the specific curing time required.
During the curing process, it’s important to avoid touching or disturbing the mold to prevent any deformities or imperfections. Additionally, using mold release techniques can help in removing the cured mold material from the mold box easily. Applying a thin layer of mold release agent, such as petroleum jelly or silicone spray, before pouring the mold material can help facilitate the release process.

Remove the Mold Box
Once the mold has fully cured, we carefully remove the mold box. Mold removal techniques are crucial at this stage to prevent any breakage.
Here are five important steps to follow:
- Gently tap the sides of the mold box to loosen it from the cured mold.
- Slowly lift the mold box upwards, ensuring that the mold remains intact.
- If the mold box is stuck, use a small spatula or butter knife to gently pry it away from the mold.
- Take your time and be patient to avoid any unnecessary pressure that may damage the mold.
- Once the mold box is completely removed, inspect the mold for any cracks or imperfections.
Now that the mold box has been successfully removed, it’s time to proceed to the next step and release the candle from the mold.
Release the Candle From the Mold
To remove the candle from the mold, we carefully loosen and separate the two halves. This can be done using various release techniques.

One common method is to gently tap the sides of the mold with a rubber mallet or a wooden dowel. This helps to loosen the candle and allows it to slide out easily.
Another alternative method is to place the mold in the freezer for a few hours. The cold temperature causes the wax to contract slightly, making it easier to release from the mold.
After applying the chosen release technique, we carefully twist and pull on each half of the mold to separate them.
Clean and Prepare the Mold for Reuse
Now that we’ve successfully released the candle from the mold, it’s essential to clean and prepare it for reuse.

Cleaning the mold is crucial to ensure the next candle has a smooth finish and doesn’t contain any leftover residue. We’ll discuss various mold cleaning techniques, provide maintenance tips to prolong the mold’s lifespan, and highlight the benefits of reusing molds.
Mold Cleaning Techniques
Let’s clean and prepare the mold for reuse using effective mold cleaning techniques. Mold maintenance is crucial to ensure the longevity and quality of your molds. Here are some tips to help you clean your molds effectively:
- Use warm water and mild soap to clean the mold. Gently scrub the surface with a soft brush to remove any residue.
- For stubborn stains or residue, soak the mold in a mixture of vinegar and water for a few hours. Then, scrub it again to remove the remaining debris.
- Rinse the mold thoroughly with clean water to remove any soap or vinegar residue.
- Allow the mold to air dry completely before storing it to prevent mold growth.
- Store the mold in a cool, dry place away from direct sunlight and extreme temperatures.
By following these mold cleaning techniques, you can ensure that your molds are clean and ready for reuse.
Now, let’s move on to some essential mold maintenance tips.

Mold Maintenance Tips
For maintaining and preparing our molds for reuse, we need to follow some essential mold maintenance tips. Proper maintenance not only ensures the longevity of our molds but also helps in preventing mold damage. Here are some important steps to follow:
- Clean the mold thoroughly after each use to remove any residue or leftover wax. Use warm water and mild dish soap, and gently scrub the mold with a soft brush.
- Inspect the mold for any signs of wear or damage. If you notice any cracks or chips, consider using mold repair techniques such as epoxy or silicone sealant to fix them.
- Before reusing the mold, make sure it’s completely dry. Moisture can cause the wax to stick to the mold or create air bubbles in the finished candle.
- Apply a thin layer of mold release spray or oil to the inside of the mold before pouring the wax. This will help in easy release of the candle once it has cooled and hardened.
- Store the mold in a cool and dry place to avoid exposure to heat or humidity, which can warp or deform the mold.
Mold Reuse Benefits
To maintain and prepare our molds for reuse, we need to clean them thoroughly after each use and inspect for any signs of wear or damage. Properly caring for our molds not only extends their lifespan but also offers several benefits for our candle-making process. Here are some mold reuse benefits and troubleshooting techniques to consider:
- Improved cost-efficiency: Reusing molds saves money by reducing the need to purchase new ones.
- Time-saving: Having reusable molds eliminates the time spent on creating new molds for each candle.
- Consistency: Reusing molds ensures consistent shapes and sizes for our candles.
- Environmentally friendly: By reusing molds, we reduce waste and contribute to a more sustainable candle-making practice.
- Versatility: Reusable molds allow us to experiment with different candle designs and techniques.
Experiment With Different Mold Materials
We can try out various mold materials to see which ones work best for making candles. Different mold shapes can give candles a unique and interesting look.
To start, we can experiment with silicone molds. Silicone is a popular choice because it’s flexible, easy to release the candle from, and can withstand high temperatures.
Another option is metal molds, which are durable and heat-resistant. They come in various shapes like cylinders, squares, and hearts.
Additionally, we can try using plastic molds, which are affordable and available in a wide range of shapes and sizes.
Lastly, we can even experiment with natural materials like fruits and vegetables to create interesting candle molds.
Remember to also consider experimenting with additives like colorants and scents to enhance the candle-making experience.

Troubleshooting Common Mold-Making Issues
As we experiment with different mold materials for making candles, it’s important to address and troubleshoot common issues that may arise during the mold-making process. Here are some tips to help you troubleshoot mold issues and prevent mold contamination:
- Check for leaks: Inspect the mold for any cracks or gaps that may cause leakage. This can result in misshapen candles or uneven surfaces.
- Adjust temperature: If your candles aren’t setting properly, it could be due to incorrect temperatures. Make sure to follow the recommended temperature guidelines for the mold material you’re using.
- Clean and sanitize: To prevent mold contamination, thoroughly clean and sanitize your mold before each use. This will help eliminate any bacteria or mold spores that could affect the quality of your candles.
- Use a release agent: Applying a release agent, such as a cooking spray or mold release spray, can help prevent candles from sticking to the mold.
- Store properly: After each use, store your mold in a clean and dry place to avoid any potential growth of mold or mildew.
Frequently Asked Questions
How Long Does It Take for the Mold Material to Cure?
It usually takes a few hours for the mold material to cure completely. If you’re experiencing issues with curing time, try troubleshooting the mold mixture by adjusting the ratios and following the instructions carefully.
Can I Use a Silicone Mold for Making Candles?
Using a silicone mold for making candles is a great alternative to traditional molds. The benefits include easy release of the finished candle, durability, and the ability to create intricate designs.
What Should I Do if My Mold Material Does Not Mix Properly?
If our mold material does not mix properly, we can troubleshoot it by checking the temperature, ensuring proper ratios of components, and mixing thoroughly. If the problem persists, we can explore alternative materials for candle molds.
How Do I Prevent Air Bubbles From Forming in My Mold?
To prevent air bubbles from forming in our mold, we can take a few steps. First, we need to ensure that our mold material is thoroughly mixed. If it’s not, air can get trapped and cause bubbles.
What Is the Best Way to Clean and Store My Mold for Future Use?
To clean and store your mold for future use, start by gently washing it with warm soapy water. Rinse thoroughly and pat dry. Store in a cool, dry place to prevent dust and moisture buildup.
Conclusion
In conclusion, creating your own mold for candles is a fun and rewarding process. By following these step-by-step instructions, you can experiment with different designs and materials to customize your candles.
Just like molding a candle, you have the power to shape your own creativity and bring your ideas to life.

So why not give it a try and let your imagination burn bright?