Are you ready to make the most unique concrete candle holders? We have all the supplies you need!
In this guide, we’ll show you step-by-step how to make these stunning candle holders that will surely impress your friends and family.
With just a few materials and some simple techniques, you’ll be able to create beautiful and unique candle holders that will bring warmth and style to any space.
So, let’s roll up our sleeves and get started on this fun and rewarding DIY project.

Get ready to serve others with your creativity and craftsmanship, and let’s make some concrete candle holders together!
Key Takeaways
- Suitable concrete mix and proper candle holder sizing are important considerations for making concrete candle holders.
- The concrete mix should be easy to work with, hold its shape when molded, and be designed for crafting purposes.
- Proper mixing of the concrete is crucial for strength and durability, and the right consistency should be achieved for the concrete to set properly.
- The selection of molds and pouring technique should be done carefully to ensure the desired shape and size of the candle holders, and the use of a release agent can prevent sticking.

Syntic 40 Pack Small Glass Jars with Cork Lids, 7oz Empty Mason Jars for Making Candles, Yogurt Container with PE Lids for Wedding Favors, Baby Shower, Candy, Spices with Twine, Labels
Candy Bottles with 6 Kinds of Accessories - Perfectly satisfying your daily lifestyle demands. 40 PE lids +...
As an affiliate, we earn on qualifying purchases.
Materials Needed for Concrete Candle Holders
To make concrete candle holders, we’ll need the following materials:
- a suitable concrete mix
- proper candle holder sizing
When choosing the right concrete mix, it’s important to consider its strength and durability. Look for a mix specifically designed for crafting purposes, as it will provide the best results. Additionally, ensure that the mix is easy to work with and can hold its shape when molded.
Proper candle holder sizing is crucial to ensure a snug fit for your candles. Measure the diameter and height of your candles and select molds or containers that match these dimensions. This will prevent the candles from wobbling or falling out of the holders.


YJHSS 24-Pack 8oz Candle Tins with Lids, Metal Candle Jars for Candle Making, Bulk Empty Containers for Beginners & DIY Storage -Black
Capacity: 8oz =235ml; Dimensions : 3.15" (Diameter) x 2.35" (Height); Each candle tins are made of premium tinplate,...
As an affiliate, we earn on qualifying purchases.
Preparing Your Workspace
Now let’s talk about preparing our workspace for making concrete candle holders.
First, gather all the materials needed, including the concrete mix, molds, and any additional decorations or embellishments.
Next, take safety precautions by wearing gloves, goggles, and a face mask to protect yourself from any potential hazards.
Lastly, make sure to organize your workspace by clearing any clutter and setting up a clean, flat surface to work on.

Materials Needed
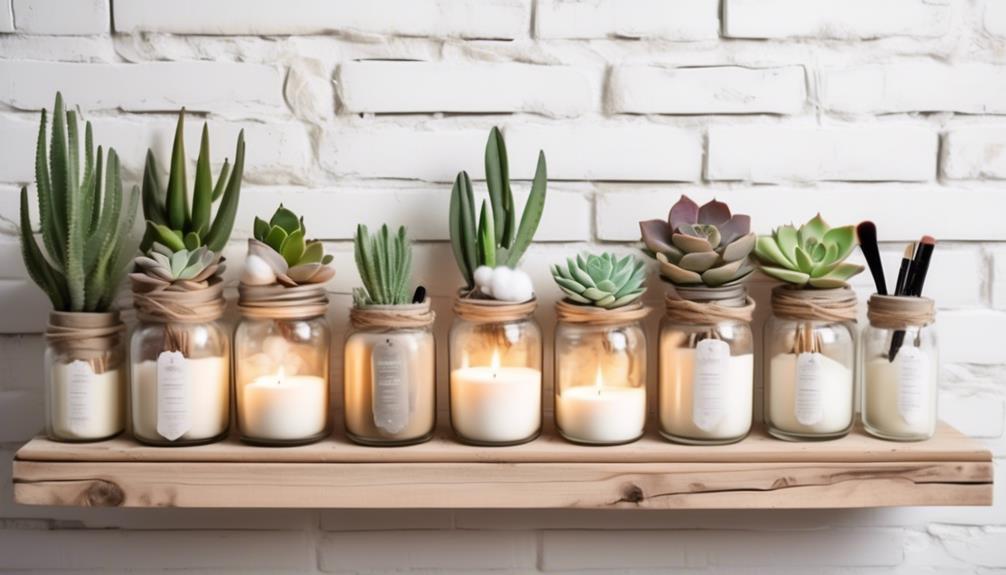
We gather the necessary materials to prepare our workspace for making concrete candle holders. Before we begin, it’s important to choose the right mold for our project. The mold will determine the shape and size of our candle holders. We can use silicone molds, plastic containers, or even repurpose everyday objects like yogurt cups or tin cans. Once we have decided on the mold, we gather the following materials:
| Materials | Quantity |
|---|---|
| Concrete mix | 1 bag |
| Water | 1 cup |
| Mixing container | 1 |
| Mixing tool (spoon or stick) | 1 |
| Mold release spray | As needed |
| Candle wicks | Desired number |
| Decorative items (optional) | As desired |
With these materials ready, we can now move on to the next step of the process.
Safety Precautions
To ensure a safe work environment, let’s now discuss the necessary safety precautions for preparing our workspace when making concrete candle holders. Preventing accidents is our top priority, so it’s important to take the following safety measures.
First, ensure that your workspace is well-ventilated to avoid inhaling any harmful fumes. Open windows or use fans to circulate fresh air.

Second, wear appropriate protective gear such as goggles, gloves, and a dust mask to protect your eyes, hands, and respiratory system.
Third, clear your workspace of any clutter or obstacles to minimize the risk of tripping or falling. Additionally, keep a fire extinguisher nearby in case of emergencies.
By following these safety precautions, you can create a secure environment for your concrete candle holder project.
Now, let’s move on to the next section about organization tips.

Organization Tips
Before we begin discussing organization tips for preparing our workspace, it’s important to understand the importance of an organized and efficient work area. A well-organized workspace not only helps us work more efficiently but also enhances our productivity and creativity. When it comes to workspace organization, storage solutions play a crucial role. Having the right storage options can help keep our tools and materials easily accessible and prevent clutter from taking over our workspace. To help you create an organized and efficient work area, here are some practical organization tips:
| Column 1 | Column 2 | Column 3 |
|---|---|---|
| Declutter | Categorize | Label |
| Utilize space | Invest in bins | Create zones |
| Prioritize | Clean as you go | Maintain order |

WFPLUS 100 Pcs Aluminum Tea Lights Cups, Empty Case Candle Wax Containers, Metal Tea Light Tins with 100 Pcs Candle Wicks Packaged in Carton Box, Candle Mold for DIY Candles Making Supplies
Size and Material: Round Tin Tea Light Cups Diameter: 3.7cm/1.5 Inch, Height: 1.5cm/0.6 Inch, made of aluminum, high...
As an affiliate, we earn on qualifying purchases.
Mixing the Concrete
Let’s talk about mixing the concrete for your candle holders.
Proper mixing is crucial to ensure the strength and durability of the final product. It’s important to follow the recommended mixing time and achieve the right consistency for the concrete to set properly.
Proper Concrete Mixing
We mix the concrete using a cement mixer to ensure proper consistency and strength in our concrete candle holders. Proper concrete mixing is crucial to achieve the desired results. Here are some important tips and techniques to consider when mixing concrete:

- Start with the right ratio of ingredients: the ideal mix consists of one part cement, two parts sand, and three parts gravel.
- Measure accurately to maintain consistency throughout the mixing process.
- Gradually add water while mixing to achieve the desired consistency. Avoid adding too much water as it can weaken the concrete.
- Use a cement mixer for efficient and thorough mixing. This helps to eliminate lumps and ensure a homogeneous mixture.
- Troubleshoot common mixing problems by adjusting the water-to-cement ratio or adding more aggregates to improve the mixture’s workability.
By following these mixing techniques, you can create high-quality concrete candle holders with optimal strength and durability.
Now, let’s move on to the next section to discuss mixing time and consistency.
Mixing Time and Consistency
To ensure optimal results, it’s important to consider the mixing time and consistency when mixing the concrete for our candle holders.
Proper mixing techniques are crucial for achieving a smooth and uniform consistency, which will result in sturdy and durable candle holders. When mixing the concrete, it’s recommended to use a power mixer or a drill with a mixing attachment to ensure thorough and efficient mixing.

Start by adding water to the dry mix gradually, while continuously mixing. Pay close attention to the consistency of the mixture – it should be thick and have a creamy texture. If the mixture is too dry, add small amounts of water until the desired consistency is achieved. On the other hand, if the mixture is too wet, add more dry mix until it reaches the right consistency.

Aubeco 720PCS Candle Wicks for Candle Making, Candle Wick Stickers, Heat Resistance Double-Sided Stickers with The Little ‘‘Tail’’, Stickers for Candle Making
Value Pack: 720 pieces candle wick stickers in one pack enough for a long time to use and...
As an affiliate, we earn on qualifying purchases.
Choosing the Right Mold for Your Candle Holder
For choosing the right mold for our concrete candle holder, we need to consider various factors. Here are some alternative mold options to consider:
- Silicone molds: These are flexible and easy to remove, making them ideal for intricate designs.
- Plastic molds: These molds are affordable and come in a variety of shapes and sizes.
- Glass molds: These create a unique finish and allow you to see the candle as it burns.
- DIY molds: You can create your own molds using cardboard, plastic containers, or even household items.
When troubleshooting mold issues, keep these tips in mind:
- Use a release agent: This will help prevent the concrete from sticking to the mold.
- Tap the mold: Gently tap the sides of the mold to release any air bubbles trapped in the concrete.
- Adjust the consistency: If the concrete is too runny, it may leak out of the mold. If it’s too thick, it may not fill the mold evenly.
Preparing the Mold for Pouring
One option to consider when preparing the mold for pouring is to apply a release agent to prevent the concrete from sticking. This is especially important for mold maintenance and ensuring easy removal of the candle holder once it has set.
A release agent can be in the form of a spray or a brush-on solution, and it creates a barrier between the concrete and the mold surface. This step is crucial in creating custom molds, as it allows for intricate designs and shapes without the risk of damaging the mold or the finished product.
Pouring the Concrete Into the Mold
Our first step in pouring the concrete into the mold is to mix the concrete according to the instructions on the packaging. Once the concrete is mixed and ready to go, we can begin pouring it into the mold.
Here are some helpful tips for this process:
- Slow and steady: Pour the concrete slowly and steadily into the mold to avoid any spills or uneven distribution.
- Tap the mold: Gently tap the sides of the mold with a rubber mallet to remove air bubbles and ensure the concrete settles evenly.
- Smooth the surface: Use a trowel or the back of a spoon to smooth the surface of the concrete and create a flat, even finish.
- Remove excess concrete: If there’s any excess concrete, use a putty knife or a scraper to carefully remove it from the mold.
- Troubleshoot pouring issues: If you encounter any issues during the pouring process, such as air pockets or uneven pouring, try tapping the mold gently or adjusting the pouring speed.
Now that we’ve poured the concrete into the mold, let’s move on to the next step of removing air bubbles from the concrete.

Removing Air Bubbles From the Concrete
Now let’s tackle the important task of removing air bubbles from the concrete to ensure a smooth and flawless finish for our candle holders.
There are a few key points to keep in mind to prevent air bubbles from forming in the first place. One method is to use a vibrating tool while pouring the concrete. This helps to dislodge any trapped air and allows it to escape before the concrete sets. Another method is to tap the mold gently to release any trapped air. By doing this, we can minimize the formation of air bubbles during the pouring process.
However, if some bubbles do appear, there are effective ways to remove them. One method is to lightly tap the sides of the mold with a rubber mallet. This helps to dislodge the bubbles and encourages them to rise to the surface. Another method is to vibrate the mold. By applying vibration, we can create movement in the concrete and encourage the bubbles to rise and pop.
Preventing Concrete Air Bubbles
To prevent concrete air bubbles, we use a vibrating tool during the pouring process. The vibrations help to remove trapped air, ensuring a smoother and more solid final product.

Here are some additional tips to prevent air bubbles in your concrete candle holders:
- Use a high-quality concrete mix: Opt for a mix specifically designed for casting to minimize the risk of air entrapment.
- Properly measure and mix ingredients: Follow the instructions carefully and ensure thorough mixing to achieve a consistent and bubble-free mixture.
- Tap the mold: Gently tap the sides of the mold after pouring to help release any trapped air bubbles.
- Avoid overfilling the mold: Leave some space at the top to allow for expansion and prevent air from getting trapped.
- Work in a dust-free environment: Dust particles can contribute to the formation of air bubbles, so keep your workspace clean.
Effective Bubble Removal
During the pouring process, we can effectively remove air bubbles from the concrete by using a vibrating tool. This technique helps to ensure that our concrete candle holders are free from unsightly air pockets and have a smooth, professional finish.
To prevent bubble formation, it’s important to mix the concrete thoroughly and slowly pour it into the mold, allowing the mixture to settle and any trapped air to escape. However, if you encounter bubble issues, using a vibrating tool can help.
Simply place the tool on the surface of the concrete and move it around in a circular motion to encourage the bubbles to rise and escape. Be sure to keep the tool moving slowly to avoid creating new bubbles.

Allowing the Concrete to Cure
We will let the concrete cure before moving on to the next step in making our concrete candle holders. Allowing the concrete to cure properly is crucial for achieving strong and durable candle holders.
Here are some tips to ensure a successful curing process:
- Keep the concrete in a moist environment to prevent it from drying too quickly.
- Avoid moving or disturbing the concrete during the curing process to prevent cracks or uneven drying.
- Use a curing compound or plastic sheeting to cover the concrete and retain moisture.
- Maintain a consistent temperature and humidity level to promote optimal curing conditions.
- If you encounter any issues during the curing process, such as surface cracks or discoloration, consult a professional for troubleshooting advice.
Removing the Candle Holder From the Mold
Now let’s talk about the different techniques for removing the candle holder from the mold.
We’ll explore methods that will help prevent any breakage or damage to the mold, ensuring a successful removal.

Additionally, we’ll discuss alternative materials that can be used for molds, providing options for those who may not have access to traditional molds.
Mold Removal Techniques
To extract the concrete candle holder from the mold, we employ a demolding technique. This process ensures that the candle holder comes out smoothly and without any damage. Here are some mold removal techniques that we recommend:
- Gently tap the sides of the mold to loosen the concrete.
- Use a rubber mallet to carefully release any stubborn spots.
- Slowly and steadily lift the mold from the bottom, supporting the candle holder as you go.
- If needed, apply a small amount of lubricant, such as cooking spray, to ease the removal process.
- Once the candle holder is out, clean the mold thoroughly to prevent any residue buildup for future use.
By following these mold removal techniques, you can ensure that your concrete candle holder remains intact and ready for use.
Now, let’s move on to preventing mold breakage.

Preventing Mold Breakage
To prevent mold breakage when removing the candle holder from the mold, carefully lift the mold from the bottom while ensuring the candle holder is supported. This step is crucial in preventing moisture damage and avoiding cracks and chips in the final product.
When removing the mold, take your time and be gentle. Start by turning the mold upside down and placing it on a soft, clean surface. Slowly lift the mold from the bottom, supporting the candle holder with your other hand. Avoid applying any pressure or force that could cause the mold to break.
By supporting the candle holder while removing the mold, you minimize the risk of cracks or chips forming. These imperfections can occur if the candle holder is left unsupported and subjected to unnecessary stress during the removal process.
Alternative Mold Materials
When removing the candle holder from the mold, we can explore alternative mold materials to ensure a smooth and successful process. Here are some alternative mold materials you can consider, along with their benefits and drawbacks:

- Silicone molds: These molds are flexible, making it easier to remove the candle holder without damaging it. However, they can be expensive and may not withstand high temperatures.
- Plastic containers: Using plastic containers as molds is cost-effective and readily available. However, they may not provide as smooth of a finish as other materials and can be prone to cracking or warping.
- Cardboard tubes: These are great for creating cylindrical candle holders. They’re inexpensive and easy to work with. However, they may not be as durable as other materials and can absorb moisture.
- Glass containers: Glass containers can create unique and decorative candle holders. They provide a smooth finish and can withstand high temperatures. However, they can be fragile and may require extra care when removing the candle holder.
- Metal molds: Metal molds are durable and can withstand high temperatures. They provide a smooth finish and are reusable. However, they can be more expensive and may require a release agent to prevent sticking.
Exploring these alternative mold materials will help you find the best option for your concrete candle holder project.
Sanding and Smoothing the Surface
We gently sand and smooth the surface of our concrete candle holders, using a fine-grit sandpaper to achieve a polished finish. This step is crucial in giving our candle holders a professional and elegant look. By employing proper sanding techniques, we can remove any imperfections or rough edges, ensuring a smooth and flawless surface.
To assist you in this process, we have provided a table below that outlines the recommended sanding techniques for different stages of finishing. By following these guidelines, you can achieve the desired result and add the perfect finishing touches to your concrete candle holders.
| Sanding Stage | Sandpaper Grit | Technique |
|---|---|---|
| Initial Sanding | 80 or 100 | Use circular motions |
| Smoothing Surface | 200 | Sand in straight lines |
| Polishing | 400 | Apply light pressure |
| Final Touches | 600 | Use a damp cloth |
Remember to clean the candle holders thoroughly after sanding to remove any dust or debris. Your concrete candle holders will now be ready for the next step in the process.

Adding a Personal Touch With Paint or Decorative Accents
After sanding and smoothing the surface, we can now add a personal touch to our concrete candle holders with paint or decorative accents. Here are some painting techniques and embellishments using beads that will make your candle holders truly unique:
- Stencil painting: Use stencils to create intricate patterns on the surface of the candle holders. Apply acrylic paint with a sponge or brush for a clean and crisp design.
- Dip painting: Dip the bottom of the candle holder into a bowl of paint to create a beautiful ombre effect. Experiment with different colors to match your home decor.
- Decoupage: Cut out decorative paper or fabric and adhere it to the surface of the candle holder using decoupage glue. This adds texture and visual interest.
- Bead embellishments: Glue beads of various sizes and colors onto the candle holder to create a stunning mosaic effect. Mix and match different beads for a one-of-a-kind design.
- Metallic accents: Use metallic paint or leaf to add a touch of elegance. Apply it to the rim or base of the candle holder for a sophisticated look.
Sealing the Concrete Candle Holder
To seal the concrete candle holder, we’ll apply a protective coat of sealant. Sealing the holder is essential to prevent water damage, staining, and to enhance its durability.
There are different sealing techniques you can use, depending on the type of sealant you choose. One common method is to brush on the sealant using a foam brush, ensuring an even and thorough coverage. Make sure to follow the manufacturer’s instructions regarding drying time and the number of coats needed.
If you encounter any issues during the sealing process, here are a few troubleshooting tips. If the sealant appears streaky or uneven, try applying a second coat. If the sealant bubbles or forms air pockets, gently use a foam brush to smooth them out.
Take your time and be patient with the sealing process to achieve a beautifully finished concrete candle holder.
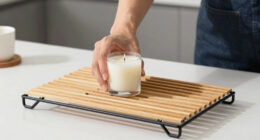
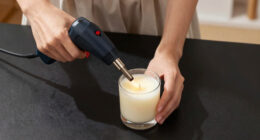
Inserting the Candle Into the Holder
Once the concrete candle holder has been sealed, it’s time to insert the candle into the holder. Here are a few tips to help you prevent wax spills and choose the right candle size:
- Measure the candle: Before inserting the candle, measure its diameter and height to ensure it fits properly inside the holder. This will prevent any wax overflow.
- Trim the wick: Trim the candle’s wick to about ¼ inch before inserting it into the holder. This will help prevent the flame from getting too high and causing wax spills.
- Center the candle: Place the candle in the center of the holder to ensure it burns evenly.
- Secure the candle: Gently press the candle into the holder, making sure it sits snugly. This will prevent it from tipping over or moving while burning.
- Test stability: Give the candle a gentle shake to test its stability. If it wobbles, readjust it until it sits securely.
Styling and Incorporating Your New Candle Holders Into Your Home Decor
Our favorite way to style and incorporate our new candle holders into our home decor is by placing them on our mantel. This not only creates a focal point in the room but also allows the soft glow of the candles to illuminate the space, creating a cozy atmosphere.
To enhance the visual appeal, we like to arrange the candle holders in varying heights and sizes, creating a dynamic and visually interesting display. Additionally, we like to pair the candle holders with other decorative elements such as vases, picture frames, or small plants to add texture and depth to the mantel.

Frequently Asked Questions
How Long Does It Take for the Concrete to Cure Completely?
Factors affecting the curing time of concrete include temperature, humidity, and the mix design. To speed up the process, ensure adequate moisture, maintain a warm environment, and use accelerators.
Can I Use Any Type of Paint to Decorate the Candle Holder?
Yes, you can use various types of paint to decorate concrete candle holders. Some popular options include acrylic paint, spray paint, and even chalk paint. Just make sure to seal the paint for long-lasting results.
What Should I Do if I Accidentally Pour Too Much Concrete Into the Mold?
If we accidentally pour too much concrete into the mold, we can fix the mistake by carefully removing the excess concrete before it dries. Alternatively, we can repurpose the excess concrete for other projects.
Can I Use the Candle Holder Outdoors?
Yes, you can use the candle holder outdoors. Concrete is weather resistant and can withstand various conditions. However, if you’re concerned about durability, you can explore alternative materials like resin or metal.

How Do I Clean the Concrete Candle Holder?
To clean the concrete candle holder, we recommend using gentle cleaning methods and the best cleaning products. Regularly dust the holder and wipe it with a soft cloth. For tougher stains, use a mild soap and water solution.
Conclusion
In conclusion, making concrete candle holders is a simple and creative way to add a personal touch to your home decor.
By following the steps outlined in this article, you can create unique and stylish candle holders that will enhance the ambiance of any room.
Whether you choose to paint them or leave them natural, these candle holders are sure to make a statement.

So why not give it a try and enjoy the beauty and tranquility these handmade creations bring to your space?