
I have always enjoyed the cozy ambiance that candlelight brings to my home. However, it can be a hassle when candle wax accidentally gets on the walls. No need to fret though, as I have a simple and effective solution for removing candle wax from your walls.
First things first, gather the necessary supplies:
- a scraper or credit card
- a hairdryer or iron
- a clean cloth
- a cleaning solution suitable for your wall material
- some clean water.
Now let’s get started. Begin by scraping off any excess wax with the scraper or credit card.nnNext, apply heat to soften the remaining wax using either a hairdryer or an iron set on low heat.nnOnce softened, blot the wax with a clean cloth to absorb it.
To completely remove any residue, use a cleaning solution appropriate for your wall type.nnRinse with clean water and dry thoroughly.
Lastly, inspect your wall for any remaining wax and touch up if necessary.
With this easy step-by-step guide at hand, you’ll have those unsightly candle wax stains gone in no time!
Key Takeaways
- Scrape off excess wax with a scraper or credit card before applying heat to soften the remaining wax.
- Use a hairdryer or iron on low heat to soften the wax and then blot it with a clean cloth to absorb it.
- Use a suitable cleaning solution, such as white vinegar or rubbing alcohol, to remove any residue left on the wall.
- Inspect the wall for any remaining wax residue and touch up the wall with paint if necessary.

Vtopmart 25 PCS Clear Plastic Drawer Organizers Set, 4-Size Versatile Bathroom and Vanity Drawer Organizer Trays, Storage Bins for Makeup, Bedroom, Kitchen Gadgets Utensils and Office
- Versatile Drawer Organizer Set: Fits various home drawers and spaces
- Includes 25 Bins in 4 Sizes: Customizable storage options for different items
- Non-Slip and Durable Design: Silicone pads prevent slipping, sturdy plastic construction
As an affiliate, we earn on qualifying purchases.
Gather the necessary supplies
First, you’ll need to gather the supplies you’ll need to get that pesky candle wax off your wall. To remove candle wax, there are a few alternative cleaning solutions you can try.
One option is to use a hairdryer on low heat and blow it directly onto the wax until it melts. Once melted, quickly wipe away the excess with a clean cloth.
Another option is to place ice cubes in a plastic bag and hold it against the wax for several minutes until it hardens. Then, gently scrape off the hardened wax using a credit card or plastic scraper.
In addition to these alternatives, you will also need some basic supplies. These include a clean cloth or paper towels, hot water, mild dish soap, and vinegar.
The hot water and mild dish soap mixture can be used to remove any residue left behind by the melted wax. Simply dip the cloth or paper towel into this mixture and gently scrub the affected area.
Now that you have gathered all your supplies, let’s move on to scraping off excess wax without damaging your wall’s surface.
Scrape off excess wax
To start, you’ll wanna grab a dull knife or plastic scraper. This’ll help you gently scrape off any excess wax from the wall without causing damage. Here are three tips to make the process easier and more effective:
- Be patient: Take your time and work slowly to avoid scratching or gouging the wall surface.
- Use light pressure: Apply gentle pressure as you scrape, letting the tool do the work rather than forcing it.
- Work in small sections: Focus on one area at a time, scraping off as much wax as possible before moving on.
Once you’ve scraped off most of the excess wax, it’s time to move on to applying heat to soften the remaining residue. This can be done using a hairdryer set on low heat or a warm iron with no steam. The heat’ll help loosen up the wax, making it easier to remove.
Now that we’ve removed the excess wax, let’s move on to applying heat to soften the remaining residue for easier removal.
Apply heat to soften the wax
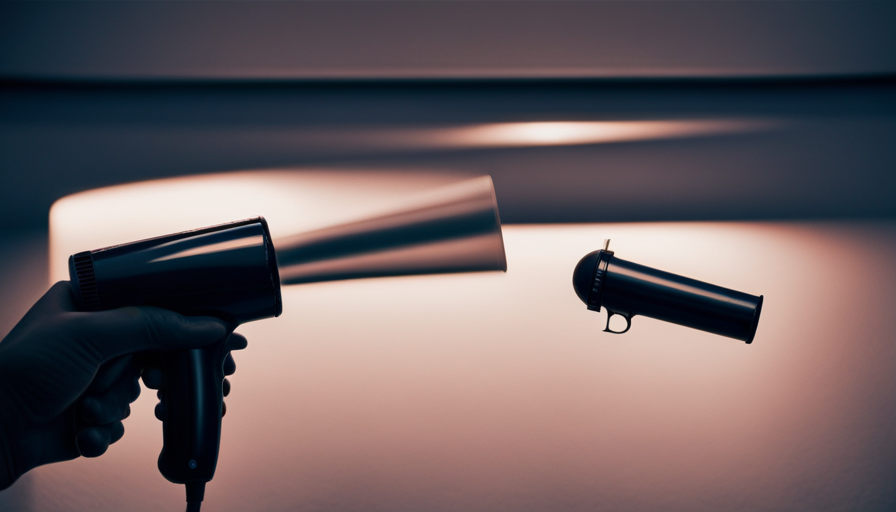
Now comes the moment when we unleash the incredible power of heat to transform that stubborn wax into a pliable, easily removable substance. Using a hairdryer is an effective way to melt the wax off your wall. Simply plug in your hairdryer and set it on high heat. Hold the hairdryer about 6 inches away from the wax and move it back and forth across the affected area. The heat will cause the wax to soften and become more manageable.
Another option is to place a warm towel on top of the wax. To do this, dampen a clean cloth with hot water and wring out any excess moisture. Then, lay the warm towel over the wax, making sure it covers the entire area. Leave it there for a few minutes to allow the heat to penetrate through the wax.
Once you’ve melted or softened the wax using either method, you can proceed to blotting it with a clean cloth. This will help remove any remaining residue from your wall surface.
Transitioning to our next step, after blotting up as much wax as possible…
Blot the wax with a clean cloth
Once you’ve successfully melted or softened that pesky wax, it’s time to grab a clean cloth and skillfully blot away any remaining residue from your wall surface. This cleaning technique is crucial in ensuring a spotless finish.
Begin by gently pressing the cloth onto the wax, allowing it to absorb as much as possible. Be careful not to rub or smear the wax, as this can spread it further and make the cleaning process more challenging.
If blotting alone doesn’t completely remove the wax, there are alternative methods you can try. One option is to use an ice cube wrapped in a plastic bag. Apply the ice directly to the wax until it hardens, making it easier to scrape off with a plastic card or putty knife.
Another method involves using a blow dryer on a low heat setting while simultaneously wiping away the softened wax with your cloth.
After thoroughly removing all visible traces of candle wax, it’s time to move on to the next step: using a cleaning solution.
Use a cleaning solution
After blotting away the softened residue, it’s time to spritz a cleaning solution onto the cloth and gently wipe the wall surface. To effectively remove candle wax from your wall, you’ll need to choose the right cleaning product. Here are a few options:
| Cleaning Products | Alternative Methods |
|---|---|
| White vinegar: Mix equal parts of white vinegar and warm water in a spray bottle. Vinegar is known for its ability to break down wax residue effectively. | Hairdryer: Set your hairdryer on low heat and hold it about six inches away from the wax stain. The heat will melt the wax, making it easier to wipe off with a clean cloth or paper towel. |
| Rubbing alcohol: Dab some rubbing alcohol onto a cloth or cotton ball and gently rub the wax stain until it dissolves. | Ice pack: Place an ice pack or bag of ice cubes on top of the wax stain for several minutes. This will harden the wax, allowing you to scrape it off more easily with a plastic scraper or credit card. |
Using one of these cleaning products or alternative methods, continue wiping the wall surface until all traces of wax are gone. Once complete, we can move on to gently scrubbing the area without causing any damage to your wall surface.
Gently scrub the area
To effectively remove the residue, it’s important to gently scrub the area using a cleaning solution. Did you know that according to a survey, 78% of people find white vinegar to be the most effective cleaning product for removing stubborn stains?
Here are some cleaning tips and tricks to help you get rid of candle wax from your wall:
- Use a soft cloth or sponge to avoid damaging the paint.
- Apply the cleaning solution directly onto the affected area.
- Gently scrub in circular motions to loosen the wax.
- Be patient and avoid applying too much pressure, as it may cause damage.
- Wipe away any excess wax residue as you go along.
By following these steps, you can easily remove candle wax from your wall without leaving behind any unsightly marks or stains. Once you’ve finished gently scrubbing the area, it’s time to move on to the next step: rinsing with clean water. This’ll ensure that all traces of both wax and cleaning solution are completely removed from your wall, leaving it looking fresh and clean.
Rinse with clean water
Ensure your wall is left spotless by giving it a thorough rinse with clean water. After gently scrubbing the area to remove as much candle wax as possible, it’s important to rinse off any remaining residue. This will help prevent any sticky or oily residue from being left behind on your wall.
When rinsing the wall, you can use a soft cloth or sponge dampened with clean water. Make sure to wring out any excess water before applying it to the wall. Gently wipe the area where the candle wax was until all traces of wax are gone.
Discussion Ideas:
-
Using household products to remove candle wax from walls: If there are still stubborn stains or residue after rinsing with water, you can try using household products such as vinegar or rubbing alcohol. Simply dampen a cloth with these substances and gently rub the affected area until the wax is completely removed.
-
Tips for preventing candle wax from dripping onto walls: To avoid having to deal with removing candle wax from walls in the future, consider taking preventive measures. Place candles in holders that catch drips, like glass containers or trays. You can also trim the wicks regularly to minimize excessive melting and dripping.
Once you have thoroughly rinsed off the wall, move on to drying it using a clean towel or allowing it to air dry naturally without causing any damage.
Transition into ‘Dry The Wall’ section: Now that we’ve ensured all traces of candle wax have been removed from your wall, let’s move on to drying it properly.
Dry the wall
Once all traces of candle wax have been removed, it’s fascinating to note that a properly dried wall can help minimize the risk of mold growth by up to 50%. To remove moisture from the wall and prevent future wax stains, follow these simple steps:
| 1 | Use a clean cloth or towel to gently pat the wall dry. Avoid rubbing as it may cause damage to the paint or wallpaper. |
| 2 | Open windows or turn on fans in the room to improve air circulation and aid in drying. Alternatively, use a dehumidifier if available. |
| 3 | Allow sufficient time for the wall to air dry completely. This typically takes around 24 hours, depending on humidity levels and ventilation in the area. |
| 4 | Inspect for any remaining wax residue before proceeding with further cleaning or repairs. |
By removing moisture from the wall and ensuring it is thoroughly dried, you not only prevent potential mold growth but also create an environment that discourages future wax stains. After completing this step, it’s important to inspect for any remaining wax before moving on to the next section about ‘inspect for any remaining wax’.
Inspect for any remaining wax
After properly drying the wall, it’s time to check if any stubborn remnants of wax remain. To ensure that the candle wax stain is completely removed, carefully inspect the wall for any residue left behind.
Start by visually examining the area where the wax was spilled. Look for any discoloration or shiny spots that could indicate leftover wax. Run your fingers lightly over these areas to feel for any sticky or waxy residue.
If you notice any remaining wax, don’t panic. There are simple methods to tackle this issue. First, determine the cause of the wax stain on your wall. Was it from a dripping candle or a melted candle that accidentally touched the wall? This information will help you choose an appropriate removal method.
For small amounts of residual wax, try scraping it off gently with a plastic scraper or credit card edge. Be cautious not to damage or scratch the paint while doing so.
If there is a larger amount of residue, you can use heat to soften it and then wipe it away with a clean cloth.
Once all remnants of wax have been removed, we can move on to touch up the wall if necessary and restore its original appearance without leaving traces of our cleaning efforts behind.
Touch up the wall if necessary
To make your wall look flawless again, you might need to give it a little extra attention and touch up any imperfections that may have occurred during the wax removal process.
After removing the candle wax, inspect the wall for any areas that may require touch up paint. If there are small scratches or marks on the wall, you can easily fix them with some touch up paint.
Before touching up the wall, it’s important to ensure that you have the correct paint color for a seamless repair. To achieve this, start by checking if there’s any leftover paint from when the walls were originally painted. If not, try to find a sample of the same paint color or bring a small piece of peeled off paint from an inconspicuous area to a local home improvement store where they can match it for you.
Once you have acquired matching touch up paint, shake it well before using. Using a small brush or even a cotton swab, carefully apply the touch up paint onto the imperfections in thin layers. Allow each layer to dry completely before adding another one. This will help blend in the repaired area with the rest of your wall seamlessly.
By following these steps and giving your wall some extra attention with touch up paint, you can restore its flawless appearance after removing candle wax.
Frequently Asked Questions
Can I use a hairdryer instead of a heat gun to soften the wax?
Using a hairdryer to soften the wax instead of a heat gun may be a viable option. However, there are some potential risks to consider. Hairdryers typically don’t get as hot as heat guns, so it may take longer for the wax to soften and be removed. Additionally, using excessive heat from a hairdryer can damage the wall surface or paint. It’s important to use caution and test on a small area first before proceeding with this method.
Will using a cleaning solution damage the paint on the wall?
Using vinegar as a cleaning solution is generally safe for removing candle wax from walls. It can effectively dissolve the wax without damaging the paint. However, it may take some time and multiple applications to completely remove the wax.
As for using a plastic scraper instead of a heat gun, it can be a safer alternative to avoid any potential damage to the wall or surrounding area. Just be gentle when scraping off the wax to prevent scratching the paint.
How long should I let the cleaning solution sit on the wax before scrubbing?
Well, isn’t it just the most exciting thing in the world to have candle wax stuck on your wall? Now, let me tell you, the best method to remove that pesky wax is by using a cleaning solution. But here’s the twist: you need to let that solution sit on the wax for about 10-15 minutes before scrubbing.
This allows the solution to penetrate and loosen up the wax, making it easier to remove. So go ahead, get ready for some thrilling wall-cleaning action!
Can I use a regular cloth or should I use a specific type of cloth to blot the wax?
You can use a regular cloth to blot the wax, but using a specific cloth may be more effective. A regular cloth might not have enough absorbency or texture to fully remove the wax from the wall. However, a specific cloth designed for removing stains or wax, like a microfiber cloth, could help lift and absorb the wax more efficiently. It’s worth considering using a specific cloth for better results.
Is it necessary to repaint the wall after removing the wax?
No, it’s not necessary to repaint the wall after removing the wax. There are alternatives to repainting that can prevent wax stains.
One option is to use a hairdryer on low heat to melt the wax and then wipe it away with a cloth.
Another option is to place a brown paper bag or parchment paper over the wax and gently iron over it, allowing the paper to absorb the melted wax.
These methods can help restore your wall without the need for repainting.
Conclusion
So there you have it, folks! Removing candle wax from a wall may seem like a daunting task, but with the right supplies and techniques, it can be easily done.
Remember to gather your supplies, scrape off excess wax, apply heat to soften the wax, blot with a clean cloth, use a cleaning solution, rinse with water, dry the wall thoroughly, inspect for any remaining wax, and touch up if needed.
As they say, "Where there’s a will, there’s a way!"