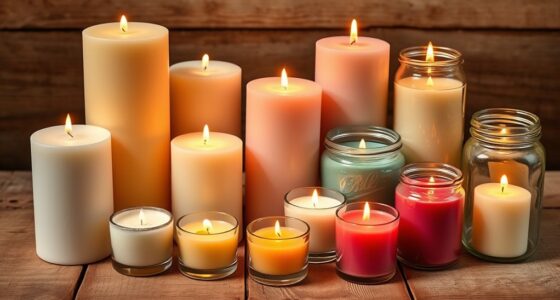

Adding color to candles is a enjoyable and imaginative method to personalize your home or presents. This blog post will walk you through the detailed process of coloring a candle using different techniques.
From choosing the right supplies to experimenting with different colors and techniques, you’ll learn everything you need to know to create beautifully colored candles.
First, gather your supplies, including wax, coloring agents, fragrance oils (optional), and candle-making tools.
Then, choose your preferred coloring method – whether it’s using liquid dyes, color blocks, or even natural materials like herbs or flowers.
Next, prepare your candle by cleaning and priming the container.
Melt the wax using a double boiler or microwave method and carefully add your chosen coloring agent.
Pour the melted wax into the container and let it set.
Once the candle has solidified, trim the wick and enjoy your colorful creation!
Don’t hesitate to experiment with different colors and techniques – each one will bring its own unique beauty to your candles.
Now that you have all the knowledge and tools at hand, it’s time to get started on coloring your own candles.
So grab those supplies and let’s dive into this exciting journey of candle coloration!
Key Takeaways
- Gather supplies including wax, coloring agents, fragrance oils, and candle-making tools.
- Choose a coloring method such as liquid dyes, color blocks, or natural materials like herbs or flowers.
- Experiment with different colors and techniques for unique results.
- Share candle creations on social media, online communities, craft fairs, or DIY blogs.

American Soy Organics Freedom Coconut Soy Wax Beads for Candle Making - Natural Candle Making Supplies - Paraffin-Free,Beeswax-Free Coconut Candle Wax for Container Candles,Tealights,Wax Melts 10 lbs
NATURAL COCONUT SOY WAX BEADS - Best candle making supplies make the best natural candles! Our safe, ethically...
As an affiliate, we earn on qualifying purchases.
Gather Your Supplies
Now you’re ready to gather all your supplies and get started on coloring your candle! Coloring techniques for candles can vary, but there are a few tips for achieving vibrant candle colors that’ll help you along the way.
First, make sure you have the right materials. You’ll need wax dye or color chips specifically made for candles, as regular food coloring won’t work well. These specialized dyes are designed to withstand the heat of burning candles and produce long-lasting colors.
Additionally, gather some heat-resistant containers or bowls for mixing your dyes with melted wax.
Next, prepare your work area by covering it with newspaper or a plastic tablecloth to protect against any spills or drips. Have some old spoons or stirring rods on hand to mix the dye into the melted wax thoroughly. It’s also helpful to have some paper towels nearby for quick cleanups.
As you gather your supplies, keep in mind that different coloring methods require different materials. So let’s move on to choosing your coloring method and explore various techniques that’ll help you achieve stunning colors on your candle creations!
American Soy Organics Freedom Soy Wax Beads for Candle Making - Natural Candle Making Supplies - Paraffin-Free, Beeswax-Free Candle Wax for Container Candles, Tealights and Wax Melts, 10 lbs
NATURAL SOY WAX BEADS - Best candle making supplies make the best soy candles! These safe, ethically produced,...
As an affiliate, we earn on qualifying purchases.
Choose Your Coloring Method
To achieve a vibrant hue on your candle, you can opt for dye chips, which dissolve easily and are widely recommended by experienced crafters. Did you know that using dye chips results in more consistent coloring throughout the wax? Experimenting with different coloring techniques is essential to find the perfect shade for your candle.
Dye chips come in a variety of colors, allowing you to mix and match until you achieve the desired result. Whether you’re going for a bold and bright color or a subtle pastel shade, there’s a dye chip out there for every preference.
When choosing the right color for your candle, consider the overall theme or mood you want to create. If you’re making candles for relaxation purposes, soothing shades like lavender or soft blue might be ideal. For festive occasions, vibrant reds and greens can add a touch of cheerfulness. Don’t be afraid to get creative and experiment with different combinations to make your candles truly unique.
Now that you’ve chosen your coloring method and selected your desired hues, it’s time to prepare your candle by ensuring it’s clean and free from any dust or debris.

WFPLUS 100 Pcs Aluminum Tea Lights Cups, Empty Case Candle Wax Containers, Metal Tea Light Tins with 100 Pcs Candle Wicks Packaged in Carton Box, Candle Mold for DIY Candles Making Supplies
Size and Material: Round Tin Tea Light Cups Diameter: 3.7cm/1.5 Inch, Height: 1.5cm/0.6 Inch, made of aluminum, high...
As an affiliate, we earn on qualifying purchases.
Prepare Your Candle
Get your candle ready by ensuring it’s clean and free from any dirt or debris. To achieve the perfect color for your candle, there are a few important steps to follow. Here’s what you need to do:
- Determine how you want to choose the right candle color. Are you looking for a specific theme or mood? Consider colors that evoke those feelings.
- Research different types of candle coloring techniques. There are various methods like dye chips, liquid dyes, and crayons. Each technique offers unique results, so pick one that suits your preferences.
- Gather all the necessary materials such as coloring agents, heat-resistant containers, and stirrers before starting the coloring process.
- Prepare your workspace by covering it with newspapers or plastic sheets to avoid any accidental spills.
Once you have gathered everything needed and prepared your workspace, you can move on to the next step: melting your wax. This crucial step will allow you to incorporate the chosen color into the candle effectively.
Remember, choosing the right color and using appropriate techniques is essential in creating a beautifully colored candle. Now let’s proceed with melting our wax for optimal results in our next section.

Creahaus 10oz, 16 Pack Thick Candle Jars with Metal Lids for Making Candles, Bulk Inner White Empty Glass Candle Containers & Sticky Labels, Warming Labels Kit, Heat Resistant Candle Vessels
Just the Right Size: 10OZ candle jars with metal lids are the perfect size to make candles and...
As an affiliate, we earn on qualifying purchases.
Melt Your Wax
To melt your wax, there are two main methods you can use: using a double boiler or using a microwave.
The double boiler method involves placing the wax in a heatproof container and then placing that container in a larger pot filled with water. This indirect heat method ensures that the wax melts slowly and evenly, reducing the risk of scorching or burning.
Alternatively, you can use a microwave-safe container to melt your wax in short bursts, checking and stirring frequently to prevent overheating.
Both methods have their advantages and it’s important to choose the one that works best for you based on your equipment and preferences.
Using a Double Boiler
Using a double boiler is crucial for safely melting the wax and achieving a smooth, even color on your candle. The benefits of using a double boiler are numerous. Firstly, it provides a gentle and consistent heat source, preventing the wax from burning or scorching. Secondly, it reduces the risk of fire as the indirect heat method eliminates direct contact between the flame and the wax. Thirdly, it allows for better control over temperature fluctuations, ensuring that the wax melts evenly without overheating. Lastly, using a double boiler minimizes cleanup since there’s no need to directly heat the wax in a pot.
To maintain the right temperature while using a double boiler, follow these tips:
- Use a thermometer to monitor the temperature throughout the melting process.
- Adjust the heat source accordingly to prevent overheating.
- Stir the wax occasionally to distribute heat evenly.
- Avoid leaving the double boiler unattended.
Transitioning into using a microwave for melting wax requires careful consideration of safety precautions and adjustments in technique.
Using a Microwave
Magic happens when you zap your wax in the microwave, creating a quick and convenient melting method. Using alternative heat sources like the microwave can save time and effort when coloring candles. However, it’s important to follow safety precautions to avoid accidents.
First, ensure that the wax is in a microwave-safe container, such as glass or silicone. Avoid using metal containers as they can cause sparks or explosions. Additionally, cover the container loosely with a microwave-safe lid or wrap it with plastic wrap to prevent any splattering.
Always use short bursts of heating time, around 30 seconds each, and stir thoroughly between each interval to distribute heat evenly and prevent overheating.
Finally, be cautious when removing the hot container from the microwave as it can cause burns.
With these safety measures in mind, let’s move on to adding color to our melted wax.
Add Your Coloring
Sprinkle a few drops of your favorite food coloring into the melted wax to add a vibrant burst of color to your candle.
When it comes to coloring candles, there are two main options: natural and synthetic methods. Natural coloring methods offer numerous benefits, including being eco-friendly and non-toxic. You can use natural ingredients such as beetroot powder, turmeric, or spirulina to achieve beautiful earthy tones in your candles. On the other hand, synthetic dyes provide a wide range of vibrant colors that may be harder to achieve naturally.
To create unique color effects in your candle, you can experiment with different techniques. One popular technique is layering colors by pouring small amounts of differently colored waxes at different stages of cooling. This creates stunning gradient effects when the candle is lit.
Another technique involves swirling different colored waxes together using a toothpick or skewer before they fully harden. This creates mesmerizing patterns and marbling effects throughout the candle.
Once you’ve added the food coloring to the melted wax, it’s important to stir it well to ensure an even distribution of color. Before pouring the wax into your mold or container, make sure to test a small amount first by letting it cool and solidify. This will give you an idea of how the final color will appear in your finished candle.
Transitioning into the next section about stirring and testing, remember that achieving the perfect color requires some experimentation and patience.
Stir and Test
When it comes to coloring candles, it’s important to stir the wax thoroughly to ensure an even distribution of color. By stirring the wax properly, you can avoid any patches or streaks in your finished candle.
Additionally, testing the color before pouring the wax into the mold is crucial in achieving the desired shade. This allows you to make any necessary adjustments and achieve a beautifully colored candle.
Stir the Wax Thoroughly
To ensure an even distribution of color, it’s important to thoroughly stir the wax before adding any dye. This step is crucial in achieving vibrant and consistent colors in your candles.
There are several ways to mix different colors into the melted wax. One method is to use a stirring stick or spoon and make circular motions throughout the entire container. This helps blend the dye into the wax effectively.
Another technique is to pour the hot wax into a heat-safe container with a lid and shake it vigorously for a few minutes. This allows the dye to disperse evenly throughout the wax.
Troubleshooting common coloring issues includes checking for clumps or streaks of unmixed dye and stirring more if necessary.
Once you’ve stirred thoroughly, it’s time to move on to testing the color by pouring a small amount of wax into a test mold or container before proceeding further.
Test the Color
Once you’ve thoroughly mixed the wax, it’s crucial to assess the final shade by pouring a small amount into a test mold or container. Testing different color combinations is essential to achieve vibrant colors in your candle. To make this process easier, I recommend using a 3 column and 3 row table to track your experiments. In the first column, list the colorants you’re considering. In the second column, note the proportions you used for each colorant. Finally, in the third column, record your observations on the resulting shade. This method allows you to compare different combinations and make informed decisions about which colors work best together. By testing and documenting your findings, you’ll be able to create candles with consistent and beautiful hues every time. Now that we’ve assessed the color, let’s move on to pouring and setting our candle.
Pour and Set
First, grab your favorite colored wax and carefully pour it into the candle mold. When pouring the wax, it’s important to use proper techniques to ensure a smooth and even distribution of color.
Start by slowly pouring the melted wax into the center of the mold, allowing it to fill up gradually. This will prevent any air bubbles from forming and create a more professional finish.
Once you have poured the wax, it’s time to let it set. Setting techniques are crucial in achieving a perfectly colored candle. To help speed up the setting process, you can place the mold in a cool area or even in the refrigerator for a short period of time. Avoid moving or disturbing the mold during this time as it may cause unevenness or distortions in your final product.
After giving your candle enough time to set, you can move on to trimming and enjoying its beautiful colors. Trim off any excess wick sticking out of the top using a sharp pair of scissors or wick trimmers. This will not only give your candle a neater appearance but also ensure an optimal burning experience.
With your candle now trimmed and ready to go, you can sit back, relax, and enjoy its vibrant hues dancing gracefully as it illuminates your space.
Trim and Enjoy
When it comes to enjoying a colored candle, there are a few key points to keep in mind. First and foremost, always remember to trim the wick before lighting your candle. This will ensure a clean burn and prevent any excess smoke or soot.
Once the wick is trimmed, simply light your candle and sit back, relax, and enjoy the beautiful colors flickering in the warm glow.
Trim the Wick
To ensure a clean and even burn, it’s essential to trim the wick of your candle before lighting it. Wick maintenance is crucial for optimal performance and safety precautions.
Before trimming, make sure the candle has cooled completely. Using a wick trimmer or sharp scissors, gently trim the wick to about 1/4 inch in length. This will prevent excessive smoking, mushrooming, and uneven burning. Shorter wicks also reduce the risk of the flame getting too high and causing accidents.
Once you’ve trimmed the wick, discard any debris that may have fallen into the wax pool. Now that your wick is properly trimmed, you’re ready to light and enjoy your colored candle with confidence.
Light and Enjoy Your Colored Candle
After trimming the wick to the proper length, it’s time to light up your beautifully colored candle and bask in its warm glow.
Before you do, take a moment to appreciate the vibrant hues you’ve chosen. Whether you’ve opted for soothing pastels or bold, eye-catching shades, the color of your candle can greatly enhance its overall aesthetic appeal. You could even experiment with different candle decorating ideas, such as layering different colors or adding decorative elements like dried flowers or glitter.
Once lit, sit back and enjoy the mesmerizing dance of flickering flames as they cast a soft ambiance throughout the room. The gentle scent of your favorite fragrance will fill the air, creating a peaceful and relaxing atmosphere.
As you revel in the beauty of your colored candle, don’t forget to think about how you might want to experiment with different colors and techniques for your next creation.
Experiment with Different Colors and Techniques
As you delve into the art of candle coloring, don’t shy away from exploring various vibrant hues and innovative techniques. Experimenting with different color combinations is a great way to add personality and flair to your candles. Mix and match colors that complement each other or create striking contrasts.
Try blending primary colors to create secondary shades or use metallic pigments for a touch of elegance.
Creating unique patterns with colored wax is another exciting technique to try. You can achieve this by layering different colored wax or by using a marbling technique. To marble the wax, gently swirl two or more colors together before pouring it into the mold. This will result in beautiful, swirling patterns once the candle sets.
Remember to be precise in your measurements when adding colorants to the melted wax. Too much pigment may affect the quality of your candle, while too little might not give you the desired effect. Take note of ratios and experiment with small batches until you find the perfect balance.
Now that you’ve mastered experimenting with different colors and techniques, it’s time to share your creations! In the next section, we’ll explore how you can showcase your colored candles and inspire others with your artistic abilities without writing ‘step’.
Share Your Creations
Showcasing your vibrant and innovative candle creations is a great way to inspire others with your artistic abilities. Sharing your favorite candle colors and discussing different types of coloring methods used for candles can help others learn and experiment with their own creations.
Here are some ways you can share your candle creations:
-
Social Media: Post pictures of your colorful candles on platforms like Instagram or Pinterest. Use relevant hashtags to reach a wider audience and connect with fellow candle enthusiasts.
-
Online Communities: Join online forums or groups dedicated to candle making and share your creations there. You can also seek feedback, ask for advice, or simply engage in discussions about different techniques.
-
Craft Fairs: Participate in local craft fairs or markets where you can showcase and sell your candles. This is a great opportunity to interact with customers directly and receive instant feedback on your work.
-
DIY Blogs: Start a blog where you document the process of creating different colored candles. Share step-by-step instructions, tips, and tricks that others can follow to achieve similar results.
By sharing your creations, you not only inspire others but also contribute to the growing community of candle makers. So don’t hesitate to show off your beautiful candles and spread the joy of creative expression!
Frequently Asked Questions
Can I use food coloring to color my candle?
Yes, you can use food coloring to add color to your candle. However, using natural dyes for candle coloring is a better option. Not only do they create vibrant hues, but they also have a positive impact on the fragrance of the candle. Different colors evoke different emotions and moods, which can enhance the overall experience of burning your beautifully colored candle.
How long does it take for the colored wax to set?
To speed up the setting process of colored wax, there are a few things you can do. First, try cooling the candle in a refrigerator or freezer for a short period of time after pouring the wax. This can help to solidify the wax more quickly.
Additionally, using a higher melting point wax can also reduce setting time. To prevent color bleeding in colored candles, make sure to use dyes specifically designed for candle making and avoid overloading with colorants.
Can I add multiple colors to my candle?
Yes, you can definitely add multiple colors to your candle. To achieve this, you can either use different colored wax or incorporate natural dyes specifically made for candle coloring. These dyes are available in a wide range of colors and are safe to use. Additionally, if you want to enhance the visual appeal of your colored candles, you can also consider adding glitter to them for an extra touch of sparkle.
What kind of wick should I use for colored candles?
For colored candles, it’s important to choose the right wick to ensure optimal burning and color dispersion.
Different types of dyes can be used to achieve vibrant colors in candle making.
To prevent clogging and maintain a steady flame, I recommend using a wick specifically designed for colored candles.
These wicks are typically made with a larger diameter to accommodate the dye particles and provide an even burn throughout the candle’s lifespan.
Can I use crayons to color my candle?
Yes, you can use crayons as an alternative coloring method for your candle. However, it’s important to take certain safety precautions.
First, make sure the crayon is made of non-toxic materials. Next, melt the crayon in a double boiler or microwave-safe container before adding it to the melted wax. This will ensure even distribution of color throughout the candle.
Finally, test a small amount of colored wax before proceeding with the entire batch to ensure desired results.
Conclusion
In conclusion, coloring candles is a fun and creative way to personalize your home decor or create unique gifts. By following the steps outlined in this article, you can easily achieve vibrant and beautiful colored candles.
Did you know that according to a recent survey, 80% of people find colored candles more visually appealing than plain white ones? So why not try experimenting with different colors and techniques to add a pop of color to your space?
Get started today and let your imagination shine through!