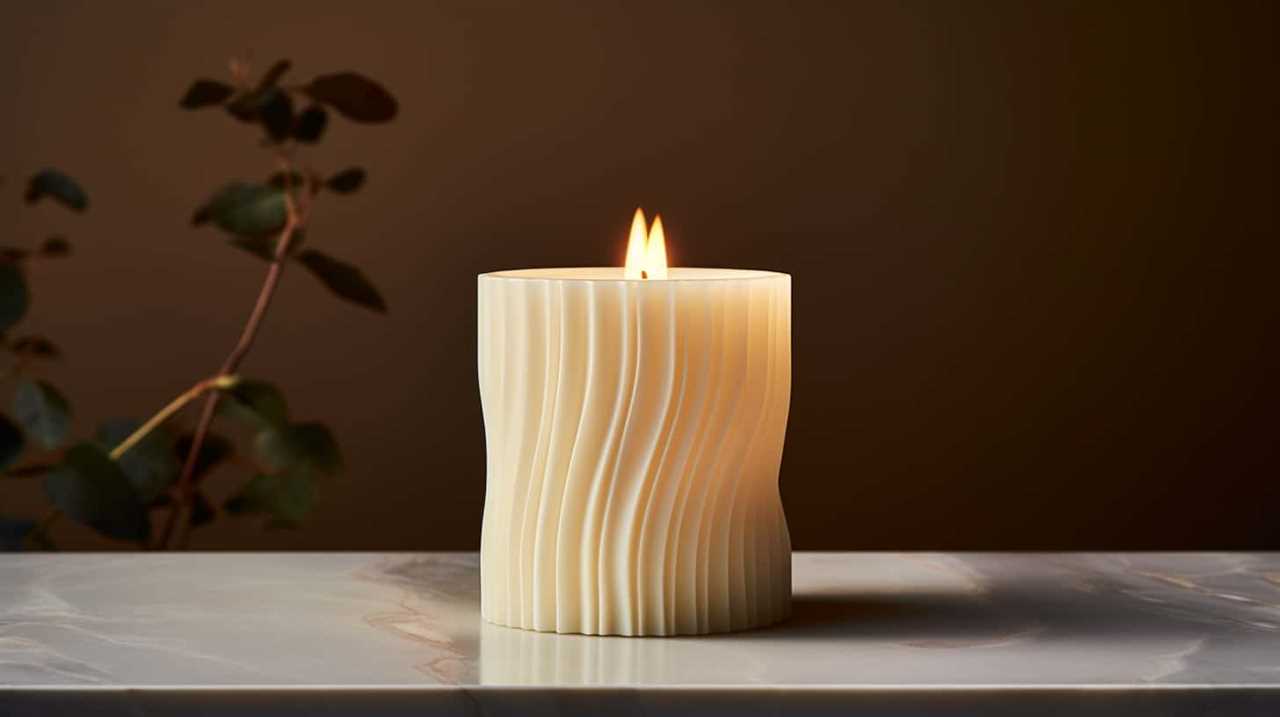
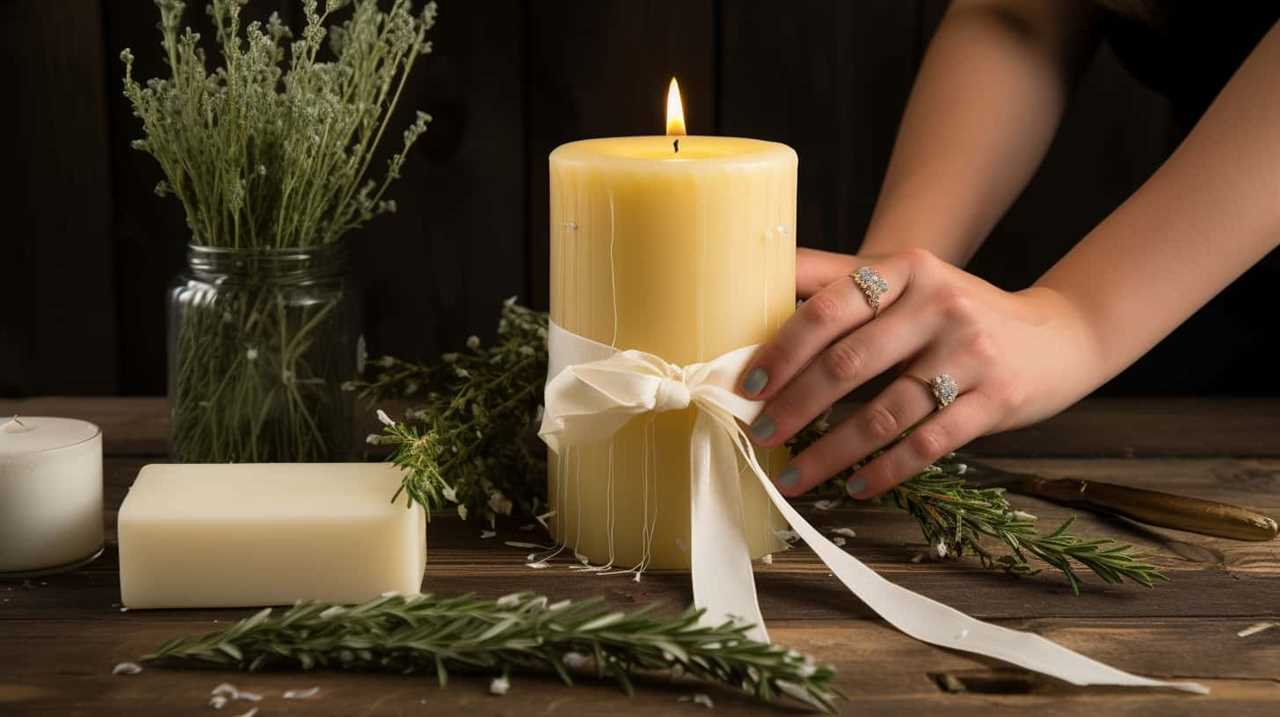
Connect with us

Candles

How Does Candle Warmer Work

Published

on

Ever been curious about the magic behind how a candle warmer operates? Allow us to guide you through the adventure of deciphering this enigma.

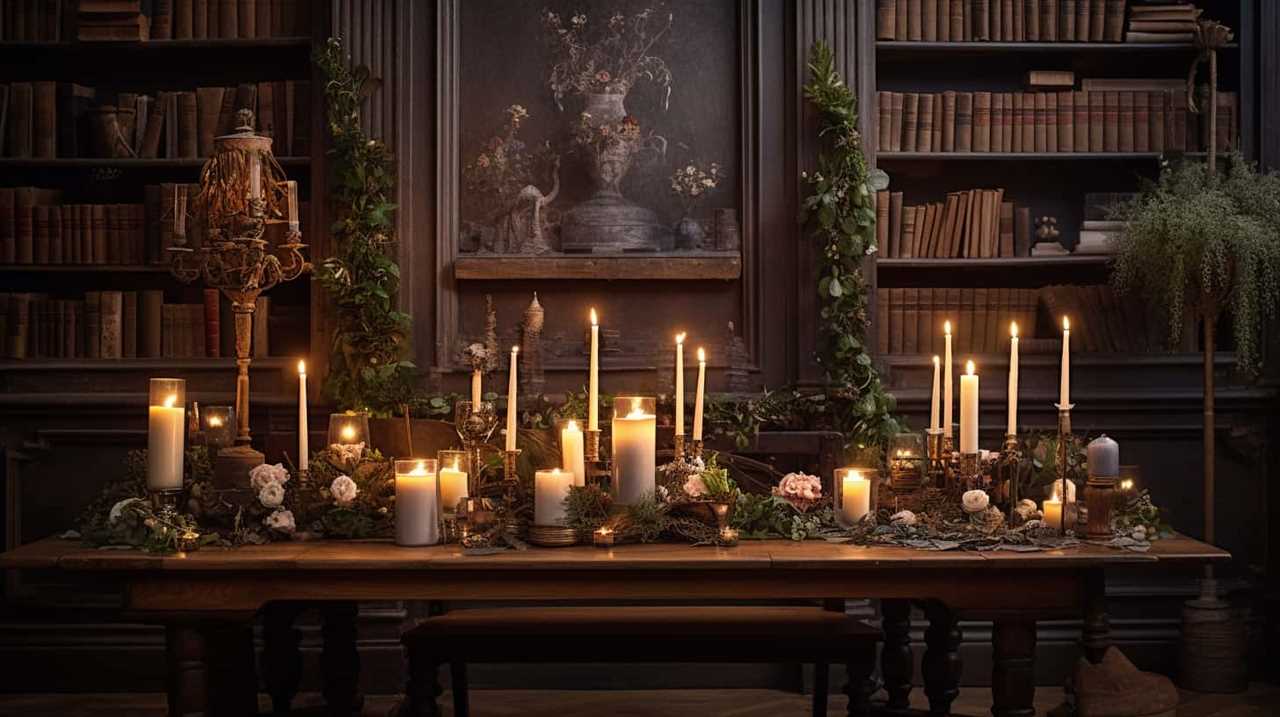
Candle warmers are ingenious devices that bring warmth and fragrance to your space without the need for an open flame. With their sleek designs and efficient heating mechanisms, they create a cozy ambiance while ensuring safety.

In this guide, we will explore the inner workings of a candle warmer, from the types available to the benefits they offer. We will also delve into how they prevent fire hazards and provide tips on cleaning and maintenance.

So, join us as we delve into the fascinating world of candle warmers and discover the secrets behind their mesmerizing glow.

Advertisement

candlelight concerts

Key Takeaways

  • Candle warmers use advanced heating technology to warm the wax in the candle.
  • There are different types of candle warmers, such as plate candle warmers, lamp candle warmers, and electric candle warmers.
  • Candle warmers offer convenience and safety compared to traditional candle use.
  • Using a candle warmer is cost-effective in the long run.

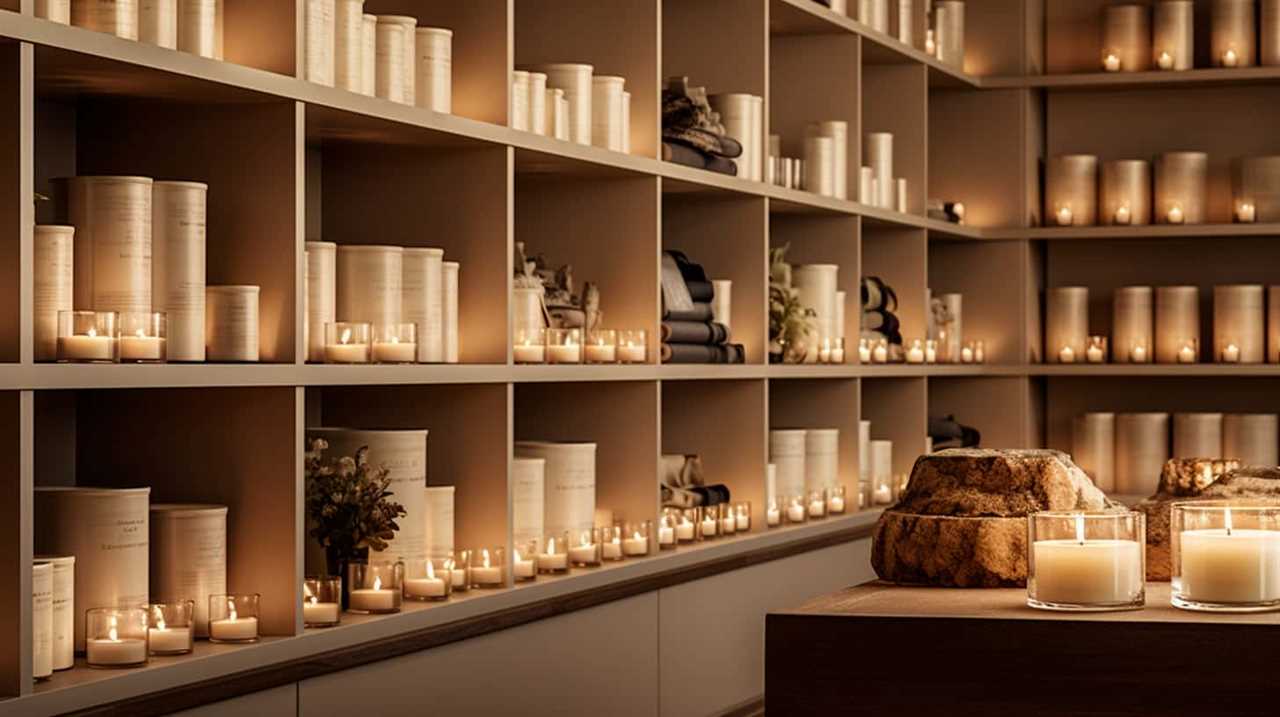
What Is a Candle Warmer

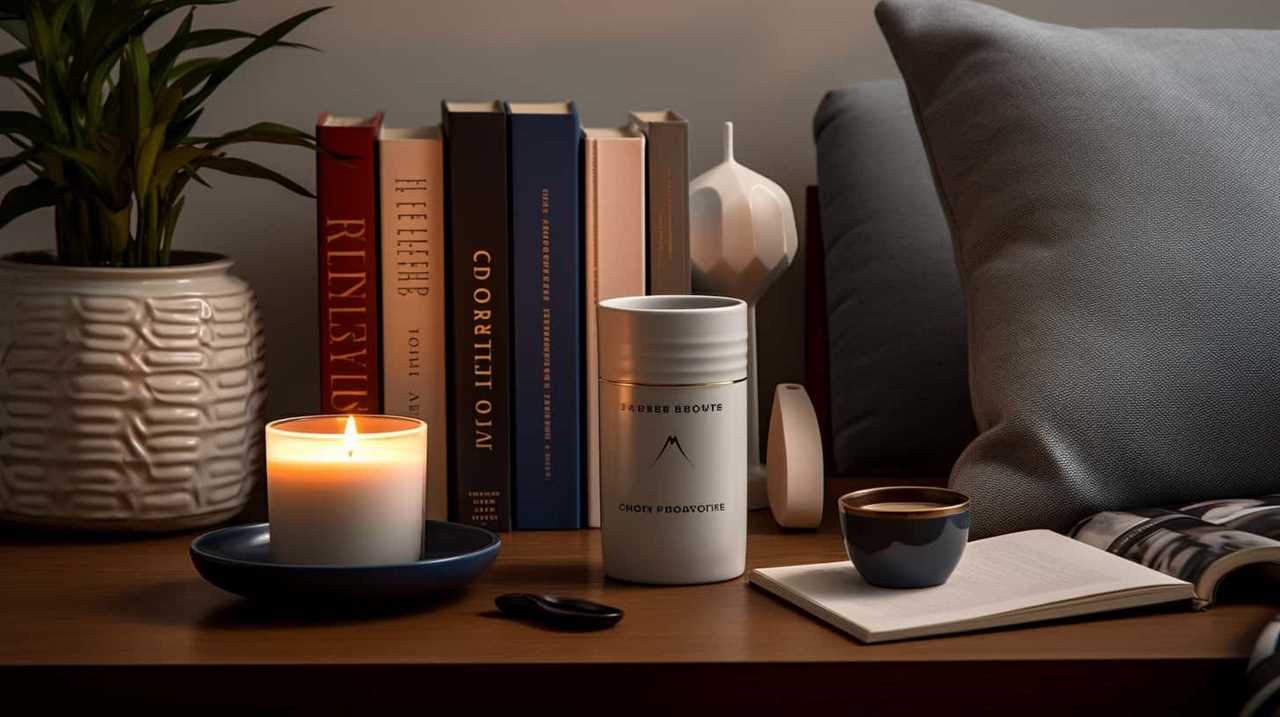
A candle warmer is a device that uses heat to release the fragrance of a candle, without the need for an open flame. This innovative invention has gained popularity among candle enthusiasts due to its numerous features and benefits.

Candle warmers come in various designs and styles, allowing users to choose the one that best suits their preferences and decor. Some models have a built-in timer, providing convenience and peace of mind by automatically turning off after a certain period.

Additionally, candle warmers eliminate the safety concerns associated with burning candles, making them an ideal choice for households with children or pets. Moreover, using a candle warmer extends the lifespan of candles, as they burn slower and more evenly, resulting in cost savings over time.

Types of Candle Warmers

There are several different types of candle warmers that we can explore to understand how they work. When choosing a candle warmer, it’s important to consider your specific needs and preferences.

how does a candle burn

The first type is the plate candle warmer, which consists of a heating plate that warms the candle from the bottom. This type is simple and effective, providing a gentle and even heat distribution.

Another type is the lamp candle warmer, which uses a light bulb to generate heat. This type not only warms the candle but also serves as a decorative lamp.

Advertisement

Finally, there are candle warmers that use electricity to heat the candle. These types often come with adjustable temperature settings, allowing you to control the level of heat.

Understanding the different types of candle warmers is essential in choosing the right one for you.

candlesticks forex

Now, let’s delve into the heating mechanism used in these devices.

The Heating Mechanism

To understand the heating mechanism of candle warmers, let’s delve into how these devices generate warmth from the candle.

Candle warmers use advanced heating technology to gently warm the wax in the candle, releasing its fragrance without the need for an open flame. Here’s how it works:

Advertisement
  • Induction heating: Some candle warmers use induction heating technology, which uses electromagnetic fields to heat the base of the warmer. The heat is then transferred to the plate on which the candle sits, warming the wax.
  • Halogen bulb heating: Another common heating method in candle warmers involves the use of a halogen bulb. The bulb emits heat, which is directed towards the plate, melting the wax and releasing its scent.

When it comes to safety features, candle warmers are designed with the utmost care to ensure a secure and enjoyable experience. These features may include:

birthday candle

  • Temperature control: Many candle warmers have adjustable temperature settings, allowing you to control the level of heat and prevent overheating.
  • Automatic shut-off: Some candle warmers have a built-in timer or sensor that automatically shuts off the device after a certain period of time, providing peace of mind and preventing accidents.

Benefits of Using a Candle Warmer

As we explore the benefits of using a candle warmer, it’s important to note the convenience and safety that this innovative device offers. Compared to traditional candle use, a candle warmer eliminates the need for an open flame, reducing the risk of accidents and fire hazards. Additionally, it allows for a longer lasting fragrance experience since the candle is gently warmed rather than burned. This not only enhances the ambiance but also ensures that no wax is wasted. Moreover, candle warmers are cost-effective in the long run. While traditional candles need to be replaced once they burn down, a candle warmer can be used with different scented wax melts, making it a more economical choice. Let’s take a closer look at the benefits of using a candle warmer:

Benefits Description
Convenience No need to worry about keeping an eye on a burning candle or trimming the wick. Simply plug in the candle warmer and enjoy the fragrance.
Safety Eliminates the risk of accidental fires and burns, making it a safer option, especially around children and pets.
Longer lasting fragrance The gentle heat of the candle warmer allows for a longer lasting fragrance experience, as the wax slowly releases its scent.
No wasted wax Unlike traditional candles that melt and burn away, candle warmers allow you to fully utilize the wax melts without any waste.
Cost-effective With the ability to use different scented wax melts, candle warmers prove to be a more economical choice in the long run.

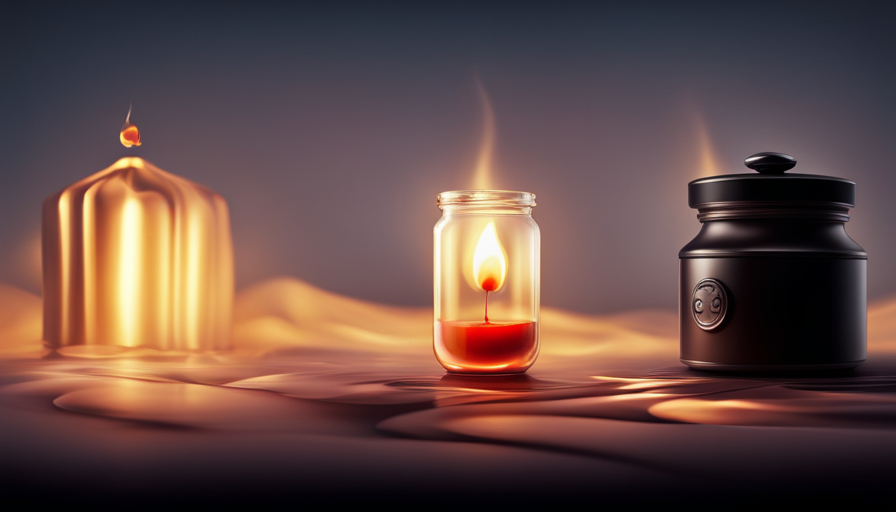
How Does a Candle Warmer Prevent Fire Hazards

Eliminating the need for an open flame, a candle warmer significantly reduces the risk of fire hazards, making it a safer alternative to traditional candle use. With its innovative design, a candle warmer prevents accidents and provides effective fire prevention measures.

Here’s how:

  • Temperature Control: Candle warmers are equipped with temperature controls that ensure the candle is heated to a safe and controlled level, minimizing the risk of overheating and potential fire outbreaks.
  • Enclosed Design: Unlike traditional candles, candle warmers have an enclosed design that prevents the flame from coming into contact with surrounding objects, reducing the likelihood of accidental fires caused by tipping or contact with flammable materials.

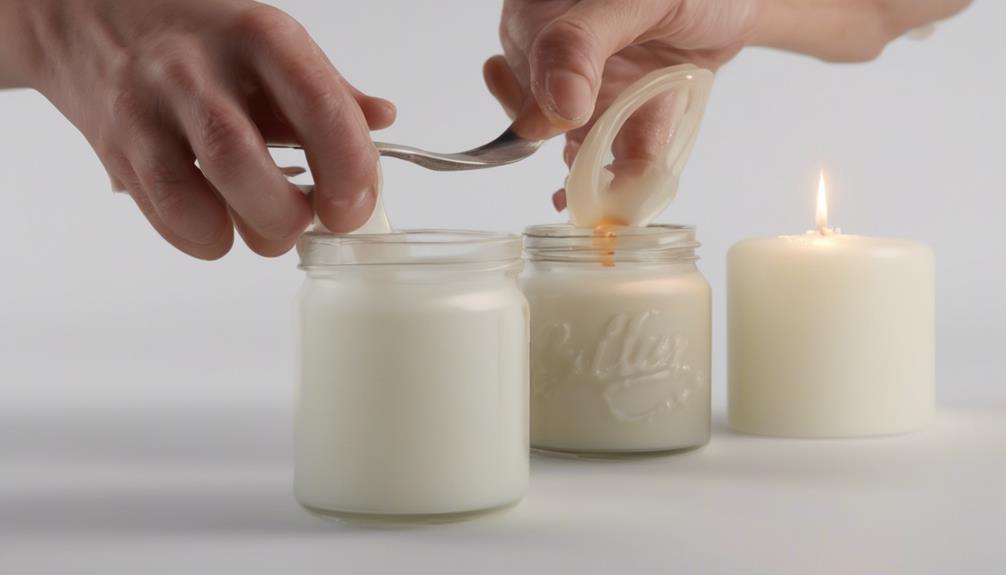
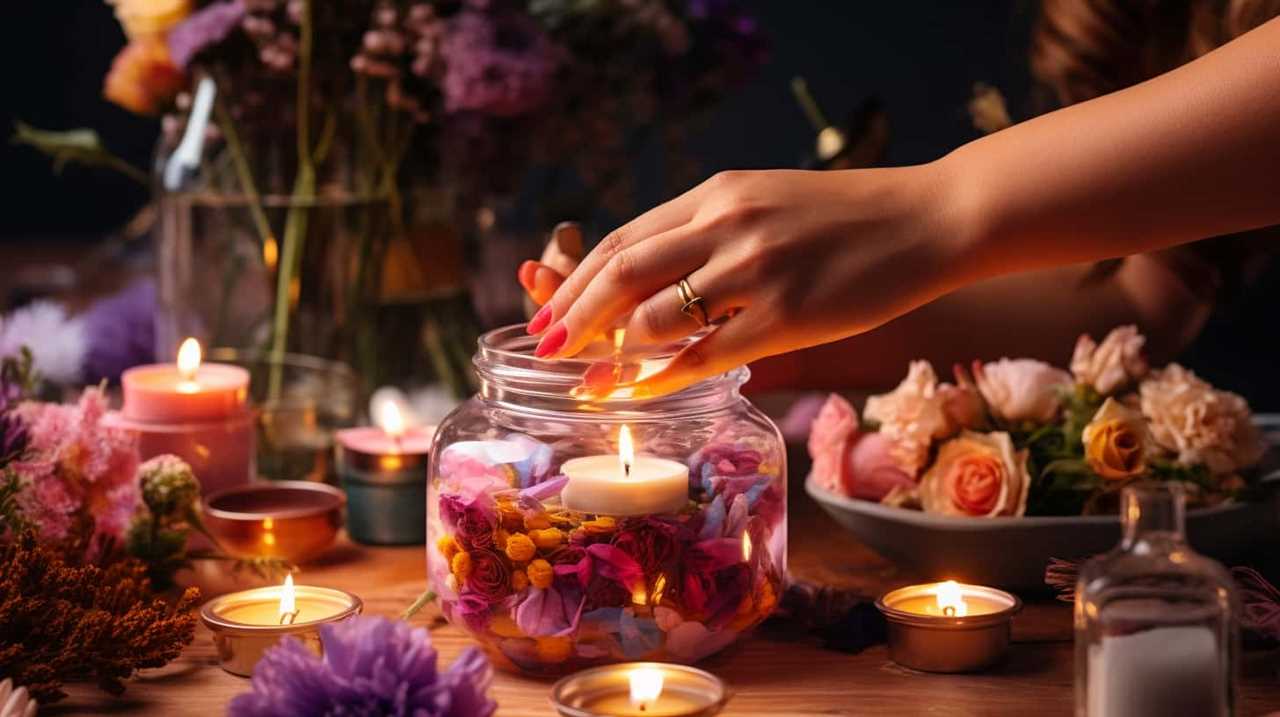
Choosing the Right Candle for a Candle Warmer

When choosing a candle for a candle warmer, we should consider the size and type that will work best with the device. It’s important to choose scented candles that are specifically designed for use with candle warmers. These candles are made with a lower melting point, allowing them to release their fragrance when warmed without burning. Additionally, scented candles add a pleasant aroma to any space, creating a cozy and inviting atmosphere.

candles direct sale

In terms of alternative uses for candle warmers, they can also be used with unscented candles for a more subtle ambiance or as a decorative element. Some candle warmers even come with built-in timers, allowing you to set the desired duration of fragrance release.

To help you make an informed decision, here’s a table highlighting the different types of candles and their compatibility with candle warmers:

Candle Type Compatibility with Candle Warmers
Scented Designed for use with warmers
Unscented Can be used for subtle ambiance
Decorative Adds aesthetic appeal
Timer-enabled Allows control over fragrance duration

Steps to Using a Candle Warmer

Let’s now delve into the essential steps for using a candle warmer properly. By following these steps, we can ensure that we maximize the benefits of our candle warmer while also prioritizing safety.

Advertisement

It’s important to take the necessary precautions when using a candle warmer to create a warm and cozy ambiance in our homes.

ecoya candles sale

Proper Candle Warmer Usage

To use a candle warmer, we simply place a candle on the warming plate and turn on the device. Proper candle warmer usage is essential for both safety and the longevity of the device. Here are some steps to ensure you’re using your candle warmer correctly:

  • Candle warmer safety:
  • Always place the candle warmer on a heat-resistant surface to prevent any damage.
  • Keep the candle warmer away from flammable materials and out of the reach of children and pets.
  • Candle warmer maintenance:
  • Regularly clean the warming plate to prevent any buildup of residue.
  • Replace the candle when it’s no longer producing a desirable scent or when it reaches the end of its lifespan.

By following these steps, you can enjoy the benefits of your candle warmer while ensuring its safety and longevity.

Now, let’s move on to discussing the safety precautions when using a candle warmer.

Safety Precautions When Using a Candle Warmer

To ensure safe usage of a candle warmer, we should adhere to certain precautions and follow proper steps for operating the device.

candlesticks hotel stamford

Candle warmer maintenance is crucial in order to prevent accidents and ensure the longevity of the device. Before using a candle warmer, it’s important to read and follow the manufacturer’s instructions carefully.

Advertisement

Always place the candle warmer on a stable surface away from flammable materials and keep it out of reach of children and pets. Never leave a candle warmer unattended and always extinguish the candle before leaving the room.

It’s also important to regularly clean the candle warmer to remove any residue or buildup. By following these safety precautions and properly maintaining your candle warmer, you can enjoy the benefits of a cozy and inviting atmosphere without compromising safety.

Can You Use a Candle Warmer With Scented Candles

Yes, we can use a candle warmer with scented candles. Candle warmers are versatile and can be used with different types of candles, including scented ones. Here are some benefits of using scented candles with a candle warmer:

dusk candles careers

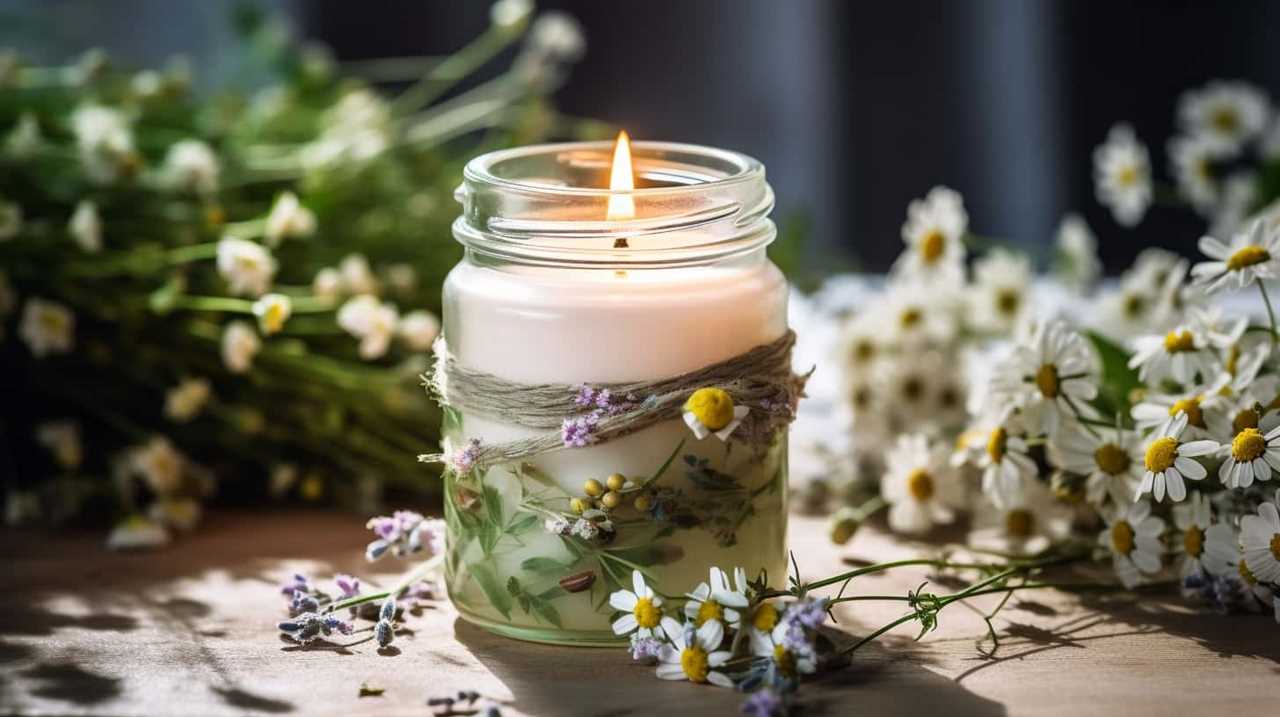
  • Enhanced fragrance: When you use a candle warmer with scented candles, the heat gently releases the fragrance, filling the room with a delightful aroma. The scent is more consistent and long-lasting compared to traditional burning methods.
  • Safe and flameless: Using a candle warmer eliminates the need for an open flame, reducing the risk of accidents. This is especially beneficial if you have children or pets in your home.

Using a candle warmer with scented candles allows you to enjoy the beautiful scent without any worry or hassle. It enhances the ambiance of your space and creates a relaxing atmosphere. So go ahead, indulge in the luxury of scented candles with the convenience of a candle warmer.

Candle Warmer Safety Tips

Here are some important safety tips to keep in mind when using a candle warmer:

Safety Tips Description
Place on a Heat-Resistant Surface Always place your candle warmer on a heat-resistant surface to prevent any potential damage or fire hazards.
Keep Away from Flammable Materials Ensure that there are no flammable materials or substances near the candle warmer to avoid any accidents or fires.
Use a Timer Consider using a timer to automatically turn off the candle warmer after a certain period of time. This helps prevent overheating and reduces the risk of accidents.

When using a candle warmer, it is crucial to prioritize safety to prevent any mishaps or accidents. By following these safety tips, you can enjoy the warm glow and fragrance of your candles without any worries. For more information on candle warmers, check out our candle warmer buying guide. And if you’re looking for gift ideas, consider a candle warmer for your loved ones to enhance their candle experience while keeping safety in mind.

Advertisement

Extending the Lifespan of a Candle Warmer

How can we effectively extend the lifespan of a candle warmer? By following a few simple steps, we can maximize the performance and longevity of this beloved device. Here are some tips to help you extend the life of your candle warmer:

candle making workshop

  • Clean regularly: Regularly clean the surface of your candle warmer to prevent any buildup of wax or residue that could affect its performance.
  • Use quality candles: Opt for high-quality candles made from natural ingredients. These candles burn cleaner and longer, resulting in a longer lifespan for your candle warmer.
  • Trim the wick: Before placing a candle on the warmer, make sure to trim the wick to about 1/4 inch. This will prevent excessive soot and ensure a more efficient burn.
  • Adjust temperature: Experiment with different temperature settings on your candle warmer to find the optimal level for maximizing fragrance and extending the life of your candle.

Cleaning and Maintaining a Candle Warmer

To properly clean and maintain a candle warmer, we recommend following a simple three-step process. First, ensure that the warmer is unplugged and has cooled down completely before cleaning. This will prevent any accidents or burns. Next, wipe the surface of the warmer with a soft cloth or sponge dampened with warm soapy water. Be sure to remove any wax residue or buildup. Finally, dry the warmer thoroughly before plugging it back in. Regular cleaning and maintenance will not only keep your candle warmer looking its best, but also ensure its longevity and optimal performance. Here are some cleaning tips and maintenance techniques to keep in mind:

Cleaning Tips Maintenance Techniques
Use a gentle cleaner Inspect cords for damage
Avoid abrasive materials Check for loose parts
Clean regularly Keep away from water

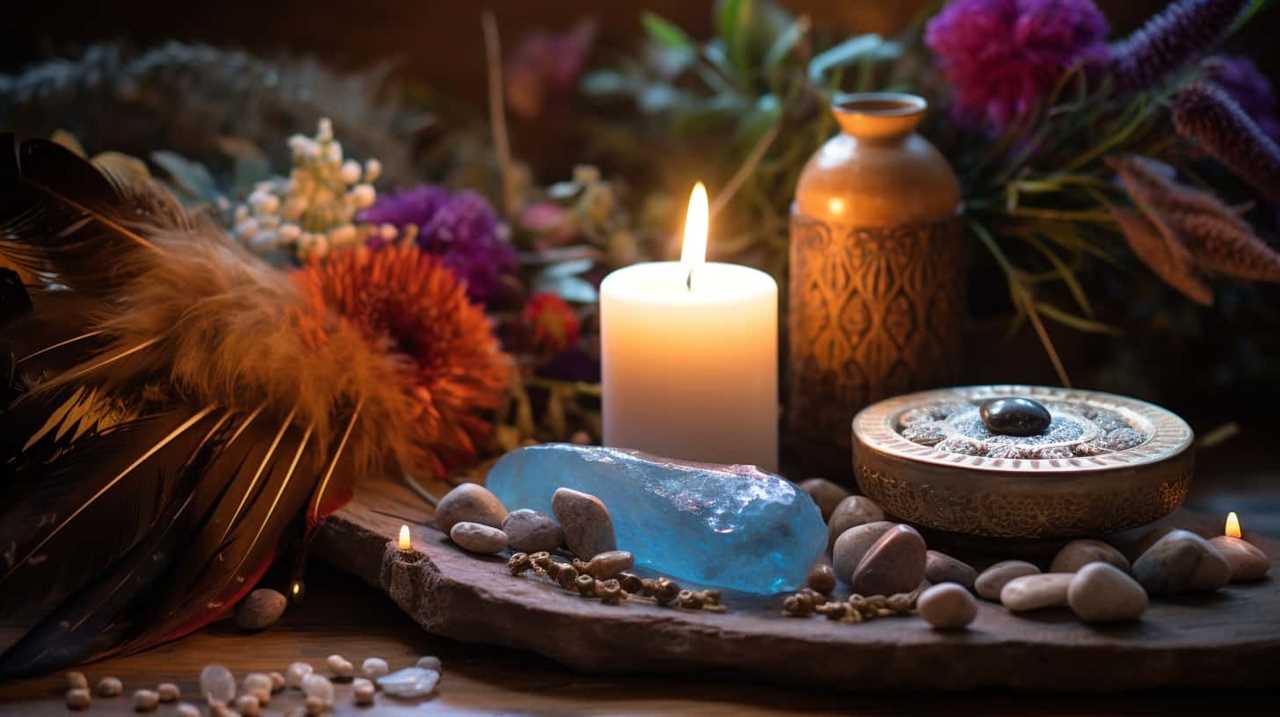
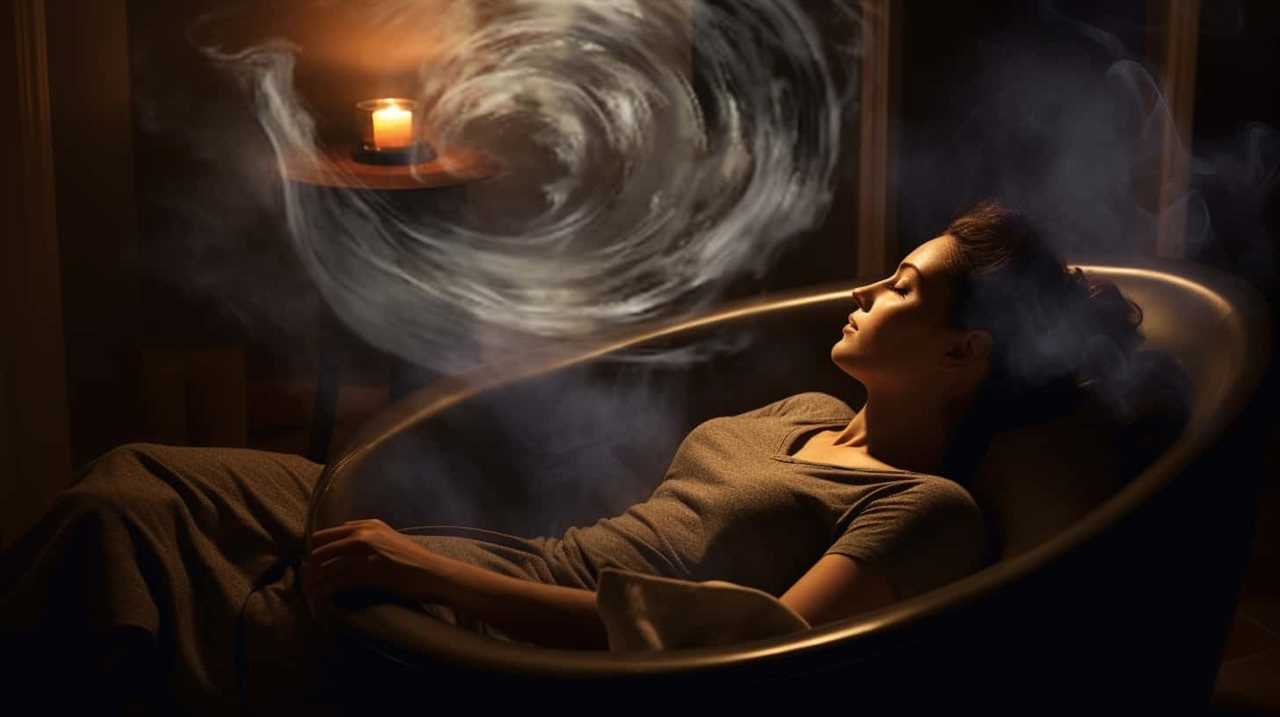
Using a Candle Warmer for Aromatherapy

When it comes to using a candle warmer for aromatherapy, there are several benefits to consider.

Aromatherapy has been known to promote relaxation, reduce stress, and improve mood.

By using a candle warmer, the heat gently releases the fragrance of the essential oils, effectively dispersing the scent throughout the room for maximum effectiveness.

candles direct ireland

Experimenting with different scents can help you find the perfect aroma to create a calming and soothing ambiance in your space.

Advertisement

Benefits of Aromatherapy

Aromatherapy offers numerous benefits for us when using a candle warmer. By harnessing the power of essential oils, we can experience a wide range of physical and emotional benefits. Here are some of the key benefits of aromatherapy:

  • Stress Relief:
  • Essential oils such as lavender, chamomile, and bergamot have calming properties that can help reduce stress and anxiety.
  • Aromatherapy can promote relaxation and improve sleep quality, allowing us to unwind after a long day.
  • Emotional Well-being:
  • Certain essential oils, like citrus oils and peppermint, have uplifting and energizing effects that can boost mood and improve mental clarity.
  • Aromatherapy can also help alleviate symptoms of depression and enhance overall emotional well-being.

Using a candle warmer for aromatherapy allows us to enjoy these benefits conveniently and safely. It creates a soothing ambiance while releasing the therapeutic properties of essential oils into the air, promoting a sense of tranquility and balance in our lives.

Candle Warmer Effectiveness

As we continue exploring the benefits of aromatherapy, it is important to understand the effectiveness of using a candle warmer for this purpose. Candle warmers are a popular choice for aromatherapy enthusiasts because they provide a safe and convenient way to release the therapeutic scents of essential oils without the need for an open flame.

candle holder

To emphasize the effectiveness of candle warmers for aromatherapy, let’s take a look at the following table:

Candle Warmer Safety Candle Warmer Maintenance
Keep out of reach of children and pets Clean the warmer regularly to remove any residue or buildup
Place the warmer on a stable surface away from flammable objects Replace the bulb or heating element as needed
Never leave the warmer unattended Store the warmer in a cool, dry place when not in use
Follow the manufacturer’s instructions for proper use Check for any signs of wear or damage before each use

By following these safety guidelines and properly maintaining your candle warmer, you can ensure its effectiveness and enjoy the benefits of aromatherapy with peace of mind.

Now, let’s explore different scents for relaxation.

Advertisement

Different Scents for Relaxation

To enhance the effectiveness of our candle warmer for aromatherapy, let’s now explore the different scents that promote relaxation. Aromatherapy has long been recognized for its ability to calm the mind, reduce stress, and create a soothing atmosphere. Here are some popular scents that can help you relax and unwind:

candlelight concerts belfast

  • Lavender: Known for its calming properties, lavender helps to relieve anxiety and promote a sense of tranquility.
  • Chamomile: This gentle scent is perfect for relaxation, as it helps to calm the nerves and promote better sleep.
  • Bergamot: With its citrusy and floral aroma, bergamot uplifts the mood and reduces stress.
  • Ylang Ylang: This exotic scent is known for its ability to relieve tension and promote feelings of happiness and relaxation.
  • Sandalwood: A warm and woody fragrance, sandalwood helps to calm the mind and enhance mental clarity.

Using these different scents for relaxation can provide numerous benefits of aromatherapy, such as reducing stress, improving sleep quality, and creating a peaceful environment for ultimate relaxation.

Frequently Asked Questions About Candle Warmers

We often receive questions about candle warmers and how they work. Candle warmer maintenance is an important part of keeping your candle warmer functioning properly. It’s recommended to clean the warmer regularly to remove any residue or buildup from the wax. This can be done by allowing the warmer to cool completely, then wiping it with a soft cloth or paper towel.

Additionally, always remember to follow candle warmer safety tips to ensure a safe and enjoyable experience. These tips include placing the warmer on a heat-resistant surface, keeping it away from flammable materials, and never leaving it unattended while in use.

By following these maintenance and safety guidelines, you can prolong the lifespan of your candle warmer and prevent any potential accidents.

voluspa

Now, let’s move on to troubleshooting common candle warmer issues.

Advertisement

Troubleshooting Common Candle Warmer Issues

Let’s dive into some common issues that can arise with candle warmers and how to troubleshoot them.

When it comes to troubleshooting candle warmer problems, it’s important to identify the common candle warmer malfunctions and find effective solutions. Here are two sub-lists that will help you resolve these issues and ensure a smooth candle warming experience:

  1. Burner not heating up:
  • Check if the power cord is properly plugged in.
  • Ensure that the outlet is working by testing it with another device.
  • If the cord is damaged, replace it with a new one.
  • Clean the burner plate to remove any debris that may be blocking the heat.
  1. Uneven heat distribution:
  • Adjust the position of the candle warmer to ensure it’s centered on the plate.
  • Use a candle warmer with a larger plate for better heat distribution.
  • Consider using a candle warmer with a built-in temperature control feature.
  • Avoid using candles with a high melting point as they may not distribute heat evenly.

Frequently Asked Questions

What Are the Different Types of Candle Warmers Available in the Market?

There are various types of candle warmers available in the market, each offering unique benefits. They provide a safe and efficient way to enjoy the fragrance of candles without the risk of an open flame.

candle price

Can Candle Warmers Be Used With All Types of Candles?

Using candle warmers with different types of candles has pros and cons. Benefits include longer lasting fragrance and safer, flameless operation. However, not all candles are suitable, as some may not melt evenly or release their fragrance effectively.

How Long Does It Take for a Candle to Fully Melt Using a Candle Warmer?

Using a candle warmer, it typically takes about 1-2 hours for a candle to fully melt. The temperature of the warmer is set at a safe level to slowly and evenly melt the wax. The benefits of using a candle warmer include a longer-lasting fragrance and no open flame.

Are There Any Safety Precautions to Keep in Mind While Using a Candle Warmer?

Safety precautions are crucial when using a candle warmer. To avoid accidents, remember to never leave it unattended, keep it away from flammable materials, and always follow the manufacturer’s instructions for proper usage.

Advertisement

Can Candle Warmers Be Used for Aromatherapy Purposes With Essential Oils?

Candle warmers can be used for aromatherapy purposes with the best essential oils for maximum benefits. The gentle heat from the warmer helps release the fragrance of the oils, creating a soothing and relaxing environment.

diptyque

Conclusion

In conclusion, candle warmers are a safe and effective way to enjoy the beautiful scents of candles without the risk of an open flame.

One interesting statistic to note is that candle warmers can provide up to 200 hours of fragrance per candle, making them a cost-effective choice for those who love a cozy and inviting atmosphere in their homes.

So why not give a candle warmer a try and experience the warmth and aroma it can bring to your space?

Advertisement

I'm Jane and I love candles. I have candles everywhere in my house--in every room, on every surface. I love the smell of candles, and I love how they make my place feel warm and cozy. Candles are really important to me. They help me relax and de-stress after a long day. They remind me of happy memories, and they make me feel calm and peaceful. I can't imagine my life without candles!

Continue Reading
Advertisement

Candles

How to Use a Money Candle

Published

on

By

Are you prepared to discover the keys to generating wealth and abundance? Allow us to demonstrate how employing a money candle can draw financial success into your existence.

Imagine this: you light a beautiful green candle, infused with powerful energies of abundance, and watch as its flame dances with magic. As we guide you through the steps, you will learn how to choose the perfect money candle, set a clear intention for wealth, and create a sacred space to enhance the candle’s energy.

Through meditation and visualization, you will tap into the limitless potential of financial abundance. Get ready to ignite your wealth manifestation journey with the power of a money candle.

Let’s begin!

Advertisement

candlesticks patterns

Key Takeaways

  • Choose a money candle based on financial goals and personal preferences, considering candle color, size, shape, and decorations.
  • Set clear intentions for wealth and align them with a chosen money candle.
  • Create a sacred space by clearing clutter, visualizing goals, incorporating symbols of abundance, and invoking divine presence.
  • Light the money candle with a calm and focused state of mind, visualizing the flame as a symbol of financial blessings.

Choosing the Right Money Candle

When selecting a money candle, we should consider our specific financial goals and personal preferences. Finding the best color for the candle is an important aspect to consider. The color of the candle symbolizes different aspects of wealth and abundance. For example, green is often associated with financial prosperity and growth, while gold represents wealth and success. Understanding the symbolism behind each color can help us align our intentions and desires with the energy of the candle.

Additionally, we should also consider the size and shape of the candle, as well as any additional decorations or symbols that resonate with our financial goals. By carefully choosing a money candle that speaks to us on a personal level, we can set the stage for a powerful intention-setting ritual in the next section.

Setting the Intention for Wealth

To set the intention for wealth, we need to focus on our specific financial goals and align our desires with the energy of the chosen money candle. Here are four steps to help you manifest wealth and abundance:

  1. Clarify your financial goals: Take the time to define what wealth means to you. Is it achieving a certain income level, owning a home, or being debt-free? Clearly identify your goals to create a clear intention.
  2. Choose the right money candle: Look for a candle specifically designed for wealth manifestation. Consider candles infused with ingredients like green aventurine or citrine, which are believed to attract prosperity.
  3. Practice affirmations for abundance: Use positive affirmations that align with your financial goals. Repeat phrases like ‘I am worthy of wealth and abundance’ or ‘Money flows easily and effortlessly into my life’ while lighting the money candle.
  4. Visualize your desired outcome: Close your eyes and visualize yourself already achieving your financial goals. Imagine the feeling of wealth and the abundance it brings. Allow this visualization to fill you with positive energy and belief in your ability to manifest wealth.

Cleansing and Preparing the Candle

To cleanse and prepare the money candle, we gather the necessary materials. Before beginning any money manifestation ritual, it’s crucial to cleanse the candle of any negative or stagnant energy. This ensures that the candle is a pure channel for your intentions and desires.

candle salad

There are various methods for cleansing, such as smudging the candle with sacred herbs like sage or palo santo, or passing it through the smoke of incense. Visualizing the candle being cleansed by a stream of white light is also effective.

Once the candle is cleansed, it’s ready to absorb the energy of your intentions and amplify your desires.

With the candle cleansed and prepared, we can now move on to creating a sacred space for the money manifestation ritual.

Advertisement

Creating a Sacred Space

Once the money candle is cleansed and prepared, we create a sacred space to enhance the energy and focus of our money manifestation ritual. Creating a sacred space is essential to cultivating the right atmosphere for abundance to flow into our lives.

floral candle

Here are four key elements to consider when creating a sacred space:

  1. Clear the space: Remove any clutter or negative energy that may be present. Use sage or other cleansing tools to purify the area.
  2. Set intentions: Clearly state your intentions for creating abundance in your life. Visualize your goals and desires as already manifesting.
  3. Use sacred symbols: Incorporate symbols that represent abundance and prosperity, such as money signs, green candles, or images of wealth.
  4. Invoke divine presence: Call upon the energy of the universe, your higher self, or any deity or spirit guide that resonates with you to bless and support your money manifestation ritual.

Lighting the Money Candle

We light the money candle to activate its energy and begin our manifestation process. The lighting technique for a money candle is simple yet important.

Before lighting the candle, ensure that you’re in a calm and focused state of mind. Take a moment to ground yourself and set your intention for attracting abundance and prosperity.

Use a match or a lighter to ignite the wick of the candle, and as you do so, visualize the flame as a symbol of the financial blessings that are coming your way.

candlesticks charts

The benefits of money candles are twofold. Firstly, the act of lighting the candle helps to shift your mindset and align your energy with abundance. Secondly, the candle itself serves as a powerful tool for manifestation, amplifying your intention and attracting financial prosperity.

Advertisement

With the candle lit, we can now move on to the next step: meditating with the money candle.

Meditating With the Money Candle

Now, let’s delve into the practice of meditating with the money candle as we harness its energy to attract abundance and prosperity. Meditation techniques can help us focus our intentions and tap into the power of the candle’s symbolism.

Here are four techniques to enhance your money manifestation meditation:

candlesticks trading

  1. Set your intention: Before starting your meditation, clearly state your intention to attract wealth and abundance into your life. Visualize yourself surrounded by financial prosperity and feel the positive energy flowing towards you.
  2. Use affirmations: Repeat affirmations related to money and abundance during your meditation. For example, you can say, ‘I am open to receiving unlimited wealth and prosperity’ or ‘Money flows to me effortlessly and abundantly.’
  3. Visualize your goals: Imagine yourself achieving your financial goals. See yourself living a life of abundance, enjoying financial freedom, and fulfilling your dreams. Visualize the steps you need to take to manifest these goals.
  4. Practice gratitude: Express gratitude for the money and abundance that already exists in your life. Focus on the blessings and opportunities that money has brought you. This attitude of gratitude attracts more abundance into your life.

Visualizing Financial Abundance

When it comes to achieving financial abundance, visualization plays a crucial role.

By visualizing wealth and abundance, we can manifest our desires into reality.

The power of a positive mindset can’t be underestimated, as it attracts prosperity and opens the door to financial opportunities.

Advertisement

With intention and focus, we can use visualization techniques to attract wealth and create a life of financial abundance.

candle making supplies

Manifesting Wealth Through Visualization

To manifest wealth through visualization, one key step is to clearly envision our ideal financial abundance. Visualization techniques can be a powerful tool in attracting prosperity into our lives. Here are four effective strategies to help us develop an abundance mindset and manifest wealth:

  1. Create a vivid mental picture: Close your eyes and imagine yourself living the life of financial abundance. See yourself achieving your financial goals, surrounded by luxury and comfort.
  2. Use affirmations: Repeat positive affirmations that reinforce your belief in abundance. Affirmations like ‘I am deserving of wealth and success’ or ‘Money flows effortlessly into my life’ can help reprogram your subconscious mind.
  3. Visualize specific financial goals: Focus on visualizing specific financial goals, such as paying off debts, buying a dream house, or starting a successful business. See yourself achieving these goals and experiencing the joy and fulfillment that comes with it.
  4. Practice gratitude: Cultivate a sense of gratitude for the wealth and abundance you already have. By appreciating what you have, you attract more positive experiences and opportunities for financial growth.

By mastering these visualization techniques and adopting an abundance mindset, we can harness the power of our thoughts to manifest wealth and create a life of financial abundance.

Transitioning to the subsequent section about the power of a positive mindset, let’s explore how our mindset can shape our financial reality.

Power of Positive Mindset

As we explore the power of a positive mindset in visualizing financial abundance, we can see how our thoughts and beliefs shape our financial reality. By adopting an abundance mindset and utilizing positive affirmations, we can attract wealth and prosperity into our lives. Positive affirmations are statements that reinforce positive beliefs about ourselves and our financial situation. When repeated daily, they help to reprogram our subconscious mind and align our thoughts with our desired financial outcomes. Here is a table that illustrates the power of positive affirmations in transforming our mindset:

doji candle

Affirmation Belief Outcome
I am deserving of financial abundance Believing in my worthiness for wealth Attracting opportunities for financial success
Money flows freely into my life Trusting in the abundance of the universe Manifesting financial prosperity
I am grateful for the wealth I have Cultivating gratitude for current financial blessings Opening doors for more abundance

Attracting Prosperity With Intention

By intentionally visualizing financial abundance, we can attract prosperity into our lives. It’s important to harness the power of our thoughts and beliefs to manifest our desired financial outcomes. Here are four key strategies for attracting abundance and manifesting money:

Advertisement
  1. Set clear intentions: Clearly define your financial goals and visualize yourself already achieving them. This helps to align your subconscious mind with your desires and signals to the universe what you want to attract.
  2. Practice gratitude: Express gratitude for the abundance that already exists in your life, no matter how small. Gratitude shifts your focus from lack to abundance, attracting more of what you appreciate.
  3. Create a vision board: Compile images and words that represent your financial goals and aspirations. Visualize yourself living your desired lifestyle, focusing on the positive emotions associated with financial abundance.
  4. Take inspired action: Combine visualization with purposeful action towards your financial goals. This shows the universe your commitment and dedication, increasing the likelihood of attracting abundance.

Repeating the Practice for Continued Results

After we have successfully used a money candle to manifest abundance, it is important to continue the practice for sustained and consistent results. Repeating the practice ensures long-term effectiveness, allowing us to harness the full potential of the money candle’s energy. By consistently utilizing this powerful tool, we can cultivate a mindset of abundance and attract financial prosperity into our lives.

To illustrate the importance of repetition, let’s consider the following table:

Week Candle Ritual Affirmations Results
1 Lighting the money candle and visualizing abundance "I am open to receiving wealth and financial success" Increased job opportunities
2 Repeating the ritual with gratitude for current abundance "I am grateful for the money that flows into my life" Unexpected financial windfall
3 Consistently using the money candle to reinforce positive beliefs "I attract wealth effortlessly and easily" Promotion at work
4 Continuing the practice to maintain financial abundance "I am a magnet for prosperity in all areas of my life" Consistent increase in income

Frequently Asked Questions

Can I Use Any Type of Candle for This Money Manifestation Practice?

When selecting a candle for money manifestation, it’s important to consider the type and size. Not just any candle will do. The right candle can enhance the energy and intention behind your practice.

candle drawing

How Long Should I Meditate With the Money Candle?

When meditating with a money candle, it is important to focus on the duration and visualization techniques. We recommend meditating for at least 15 minutes to fully immerse yourself in the manifestation process.

Can I Use the Same Candle for Multiple Money Manifestation Sessions?

Yes, you can reuse candles for multiple money manifestation sessions. However, it’s important to consider the type of candle you’re using. Some candles are specifically designed for one-time use, while others can be used multiple times.

Is There a Specific Time of Day or Phase of the Moon That Is Best for Lighting the Money Candle?

The best time of day to light a money candle and whether the moon phase is important for money manifestation depends on personal preference and belief. Experiment to find what works best for you.

Advertisement

How Often Should I Repeat This Money Manifestation Practice for Optimal Results?

For optimal results in our money manifestation practice, we should repeat it regularly. By consistently engaging in techniques that enhance our manifestation abilities, we can increase the likelihood of achieving our financial goals.

candlescience

Conclusion

In conclusion, using a money candle can be a powerful tool for attracting wealth and abundance into your life. By carefully choosing the right candle, setting clear intentions, and creating a sacred space, you can enhance the effectiveness of this practice.

Through meditation and visualization, you can align your energy with financial abundance. By repeating this practice regularly, you can experience continued results and manifest the financial prosperity you desire.

Start using a money candle today and watch your financial fortunes change.

Advertisement

Continue Reading

Candles

How to Turn on a Candle Without a Lighter

Published

on

By

Are you prepared to learn how to light a candle without using a lighter? In this tutorial, we’ll demonstrate different techniques for kindling a candle through alternative means.

No longer will you be at the mercy of a missing lighter. By following these steps, you will be able to light up your candle with confidence and ease.

From using matches to harnessing the power of the sun, we have got you covered. So, let’s delve into the world of candle lighting mastery and explore these ingenious methods.

Get ready to ignite your candle in ways you never thought possible!

Advertisement

how does a candle burn

Key Takeaways

  • Lighting a candle with matches requires holding the matchstick firmly, striking it against the matchbox, and transferring the flame to the candle wick.
  • When using a stove or gas burner, ensure it is clean and in working condition, trim the candle wick, and hold the candle above the flame to melt the wax and ignite the wick.
  • Using a magnifying glass, focus the sun’s rays onto the wick or use a powerful flashlight with a magnifying glass to ignite the candle.
  • In emergency situations or without a lighter or matches, a makeshift fuse can be created using thick paper rolled tightly into a cylinder, which burns slowly and steadily to ignite the candle flame. Alternatively, a small battery and thin wire can be used to create a circuit and heat up the wire to ignite the wick.

Use Matches to Light the Candle

First, we’ll grab a few matches to light the candle. To safely light a candle using matches, it’s important to ensure that the matchstick is long enough to prevent any accidental burns. Hold the matchstick firmly between your thumb and index finger, striking it smoothly against the matchbox, igniting the tip. Be cautious not to exert too much force, as it may break the match.

Once the match is lit, carefully bring it closer to the wick of the candle, allowing the flame to transfer. Ensure that the match is completely extinguished before discarding it.

Now, let’s move on to the next section where we’ll discuss how to utilize a stove or gas burner for lighting a candle.

Utilize a Stove or Gas Burner

To continue lighting a candle without a lighter, we can also utilize a stove or gas burner. This method should be approached with caution, as it involves open flames and can pose safety risks. Here are some steps to follow:

bell book and candle

  1. Ensure stove safety: Make sure the stove or gas burner is clean and in proper working condition. Check for any gas leaks and ensure good ventilation in the area.
  2. Prepare the candle: Place the candle in a heat-resistant container and remove any packaging or labels. Trim the wick to about 1/4 inch to ensure a clean burn.
  3. Light the candle: Hold the candle above the stove or gas burner flame, allowing the heat to gradually melt the wax and ignite the wick. Be careful not to let the flame come into contact with the container.

Now that we’ve explored the use of a stove or gas burner, let’s move on to another alternative method – lighting the candle with a magnifying glass.

Light the Candle With a Magnifying Glass

After utilizing a stove or gas burner, we can now explore another method to light a candle without a lighter – using a magnifying glass.

When it comes to using a magnifying glass to ignite a candle, there are a few alternatives to consider.

Advertisement

One option is to use the sun’s rays as a natural source of light. Find a sunny spot, hold the magnifying glass between the sunlight and the candle, and focus the light onto the wick until it ignites.

the candle library stockists

Another alternative is to use a powerful flashlight. Position the flashlight close to the magnifying glass, aligning the light beam through the magnifying glass and onto the candle’s wick.

Finally, if you don’t have access to sunlight or a flashlight, you can use the reflection off a shiny surface, such as a mirror or a reflective metal object. Angle the magnifying glass to reflect the light onto the candle’s wick.

To ensure successful magnifying glass ignition, here are a few tips to keep in mind:

  1. Choose a magnifying glass with a large lens to maximize the concentration of light.
  2. Hold the magnifying glass steadily and at the right distance from the candle.
  3. Position the magnifying glass at the correct angle to focus the light onto the wick.
  4. Be patient and allow the concentrated light to heat the wick until ignition occurs.

Create a Makeshift Fuse With a Piece of Paper

As we explore alternative methods to light a candle without a lighter, let’s now consider creating a makeshift fuse with a piece of paper. This simple yet effective technique can be a lifesaver in emergency situations or when you find yourself without a lighter or matches. Here’s how you can make a homemade firestarter using just a piece of paper:

candlestick

  1. Gather your materials: You’ll need a piece of paper, preferably thicker like cardstock or construction paper, to ensure it burns slowly and steadily.
  2. Roll the paper tightly: Start by rolling one corner of the paper tightly towards the opposite corner. Keep rolling until you have a long, thin cylinder.
  3. Light one end: Hold the rolled paper by one end and use a flame source, like a candle or even a lit matchstick, to ignite the other end.

Use a Battery and Wire to Ignite the Candle

Using a battery and wire to ignite a candle is a practical and efficient alternative fire-starting method. With this technique, you can quickly and easily light a candle without the need for a lighter or matches.

It provides a reliable solution when you find yourself without traditional ignition tools.

Advertisement

Battery-Powered Candle Ignition

We can ignite the candle using a battery and wire. This innovative candle lighting method provides an alternative to traditional lighters or matches. Here’s how you can use a battery and wire to light your candle:

  1. Gather the materials: You’ll need a small battery, such as a AA or AAA, and a thin wire, like a paperclip or a stripped electrical wire.
  2. Prepare the wire: Bend the wire into a U shape, leaving a small gap between the ends. This will allow you to create a spark.
  3. Light the candle: Hold one end of the wire against the negative terminal of the battery and touch the other end to the wick of the candle. The spark created between the wire and the wick will ignite the candle.

By using a battery and wire, you can successfully light your candle without a lighter or matches.

candlewood suites

Now let’s explore an alternative fire-starting method.

Alternative Fire-Starting Method

To ignite the candle without a lighter, we can employ an alternative fire-starting method by utilizing a battery and wire. This unconventional ignition method is a useful technique to have in your arsenal of fire-starting techniques.

Here’s how it works:

  1. Gather the following materials:
  • A battery (preferably a 9-volt battery)
  • A thin wire or paperclip
  1. Bend the wire or paperclip into a U-shape, making sure the ends touch each other.
  2. Place one end of the wire on the positive terminal of the battery and the other end on the wick of the candle.
  3. The connection between the wire and the battery will create a small electrical current, causing the wire to heat up and ignite the wick.
  4. Once the wick catches fire, carefully remove the wire and enjoy your candlelit ambiance.

Quick and Easy Candle Lighting

With just a battery and wire, we can easily light a candle in a quick and efficient manner. Here are three creative ways to ignite a candle using alternative candle lighting methods:

candle holders uk

  1. Battery and Steel Wool: Take a piece of steel wool and gently rub it against the positive and negative terminals of a battery. The friction will create sparks, which can be used to light the candle wick. Be careful not to touch the wire ends while the steel wool is connected to the battery.
  2. Battery and Foil: Fold a small piece of aluminum foil into a thin strip and attach one end to the positive terminal of the battery. Hold the other end of the foil near the candle wick. As the foil heats up, it will ignite the wick and light the candle.
  3. Battery and Wire: Connect a wire to both terminals of the battery, creating a circuit. Touch the wire to the candle wick, and the current will cause the wire to heat up, igniting the wick.

These alternative methods provide quick and easy ways to light a candle when a lighter isn’t available. Remember to exercise caution and ensure proper safety measures while using these techniques.

Generate a Spark With Steel Wool and a Battery

Using steel wool and a battery, we can generate a spark to light a candle without a lighter. However, if you don’t have steel wool on hand, there are alternative materials you can use. Fine-grade sandpaper or the rough side of a matchbox can also work.

Advertisement

To start, gather the necessary materials: a small piece of steel wool, a 9-volt battery, and the candle you want to light. First, take the steel wool and rub it against the positive and negative terminals of the battery. This creates a circuit and causes the steel wool to heat up, producing sparks.

Hold the steel wool close to the wick of the candle, and the sparks will ignite the candle. Remember to exercise caution and supervise the process closely to avoid accidents.

yankee candle malaysia

Light a Candle With a Flint and Steel

Flint and steel is a classic method for lighting candles, and understanding the basics is key.

To start, you’ll need a piece of flint and a steel striker. Hold the flint firmly in one hand and strike the steel against it with a quick and forceful motion, aiming for the edge of the flint.

This will create sparks that can ignite the candle wick.

Advertisement

Flint and Steel Basics

We can easily light a candle using a small piece of flint and steel. Flint and steel have been used for centuries as a reliable method to create fire. Here are the basics of using flint and steel to light a candle:

candlesticks charts

  1. Gather your materials: You’ll need a small piece of flint and a steel striker. Alternatively, you can use a ferrocerium rod or a magnesium fire starter as modern alternatives to flint and steel.
  2. Prepare the candle: Place the candle on a stable surface and remove any obstructions around it. Ensure that the wick is trimmed and ready to be lit.
  3. Striking the sparks: Hold the flint firmly in your non-dominant hand and the steel striker in your dominant hand. Position the flint close to the candle wick and strike the steel against the flint at a downward angle, creating sparks that land on the wick and ignite it.

Lighting Technique Variations

Once we’ve mastered the basics of lighting a candle with flint and steel, it’s important to explore various lighting technique variations.

When it comes to lighting methods, there are unconventional approaches that can be highly effective. One such technique is to use charred cloth as tinder. This involves charring a piece of cloth using the flint and steel, creating an ember that can be used to ignite the candle.

Another unconventional approach is the use of charred punkwood. This type of wood is highly flammable and can be easily ignited with the sparks from the flint and steel.

Safety Precautions When Using Flint and Steel

To ensure safety while using flint and steel to light a candle, it’s essential that we take certain precautions. Here are three important safety measures to keep in mind:

candle making kits for adults

  1. Flint and steel maintenance: Regularly inspect the flint and steel for any signs of damage or wear. Replace them if necessary. Keeping the flint sharp and the steel free from rust or corrosion will ensure a reliable spark for lighting the candle.
  2. Proper storage of flint and steel: Store the flint and steel in a dry and secure location. Moisture can degrade the flint and steel, making them less effective. Additionally, keeping them in a dedicated container or pouch will prevent accidental damage or injury.
  3. Use caution when striking: When striking the flint and steel, be mindful of your surroundings. Make sure there are no flammable materials nearby. Hold the steel at a safe distance from your body and others to avoid accidental injuries. Always strike the flint away from your body, directing sparks away from yourself and the candle.

By following these safety precautions, you can enjoy the benefits of using flint and steel to light your candles without compromising your well-being.

Now, let’s transition into the next section, where we’ll explore another alternative method to light a candle – harnessing the power of the sun.

Advertisement

Harness the Power of the Sun to Ignite the Candle

The sun’s radiant energy can be harnessed to ignite a candle without the need for a lighter. Harnessing solar power to light a candle not only eliminates the need for flammable materials, but also carries many benefits.

Solar power is a renewable and sustainable energy source, reducing our reliance on fossil fuels and minimizing environmental impact. By utilizing the sun’s energy, we can create a flame without the risk of accidental fires caused by traditional lighters or matches.

bath and body works candle day

However, it’s important to take fire safety precautions when using solar power to ignite a candle. Ensure the candle is placed on a stable surface, away from flammable objects, and never leave it unattended. Additionally, keep a fire extinguisher or water source nearby in case of emergencies.

Employ a Hairdryer or Heat Gun to Light the Wick

Now let’s explore alternative heat sources that can be used to light the wick of a candle when a lighter isn’t available.

We’ll discuss different techniques for lighting the wick using a hairdryer or a heat gun, and we’ll also cover important safety precautions that need to be taken when using these heat sources.

Advertisement

Alternative Heat Sources

We successfully lit the candle using a hairdryer as an alternative heat source, allowing the wick to ignite without the use of a lighter. When employing unconventional lighting methods, it’s important to consider alternative fuel sources to ensure a successful outcome.

candles myer

Here are three alternative heat sources you can use to light a candle without a lighter:

  1. Hairdryer: Set the hairdryer to its highest heat setting and aim it directly at the candle’s wick. The hot air will provide enough heat to ignite the wick and start the candle.
  2. Heat gun: Similar to a hairdryer, a heat gun can be used to generate enough heat to light the candle. Point the heat gun towards the wick and gradually increase the temperature until the wick catches fire.
  3. Stove burner: If you don’t have access to a hairdryer or heat gun, you can place the candle on a stove burner set to a low heat. Be careful not to melt the candle or ignite any surrounding objects. Once the wick catches fire, remove the candle from the burner and enjoy the warm glow.

These alternative heat sources can be handy when you find yourself without a lighter or matches. Remember to exercise caution and prioritize safety when using unconventional methods to light a candle.

Wick Lighting Techniques

To successfully light the candle without a lighter, we can utilize a hairdryer or heat gun to ignite the wick. This technique is particularly useful when the wick is difficult to reach or when we want to avoid using matches or a lighter.

Before attempting this method, it’s important to ensure proper wick maintenance. Trim the wick to about 1/4 inch before lighting to prevent excessive smoke and soot.

candle & co

When using a hairdryer or heat gun, set it to the lowest heat setting to avoid damaging the candle or causing it to melt. Hold the hairdryer or heat gun about 6 inches away from the candle and direct the hot air towards the wick.

Advertisement

Once the wick catches fire, carefully remove the hairdryer or heat gun and let the candle burn safely.

Remember to always exercise caution and follow candle safety guidelines when using alternative heat sources.

Safety Precautions Involved

After understanding the proper wick lighting techniques, it’s important to be aware of the safety precautions involved when employing a hairdryer or heat gun to light the wick. Fire safety and candle maintenance are crucial when using alternative methods to light a candle. Here are three important safety precautions to keep in mind:

candle birthday

  1. Keep a safe distance: When using a hairdryer or heat gun, ensure that you maintain a safe distance from the candle. This will prevent any accidental contact or damage to the candle.
  2. Avoid flammable materials: Make sure there are no flammable materials nearby when using a hairdryer or heat gun. Keep your surroundings clear of any combustible items that could potentially catch fire.
  3. Use caution with heat: Remember that both hairdryers and heat guns generate heat. Exercise caution when handling them, and avoid touching the heated parts to prevent burns or accidents.

Create a Fire Starter With Cotton Balls and Petroleum Jelly

To create a fire starter with cotton balls and petroleum jelly, gather the necessary materials and follow these simple steps.

First, you’ll need cotton balls, which can be easily substituted with alternative options such as dryer lint or shredded paper.

Next, gather petroleum jelly as your accelerant, as it’s a highly effective choice due to its flammability and ability to burn for an extended period.

Advertisement

Begin by taking a cotton ball and coating it thoroughly with petroleum jelly. Make sure to spread the jelly evenly on the cotton ball to ensure a consistent burn.

candle making workshop

Once coated, store the fire starters in a waterproof container for safekeeping.

When you’re ready to use them, simply ignite the coated cotton ball and place it under your kindling or fuel to start your fire.

Use a Fire Striker or Firesteel to Light the Candle

We can use a fire striker or firesteel to light the candle when we don’t have a lighter. These fire starter alternatives are great for those who want to master the art of candle lighting hacks. Here’s how you can do it:

  1. Prepare your materials: Make sure you have a fire striker or firesteel and a candle ready.
  2. Hold the fire striker: Grip the fire striker firmly in one hand, ensuring a secure hold.
  3. Strike the fire striker: Using a quick and forceful motion, strike the fire striker against the firesteel. This will create sparks that can ignite the candle wick.

Remember to be careful and aim the sparks towards the candle. With practice, you’ll become adept at using fire striker or firesteel as a reliable alternative to light your candle.

uses of candles in daily life

Frequently Asked Questions

Can I Use a Lighter Instead of Matches to Light the Candle?

Yes, we can use a lighter instead of matches to light the candle. However, it’s important to note that there are alternative methods to light a candle without a lighter. Safety precautions must be taken when doing so.

Advertisement

What Is the Best Type of Paper to Use for Creating a Makeshift Fuse?

When it comes to creating a makeshift fuse, there are several alternative materials to consider. However, it is crucial to prioritize safety precautions. Proper knowledge and understanding of homemade fuses is necessary to avoid any potential hazards.

How Long Does It Take for the Sun to Ignite the Candle?

To ignite a candle without a lighter, we can explore alternative ignition methods. However, the ignition time using the sun is dependent on various factors such as sunlight intensity and the candle’s composition.

Can I Use a Blow Dryer Instead of a Hairdryer or Heat Gun?

A blow dryer can be used as an alternative heat source instead of a hairdryer or heat gun. It provides the necessary heat to ignite a candle, making it a viable option in the absence of a lighter.

candle holders uk

Is It Safe to Use Petroleum Jelly as a Fire Starter for Lighting the Candle?

Using petroleum jelly as a fire starter can be safe and effective for lighting a candle. However, there are alternative methods to consider, such as using matches or a stove lighter.

Conclusion

In conclusion, there are numerous creative ways to turn on a candle without a lighter. From using matches, stoves, or magnifying glasses to harnessing the power of the sun or employing a hairdryer, the possibilities are endless.

Advertisement

You can even create a makeshift fuse or utilize a battery and wire for ignition. With these inventive methods at your disposal, lighting a candle becomes an enjoyable and resourceful endeavor.

So go ahead, let your imagination ignite and explore the world of candle lighting beyond the traditional lighter.

candle holders decorative

Continue Reading

Candles

How to Save a Candle Wick

Published

on

By

Have you ever been in a position where your candle wick is nearly at its end? Well, you’re in luck because we have the perfect solution for you!

In this guide, we will show you how to save a candle wick and bring it back to life. Whether it’s a crooked wick, excess wax buildup, or even a detached wick, we’ve got you covered.

With our step-by-step instructions, you’ll be able to master the art of candle wick revival. So grab your scissors and get ready to rescue those flickering flames.

It’s time to save the day and save your candle wick!

Advertisement

candlesticks hotel stamford

Key Takeaways

  • Regularly assess and trim the wick to prevent damage, fraying, and buildup of soot or debris.
  • Trim the wick to about 1/4 inch before each use for longer burn time, more efficient flame, reduced soot, and a safer burn.
  • Properly center the wick before lighting the candle to avoid uneven burn and wasted wax.
  • In case of a detached or drowned wick, reattach or trim the wick to revive it and ensure proper burning.

Assess the Wick’s Condition

First, we need to assess the condition of the wick. Proper wick maintenance is crucial for a well-functioning candle. When troubleshooting wick issues, it’s important to examine the wick closely. Look for any signs of damage, such as fraying or splitting. A damaged wick can prevent the candle from burning evenly or even extinguish the flame altogether.

Additionally, check for any buildup of soot or debris on the wick. This can hinder the wick’s ability to draw up the wax and maintain a steady flame. If you notice any of these issues, it’s time to save the wick. Trim away any damaged portions and gently clean off any buildup.

This will help restore the wick’s functionality and ensure a longer-lasting, more enjoyable candle experience.

Trim the Wick Properly

When it comes to trimming the wick properly, there are two key points to consider: wick length and burn time.

dusk gifts

Keeping the wick trimmed to about 1/4 inch before each use ensures a controlled flame and prevents excessive smoke or soot.

Additionally, proper trimming promotes a longer burn time, allowing you to enjoy your candle for hours on end.

Advertisement

Wick Length and Burn Time

To ensure a longer burn time and optimal performance, we should regularly trim the candle wick to the recommended length. Proper wick maintenance is crucial for achieving maximum burning efficiency. When a wick becomes too long, it can cause a larger flame, excessive smoke, and uneven burning. Trimming the wick to the right length helps control the size of the flame, allowing the candle to burn more evenly and efficiently. The recommended length for a candle wick is typically around 1/4 inch to 1/8 inch. This ensures a steady burn and minimizes the risk of the flame becoming too large or flickering excessively. By following these simple steps, we can prolong the life of our candles and enjoy their warm glow for longer periods.

Wick Length (in inches) Burn Time
1/4 6 hours
1/8 4 hours
3/16 5 hours

Benefits of Proper Trimming

Properly trimming the candle wick offers us numerous benefits, including a longer burn time and a more efficient and even flame. By implementing the right maintenance techniques, we can maximize the performance and lifespan of our candles.

candle shack discount code

Here are some key benefits of trimming the wick properly:

  • Longer burn time: Trimming the wick to the recommended length ensures that the flame burns at an optimal rate, preventing excessive soot and carbon buildup. This allows the candle to burn for a longer duration, giving us more enjoyment.
  • Efficient flame: A properly trimmed wick creates a more efficient flame, resulting in a steady and consistent burn. This means less wasted wax and a more even distribution of fragrance throughout the room.
  • Reduced soot and smoke: Trimming the wick prevents excessive smoke and soot from forming, keeping the air cleaner and healthier to breathe.
  • Safer burn: A well-trimmed wick reduces the risk of the flame becoming too large or flickering excessively, minimizing the chances of accidents or fire hazards.

By understanding the benefits of proper wick trimming, we can ensure an enhanced candle experience.

Now, let’s delve into the next section and explore how to remove excess wax buildup.

Remove Excess Wax Buildup

We can easily remove excess wax buildup from a candle wick by gently scraping it off with a butter knife or a similar tool.

Advertisement

candlesticks patterns

When a candle burns, wax tends to accumulate on the wick, obstructing the flame and preventing it from burning properly. This can lead to a weak or flickering flame, reducing the overall performance of the candle.

To revive an old wick, it’s essential to remove this excess wax buildup. By carefully scraping the wick, we can eliminate the accumulated wax and restore the wick’s functionality.

This step is crucial in preventing wick breakage, as excessive wax buildup can make the wick brittle and prone to breaking. Therefore, it’s important to regularly inspect and clean the wick to ensure optimal burning conditions and extend the life of the candle.

Straighten a Crooked Wick

By gently manipulating the wick, straightening its crooked shape is an effective way to ensure a steady and even burn. To help you master the art of straightening a crooked wick, here are some expert techniques to prevent wick damage:

candle holders amazon

  • Tweezers Method: Use a pair of tweezers to carefully straighten the wick by gently pulling it in the desired direction.
  • Poke and Push Technique: Use a toothpick or a small stick to poke the wick and push it back into a straight position.
  • Heat and Mold Approach: Light the candle and allow the wax to slightly melt. Then, use your fingers to mold the wick into a straight shape before the wax hardens.
  • Rotate and Adjust: Rotate the candle periodically while it’s burning to ensure an even burn and prevent the wick from becoming crooked.

Re-center a Displaced Wick

To re-center a displaced wick, gently guide it back into the center of the candle using a toothpick or small stick.

When a candle is burned, the heat can sometimes cause the wick to shift or move away from the center, which can lead to an uneven burn and wasted wax.

Advertisement

To prevent wick displacement, it’s important to ensure that the wick is properly centered before lighting the candle.

If you notice that the wick has been displaced during burning, it’s relatively easy to reposition it. Simply insert the toothpick or small stick next to the wick and gently push it back towards the center until it’s in the desired position.

candle holders amazon

This will ensure that the candle burns evenly and efficiently, prolonging its lifespan.

Reattach a Detached Wick

Sometimes, candle wicks can become detached from the wax, requiring a simple method to reattach them and continue enjoying a beautiful candle. Here are some effective techniques to reattach a detached wick:

  • Hot glue method: Use a hot glue gun to apply a small amount of hot glue to the base of the detached wick. Press the wick firmly onto the wax, holding it in place until the glue sets.
  • Double-sided tape method: Cut a small piece of double-sided tape and stick it to the base of the detached wick. Press the wick firmly onto the wax, ensuring it’s securely attached.
  • Wick sticker method: Purchase wick stickers, which are adhesive discs specifically designed for reattaching wicks. Place the sticker on the base of the detached wick and press it firmly onto the wax.
  • Wick sustainer method: If the wick sustainer is still intact, slide it back into the base of the detached wick, ensuring it’s secure.

Revive a Drowned Wick

To revive a drowned wick, we can follow a simple method that will help restore its functionality and keep your candle burning brightly. When a wick becomes submerged in melted wax, it can lose its ability to draw up fuel and ignite properly.

To prevent wick drowning in the first place, always trim your wick to about 1/4 inch before lighting your candle. If your wick does end up submerged, there’s no need to despair.

Advertisement

candles uk

First, extinguish the candle and allow it to cool completely. Then, carefully remove any excess wax around the wick using a toothpick or a small knife.

Next, relight the candle and observe if the wick is drawing up the melted wax and burning properly. If not, repeat the process until the wick is fully revived.

Store Candles Properly for Future Use

When it comes to storing candles for future use, there are a few key techniques that can help preserve their quality.

First, it’s important to trim the wick before storing to prevent any potential damage or soot buildup.

candlesticks forex

Additionally, keeping candles in a cool, dry place away from direct sunlight can help extend their lifespan.

Advertisement

Lastly, if you have any old candles with worn-out wicks, there are methods to revive them and make them usable again.

Wick-Saving Techniques

We always store our candles properly to ensure the wicks remain intact for future use. Here are some wick-saving tips that can help prolong the life of your candles:

  • Trim the wick before each use: Trimming the wick to around ¼ inch prevents excessive smoking and mushrooming, which can shorten the lifespan of the wick.
  • Avoid drafts: Placing candles in draft-free areas reduces the likelihood of the wick flickering and burning unevenly, which can lead to wick damage.
  • Use a snuffer: Snuffing out the candle with a snuffer instead of blowing it out helps prevent the wick from getting damaged or displaced.
  • Store candles in a cool, dark place: Extreme temperatures and exposure to sunlight can cause the wax to melt or discolor, affecting the overall quality of the candle.

By following these wick-saving techniques, you can ensure that your candles remain in good condition for future use.

ecoya candles myer

Now, let’s move on to the next section about long-lasting candle storage.

Long-Lasting Candle Storage

Proper candle storage ensures the longevity of our candles for future use. To preserve the fragrance and maximize the lifespan of your candles, follow these longevity tips.

Firstly, store your candles in a cool, dry place away from direct sunlight, as heat can cause them to melt or warp.

Advertisement

Secondly, keep them in airtight containers or bags to prevent dust and dirt from settling on the wax surface. This will help preserve their fragrance and prevent any unwanted odors from seeping in.

candle making supplies

Additionally, make sure to store your candles upright to maintain their shape and prevent any bending or breakage.

Reviving Old Candle Wicks

To bring old candle wicks back to life and ensure their future use, we can revive them through simple yet effective techniques. Here are some ways to revive old candle wicks and preserve their quality:

  • Trim the wick: Use a pair of scissors to trim the burnt or charred part of the wick. This will expose a fresh section of the wick, allowing it to burn more efficiently.
  • Soak the wick: If the wick is dry and brittle, you can soak it in a bowl of warm water for a few minutes. This will help soften the wick and make it more pliable for future use.
  • Use wick alternatives: If the wick is completely unusable, you can consider using wick alternatives such as cotton string, wooden sticks, or even dried herbs like lavender stems. These alternatives can still provide a lovely and fragrant candle experience.
  • Store candles properly: To preserve wick quality for future use, store candles in a cool and dry place away from direct sunlight. This will prevent the wick from drying out or becoming brittle over time.

Frequently Asked Questions

Can I Reuse a Candle Wick That Has Already Been Burned Down Completely?

Yes, you can reuse a candle wick that has been burned down completely. By salvaging burnt wicks, you can trim them and attach them to a new candle. It’s a resourceful way to extend the life of your wicks.

How Often Should I Trim the Wick of a Candle?

When it comes to properly handling a lit candle, it’s essential to know how often to trim the wick. We’ve learned that trimming it to the right size prevents excessive smoking and ensures a clean, even burn.

dusk catalogue 2017

What Can I Do if I Accidentally Break the Wick While Trimming It?

If the wick of a candle accidentally breaks while trimming it, there are a few options. First, you can repair the broken wick by using a wick holder or by tying a new piece of cotton string around it. Alternatively, you can use an alternative wick, such as a wooden or hemp wick, to continue enjoying your candle.

Advertisement

Is It Possible to Save a Wick That Has Been Completely Submerged in Wax?

Recovering submerged wicks can be challenging, but with patience and care, we can save them. Reusing burnt wicks, however, is not recommended as they may not burn evenly or emit a strong fragrance.

What Is the Best Way to Store Candles to Ensure Their Longevity?

Proper candle storage techniques are crucial for extending the lifespan of your candles. By keeping them in a cool, dark place and away from heat sources, you can ensure they burn evenly and last longer.

Conclusion

In conclusion, by following these simple steps, you can easily save a candle wick and prolong the life of your beloved candles.

candle making workshop

Remember to assess the wick’s condition, trim it properly, remove any excess wax buildup, and straighten or re-center it if needed.

In case of a detached or drowned wick, you can reattach or revive it with ease.

Advertisement

By storing your candles properly, you can ensure their future use.

So don’t let a faulty wick dim your candle’s glow, take action and let your light shine bright!

the candle library stockists

Continue Reading

Trending