TL;DR

Get decor and gifts delivered free — and shop member deals
- Fast, free delivery on millions of items
- Access to Prime Big Deal Days deals on October 6–7
- Prime Video, Amazon Music and more included
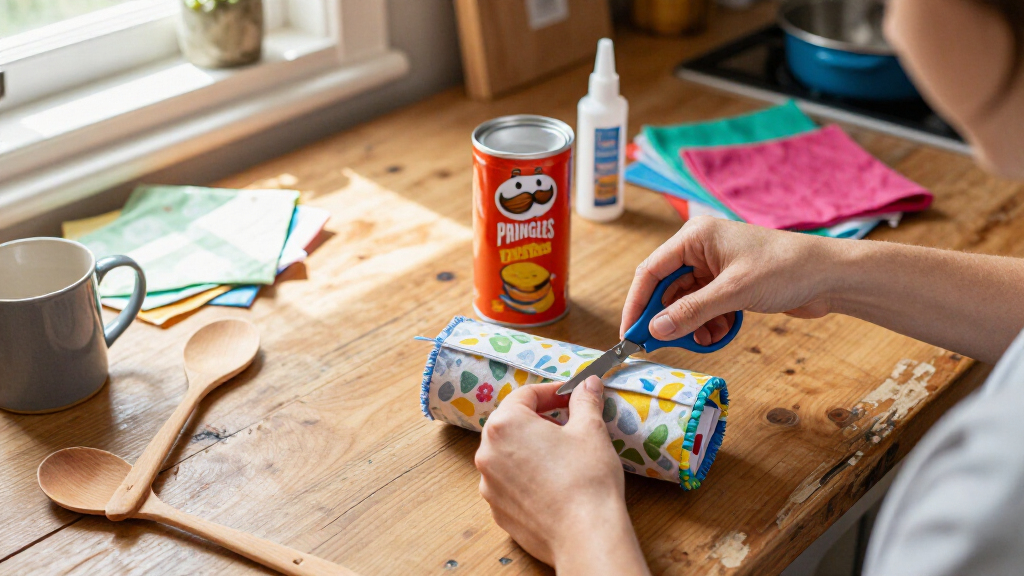
A DIY featured by Hunker shows Atix Home repurposing an empty Pringles can as a painted countertop canister for small items such as hair ties and bobby pins. The project uses basic craft supplies, but the source does not provide a verified cost comparison or details on durability and food-safe use.
A DIY video from Atix Home, featured in a report by Hunker, shows how to turn an empty Pringles can into a painted countertop canister for small household items. The low-material craft offers an alternative to buying decorative storage, although the report does not verify how much money users would save or how long the finished container lasts.
The project is intended for loose items that are easy to misplace, including bobby pins, rubber bands and hair ties. The container is cleaned, painted to suit a room, and finished with a knob attached to its lid and an adhesive label on the side. That label can identify what is stored inside.
Hunker’s instructions list a cleaning product or damp cloth, paint, a brush, a sponge, a glue gun, a small knob and decorative adhesive labels. Atix Home applies a base coat to the can and lid, lets it dry, then uses a sponge to dab paint around the can’s outer edge for texture. The knob is glued to the lid after the paint has dried.
The example shown is styled as a bathroom canister, with a wooden tray, towel and faux plant nearby. Hunker suggests coordinating surrounding decor with textiles, greenery, candles or small art. The report mentions commercial canisters priced at about $20 each or $50 to $60 for a set, but it does not give a full materials budget for the DIY or confirm that those prices apply broadly.
A Small-Item Storage Alternative
The project addresses a familiar household problem: small accessories can become difficult to find when left loose on counters or in drawers. Reusing a container that might otherwise be discarded can provide a dedicated place for those items while letting the maker choose its color and finish. That makes the idea relevant to people seeking a personalized storage option without purchasing a purpose-made canister.
The potential savings are not established by the report. Paint, a knob, labels and other supplies may already be on hand or may require a separate purchase, and the source does not compare their cost with retail storage. The more firmly supported benefit is the opportunity to reuse an empty package and adapt a simple craft to a particular room.
As an affiliate, we earn on qualifying purchases.
How The Canister Is Made
The reported method begins by removing crumbs and residue from the empty can. Hunker recommends a cleaning solution, such as an antibacterial wipe, or a damp cloth. The container should be clean before paint is applied; the report does not give specific drying times or product-preparation directions.
After painting the body and lid, Atix Home adds texture by blotting paint around the can with a small sponge. Once the paint has dried, a small knob is attached to the lid using a glue gun, and an adhesive label is placed on the can. Hunker names Rust-Oleum Painter’s Touch Latex Brush-On Paint as one possible product, describing it as suitable for several surfaces and available in different shades. That product reference is an example in the source, not a requirement for the project.
“A simple, wallet-friendly alternative is hiding in your lunch.”
— Hunker’s report
Cost And Durability Are Unreported
The source does not state when Atix Home posted the video, how much the materials cost, or whether the finished canister has been tested over time. It also does not report whether the paint or adhesive holds up to frequent handling, moisture or bathroom conditions. The example is shown as bathroom decor, but the report does not offer care or water-resistance guidance.
Hunker describes the container as a storage canister but does not specify which contents are suitable. It does not discuss food contact, sanitation beyond cleaning away crumbs, or whether the project is intended for items that could be damaged by residue. Readers should not treat the craft as tested food storage or as a moisture-proof container based on the information provided.
Choose Contents And Finish
Anyone trying the project can first decide what small items need a dedicated spot and choose a location and finish to match. The steps in the report are to clean the can, paint its body and lid, let the paint dry, add the sponge-textured detail, attach a knob with a glue gun, and apply a label. Follow the directions and drying guidance for the selected paint and adhesive, since the report does not give timing or product-specific instructions.
The source describes a craft demonstration, not a product launch or formal test, and identifies no scheduled follow-up. Questions about real-world cost, wear and performance remain unanswered unless makers or the creator provide additional details.
Key Questions
What can be stored in the repurposed can?
Hunker presents it for small household items such as bobby pins, rubber bands and hair ties. The report does not assess other uses.
What supplies does the DIY use?
The listed supplies include a cleaning solution or damp cloth, paint, a brush, a sponge, a glue gun, a small knob and an adhesive label.
Does making the canister definitely cost less than buying one?
That is not confirmed. Hunker cites retail canisters at around $20 each or $50 to $60 for a set, but provides no total cost for the paint and other DIY materials.
Is the finished canister waterproof or food-safe?
The report gives no waterproofing or food-safety information and does not describe the container as suitable for food storage.
Source: rss
Halloween Picks
halloween
As an affiliate, we earn on qualifying purchases.