
To make DIY wax melts at home, start by choosing high-quality wax like soy or beeswax and selecting your favorite fragrance oils. Melt the wax carefully using a double boiler, then mix in your scents, experimenting with blends for personalized aromas. Pour the melted wax into silicone molds or containers and allow it to cool and set naturally. For more tips on perfecting your fragrance creations, keep exploring the process step by step.
Key Takeaways
- Select high-quality wax and fragrance oils, considering melting points and scent strength for customized, long-lasting wax melts.
- Melt wax safely using a double boiler, then thoroughly blend fragrance or essential oils for desired aroma layers.
- Pour melted wax into silicone or metal molds carefully, and allow it to cool and solidify at room temperature to prevent cracks.
- Demold gently once fully hardened, ensuring proper storage in labeled, airtight containers away from sunlight.
- Follow safety guidelines, work in well-ventilated areas, and incorporate eco-friendly materials for a safe, sustainable homemade fragrance product.

VEVOR 20Lbs Wax Melter for Candle Making, 10 L Extra Large Electric Wax Melting Pot, with Easy Pour Spout and 9-Level Temp Control, Easy Clean for Candle Soap Cream Beauty Bulk Production Business
Quick Heating: This wax melting pot with easy pour spout can quickly heat and melt wax with 1100W...
As an affiliate, we earn on qualifying purchases.
Gathering Your Supplies and Ingredients
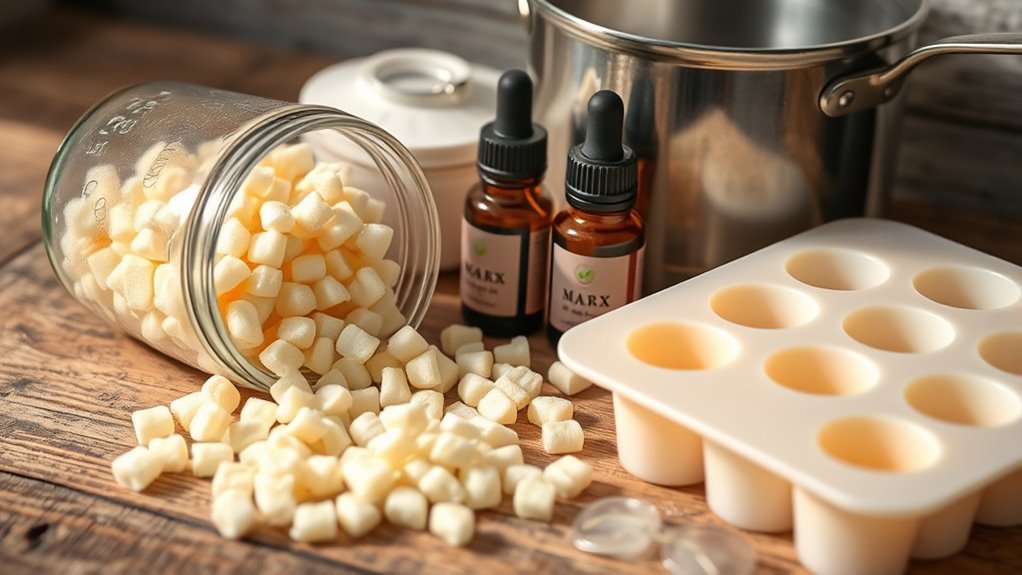
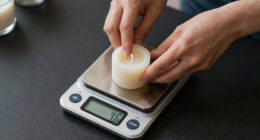
To start making your DIY wax melts, you’ll need to gather the right supplies and ingredients. First, choose a high-quality wax, like soy or beeswax, and fragrance oils to add scent. You’ll also need silicone molds or other heat-safe containers for shaping your melts. Don’t forget essential tools like a double boiler or microwave-safe containers for melting, along with stirring sticks and thermometers for safety. When it comes to crafting decorative packaging, consider small tins, clear bags, or boxes that showcase your creations. Remember, safety precautions are vital—work in a well-ventilated area, avoid water contact with hot wax, and keep children or pets away during the process. Additionally, understanding the importance of color accuracy can help you select the right visual presentation for your packaging and display areas. Incorporating proper safety protocols is essential to prevent accidents and ensure a smooth crafting experience. Being aware of sound healing science can also inspire calming ambiance while working on your project. Using a quiet workspace can help you stay focused and relaxed throughout the process. Having everything ready guarantees a smooth and enjoyable crafting experience.

VOISEN Wax Melter for Candle Making, Electric Non-Stick Wax Melter Holds 8Qts of Wax,Soy Wax for or Soap Business Candle Making with Heat Resistant Handle & Brass Spout,Temp Control (Black)
Excellent Wax Melter For Candle Making - Real 8 Qts/7.6L capacity wax melter HOLDS up to 12 Lbs...
As an affiliate, we earn on qualifying purchases.
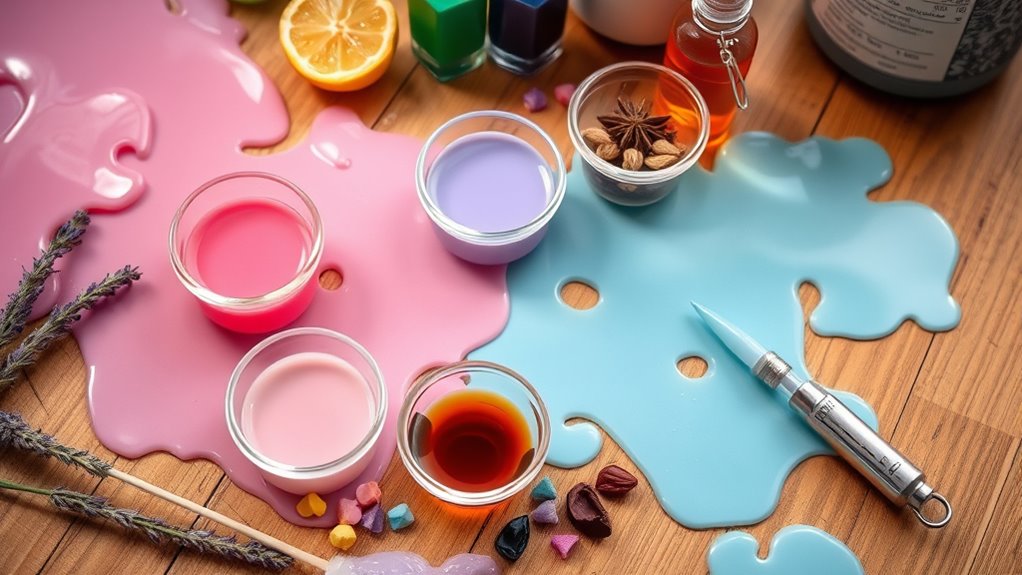
Choosing the Right Wax and Fragrance Oils

Choosing the right wax and fragrance oils is key to making great wax melts. You’ll want to contemplate the wax’s melting point and consistency, as these affect how your melts perform. Picking the right fragrance oils involves balancing scent strength and quality to create a pleasant aroma. Additionally, understanding the trustworthiness of AI models can inform your approach to selecting high-quality materials and ensuring safety in your DIY projects. Recognizing the artistic significance of ingredients can also help in choosing materials that enhance the aesthetic appeal of your wax melts. Being aware of the various types of wax available can further improve your craft and results.
Wax Types and Qualities
Selecting the right wax and fragrance oils is essential for creating high-quality wax melts that perform well and smell fantastic. When choosing wax, consider its hardness and melting points; softer waxes melt at lower temperatures, making them easier to work with, while harder waxes hold their shape better. Paraffin wax offers a good balance of hardness and melting point, ideal for beginners. Soy wax is softer with a lower melting point, giving a smoother finish but requiring careful handling. Beeswax is naturally harder with a higher melting point, perfect for long-lasting melts. Knowing these qualities helps you pick the best wax for your desired scent throw, appearance, and ease of use. Additionally, understanding the types of wax filters can help you choose the best option for your specific project and desired results. Selecting the appropriate wax properties can greatly impact the final outcome of your wax melts, ensuring they meet your expectations for quality and performance. Being aware of wax melting behavior allows you to better anticipate how your melts will set and release fragrance over time. Incorporating knowledge of growing and harvesting chia seeds can also inspire eco-friendly practices in your craft by using sustainable materials or promoting natural ingredients in your product line.
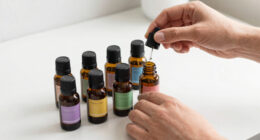
Fragrance Oil Selection
Finding the right fragrance oils is essential for making appealing wax melts that fill your space with scent. Choose oils with strong, lasting aromas to guarantee your melts are effective. Consider scent layering by combining complementary fragrance oils to create a rich, complex aroma. This technique enhances the overall scent experience and makes your melts unique. When selecting fragrance oils, also think about the essential oil benefits—some oils can promote relaxation, energy, or calmness, adding an extra dimension to your wax melts. Always opt for high-quality, skin-safe oils designed for wax melts to prevent issues like melting or scent fading. Experimenting with different combinations allows you to craft personalized fragrances that suit your mood and style perfectly. Incorporating knowledge of Best Modern Toilet features can help you create a comfortable and efficient space that complements your relaxing wax melt environment. Additionally, choosing appropriate wax types ensures better scent retention and melting performance for your homemade melts. Using essential oils for aromatherapy can further enhance your melts by adding therapeutic benefits and creating a more enjoyable sensory experience. To optimize your wax melts, consider tuning vehicle performance to customize your environment and enhance your overall relaxation experience.

VOISEN Wax Melter for Candle Making, 8Qts Candle Wax Melting Pot with Spout for Soy Wax Soap Base, Electric Wax Melter for Candle Making with Temp Control, Easy Pour,Non-Stick(White)
Excellent Wax Melter For Candle Making - Real 8 Qts/7.6L capacity wax melter holds up to 12 Lbs...
As an affiliate, we earn on qualifying purchases.
Melting and Mixing the Wax
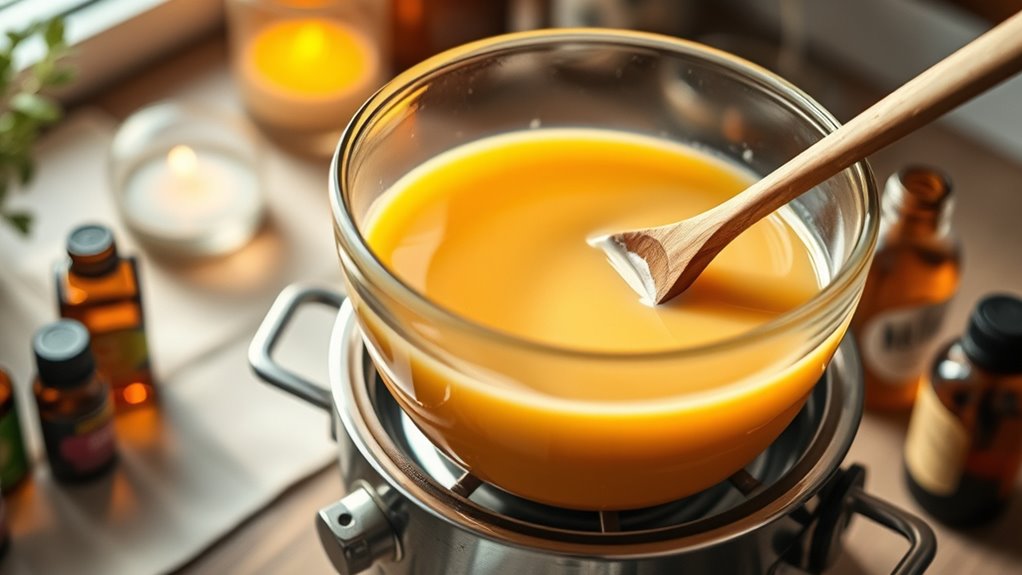
To melt the wax safely and effectively, set up a double boiler by placing a heatproof container or glass jar inside a pot filled with a few inches of water. Heat the water to a gentle simmer, allowing the wax to melt gradually. Stir the wax regularly to maintain a smooth, even wax consistency. As the wax melts, consider flavor pairing—think about how your chosen fragrances will blend for a balanced scent. Proper melting ensures the fragrance oils distribute evenly, resulting in a cohesive aroma. Keep the temperature steady; too hot can affect wax properties, and too cool might cause uneven mixing. Once fully melted, you’re ready to mix in your fragrance oils and prepare for pouring. Incorporating industry transformations like AI automation can help streamline the process and ensure consistent results. Additionally, monitoring the temperature throughout the melting process helps prevent overheating and preserves the wax quality. Maintaining the correct wax consistency is essential for achieving optimal scent diffusion in your wax melts. Using the right tools can make the melting process safer and more efficient.

VEVOR 8Lbs Wax Melter for Candle Making, Large Electric Wax Melting Pot, 4-Level Temperature Control, Easy Pour Spout Easy Clean for Candle Soap Cream Beauty Bulk Production Business or Home ASIN
Fast Heating: This wax melting pot with easy pour spout can quickly heat and melt wax with 1200W...
As an affiliate, we earn on qualifying purchases.
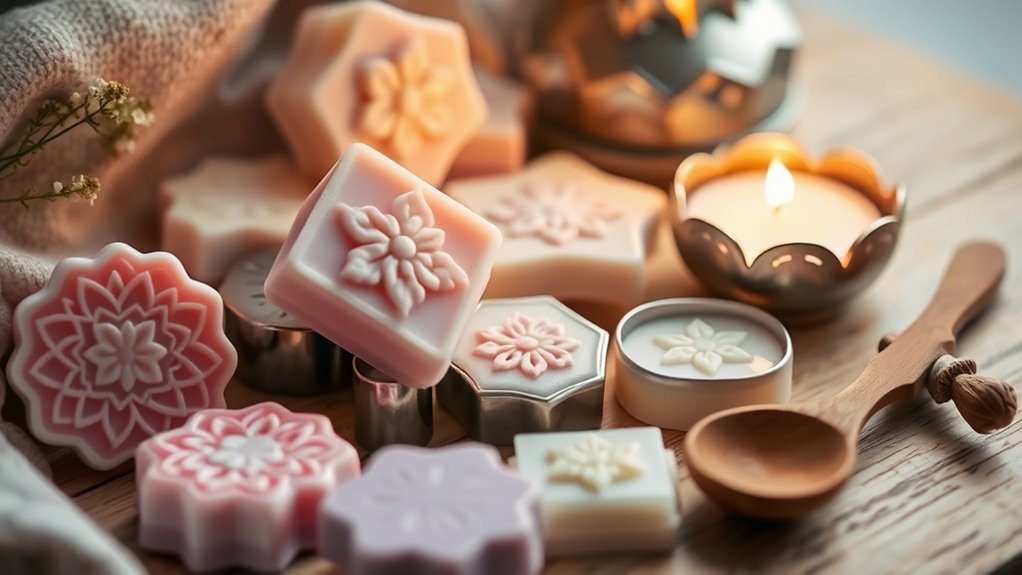
Pouring the Mixture Into Molds

Once your wax mixture is fully melted and fragrant oils are thoroughly blended in, it’s time to pour the liquid into your molds. Choose a mold material that suits your style—silicone molds are flexible and easy to demold, while metal or plastic molds offer durability. Use a steady pouring technique to minimize spills and splashes. Hold the container close to the mold’s opening to control the flow, and pour slowly to prevent air bubbles from forming. If needed, pause briefly when filling each cavity to allow excess wax to settle. Keep the molds on a flat surface to ensure even filling. Taking your time during this step helps create smooth, well-formed wax melts with minimal imperfections.
Allowing the Wax Melts to Cool and Set
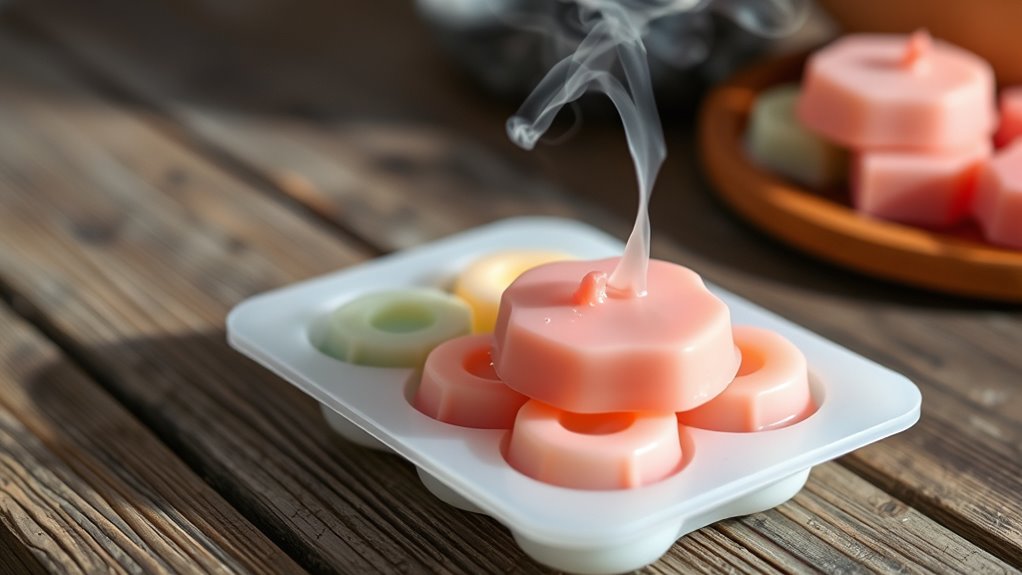
Once you’ve poured the wax into your molds, it’s important to let them cool and set properly. Using a proper cooling technique helps guarantee the wax hardens evenly without cracks. Give them enough time to fully harden so your wax melts turn out perfect and ready to use. To enhance the appearance and longevity of your wax melts, consider incorporating potent ingredients that can improve their efficacy and scent retention. Additionally, controlling the cooling process can prevent common issues like cracking or uneven surfaces, ensuring a smooth finish. Maintaining a consistent cooling temperature during this process is essential for achieving the best results.
Proper Cooling Technique
After pouring the melted wax into your molds or containers, it’s essential to let them cool and set undisturbed. Proper temperature control during cooling prevents cracks or surface imperfections. Avoid rapid cooling, which can cause uneven hardening or warping. Instead, place your molds in a draft-free area at room temperature. This slow, steady cooling ensures the wax solidifies evenly, maintaining a smooth finish. If you speed up cooling with cold environments or refrigeration, you risk creating stress fractures or compromising the scent throw. Patience is key—allow the wax to cool naturally until fully hardened. Automation technologies are increasingly used in manufacturing to optimize cooling processes and improve quality control. Once cooled, you can confidently remove the wax melts, knowing they’ve set properly for ideal fragrance release and durability.
Ensuring Complete Hardening
To guarantee your wax melts are fully hardened, it’s important to give them adequate time to cool and set completely. Proper temperature control during this phase ensures the wax solidifies evenly, preventing cracks or deformities. Start by removing the mold from heat once the wax reaches a safe temperature, then place it on a stable surface. Good mold preparation, like lightly greasing or using silicone molds, makes demolding easier. Additionally, wax melting techniques can help you achieve the best results for your craft projects. Remember these key points: – Allow enough time for cooling; rushing can compromise the shape. – Keep the environment free of drafts that may disturb setting. – Avoid moving the molds prematurely. – Use a thermometer to monitor temperature during cooling. – Be patient for a flawless, fully hardened finish.
Removing and Storing Your Wax Melts

When it’s time to remove your wax melts, you’ll want to do so carefully to prevent messes and damage. Gently loosen the edges with a plastic spatula or your fingers, avoiding sharp tools that could scratch surfaces. Once removed, place the wax melts in storage containers designed for this purpose. Using containers with tight-fitting lids helps preserve their scent and prevents spills. Be sure to label each container clearly with the fragrance name and date, so you can easily identify your wax melts later. Proper labeling also helps you keep track of which scents you’ve used and which ones you want to try again. Store your wax melts in a cool, dry place away from sunlight to maintain their quality and fragrance.
Tips for Customizing Your Fragrance Blends
Creating custom fragrance blends allows you to craft a scent that perfectly suits your preferences, making your wax melts uniquely yours. To achieve this, experiment with essential oils to develop complex, layered aromas. Scent layering is key; combine complementary oils to build depth and dimension in your fragrance. Start with a base scent, then add middle and top notes for a balanced profile. Keep these tips in mind:
- Use small amounts of essential oils to prevent overpowering
- Test blends by melting a small sample before committing
- Mix different scent families for unique combinations
- Record your ratios for future reproductions
- Consider the longevity of each scent layer when blending
Frequently Asked Questions
How Long Do Homemade Wax Melts Typically Last?
Homemade wax melts usually last about 80 to 100 hours of scent release, depending on their size and the wax used. To maximize wax melt longevity, store them in a cool, dry place away from sunlight, and keep them in an airtight container when not in use. Proper storage tips help preserve fragrance quality, ensuring your wax melts stay fresh and fragrant for as long as possible.
Can I Reuse My Wax Melt Molds?
Yes, you can reuse your wax melt molds. To do so, make sure to properly clean and dry them after each use to maintain mold maintenance. Reusing molds saves money and reduces waste, but avoid using them for other crafts or materials that may damage the mold. Check for any cracks or damages before each reuse to guarantee your DIY wax melts come out perfectly every time.
Are There Safe Alternatives to Fragrance Oils?
Think of natural essential oils as the wise guardians of fragrance safety, offering a pure alternative to synthetic fragrance oils. They’re safe when used properly and can infuse your wax melts with delightful scents. While some may worry about safety, choosing high-quality essential oils and using them in moderation keeps your flameless fragrance craft both beautiful and secure. Trust these natural options to create a safe, aromatic sanctuary in your home.
How Do I Prevent Air Bubbles in My Wax Melts?
To prevent air bubbles during the melting process, pour your wax slowly and steadily into the mold. This minimizes air entrapment, reducing bubbles. You can also gently tap or lightly shake the mold after pouring to help air escape. If air bubbles still form, reheat the wax slightly and pour again, ensuring a smooth flow. These steps help create cleaner, bubble-free wax melts for a professional finish.
What Is the Best Method to Scent Candles in Addition to Wax Melts?
Scenting candles is like painting a masterpiece—you blend the right shades for a perfect finish. You should add essential oils directly into your melted wax or candle wax before pouring. Experiment with scent combinations to create unique aromas. For stronger scent throw, choose high-quality oils and use a generous amount. Remember, stirring thoroughly helps distribute the fragrance evenly, ensuring your candles smell amazing and fill your space with delightful aromas.
Conclusion
Creating your own wax melts is like crafting a personal signature—each scent and shape reflects your unique style. When I first made my own, I was surprised how a simple blend transformed my space into a cozy retreat. Just as a painter chooses their colors carefully, you can customize fragrances to match your mood or season. With a little patience, your homemade wax melts will become a fragrant reminder of your creativity and homecoming.