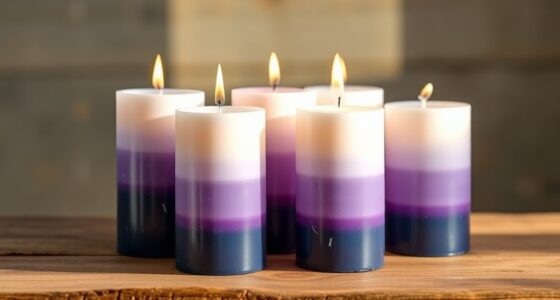

To make DIY rolled beeswax sheet candles, start by gathering high-quality beeswax sheets, wicks, a thermometer, scissors, and a clean workspace. Cut and measure the beeswax into desired sizes, then carefully roll the sheet around the wick, keeping tension for a smooth finish. Secure and shape your candles while the wax is pliable, adding decorative touches if you like. Keep safety in mind, and everything becomes easier once you learn the full process—so keep going to discover all the details.
Key Takeaways
- Choose high-quality beeswax sheets and measure desired sizes before cutting for consistent candles.
- Melt beeswax to 145°F-155°F, ensuring proper temperature for flexibility and safety during shaping.
- Wrap wicks centered in beeswax sheets with even tension, then roll tightly to form the candle.
- Shape and mold candles while wax remains pliable, adding decorations or fragrances as desired.
- Secure finished candles, trim wicks, and store in a cool, dry place for safe, beautiful results.
Gathering Your Supplies and Tools
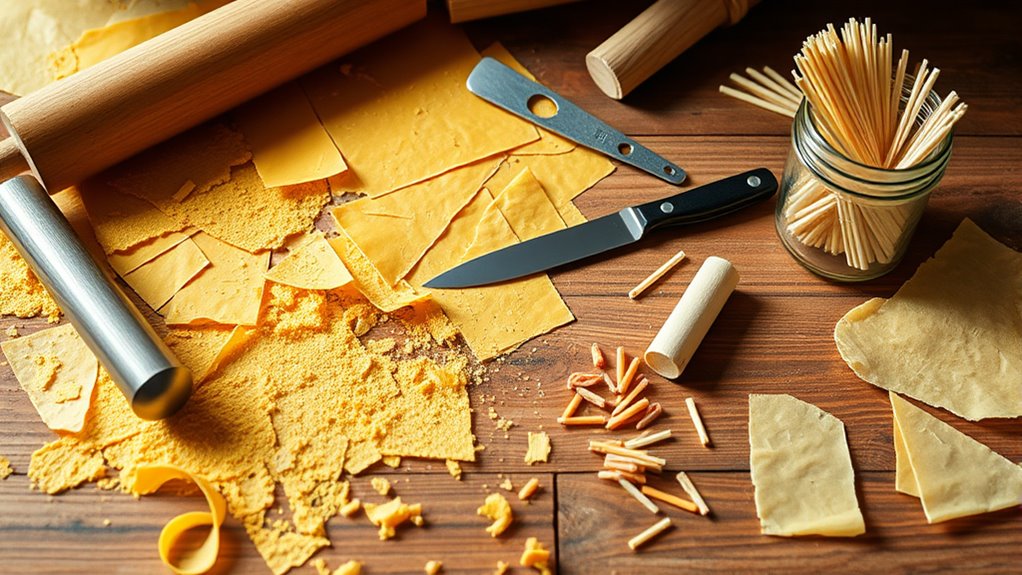
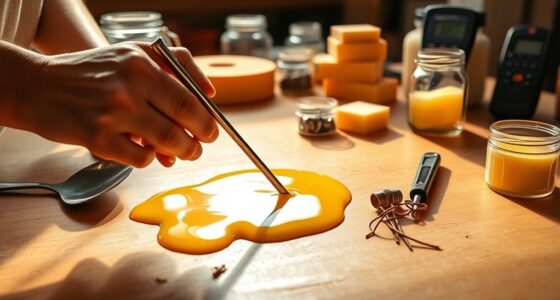
Before you begin making your beeswax candles, acquiring all the necessary supplies and tools is vital. First, choose high-quality beeswax sheets or blocks, and decide on the size and shape you want for your candles. You’ll need a reliable thermometer to monitor wax temperature, ensuring it stays within the ideal range—around 145°F to 155°F—to prevent overheating. Proper wick selection is also essential; opt for a wick that matches your candle’s diameter for an even burn. Gather scissors or a sharp knife to cut the beeswax, along with a clean, flat workspace for rolling and shaping. Additionally, keep a heat-resistant surface and some parchment paper handy to protect your workspace. Using appropriate tools can make the crafting process safer and more efficient. Being aware of candle safety tips is also important to ensure your candles burn safely and effectively. Once you have everything, you’re ready to start crafting your beautiful beeswax candles.
Preparing Your Workspace for Candle Making

Setting up a well-organized workspace is the foundation for a smooth candle-making process. Start by clearing a flat surface dedicated to your project, ensuring it’s free of clutter. Good workspace organization helps you quickly find tools and materials, reducing frustration and mistakes. Pay attention to ventilation considerations, especially if you’re melting beeswax or using any heating equipment. Proper airflow minimizes the buildup of fumes and keeps your workspace safe. Use a thermometer to monitor temperature and prevent overheating. Keep your workspace clean and dry, and have fire safety supplies nearby, like a fire extinguisher or a damp cloth. Label your supplies if needed, so everything stays within reach. A tidy, well-ventilated area helps you focus and makes your candle-making experience safer and more enjoyable. Additionally, understanding local safety regulations can ensure your workspace complies with safety standards. Being aware of the fire hazards associated with melting beeswax is also crucial for maintaining a safe environment. Incorporating fire safety precautions is essential to prevent accidents while working with heat.
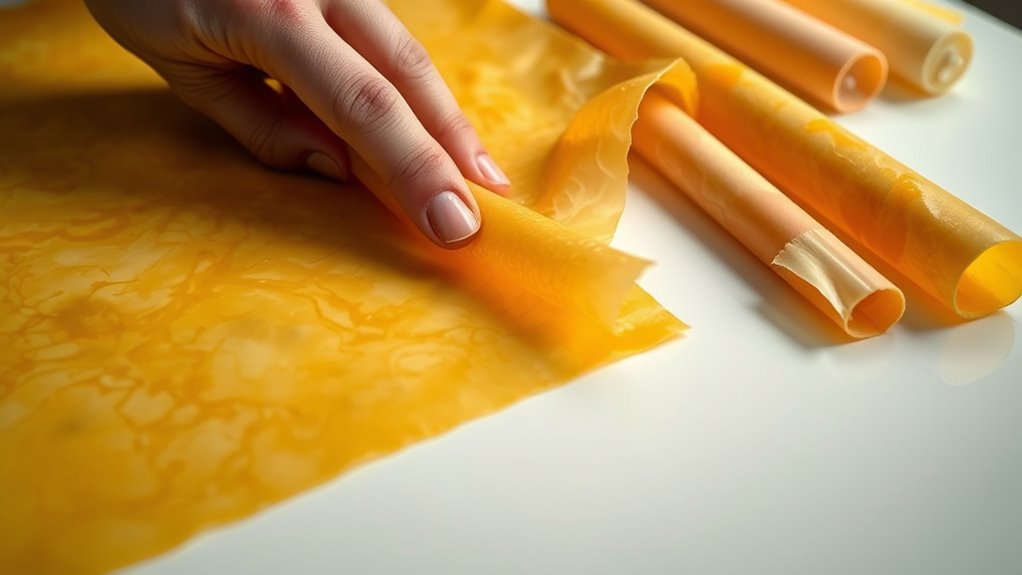
Cutting and Measuring Beeswax Sheets
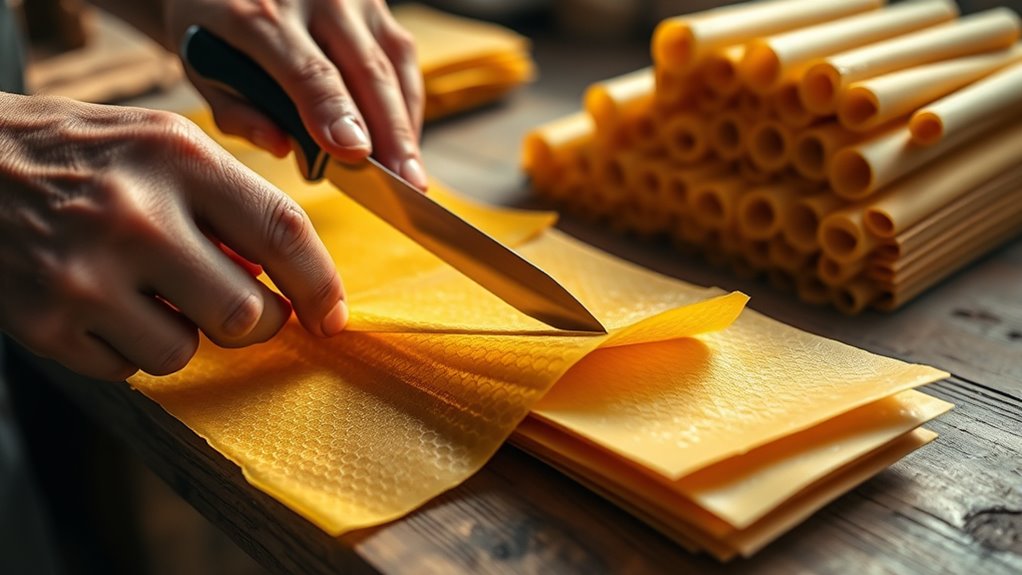
To guarantee your candles have the right shape and size, start by measuring and cutting your beeswax sheets carefully. Begin with your chosen beeswax patterns to determine the desired sheet dimensions, ensuring consistency throughout your project. Use a ruler or measuring tape for accuracy, marking the measurements clearly with a pencil. When cutting, use sharp scissors or a craft knife to achieve clean, straight edges. Double-check your measurements before making cuts to avoid wasting material. Precise cutting helps maintain uniformity in your candles and ensures they fit perfectly around the wick. Remember, accurate sheet dimensions make the rolling process easier and result in a professional-looking finished candle. Taking your time with this step sets a solid foundation for your DIY beeswax candles. Measuring and cutting with care is essential for achieving the best results. Additionally, understanding beeswax properties can help you select the right type of sheets for your project, ensuring optimal melting and flexibility. Being aware of mindfulness techniques can also enhance your crafting experience, helping you stay focused and present throughout the process. Properly handling beeswax is crucial to prevent unnecessary waste and damage during cutting.
Rolling the Beeswax Around the Wick

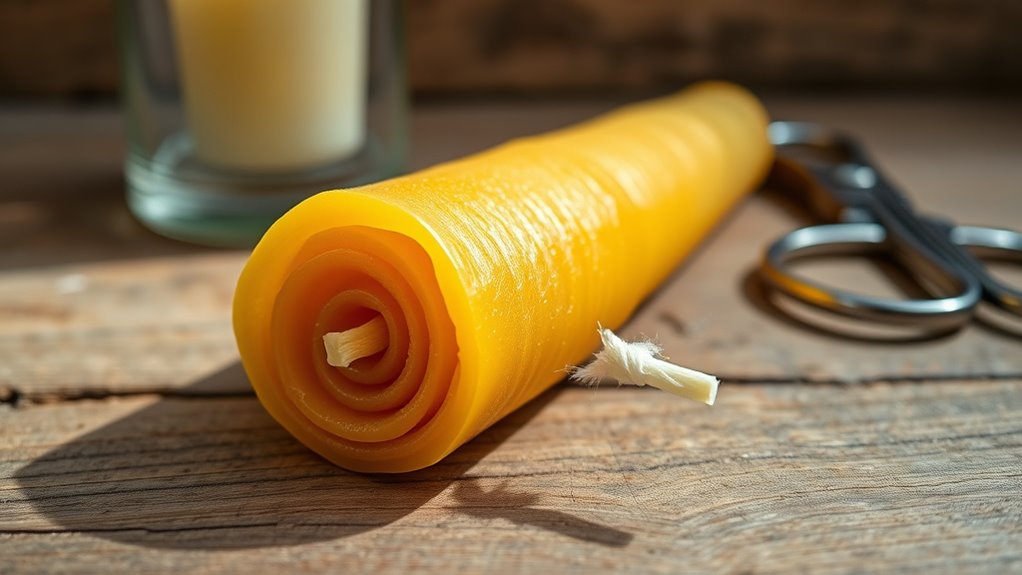
To roll the beeswax around the wick, make sure it’s centered and straight for proper wick placement. Keep even tension as you wrap to avoid wrinkles or loose spots. Use a steady technique to guarantee a smooth, tight wrap that secures the wick securely. For an extra touch, you can also customize the appearance of your candle by choosing different beeswax colors or adding decorative elements before sealing the wrap. Ensuring the proper tension during wrapping helps maintain the integrity of the candle and prevents uneven burning. Additionally, paying attention to candle safety guidelines ensures your DIY project remains safe during use. Remember to test the wick position before finalizing to ensure consistent burn quality.
Proper Wick Placement
Before placing the wick, make sure it’s centered and straight to verify proper wick alignment. This step is essential for candle stability and an even burn. Position the wick so it runs straight through the center of the beeswax sheet, avoiding any tilting that could cause uneven melting or dripping. As you roll the beeswax around the wick, keep gentle tension to maintain the wick’s straightness. Proper wick placement helps your candle burn evenly and prevents tunneling. Double-check that the wick remains centered before fully sealing the rolled beeswax. When the wick is well-aligned, your candle will stand steady and burn more consistently, giving you a safer, more enjoyable experience. Correct placement now sets the foundation for a beautifully crafted beeswax candle. Additionally, ensuring the wick is made from appropriate materials can improve ignition and burn quality.
Maintaining Even Tension
As you start rolling the beeswax around the wick, maintaining even tension is key to achieving a smooth, uniform wrap. Keep a steady grip on the beeswax sheet and avoid pulling too tight or too loose. This ensures the wick remains centered and the wrap stays even. When selecting wicks, choose one that’s appropriate for your candle size to prevent uneven burning or excess tension during rolling. Consistent tension also helps when it’s time to store your candles; tightly rolled candles are less likely to crack or deform. Proper tension during rolling makes candle storage easier, as it maintains the candle’s shape and prevents warping. Focus on steady, even pressure throughout the process to create a professional-looking, consistent finish. Retail hours can impact when you purchase your supplies, so check local store times in advance.
Wrapping Technique Tips
When wrapping beeswax around the wick, apply consistent, gentle pressure to create a smooth, even layer. Proper wick placement guarantees the candle burns evenly, while tension control prevents wrinkles or gaps. Keep the wick centered and straight as you roll to maintain symmetry. To improve technique, consider these tips:
| Tip | Benefit |
|---|---|
| Maintain steady tension | Prevents uneven layers and wrinkles |
| Keep wick straight | Ensures even wax distribution |
| Apply even pressure | Creates a uniform, professional finish |
Focus on steady, controlled movements, adjusting tension as needed. Consistent pressure and mindful wick placement help you produce a clean, smooth rolled candle with a professional look. Additionally, understanding the importance of vetted supplies ensures your materials are reliable and safe for crafting. Using quality beeswax can also enhance the overall appearance and burning quality of your candles. Incorporating legislative changes in the industry can also help you stay compliant and informed about best practices.
Securing and Shaping Your Candles

Securing and shaping your candles is a crucial step to guarantee they set smoothly and maintain the desired form. To enhance candle aesthetics, carefully hold the rolled beeswax sheet until it cools and solidifies, ensuring a clean, even appearance. If you want to incorporate scent infusion, add your fragrance oils before rolling, but avoid overhandling to prevent disrupting the scent’s distribution. Use small clips or gentle pressure to keep the roll tight as it cools. For shaping, you can gently mold the candle into curves or other forms while the wax is still pliable, then let it solidify completely. Proper securing and shaping not only improve the visual appeal but also ensure your candle burns evenly and beautifully. Additionally, maintaining the correct wax temperature during shaping helps prevent cracks or deformations in your finished candle. Using proper technique and patience during this process guarantees a professional-looking result, especially when handling airless sprayers for smooth application. Ensuring the wax is at the right temperature range is essential for achieving consistent shaping and avoiding imperfections.
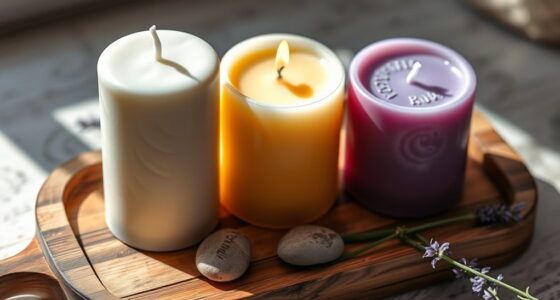
Finishing Touches and Customization

Once your candles have fully cooled and set, you can enhance their appearance with finishing touches and customization. To create a cohesive look, focus on color coordination by choosing wax sheets or decorations that complement your decor. You might also infuse your candles with a subtle scent by adding essential oils during the rolling process or drizzling melted beeswax on the surface. Consider the following options:
| Finishing Touches | Customization Ideas |
|---|---|
| Color coordination | Use contrasting or matching wax colors |
| Scent infusion | Add essential oils for aroma |
| Surface decoration | Embellish with dried flowers or herbs |
These steps allow you to personalize your candles, making them perfect for gifts or home accents. Active listening and empathy can also help you better understand your own preferences when customizing your candles. Additionally, paying attention to space and organization can help you arrange your finished candles in a way that enhances your home decor, especially if you stay informed about market trends that influence interior design choices.
Safety Tips and Candle Care
After adding finishing touches and customizing your beeswax candles, it’s important to prioritize safety to enjoy their beauty without worry. Always keep an eye on your candles when lit to prevent fire hazards. Never leave a burning candle unattended, and trim the wick to about a quarter inch before each use to avoid excessive flames. Make certain your space has proper ventilation requirements to prevent smoke buildup or overheating. Keep candles away from flammable materials and drafts that could accidentally ignite nearby objects. Extinguish candles completely when not in use, and store your beeswax sheets and candles in a cool, dry place. Following these safety tips helps protect your home and ensures your candle-making experience remains enjoyable and safe.
Frequently Asked Questions
How Long Do Homemade Beeswax Candles Typically Burn?
Homemade beeswax candles typically burn for about 10 to 15 hours, depending on their size and thickness. The candle burn time is influenced by beeswax longevity, meaning high-quality beeswax lasts longer and burns more evenly. To maximize burn time, trim the wick regularly and keep the candle away from drafts. With proper care, your DIY beeswax candles will provide a warm, long-lasting glow.
Can I Use Different Types of Wicks With Beeswax Sheets?
Yes, you can use different types of wicks with beeswax sheet candles, but wick selection is essential for safety and proper burning. Make certain the wick is compatible with beeswax sheet candles, meaning it should be thick enough to support the candle’s size and burn evenly. Cotton wicks or hemp wicks often work well, but always test the wick with your specific beeswax sheet to guarantee compatibility and peak performance.
What Are Common Mistakes to Avoid During Rolling?
Think of rolling your beeswax sheet like threading a needle—attention to proper rolling techniques prevents mishaps. Avoid common pitfalls such as pressing too hard, which can cause tears, or rushing, leading to uneven layers. Keep your sheets steady and taut, ensuring a smooth roll. By staying patient and focused, you’ll create beautiful, even candles. Remember, precision and gentle handling are your best allies in avoiding mistakes.
How Do I Store Leftover Beeswax Sheets Properly?
To store leftover beeswax sheets properly, you should focus on beeswax sheet preservation by keeping them in a cool, dry place away from direct sunlight. Wrap the sheets in parchment paper or keep them in an airtight container to prevent dust and moisture from affecting their quality. Maintaining ideal storage conditions ensures your beeswax remains pliable and ready for your next candle-making project, extending its shelf life effectively.
Are There Eco-Friendly Dyes Suitable for Beeswax Candles?
Imagine you’re a modern-day alchemist, turning beeswax into art. You’ll love eco-conscious coloring options like natural dyes from plants, spices, or mineral powders, which are safe for beeswax candles. These eco-friendly dyes offer vibrant hues without harmful chemicals, making your creations environmentally friendly and beautiful. Always test small amounts first to guarantee proper color absorption and stability, so your candles shine with natural beauty and eco-conscious charm.
Conclusion
Now that you know how to craft your own beeswax sheet candles, imagine lighting one in your cozy living room, its warm glow filling the space with natural beauty. For example, Sarah started making candles as a hobby, and now her handmade creations brighten family gatherings and gift-giving moments. With just a few simple supplies and some patience, you can turn raw beeswax into stunning, personalized candles that bring warmth and charm to any setting.