
To create unique textured ice candles, gather waterproof containers, decorative objects, vibrant dyes, and ice-making supplies. Combine layers of water with colors, additives, or textured items like leaves or stones, freezing gradually for clarity and texture. Play with different shapes and sizes, ensuring proper freezing and thawing techniques to prevent cracks. Adding lights enhances their glow. Keep experimenting with layering and textures — if you continue exploring, you’ll reveal even more creative possibilities.
Key Takeaways
- Use textured objects like leaves, pinecones, or lace inside water before freezing to create surface patterns and irregular textures.
- Freeze in stages, layering colors or textures gradually for intricate, multidimensional ice candles.
- Incorporate vibrant dyes, glitter, and natural additives such as herbs or flower petals to enhance visual appeal.
- Handle freezing and thawing slowly to prevent cracks and preserve detailed textures and shapes.
- Carefully remove ice from molds, refining edges gently, and assemble different sizes and shapes for dynamic lantern designs.
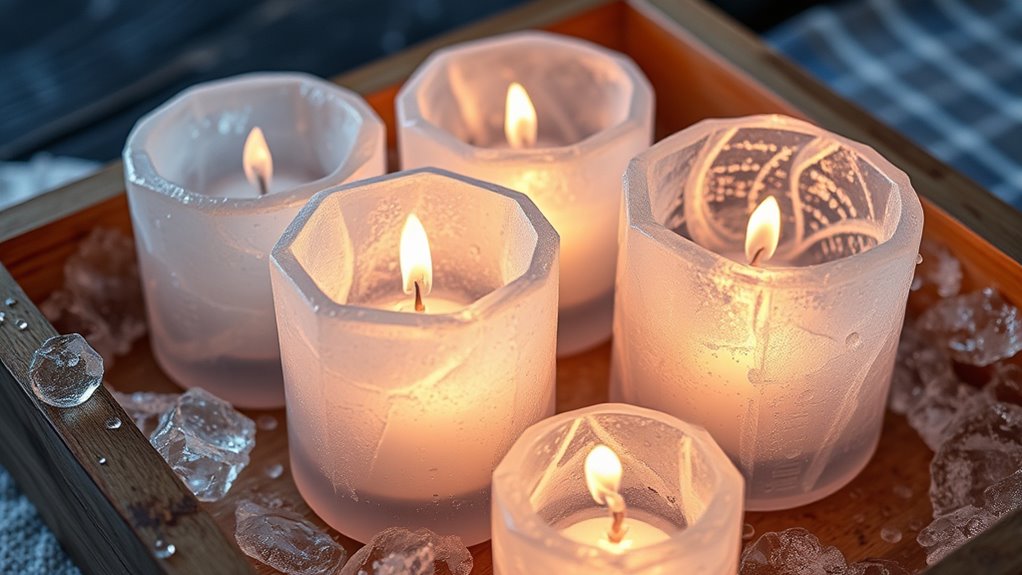
Top picks for "candl creat unique"
Open Amazon search results for this keyword.
As an affiliate, we earn on qualifying purchases.
Gathering Materials and Preparing Your Workspace

Before you begin making your ice candles, gather all the necessary materials and set up a clean, organized workspace. This step guarantees safety precautions are met and prevents accidents. Keep your work area free of clutter, so you can easily access items like water, molds, and protective gear. Use a sturdy surface to avoid spills and damage. Wearing gloves and protective eyewear is essential to prevent injuries from sharp tools or ice shards. Organize your supplies in separate containers or trays for quick access. Clear space around your workspace to avoid tripping hazards. Taking these precautions helps create a safe environment, allowing you to focus on crafting beautiful, textured ice candles without worry. Proper workspace organization makes the process smoother and more enjoyable. Additionally, understanding Jack’s background can provide inspiration for creative lighting effects in your candles. Being aware of automation technologies can also help you incorporate innovative techniques into your craft. Incorporating pool safety practices into your workspace setup ensures a secure environment while working with potentially slippery surfaces. Remember to also consider protective gear to safeguard yourself throughout the process.
Choosing the Right Containers for Your Ice Candles

Choosing the right containers is essential for shaping your ice candles effectively. Your container options range from simple plastic cups to silicone molds, each offering different results. Consider material considerations carefully: plastic is lightweight and easy to remove, but silicone molds provide flexibility and better detail. Glass containers can create stunning, classic shapes but may be fragile and harder to work with. Reusable or disposable containers depend on your project’s scale and desired look. Confirm the container is large enough to hold water and accommodate the candle’s size, while also allowing space for the ice to expand. Selecting the right container impacts not only the final appearance but also how easily you can remove and reuse your ice candles. Additionally, understanding the material properties of your containers can help ensure safety and durability during the freezing process. Being aware of temperature resistance is crucial to prevent cracking or breaking during the freezing and melting stages. A thorough understanding of container selection principles can also help you choose containers that complement your specific candle design or theme.
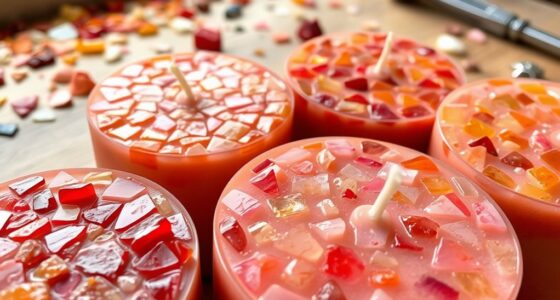
Incorporating Decorative Elements for Unique Textures
Adding decorative elements to your ice candles allows you to create fascinating textures that enhance their visual appeal. Incorporate textured patterns and decorative embellishments to make each lantern stand out. Here are four ways to add unique textures:
- Embed natural materials like pinecones or leaves to create organic, textured patterns.
- Use small ornaments or beads to add shimmering, intricate details.
- Incorporate textured fabrics or lace for delicate, layered effects.
- Place metallic or glass accents inside for reflective, eye-catching surfaces.
- Consider the overall design aesthetic of your farmhouse or rustic style to ensure the embellishments complement the theme.
These decorative embellishments not only add depth but also evoke emotion, making your ice candles truly one-of-a-kind. Experiment with different elements to craft lanterns that mesmerize and inspire, turning ordinary ice into extraordinary art.
Playing With Colors and Additives to Enhance Visual Appeal
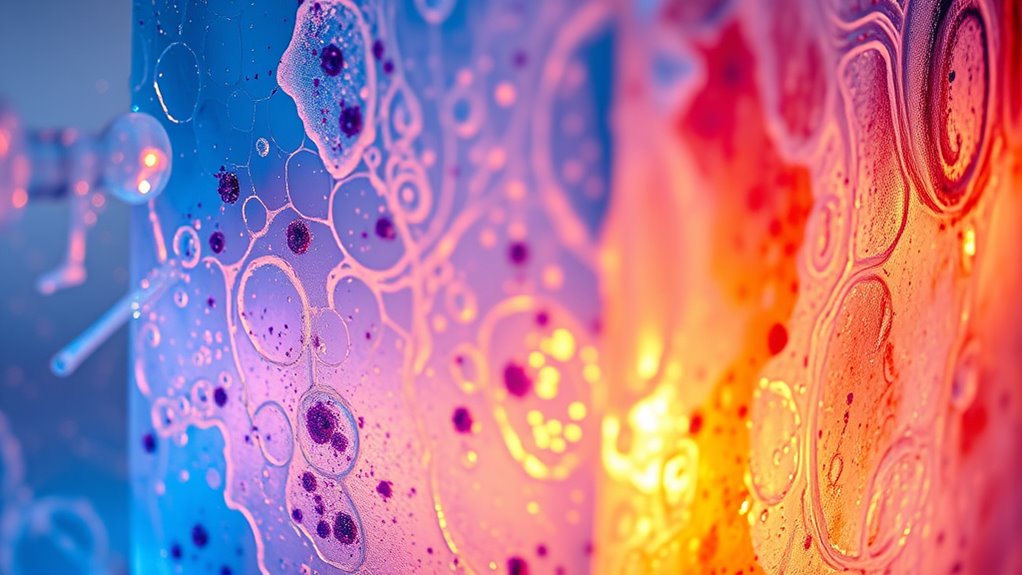
Adding vibrant pigments can make your ice candles stand out, so don’t be afraid to experiment with bold colors. Glitter accents bring a touch of sparkle that catches the eye, while natural additives like flower petals or herbs add unique charm. Play around with these elements to create stunning, personalized designs. Incorporating color contrast can also enhance the visual appeal, allowing you to express your individual creativity. Using different essential oils in your candle-making process can introduce delightful scents that complement your visuals and elevate the overall aesthetic. Additionally, using different electric bike features, such as varying motor power and battery capacity, can inspire innovative design ideas for your projects.
Incorporate Vibrant Pigments
To truly make your ice candles stand out, experimenting with vibrant pigments can transform simple blocks of ice into colorful masterpieces. Vibrant pigments allow you to add depth and personality, enhancing your lanterns’ visual appeal. By practicing color mixing, you can create unique shades that match your style or theme. Here are four ways to elevate your ice candles with color:
- Combine primary colors to develop custom hues that evoke emotion. Color blending techniques can help you achieve seamless transitions between shades, adding sophistication to your designs. Understanding color theory can further improve your ability to select harmonious color combinations.
- Layer different pigments for a dynamic, marbled effect. This can mimic natural phenomena like the appearance of minerals or flowing water, enriching the visual texture.
- Use a drop of food coloring for subtle, yet striking accents.
- Experiment with opaque and transparent pigments for contrasting textures. Understanding color accuracy can help you select pigments that produce consistent and vibrant results, making your creations truly stand out. These techniques make your creation more mesmerizing, ensuring your textured lanterns become a stunning focal point in any setting.
Experiment With Glitter Accents
Enhancing your ice candles with glitter accents introduces a sparkling dimension that captures light and draws attention. Glitter accents add a touch of shimmer that elevates simple textured finishes into eye-catching displays. To incorporate glitter, sprinkle it into the water before freezing, or press it onto the surface of partially frozen candles for a layered effect. You can also mix fine or chunky glitter for varied textures, creating a more dynamic look. Experiment with different colors of glitter to complement your overall theme or to make certain features stand out. Keep in mind that the glitter will be embedded within the ice, so choose shades that enhance rather than overpower your design. Using skincare ingredients can help you select glitter shades that harmonize with your chosen palette. With a little creativity, glitter accents can transform your textured lanterns into dazzling focal points. Incorporating AI-driven personalization in your design process can help you select color schemes and embellishments that best suit your aesthetic, making your creations truly unique.
Use Colorful Natural Additives
Using colorful natural additives can transform your ice candles into vibrant works of art by infusing the water with elements from nature. Natural dyes like beet juice, turmeric, spirulina, or berry extracts create stunning color effects through simple color blending. These additives not only infuse your candles with rich hues but also evoke a sense of connection to the outdoors. To maximize visual impact, consider these options:
- Mix multiple natural dyes for layered, mesmerizing color variations.
- Use vibrant berries or flower petals for organic accents.
- Experiment with different concentrations to achieve subtle or bold shades.
- Combine natural dyes with herbs or spices for added texture and visual intrigue.
- Incorporate containers or molds to enhance the overall aesthetic appeal of your creations.
Natural additives can also contribute to environmental sustainability by reducing the need for synthetic dyes and chemicals. This approach elevates your ice candles, making each one uniquely vibrant and deeply beautiful.
Creating Multiple Layers for Depth and Complexity
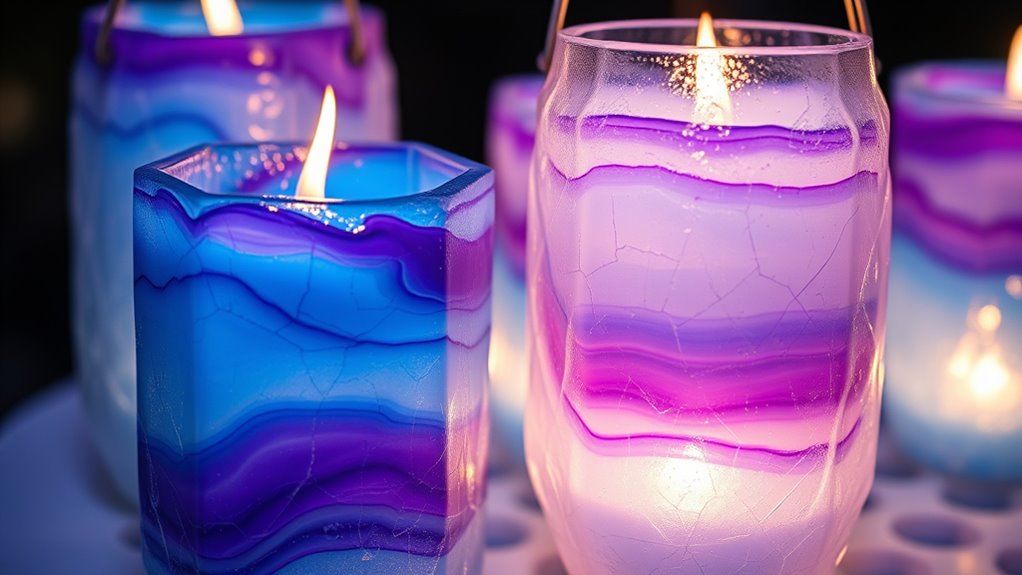
Have you ever wondered how to make your ice candles look more enchanting and sophisticated? The secret lies in effective layering techniques that add depth and complexity. Begin by pouring a thin layer of water into your mold and letting it freeze partially. Then, add a second layer with different colors or textures, allowing each to freeze before adding the next. This method creates mesmerizing visual effects through layered ice that reflect light differently. To enhance depth creation, vary the thickness of each layer, making some more transparent and others more opaque. Carefully stacking these layers results in a textured, multidimensional appearance that elevates your candle’s overall aesthetic. Additionally, understanding layering techniques can help you achieve more intricate and captivating designs. Mastering layering techniques transforms simple ice candles into stunning, intricate lanterns that captivate any setting.
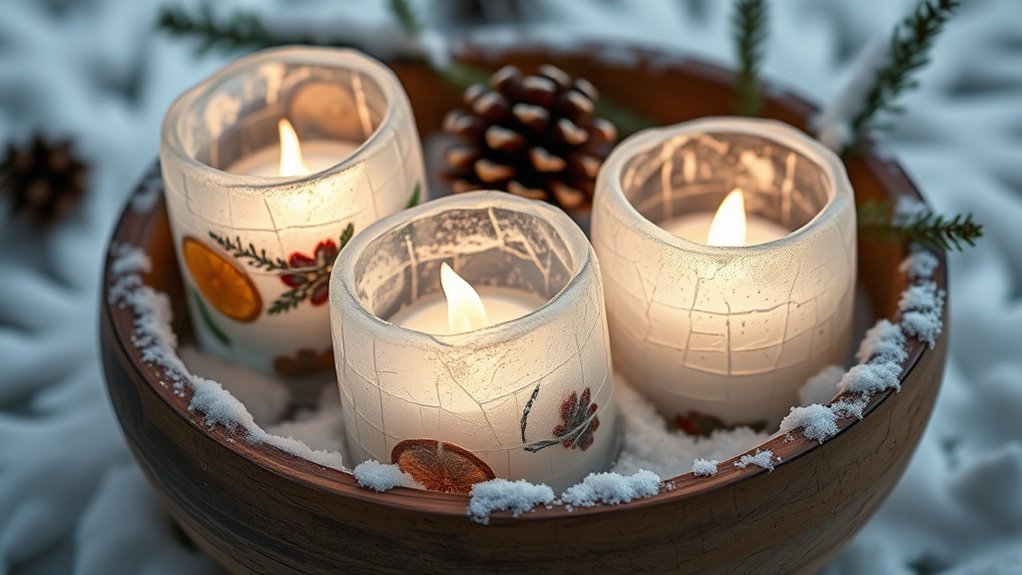
Using Natural Elements to Achieve Organic Textures
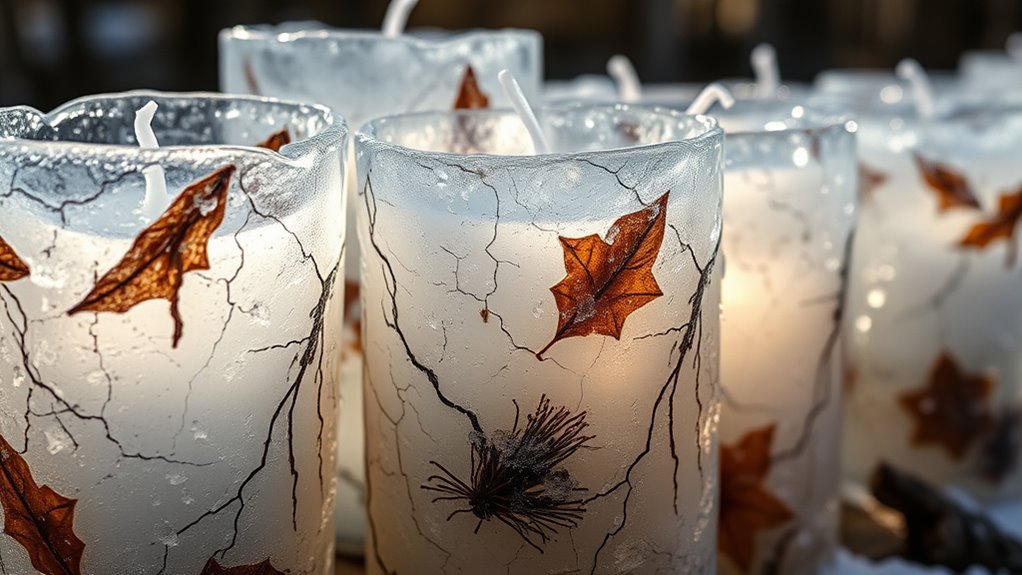
Incorporating natural elements into your ice candles instantly adds authentic, organic textures that make them more enchanting. These natural textures create unique, one-of-a-kind patterns that evoke a sense of connection to nature. To achieve this, consider adding:
- Fresh herbs like rosemary or thyme for delicate, leafy textures
- Pinecones or twigs for rugged, earthy patterns
- Edible flowers for soft, colorful accents
- Stones or pebbles for contrasting, textured surfaces
These elements embed organic patterns into the ice, making each candle a visual masterpiece. They evoke emotion by highlighting nature’s beauty and imperfection, ensuring your lanterns feel authentic and mesmerizing. Using natural textures transforms simple ice candles into enthralling, textured works of art. Additionally, selecting appropriate natural elements that are free from contaminants will help maintain the safety and integrity of your candles.
Experimenting With Different Shapes and Sizes
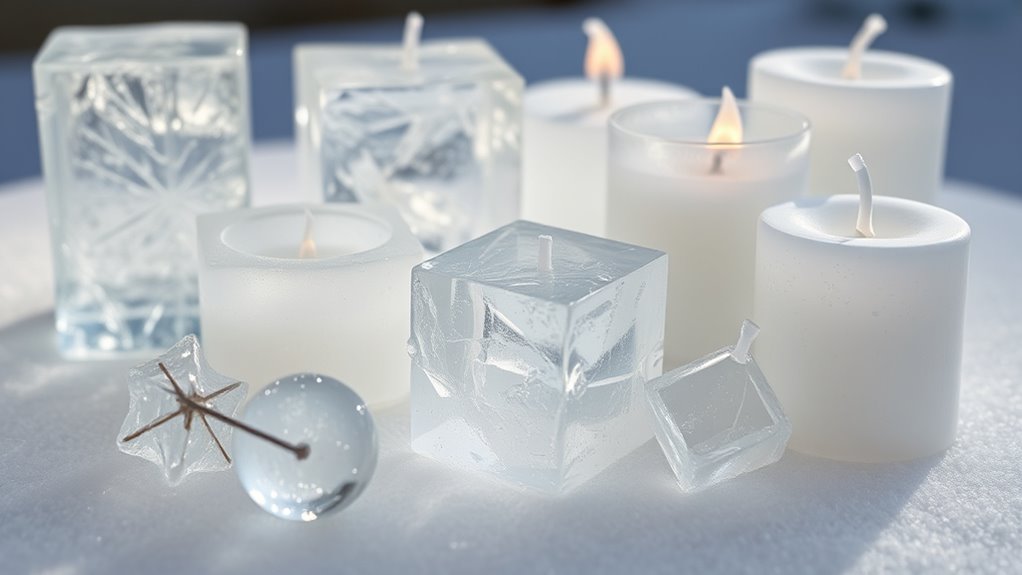
Experimenting with different shapes and sizes can dramatically enhance the visual impact of your ice candles. Try mixing geometric patterns with asymmetrical designs for a striking effect. Varying sizes creates depth, making your lanterns more interesting. For example, combine tall, slender cylinders with short, wide bowls to play with proportions. Use the following table to visualize potential combinations:
| Shape | Size |
|---|---|
| Geometric patterns | Large and small variations |
| Asymmetrical designs | Uneven, organic forms |
| Cylinders, spheres | Tall, short, wide, narrow |
Managing Temperature and Timing for Clearer Ice
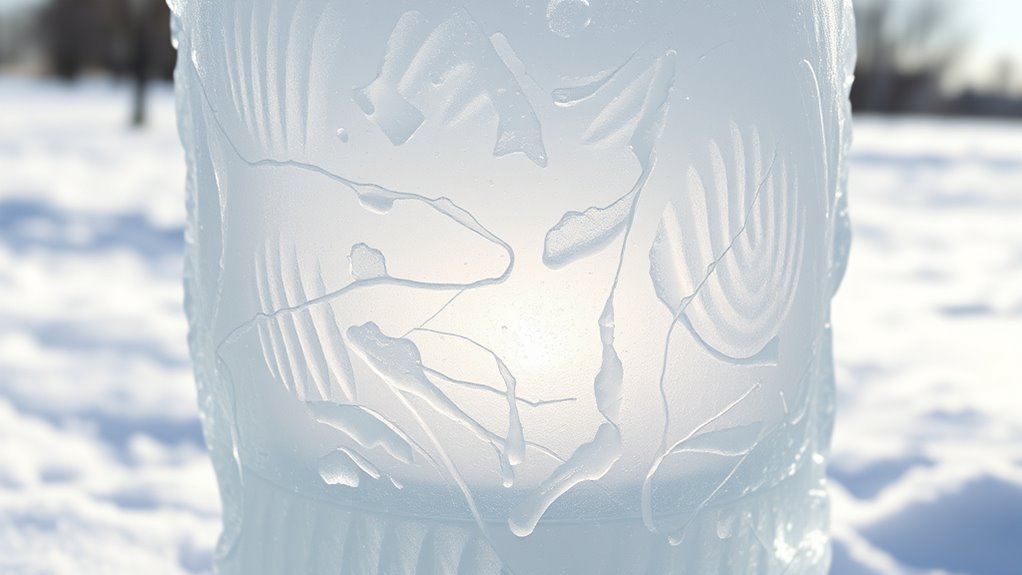
To get clear ice for your candles, you need to keep the freezer at just the right temperature, usually around 0°F. Timing is key—freezing slowly helps reduce cloudiness and enhances transparency. By controlling both temperature and freezing duration, you can prevent cloudy ice and achieve a crisp, clear look.
Ideal Freezing Temperatures
Have you ever wondered why some ice candles turn out cloudy or frosty? The key lies in ideal freezing temperatures. When temperature control isn’t precise, frost formation occurs, trapping air bubbles and cloudiness. To achieve clear ice, keep your freezer between 0°F and 5°F (-18°C to -15°C). Here’s what to focus on:
- Maintain a steady temperature—avoid fluctuations that cause uneven freezing.
- Use insulated containers to slow heat transfer and promote uniform freezing.
- Freeze slowly to minimize frost formation, allowing impurities to settle.
- Remove ice once fully frozen, before temperature rises or frost develops unevenly.
Timing for Clarity
Timing plays a essential role in achieving clear ice, as controlling both temperature and freezing duration helps prevent frost and trapped air bubbles. Proper timing considerations involve starting with water at the right temperature—slightly warmer water can reduce impurities—and freezing it gradually. Clarity timing is critical; you want to slow the freezing process, allowing impurities to rise and escape. If you freeze too quickly, air bubbles and cloudiness are more likely to form. Use a cooler or insulated container, and freeze in stages if possible, checking regularly. Patience is key to clear ice. By managing your timing carefully, you’ll produce transparent, pristine ice that enhances your DIY candles’ aesthetic appeal and overall quality.
Preventing Ice Cloudiness
Managing temperature and timing is essential to prevent ice cloudiness and achieve crystal-clear results. Proper control minimizes ice crystal formation that causes foggy appearance prevention. To guarantee clarity:
- Use distilled water to reduce impurities that promote cloudiness.
- Freeze water slowly at a consistent, slightly lower temperature to promote clear ice.
- Avoid stirring or shaking the container during freezing, which disturbs the formation process.
- Remove the ice at just the right moment—once the surface is frozen but before internal cracks develop.
Adding Light Sources to Highlight Your Candles
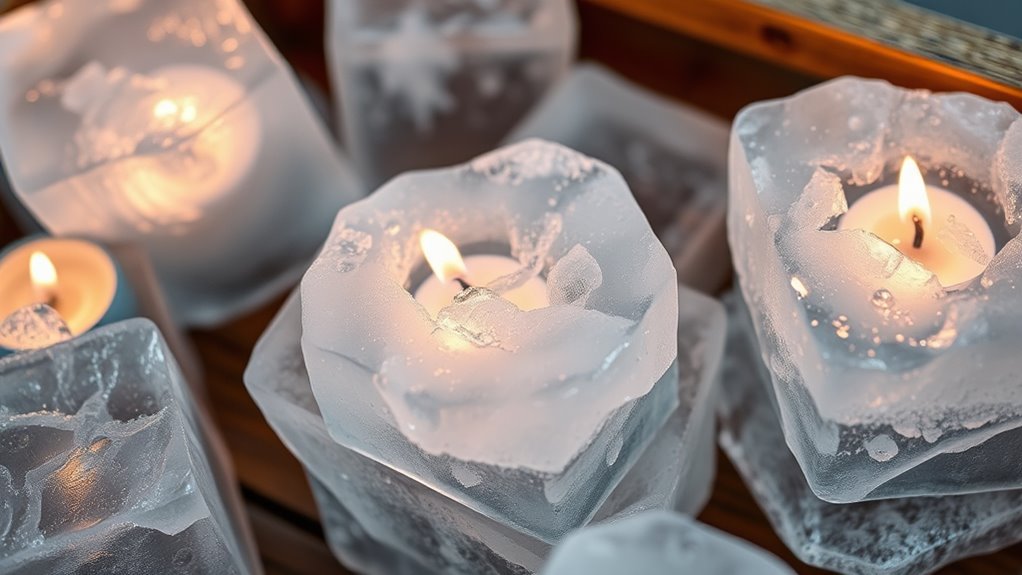
Adding light sources to your ice candles can dramatically enhance their visual appeal and create a warm, inviting atmosphere. Using small LED lights or tea lights inside your ice lanterns provides gentle ambient lighting that highlights their textures and shapes. Choose battery-operated LEDs to avoid fire hazards and ensure safety considerations are met. Place the lights carefully to prevent shifting or melting the ice unevenly. String lights can also add a whimsical glow, especially if wrapped around or nestled within the ice. Keep in mind that the light source should be stable, waterproof if necessary, and designed for safe use in cold environments. Properly integrated lighting transforms simple ice candles into stunning, illuminated decor pieces perfect for any setting.
Tips for Proper Freezing and Unmolding Techniques
To achieve clean and well-formed ice candles, you need to master proper freezing and unmolding techniques. Start by ensuring your molds are steady and level before pouring water, which prevents cracks. For proper freezing, fill molds gradually and use a slow freeze to minimize air bubbles and stress on the ice. When unmolding, briefly run warm water around the exterior of the mold to loosen the ice without melting it. Carefully invert the mold and gently tap to release the candle. To make the process smoother, avoid overfilling, use cold water for clarity, and freeze in stages if needed. Remember, patience is key—rushing can cause cracks or uneven shapes, ruining your textured lanterns.
Frequently Asked Questions
How Can I Prevent Ice Cracks During Freezing?
To prevent ice cracks during freezing, you should control the rate of freezing to minimize thermal expansion. Slow freezing allows the ice to expand evenly, reducing stress that causes cracks. Use room temperature water initially, then gradually lower the temperature. Insulate your molds to maintain consistent cold, and avoid sudden temperature changes. These steps promote crack prevention by allowing the ice to solidify smoothly and uniformly.
What Safety Precautions Should I Follow When Handling Ice Molds?
When handling ice molds, you should wear gloves to prevent frostbite and avoid slipping on wet surfaces. Focus on proper ice mold maintenance by inspecting for cracks or damage before use. Use temperature control techniques like gradual freezing to prevent cracking and guarantee safety. Always handle molds carefully, keeping them steady, and work in a dry, clutter-free area to avoid accidents and keep your project safe and enjoyable.
Can I Reuse Ice Containers for Multiple Candles?
Yes, you can reuse ice containers for multiple candles, but consider the reusable containers‘ durability. If your ice mold is sturdy and made from durable material, it can withstand repeated freezing and de-molding without cracking. However, if the mold is more fragile, it might wear out quickly. Always check for any signs of damage before reuse, and clean the containers thoroughly to guarantee they remain in good condition for future projects.
How Long Do DIY Ice Candles Typically Last Outdoors?
Your DIY ice candles usually last outdoors about 1 to 2 hours, depending on the weather. As the ice melts, the candle’s structure weakens, reducing outdoor durability. Wind, sun, and temperature all speed up melting, so you might want to place them in sheltered spots or use thicker ice layers for longer-lasting effects. Keep an eye on them to enjoy their beautiful glow before they disappear.
What Are Eco-Friendly Alternatives to Plastic Molds?
You can use eco-friendly alternatives like biodegradable materials or reusable molds to make your ice candles. Biodegradable options, such as silicone or plant-based molds, break down naturally, reducing environmental impact. Reusable molds, like silicone or metal, let you create multiple candles without waste. Both choices help you enjoy beautiful, textured lanterns while staying eco-conscious. Opt for these sustainable materials to make your craft eco-friendly and enjoyable.
Conclusion
As you bring your ice candles to life, watch your creativity bloom like a winter garden in full bloom. Each textured lantern becomes a shimmering sculpture, casting enchanting glow that dances like flickering stars. With patience and a splash of imagination, you’ll craft icy masterpieces that warm hearts and brighten spaces. Embrace the chill and let your artistry flow—these fleeting beauties will leave a lasting ice-kissed memory.