You can create beautiful, fragrant candles without wax by using alternative oils like coconut, jojoba, or olive oil, combined with essential oils for scent. Choose safe containers such as glass jars or ceramic dishes, and add a suitable wick to guarantee safe burning. Experiment with different oil blends and decorative elements to personalize your project. If you keep exploring, you’ll discover more tips and tricks to craft unique, eco-friendly oil candles that glow and smell amazing.
Key Takeaways
- Use food-grade or cosmetic-grade carrier oils like coconut, olive, or jojoba as a safe, wax-free base for candles.
- Incorporate essential oils for fragrance, ensuring proper mixing and layering for a pleasant scent.
- Select heat-safe containers such as glass, metal, or ceramic, and secure wicks with tabs or clamps.
- Add natural embellishments like dried flowers or stones to enhance visual appeal without wax.
- Follow safety guidelines: keep candles on heat-resistant surfaces, trim wicks, and avoid overfilling containers.

SoftOwl Premium Soy Candle Making Kit – Full Set – Soy Wax, Big 7oz Jars & Tins, 7 Pleasant Scents, Color Dyes & More – Perfect as Home Decorations – DIY Starter Scented Candles Making Kit
🧡 THE ULTIMATE SET FOR BEGINNERS: The natural soy wax candle making kit comes in a beautiful giftable…
As an affiliate, we earn on qualifying purchases.
As an affiliate, we earn on qualifying purchases.
Choosing the Right Oils for Your Candle Projects
When selecting oils for your DIY candles, it’s important to choose those that burn cleanly and release a pleasant scent. Focus on fragrance pairing to ensure your chosen oils complement each other well, creating a harmonious aroma. Always prioritize oil safety by selecting high-quality, food-grade or cosmetic-grade oils, as these are safer for burning and won’t release harmful fumes. Avoid using essential oils in excessive amounts, which can cause flare-ups or uneven burning. Test small batches first to gauge how the scent develops when heated. Remember, a well-chosen blend enhances your candle’s ambiance without compromising safety or quality. Additionally, understanding the importance of color accuracy can help you select oils that contribute to a more visually appealing candle. Being aware of AI’s impact on consumer preferences can guide you in choosing scents and colors that are more likely to resonate with your target audience. Moreover, selecting oils with consistent burning properties ensures your candles burn evenly and safely over time. Incorporating proper storage techniques for your oils can help maintain their quality and scent profile over extended periods. With careful selection, your homemade candles will smell great, burn safely, and provide a cozy atmosphere.

SUPMIND 12oz Candle Jars for Making Candles, 8 Pack Large Clear Glass Empty Candle Jars with Bamboo Lids, Wide Mouth Candle Container Bulk, Ideal for Candle Business
CANDLE MAKING SUPPLIES: The kit includes 8 wide-mouth candle making jars with bamboo lids. Suitable for DIY homemade…
As an affiliate, we earn on qualifying purchases.
As an affiliate, we earn on qualifying purchases.
Selecting Safe and Eco-Friendly Containers

Choosing the right containers is essential for making safe and eco-friendly DIY candles. You want options that support recycling options to reduce waste and promote sustainability. Look for containers made from glass, metal, or ceramic, as these materials are generally safe and less likely to emit harmful fumes. Verify container safety by inspecting for cracks, chips, or sharp edges that could cause accidents. Reusing household items like jam jars, teacups, or tin cans is a great way to repurpose materials and minimize environmental impact. Always clean your containers thoroughly before pouring in your oil mixture. Avoid plastics or containers not labeled as heat-safe, as they may leach chemicals or melt when heated. Selecting the right, eco-conscious containers ensures your candles are both beautiful and safe to use. Additionally, understanding permanent vs. temporary hearing loss can help you identify and address hearing issues early, ensuring safety and well-being in your environment. Incorporating energetic alignment into your project can also enhance your creative process and overall experience. Being mindful of child-safe materials is also important when repurposing household items for your candle containers, especially if children are present around your workspace.

PHATOIL 3.38FL.OZ Coconut & Vanilla Fragrance Oils for Aromatherapy, Essential Oils for Diffusers for Home, Perfect for Diffuser, Yoga, DIY Candle and Soap Making – 100ml
High Quality Glass Bottle with Free Dropper: The fragrance oils come in high-quality glass bottles and are infused…
As an affiliate, we earn on qualifying purchases.
As an affiliate, we earn on qualifying purchases.
Essential Oil Blends for Fragrant Ambiance

Creating the perfect fragrant ambiance starts with selecting the right essential oil blends. When you choose your blends, consider the aromatherapy benefits you want to achieve, like relaxation, energizing, or mood lifting. Essential oil blending allows you to customize scents that suit your space and mood, combining calming lavender with invigorating citrus or soothing chamomile with spicy cinnamon. Experiment with different ratios to find your ideal mix. Keep in mind that some oils complement each other better, enhancing the overall aroma and therapeutic effects. Well-crafted blends not only make your oil candles smell wonderful but also promote specific feelings and well-being. For example, understanding the power of horsepower can help you select the right strength of essential oils for your candles, ensuring a balanced and effective fragrance. Additionally, considering air purifier technology can help you create a healthier environment that complements your aromatic space. Developing an emotional intelligence can further enhance your ability to choose and blend oils that resonate with your mood and intentions. By thoughtfully selecting and blending your essential oils, you create a personalized, fragrant environment that elevates your space naturally. Incorporating knowledge of essential oil chemistry can further optimize your blends for maximum therapeutic benefits.

FUHITIM Essential Oil Set, Premium Essential Oils Gift Set for Diffuser, DIY Candle and Soap Making, 42×5 ML (0.17oz)
【42 Essential Oil Set】Essential oils set includes 42*5ml/0.17oz bottles of aromatherapy essential oils, give you the most variety…
As an affiliate, we earn on qualifying purchases.
As an affiliate, we earn on qualifying purchases.
Step-by-Step Guide to Making Oil Candles
To make your own oil candles, start by gathering all the supplies you need, like a container, wick, and your chosen oils. Next, prepare a well-mixed oil blend that suits your fragrance preferences. Ancient techniques can inspire your method for safely combining and handling oils for burning. It’s also helpful to consider state-specific regulations if you plan to sell or distribute your candles, ensuring compliance with local laws. Understanding safety precautions is essential to prevent accidents and ensure your candles burn safely. Strong communication skills can help you clearly follow instructions and troubleshoot any issues during the process. Finally, assemble your candle, light it, and enjoy the warm glow and aroma.
Gather Necessary Supplies
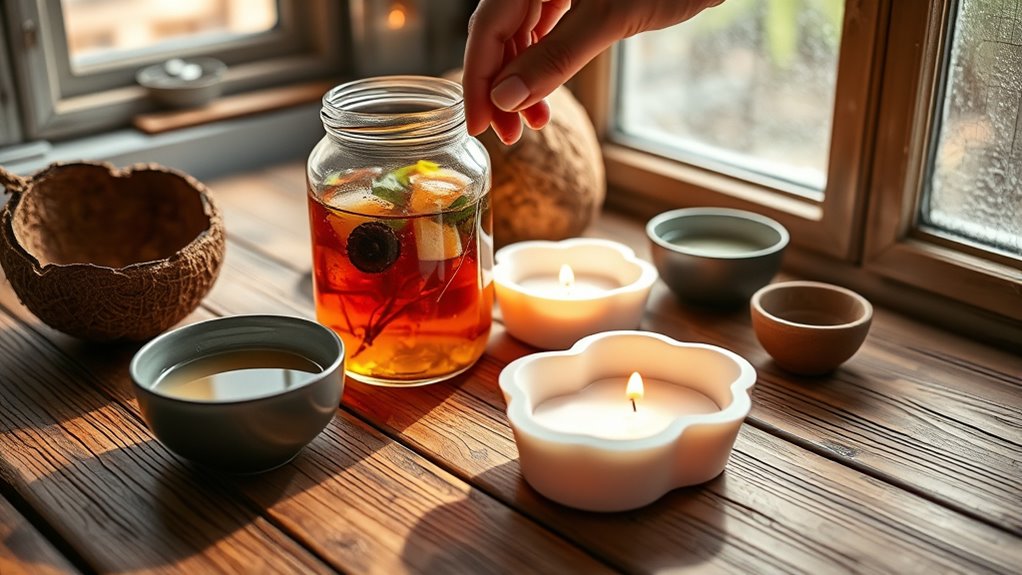
Before you start making your oil candles, gather all the supplies you’ll need to guarantee a smooth process. You’ll want a sturdy container—preferably one that’s easy to clean and follows container cleaning tips to avoid leftover residue. Choose matching candle scents to create a cohesive aroma experience. Pick a clean, dry vessel that won’t react with the oil. Get your preferred oil—like olive, coconut, or soy—and a compatible wick. You might also need a small pot for melting, scissors to trim the wick, and a lighter. Make certain your workspace is clean and free of clutter. Having everything ready ensures you won’t miss any essential supplies, making your candle-making process more efficient and enjoyable. Additionally, understanding best candles can help you select the most effective materials for your project, including choosing the right candle wax alternatives. Always consider the safety precautions when working with heat and flammable materials to prevent accidents. Being aware of alternative candle materials can also expand your options for creating unique and safe oil candles.
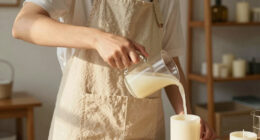
Prepare the Oil Mixture
Preparing the oil mixture is a crucial step to guarantee your candle burns smoothly and evenly. Start by selecting high-quality oils, such as carrier oils and fragrance oils, making certain they’re safe for containers. Mix your base oil with a few drops of fragrance oils to add scent. Always prioritize container safety—avoid using oils that may react with your container material. To help you visualize, here’s a simple guide:
| Oil Type | Safety Tip | Fragrance Ideas |
|---|---|---|
| Coconut Oil | Use food-grade oils | Vanilla, Citrus |
| Olive Oil | Test for container compatibility | Lavender, Peppermint |
| Jojoba Oil | Avoid synthetic fragrances | Eucalyptus |
This approach guarantees your homemade oil candle is both fragrant and safe. Additionally, understanding the composition of oils can help you select the best options for your candles. Incorporating smart home safety features, such as timers and smart sensors, can also enhance your candle-making experience by alerting you to any potential hazards. For added safety, consider researching dog-friendly candle ingredients to ensure your creations are safe around pets.
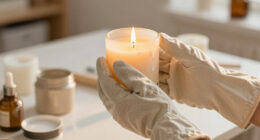
Assemble and Light Candle
Once your oil mixture is ready, it’s time to assemble and light your candle. Carefully pour the oil into your prepared container, ensuring you leave some space at the top. Insert your wick, making sure it stands upright and centered. To prevent spills, hold the wick in place with a wick tab or clamp if needed. Before lighting, check safety precautions by placing the candle on a stable, heat-resistant surface away from flammable objects. When you’re ready, light the wick slowly and watch your oil candle come to life. After use, store your candle in a cool, dark place, following proper storage tips to preserve the oil’s quality and prevent accidents. Always extinguish the flame completely and never leave it unattended. For safety and quality, it’s important to consider support hours and proper maintenance of your homemade candles. Additionally, understanding Gold IRA concepts can help diversify your investments and protect your financial future. Incorporating sound healing science principles can also enhance your relaxation and overall well-being while enjoying your creation. Remember that choosing the right alternative oils can influence the burn time and safety of your candle.
Creative Ways to Decorate Your Oil Candles
You can transform your oil candles with simple decorations that make them stand out. Choose decorative containers and holders that match your style, then add color or scent to enhance their appeal. Finish with creative embellishments and accents to personalize each piece and create a mesmerizing display.
Decorative Containers and Holders
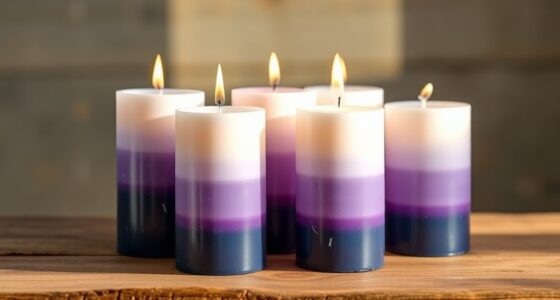
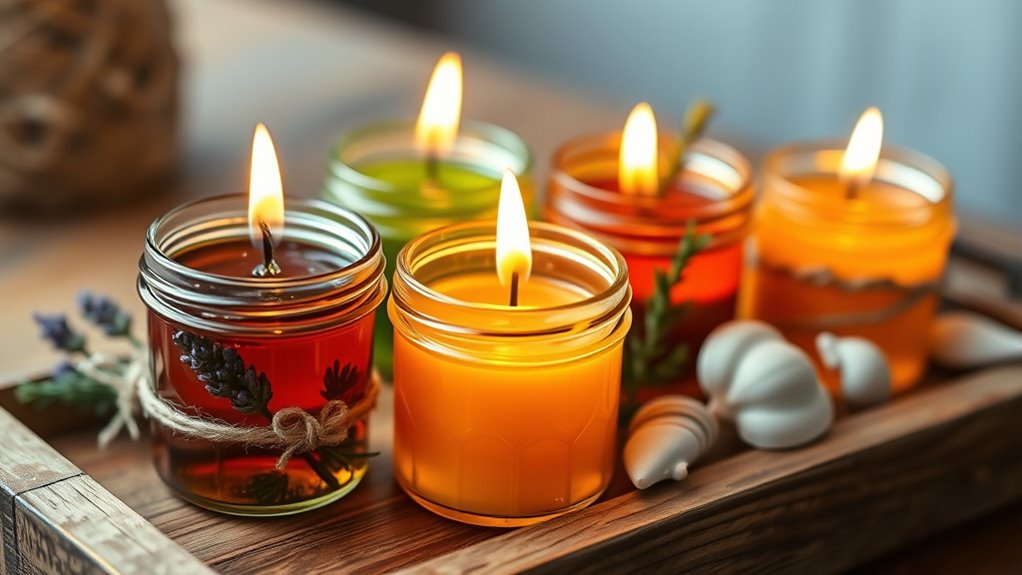
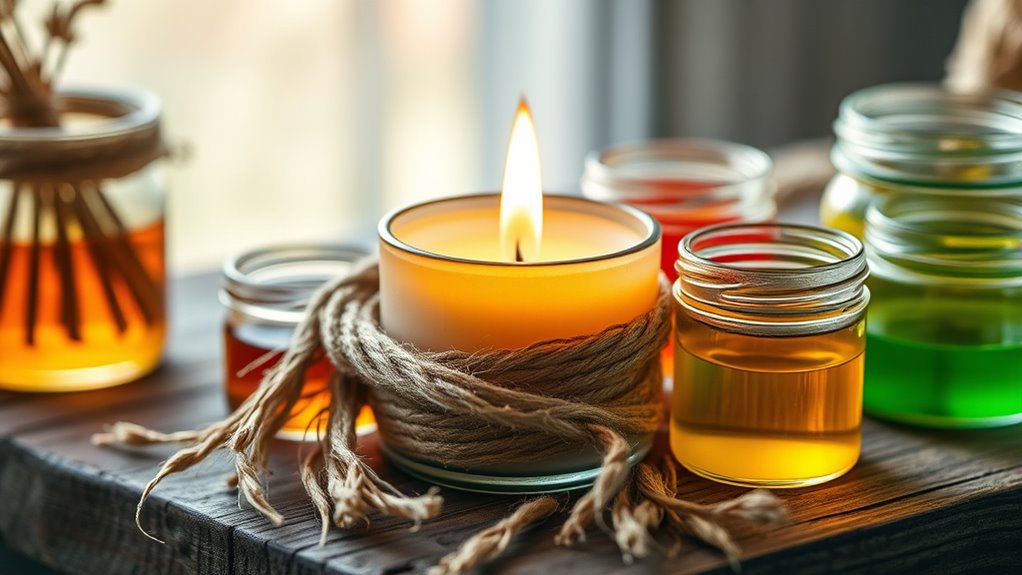
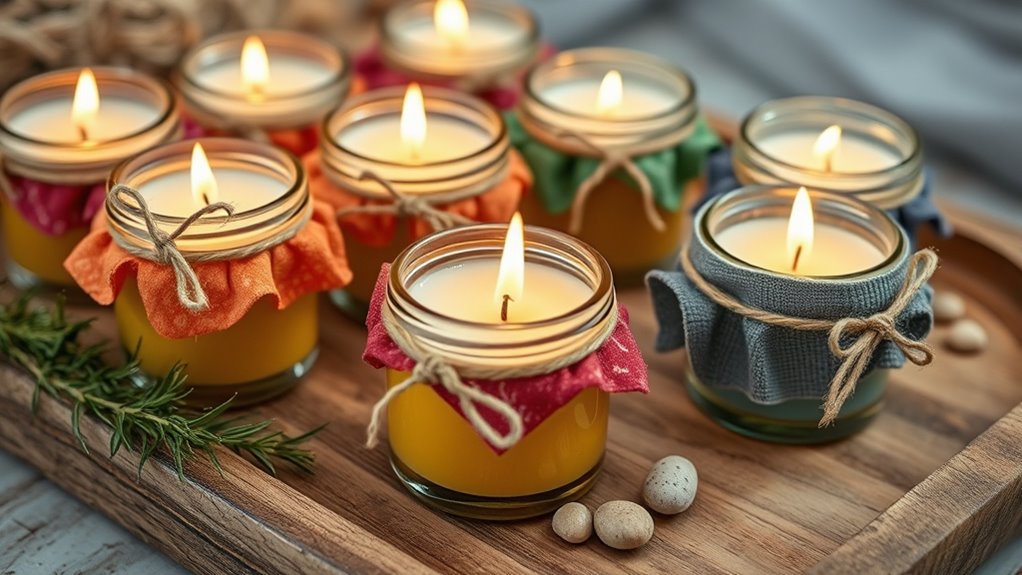
Decorative containers and holders transform plain oil candles into eye-catching accents that enhance your space. Using scented candle containers adds a personal touch, making your candles both functional and stylish. Reusable candle holders are eco-friendly choices that can be repurposed, reducing waste and adding character over time. To maximize their impact, consider pairing different textures, like glass, metal, or ceramic, to create visual interest. Embellish containers with natural elements such as twine, dried flowers, or stones for a rustic look. Additionally, customizing containers with paints or decals allows you to match your decor perfectly. Remember, the right container not only holds your oil candle but also tells a story, elevating your ambiance effortlessly.
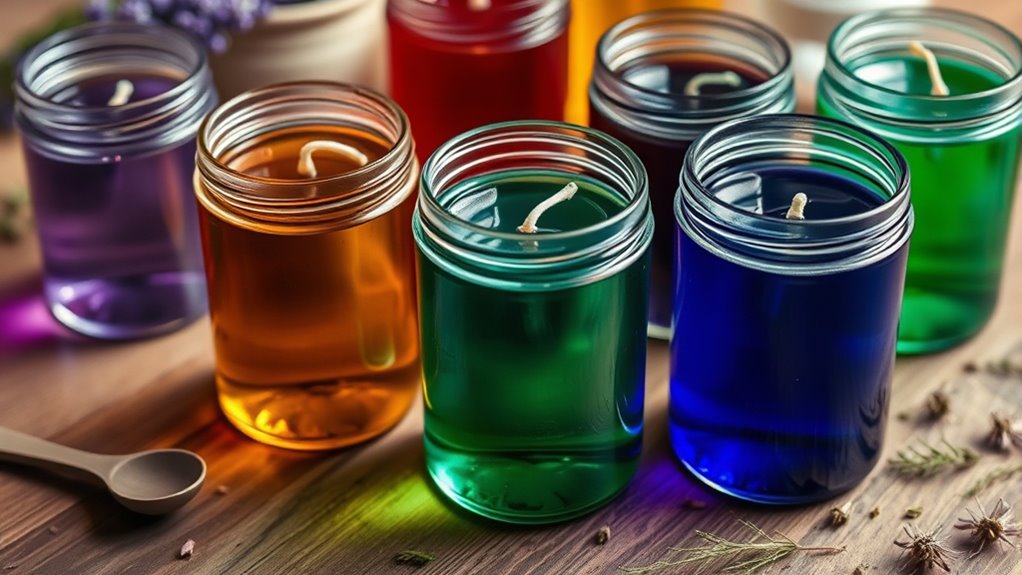
Color and Scent Enhancements
Adding color and scent to your oil candles can instantly elevate their appeal and create a more inviting atmosphere. To achieve vibrant hues, experiment with color mixing by combining different natural dyes or mica powders. This allows you to customize shades that match your decor or mood. For scent layering, start with a base fragrance and add complementary essential oils gradually, creating a complex aroma profile. You can also layer scents by pouring the candle mixture in stages, allowing each layer to set before adding the next. This technique produces a visually interesting and fragrant candle that engages multiple senses. By carefully blending colors and scents, you transform simple oil candles into personalized decorative pieces that enhance any space.
Creative Embellishments and Accents
Creative embellishments and accents can instantly elevate the appearance of your oil candles, making them stand out as unique decorative pieces. You can add ornamental accents like beads, shells, or metallic charms to create a striking look. Personalized embellishments, such as engraved tags or painted designs, add a special touch that reflects your style. These details not only enhance visual appeal but also tell a story about your creativity. Consider layering different textures or using natural elements to evoke a specific mood. By customizing your candles with thoughtful accents, you turn simple projects into meaningful decor. Remember, the key is to balance elegance and simplicity, ensuring your creative touches complement the overall design without overwhelming it.
Tips for Lighting and Maintaining Your Oil Candles
Lighting and maintaining your oil candles properly guarantees they burn safely and efficiently. To start, always follow safety precautions—place your candle on a stable, heat-resistant surface and keep it away from flammable objects. When lighting, use long matches or a lighter to avoid burns and ensure control. Trim the wick or wick-like material to about a quarter inch before each use to prevent excessive smoking and soot. Avoid moving the candle while it’s burning or still hot, and never leave it unattended. To maintain a consistent burn, let the candle burn until the oil pool reaches the edges of the container. Regularly check for any debris or wick buildup, and extinguish the flame gently with a snuffer or by dipping it into the oil to prevent splattering.
Ideas for Gift-Giving With Homemade Oil Candles
Looking for a thoughtful way to show someone you care? Homemade oil candles make meaningful gifts, especially when you personalize them with scent layering for a unique aroma experience. Consider blending essential oils to evoke calming, uplifting, or nostalgic feelings. To enhance safety and style, explore wick alternatives like cotton balls or braided herbs, adding a rustic touch. When gifting, include a small note explaining your scent choices and the significance behind them, making the gift more heartfelt. These candles symbolize warmth, care, and creativity, making them perfect for birthdays, holidays, or just because. Your effort in crafting and customizing these candles shows genuine thoughtfulness that your loved ones will cherish long after the flame is gone.
Frequently Asked Questions
Can I Use Cooking Oils Instead of Specialized Candle Oils?
Yes, you can use cooking oils instead of specialized candle oils, but you need to prioritize cooking oil safety. Be cautious, as some oils are more flammable than candle-specific ones. Follow homemade oil candle tips like using a stable container, keeping the wick short, and never leaving it unattended. Remember, testing small amounts first helps ensure your candle burns securely and effectively.
How Long Do Homemade Oil Candles Typically Burn?
Your homemade oil candles usually burn for about 4 to 8 hours, like a gentle sunrise stretching across the sky. The burn time factors include the type of oil you choose, wick size, and how much oil you pour in. Compared to traditional candles, they often last a bit shorter or longer depending on these elements. Keep an eye on the wick and oil level for the best duration.
Are There Safety Precautions for Burning Oil Candles Indoors?
Yes, you should follow safety precautions when burning oil candles indoors. Always keep a fire extinguisher nearby, and guarantee proper ventilation to prevent smoke buildup. Never leave the candle unattended, and place it on a stable, non-flammable surface away from curtains or other flammable items. Keep the wick trimmed, and avoid overfilling the container to reduce fire hazards. These steps help keep your indoor space safe while enjoying your candles.
Can I Use Recycled or Repurposed Containers for My Candles?
Like turning a forgotten teacup into a cozy fireside, you can definitely reuse recycled or repurposed containers for your candles. Recycling containers breath new life into your DIY vessel ideas, adding charm and sustainability to your project. Just make certain they’re heat-resistant and clean before pouring in your oil. With a little creativity, your repurposed containers become beautiful, eco-friendly candles that brighten your space and reduce waste.
What Are the Environmental Benefits of Oil Candles Over Wax?
Oil candles often have environmental benefits over wax candles, especially when sourced sustainably. They typically produce less pollution during burning, reducing airborne toxins. Plus, if you choose oils from sustainable sources, you support eco-friendly practices. Oil candles also tend to last longer, decreasing waste. By opting for alternative oils, you contribute to pollution reduction and promote more sustainable sourcing, making your candle burning more environmentally responsible.
Conclusion
Now that you know how to craft your own oil candles, imagine the warm glow filling your space, scenting the air with your favorite blends. Isn’t it rewarding to create something both beautiful and functional with your own hands? With a little creativity and care, you can transform everyday oils into stunning candles that brighten any room and mood. So, why not try making your own and enjoy the cozy ambiance you’ve brought to life?