TL;DR

Get decor and gifts delivered free with Prime
- Fast, free delivery on millions of items
- Prime Video, Amazon Music and more included
- Member-only deals all year
For most small businesses, a recent smartphone can make strong product photos when you pair it with soft light, a steady support, and a clean background. Choose an interchangeable-lens camera when you need more control, specialized close-ups, or a workflow your phone cannot handle. Compare the whole setup—lens, lights, tripod, storage, and editing—not just the camera body.
A candle maker can spend an afternoon photographing ten jars and still end up with ten different shades of cream. One picture looks blue, another yellow, and the last has a bright window reflected across the label. The camera may not be the main problem. The light and setup often matter more.
If you run a small shop, choosing a camera for product photography can feel like a choice between making do with your phone and buying a dedicated camera. Most businesses have a third option: start with the camera you already own, improve the light and stability, then upgrade when you can name a specific limitation.
This guide shows you how to choose for your products, what the headline specs can and cannot tell you, and how to build a repeatable setup on a modest budget. You’ll also see when a phone is enough, when a mirrorless or DSLR camera earns its place, and how to keep photos faithful to the item customers will receive.
Start with your current phone or camera and improve light, background, and stability before replacing it.
Compare autofocus, close focus, manual exposure, and lens options instead of relying on megapixel or video claims alone.
Use soft, consistent light and a tripod to keep a product catalog visually steady.
Check color against the real product and review automated edits so they do not change edges, details, or appearance.
Budget for the full workflow, including lighting, lens, support, storage, and time spent shooting and editing.
Start with the camera you can use consistently
A camera for product photography small business owners can use consistently is usually a better first choice than a more expensive body that sits in a drawer. A recent smartphone often handles small items, social posts, and online listings well when you give it soft light, a clean background, and a steady support.
Think of the camera as a paintbrush: a fine one gives you more control, but it cannot choose the colors or make the composition for you. A ceramicist selling mugs, for example, may get a clearer listing image from a phone on a tripod beside a bright window than from a dedicated camera pointed at a mug under a bare ceiling bulb.
Your phone may fall short when you need a very close view of tiny details, a series of images with identical framing, or manual control over focus and exposure. Phone cameras also switch between lenses and apply automatic processing, so a close-up can look wider or more processed than you expect. Test your actual phone on your actual products before buying gear.
An interchangeable-lens mirrorless or DSLR camera becomes useful when you need to choose a lens, control exposure precisely, connect to a computer during a shoot, or make large, detailed images. That added control has a cost in learning and workflow. If you photograph a few soap bars each month, a phone may be enough; if you photograph hundreds of jewelry pieces with fine metalwork, a dedicated macro setup may save time and reveal details your phone misses.
- Use your phone for simple listings, small catalogs, and frequent social content.
- Consider a dedicated camera when a repeatable workflow, close focus, or manual control solves a real problem.
- Upgrade one bottleneck at a time, such as lighting or a lens, after you identify what limits your images.
As an affiliate, we earn on qualifying purchases.
Spend first on light, a steady setup, and clean framing
For most small businesses, a good product photo depends more on light, stability, and composition than on buying the most expensive camera. Soft, even light shows a product’s shape and surface without throwing hard, distracting shadows across it.
Start with a window that receives indirect daylight. Put a white board or sheet of foam opposite the window to bounce some light back into the dark side of the product. Imagine photographing a dark green soap bottle: the window lights the label, while the white board lifts the shadow on the bottle’s side without turning the scene flat.
Natural light can be lovely, but it changes with clouds and time of day. If you need to shoot a large catalog on a deadline, a light tent or diffused continuous lights can make the results more repeatable. Avoid mixing a warm ceiling lamp with cool daylight; that combination can make a white mug look pink on one side and blue on the other.
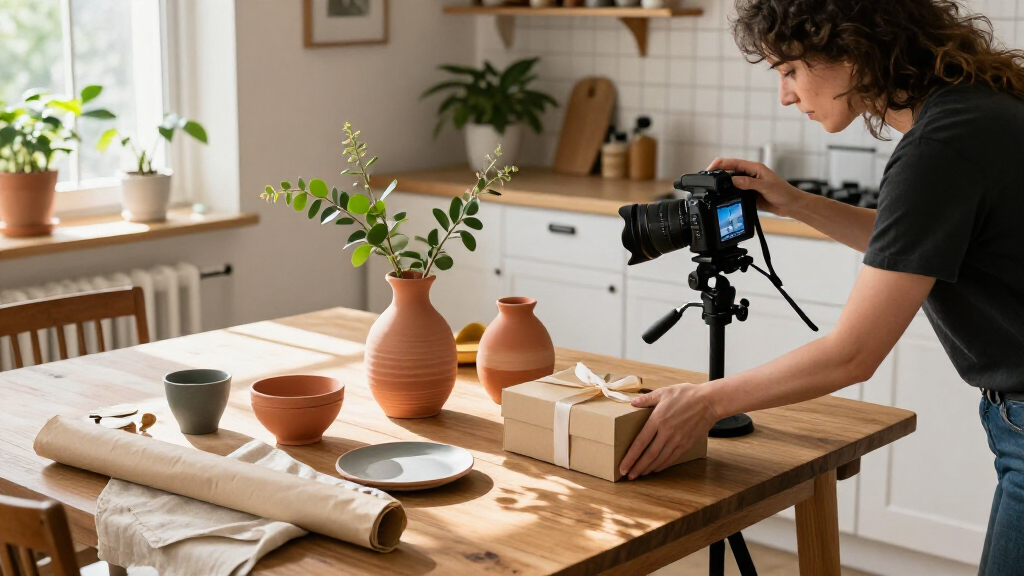
A tripod or firm tabletop stand keeps the camera in the same place from shot to shot. That matters when you photograph a dozen flavors of jam: the jars line up at the same height, and customers can compare labels without the images jumping around. Use a timer or remote shutter if tapping the screen shakes the camera.
- Place the product against a simple background and remove dust, fingerprints, and stray packaging.
- Set one soft light source to the side, then use a white card to soften the opposite shadow.
- Keep the camera level and steady; take a test frame and inspect the edges and label.
- Photograph the rest of the range without changing the camera position or light arrangement.
Repeatability sells the range. A consistent set of images helps shoppers compare products and helps your store look cared for.
Read camera specs without getting distracted by big numbers
Resolution tells you how many pixels a camera records, but it does not tell you whether the photo will look sharp, accurate, or attractive. For most web and social uses, you do not need an extreme megapixel count; you need enough detail for the largest place you plan to display or print the image.
That distinction helps when comparing compact cameras advertised with figures such as 56 MP, 64 MP, or 96 MP. A large number on a listing does not by itself explain sensor performance, lens quality, autofocus reliability, or how much detail the camera captures in real use. If you sell small leather wallets, a crisp close-up of stitching matters more than a huge file that shows every bit of dust on the table.
Check practical features instead: can you focus where your product sits, adjust exposure, lock white balance, and keep the camera steady? Does it accept a lens suited to your working distance? A standard or short-telephoto lens suits many products; a macro lens helps with tiny details, such as the engraved mark on a ring, but many products never need one.
Video resolution, flip screens, zoom claims, Wi-Fi, and included memory cards can be useful, especially if you also make behind-the-scenes clips. They do not replace the basics of a usable still-photo workflow. A built-in zoom may not give the same close-focus control as a suitable lens, and wireless transfer matters only if it saves time in your actual process.
| Feature | Why it matters | What to check |
|---|---|---|
| Resolution | Provides room to crop or print | Match it to your largest output |
| Autofocus | Keeps labels and details sharp | Test on reflective or small items |
| Lens options | Controls perspective and close focus | Choose for product size and distance |
| Manual controls | Helps keep a series consistent | Look for exposure and white balance control |
Choose a lens and distance that keep your product looking true
The lens and distance shape how a product looks in the frame, so choose them to preserve its proportions. A wide-angle phone camera held close can make the front of a bottle look oversized while its cap seems to shrink into the background.
Try moving the phone farther away and cropping in slightly instead of pushing the lens close to the product. For a handmade mug, that small change can make the handle and body look more balanced. Keep the camera roughly level with the product’s center unless you deliberately want a view from above, such as a flat lay of stationery.
A standard or short-telephoto lens is a flexible starting point for many products because it lets you work at a comfortable distance without exaggerated perspective. If the item is tiny and you need to show fine detail, a macro lens can focus closely. Think of photographing earrings: a macro lens can reveal the tiny clasp and texture, while a standard lens may struggle to focus close enough.
Do not assume every camera or phone can focus at the same distance. Test the smallest item in your catalog and check that its important details remain sharp. If you sell both a large woven basket and delicate silver charms, one setup may not suit both; you might use a wider view for the basket and a closer, more controlled shot for the charms.
- For small objects: check close-focus performance before planning a full shoot.
- For larger products: step back enough to keep straight edges from bulging.
- For detail photos: focus on the feature customers need to judge, such as a clasp, weave, or finish.
Keep product colors and details honest
Accurate color helps customers decide whether a product suits them, especially when they are judging a shade, material, or finish on a screen. Consistent light, white balance, and exposure give you a better chance of showing the item as it looks in person.
For example, a small clothing brand might photograph the same linen shirt in changing daylight. The first image looks warm and sandy; the second looks cold and gray. A customer comparing colors across the store may wonder whether the shirts are different shades. A fixed light setup and consistent white balance can reduce that confusion.
Keep bright areas from losing texture and dark areas from becoming solid black. A gray card or color reference can help you check a series, particularly if product color drives the purchase. Avoid mixing several light sources with different color temperatures, and compare the edited image with the physical item under neutral light.
Editing can correct exposure, crop the frame, remove a dust speck, or clean up a background. Automated background removal and color tools can speed routine work, but inspect the edges closely. A tool that erases a translucent glass rim or shifts a blue glaze toward purple changes what the customer sees. Retouching should tidy the photograph, not conceal a defect or alter the product’s real appearance.
Your listing photo is part of the product promise. Make it polished, then make sure the customer would recognize the item when it arrives.
Build a budget around the whole photography setup
The real cost of product photography includes more than the camera body. You may also need a lens, tripod, lighting, background material, storage, and editing software, so compare complete setups rather than choosing by the body’s headline features.
A soap maker who already owns a recent phone could start with a stable stand, a white foam board, and a clean sheet of paper as a sweep background. That simple setup may be enough to photograph a new lavender bar and its packaging. If reflections on the wrapper remain difficult, a small diffused light may solve the problem better than buying a new camera.
For a business that shoots every week, consistent lights may earn their place because they reduce time spent waiting for good daylight. For an occasional seasonal range, a window may be fine. The right answer depends on how often you shoot, how much consistency your store needs, and how much time you can spend editing each image.
Keep original files and export copies sized for each sales channel. Marketplace and social platform requirements can vary and change, so check the current instructions before uploading. A large original gives you room to crop later; a correctly sized web version loads more easily. Include the time cost in your decision too: a setup that saves an hour each week can matter more to a small business than a minor improvement in technical image quality.
- List your outputs: product pages, social posts, catalogs, or print.
- Identify the current problem: blur, color shifts, reflections, slow transfer, or insufficient detail.
- Price a complete solution: include the camera or phone, lens, support, lights, backgrounds, and storage.
- Buy to solve that problem: test the change on one product before expanding the setup.
Choose among replacement cameras by matching the workflow
If a particular compact camera is hard to find or no longer suits your needs, compare possible replacements by the work you need them to do. Similar headline specs can make models look interchangeable, but a small business benefits most from a camera that fits its products, lighting, and transfer routine.
Some compact models advertise high still resolution, Wi-Fi, a flip screen, or 4K and 8K video. Those features may appeal if you also record demonstrations or need to frame yourself on camera. For still product listings, though, autofocus, close-focus ability, consistent color, and a lens that suits your product size are more useful questions to ask.
Imagine a shop selling hand-painted ornaments and short craft videos. A flip screen and Wi-Fi might make filming and transferring images easier. A shop selling tiny gemstone settings may care more about reliable close focus and a suitable macro lens. The better match depends on the job, not which product title contains the largest resolution number.
Before buying, check the full specifications from the manufacturer or seller and look for clear information about sensor size, file types, manual controls, and compatible accessories. If a specification is missing, treat it as unknown rather than assuming it matches another camera. For most small businesses, the best product photo depends more on a repeatable setup than on a long list of features.
- For catalog consistency: prioritize a tripod, repeatable light, and exposure controls.
- For close detail: verify focus distance and lens options.
- For mixed photo and video work: check video features, screen movement, and transfer options.
Frequently Asked Questions
Can I use my phone for product photography?
Usually, yes. A recent phone can make strong listing and social images with soft light, a steady support, and a simple background. Test it on your smallest product first to check close focus and detail.
Do I need a DSLR or mirrorless camera?
Not necessarily. Consider one when you need interchangeable lenses, more manual control, stronger close-up options, or a workflow your phone cannot support. A dedicated camera adds flexibility, but it also adds equipment and learning time.
How many megapixels do I need for product photos?
Choose enough resolution for the largest image you expect to display or print. Most web and social listings do not need an extreme megapixel count, and resolution alone cannot correct poor light, missed focus, or distorted perspective.
Which lens works best for product photography?
A standard or short-telephoto lens suits many products and helps keep proportions natural at a comfortable working distance. A macro lens helps with tiny details, such as jewelry engravings or small printed marks, but many products do not need one.
How can I keep product colors accurate?
Use consistent lighting, avoid mixing light sources with different color tones, and set or correct white balance. Compare the edited image with the real item under neutral light, especially when customers use the photo to judge a color or finish.
Should I use daylight or studio lights?
Indirect daylight is an inexpensive starting point and can look soft and natural. It changes with weather and time, while diffused studio lights give you more repeatable conditions when you photograph products regularly.
When should I hire a product photographer?
Consider hiring one when your products need complex lighting, a launch depends on polished campaign images, or in-house shooting takes too much time for the result. A photographer can also help you establish a repeatable look for a larger catalog.
Conclusion
Choose the simplest camera setup that produces sharp, consistent, truthful images for the places your customers shop. For many small businesses, that means starting with a phone, soft light, a steady support, and a clean background; upgrade when a specific product or workflow exposes a real limit.
Before your next gear purchase, photograph one item from your range and inspect the result at full size. If the problem is a hard shadow, fix the light. If the tiny engraving stays blurry, investigate close focus. Let the product—not the biggest number on the box—tell you what to buy.
Fall Picks
fall essentials
As an affiliate, we earn on qualifying purchases.