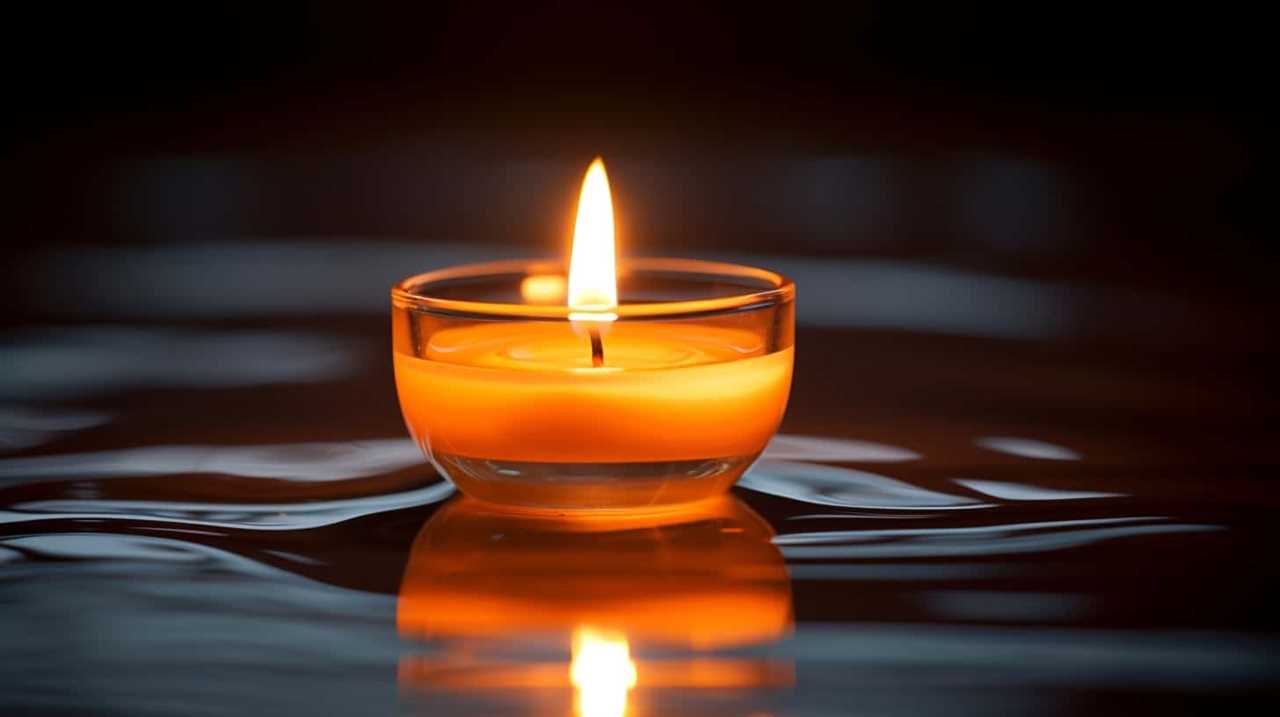
Connect with us

Candles

Why Wont My Candle Stay Lit

Published

on

Oh, how frustrating!
Translated to English (United States) language: Oh, how frustrating!

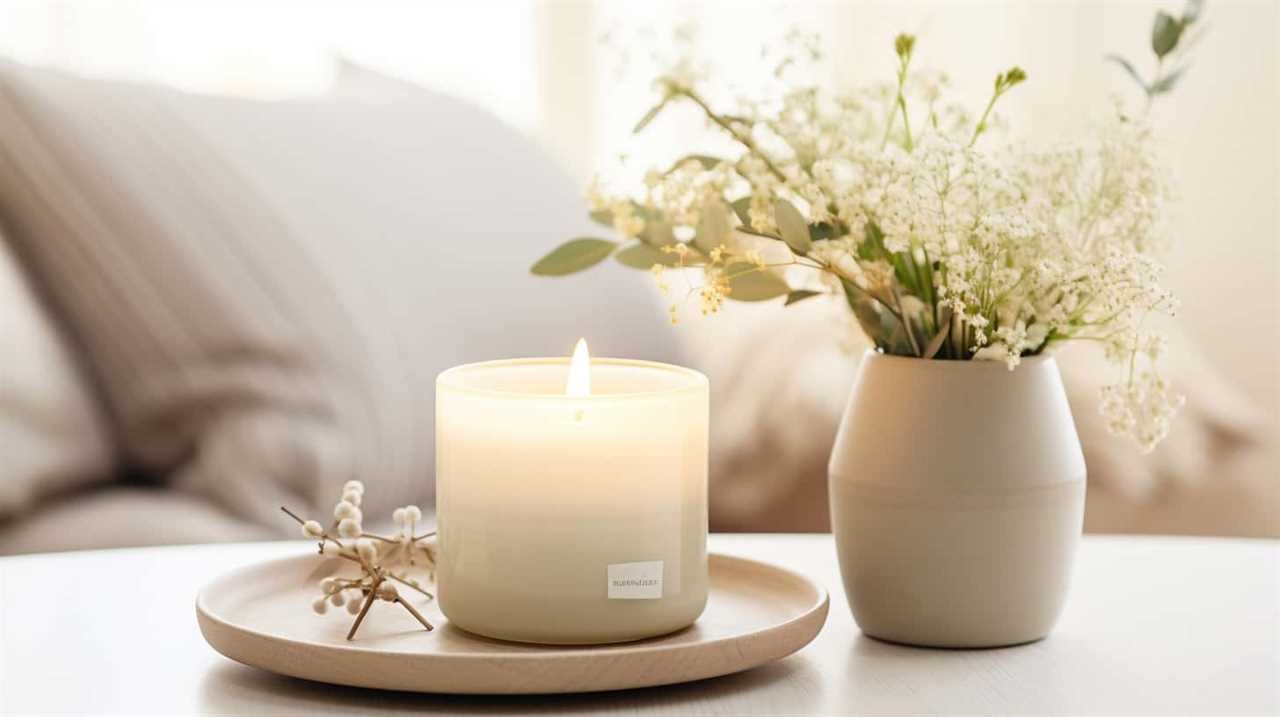
We gather here today, dear candle enthusiasts, to tackle the perplexing question that has plagued us all: why won’t our cherished candles stay lit? Fear not, for we shall embark on a journey of enlightenment, unraveling the secrets behind these stubborn flames.

With a desire for mastery, we shall delve into the realm of insufficient wick length, poor quality candle wax, and the treacherous drafts that extinguish our hopes. Let us not forget the importance of proper candle placement and the perils of an overtrimmed wick.

Oh, the trials and tribulations that come with low-quality matches and high humidity levels! And let us not overlook the significance of choosing the correct candle size for our containers and ensuring that the wax pool is fully melted before bidding our candles adieu.

Advertisement

candle shack clp

So, my fellow candle enthusiasts, let us seek the answers we so desperately crave.

Key Takeaways

  • Wick length and maintenance play a crucial role in the candle’s ability to stay lit and burn evenly.
  • The quality of wax used in the candle affects its burn performance, with low-quality wax having a lower melting temperature.
  • Placing candles in a draft-free area and away from flame-blocking objects ensures a steady flame.
  • Other factors such as improper container size, excessive airflow, and high humidity can also affect the candle’s ability to stay lit.

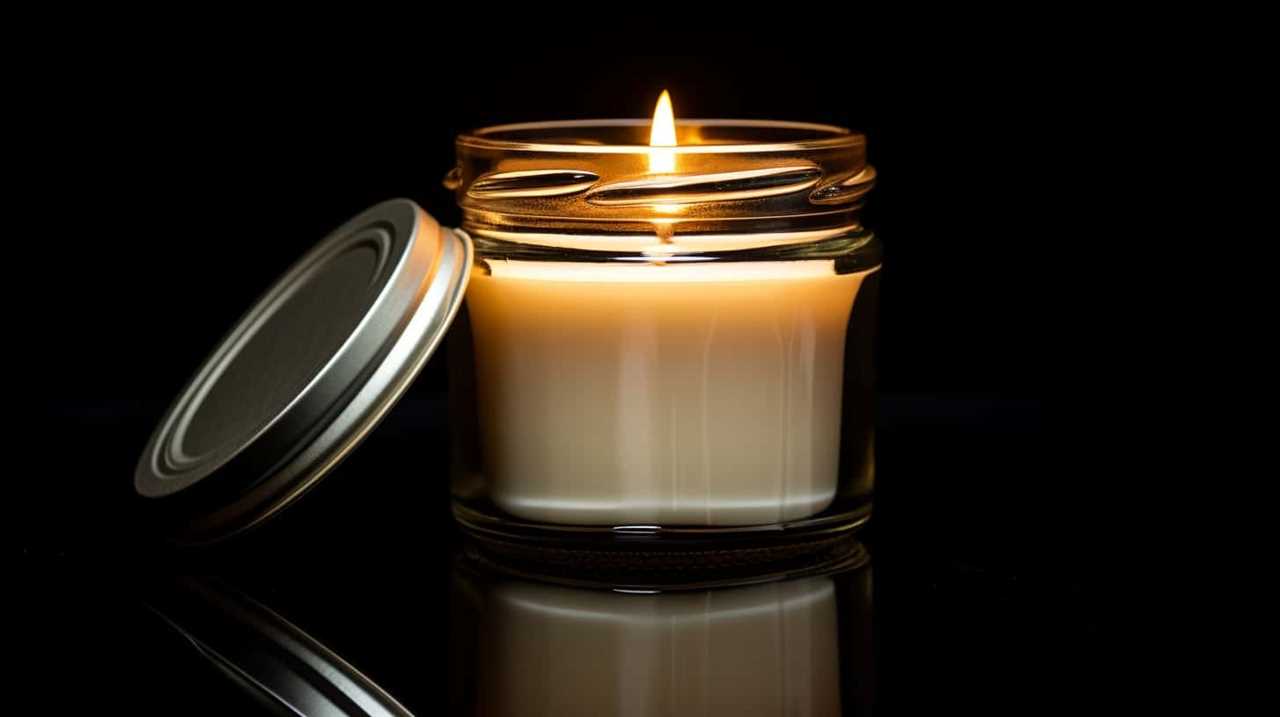
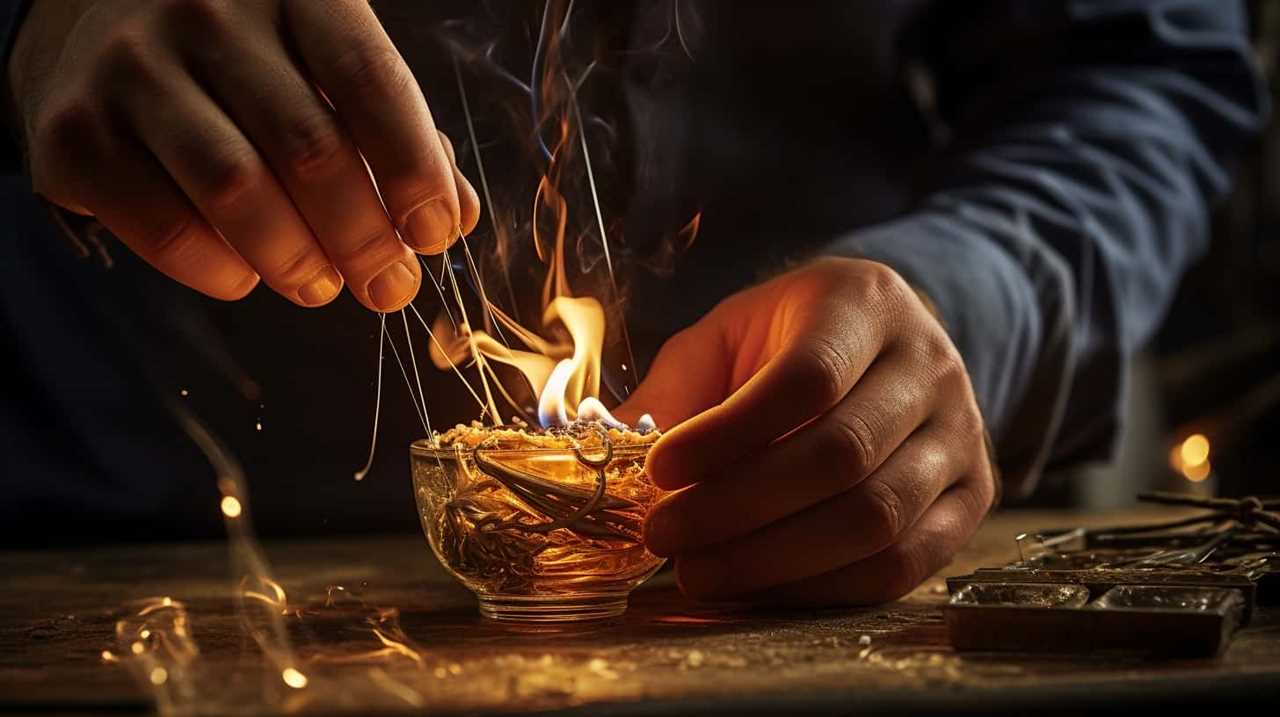
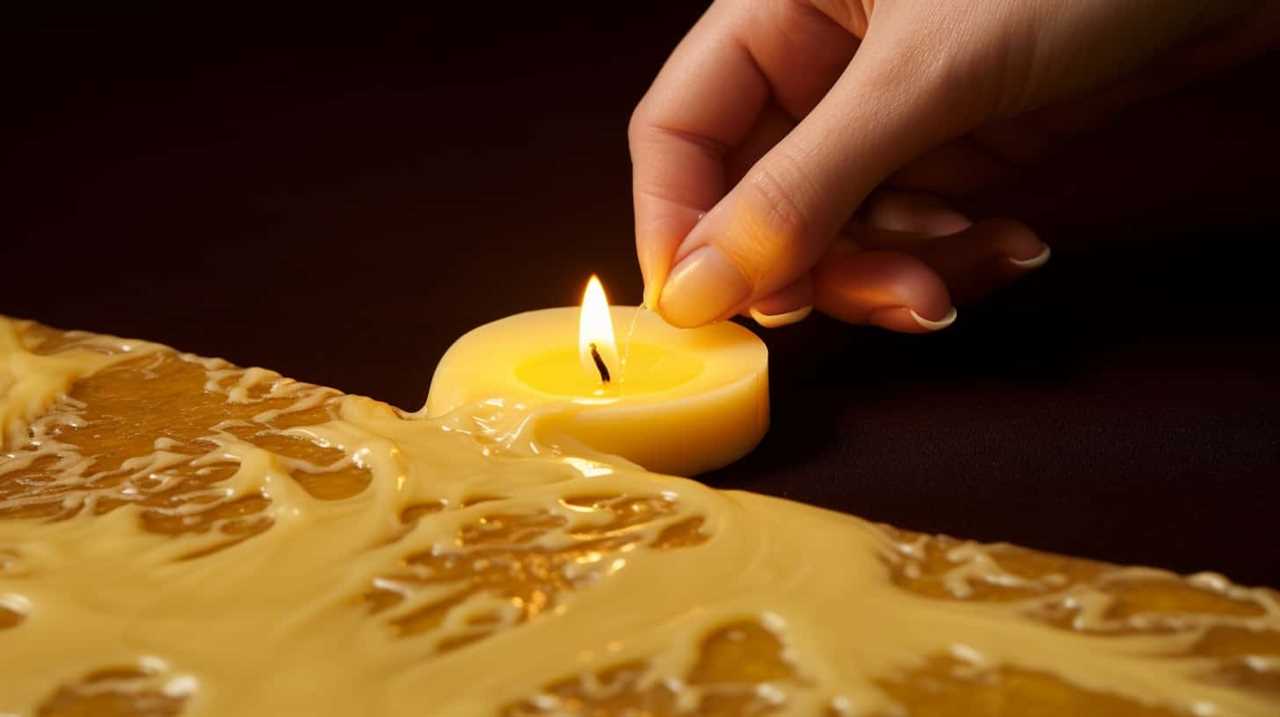
Insufficient Wick Length

We often struggle to keep our candles lit due to the insufficient length of their wicks. Proper wick trimming is essential in preventing wick drownage, which is a common cause of candles extinguishing prematurely.

To ensure optimal burn performance, it’s important to trim the wick to a length of about ¼ inch before each use. This helps to maintain a steady flame and prevents the wick from becoming too long and drowning in the melted wax.

When the wick is too short, it can lead to incomplete combustion, resulting in a weak flame or no flame at all.

candle holders ikea

Poor Quality Candle Wax

One factor that can contribute to candles struggling to stay lit is the use of low-quality candle wax. When it comes to candle making, the quality of the wax plays a crucial role in the overall performance of the candle. Inferior candle wax often has a lower melting temperature, making it difficult for the wick to stay lit and burn consistently.

To better understand the impact of poor quality candle wax, let’s take a look at the following table:

Advertisement
Candle Wax Type Wick Quality Melting Temperature
Low-Quality Subpar Low
High-Quality Excellent High

As you can see, low-quality candle wax has a lower melting temperature, which means it requires less heat to melt and can extinguish the flame more easily. Additionally, if the wick quality is subpar, it may struggle to ignite or maintain a steady burn.

To ensure your candle stays lit, it is important to choose high-quality candle wax with a higher melting temperature. This will provide a more stable flame and improve the overall performance of your candle. Additionally, investing in wicks of excellent quality will further enhance the burning experience.

candle & co

Drafty Environment

In a drafty environment, candles are more likely to struggle to stay lit due to the increased air circulation. When there’s a draft, the air movement can disrupt the flame, making it flicker or go out altogether. This is because the draft carries away the heat and oxygen that the flame needs to sustain itself.

Additionally, in a drafty environment, there’s a higher chance of moisture affecting the wick. Moisture can cause the wick to become damp, making it difficult for the flame to ignite and stay lit.

To combat this issue, it’s important to place candles in draft-free areas and ensure that the wick is dry before lighting. This will help to create a more stable and long-lasting flame.

Advertisement

Improper Candle Placement

When it comes to candle placement, there are two main factors to consider: flame-blocking objects nearby and lack of oxygen.

candlestick patterns

Flame-blocking objects such as curtains, furniture, or even other candles can obstruct the airflow and cause the flame to flicker or go out completely.

Additionally, if the candle is placed in an area with poor ventilation, it may not receive enough oxygen to sustain a steady flame.

Properly placing the candle away from any obstructions and in a well-ventilated area will help ensure that it stays lit.

Flame-Blocking Objects Nearby

We need to remove any objects that may block the flame from nearby the candle in order for it to stay lit properly. Flame-blocking objects can prevent the candle from receiving enough oxygen, leading to an inadequate burn time. It is important to ensure that there are no curtains, drapes, or other flammable materials close to the candle. Additionally, objects such as books, papers, or decorations should be kept at a safe distance to prevent them from obstructing the flame. To illustrate the importance of proper candle placement, consider the following table:

Advertisement

yankee candle uk

Flame-Blocking Objects Inadequate Burn Time
Curtains Shorter burn time
Papers Dimmer flame
Books Uneven burn
Decorations Flickering flame

Lack of Oxygen

To maximize the burn time and ensure a steady and consistent flame, proper candle placement is crucial. Oxygen deprivation can occur when a candle is placed in an area with limited air circulation. This includes inside a closed container or near walls, curtains, or other flame-blocking objects. When a candle burns, it consumes oxygen from the surrounding air to sustain the flame. If the flame is suffocated due to a lack of oxygen, it will become weak and eventually extinguish.

To prevent this, it’s important to place candles in well-ventilated areas, away from any obstructions. This will allow for proper oxygen flow and help the candle burn evenly and for a longer duration.

Overtrimmed Wick

As candle enthusiasts, we understand the frustration of a candle that won’t stay lit. Proper wick trimming is essential to ensure a steady burn and avoid extinguishing. An overtrimmed wick might be the culprit. Knowing the basics of wick trimming, maintaining the correct wick length, and following some helpful tips will help you keep your candle burning beautifully.

Wick Trimming Basics

One possible first sentence for the subtopic ‘Wick Trimming Basics (Overtrimmed Wick)’ could be: ‘When a candle won’t stay lit, it may be due to an overtrimmed wick.’

candlelight concerts belfast

Proper wick maintenance techniques are crucial for preventing wick mushrooming, which can lead to a candle not staying lit. Wick mushrooming occurs when the wick is allowed to burn too long without being trimmed, resulting in a larger flame and excessive smoke. Over time, this can cause the wick to become unstable and easily extinguished.

Advertisement

To avoid this, it’s important to trim the wick to an appropriate length before each use. However, it’s equally important to not overtrim the wick. When the wick is cut too short, it may not provide enough fuel for the flame to sustain itself, causing the candle to go out quickly.

Finding the proper wick length is essential for ensuring a candle stays lit and burns evenly.

Proper Wick Length

We often find that when we overtrim the wick, our candle won’t stay lit. Proper wick length is crucial for a well-functioning candle.

candlesticks patterns

Here are three reasons why overtrimmed wicks cause common candle wick problems:

  1. Reduced fuel supply: When the wick is too short, it can’t draw enough liquid wax to the flame. This results in a weak, flickering flame that struggles to stay lit.
  2. Incomplete burn: An overtrimmed wick burns too quickly, causing the candle to tunnel down the center instead of melting the wax evenly across the entire surface. This leads to wasted wax and a shorter burn time.
  3. Increased smoke and soot: A wick that’s too short produces excessive smoke and soot, which can stain the container and release harmful pollutants into the air.

To prevent these problems, it’s essential to follow proper wick trimming techniques. Now, let’s move on to the next section to learn some wick maintenance tips that will help ensure a consistently well-performing candle.

Wick Maintenance Tips

To address the issue of overtrimmed wicks and ensure a consistently well-performing candle, let’s explore some helpful tips for maintaining the wick.

Advertisement

Proper wick maintenance techniques are essential for preventing wick mushrooming, which can lead to an uneven burn and a shortened candle lifespan. One important tip is to trim the wick to the recommended length before lighting the candle. This usually means trimming it to about 1/4 inch.

cheap candles online australia

However, if you’ve accidentally overtrimmed the wick, don’t worry. Simply use a wick trimmer or scissors to carefully remove the mushrooming part and leave a small portion of the wick intact. This will help maintain a stable flame and prevent further mushrooming.

By following these wick maintenance tips, you can ensure a clean and even burn for your candle.

Now, let’s move on to the next issue: candle tunneling.

Candle Tunneling

As candle enthusiasts, we often wonder why our candles won’t stay lit, and one common culprit is candle tunneling. Candle tunneling occurs when the wax melts down the center, leaving a thick wall of unmelted wax around the edges. This not only wastes the wax but also prevents the wick from getting enough oxygen to burn properly.

Advertisement

how does a candle burn

To prevent tunneling and ensure a long-lasting, evenly burning candle, follow these tips:

  1. Trim the wick: A long wick can cause the candle to produce a larger flame, leading to uneven melting. Trim the wick to ¼ inch before each use.
  2. Burn the candle long enough: Allow the candle to burn long enough for the entire top layer of wax to melt. This helps prevent tunneling by creating a memory burn.
  3. Use a candle topper: A candle topper can help distribute heat evenly and prevent tunneling by trapping the heat near the top of the candle.

Inadequate Burn Time

Although it may seem counterintuitive, inadequate burn time can contribute to the issue of a candle not staying lit. Proper wick maintenance and burn time improvement are crucial for achieving a long-lasting and consistent flame.

To ensure a sufficient burn time, it’s important to trim the wick to about 1/4 inch before each use. This helps to prevent the wick from becoming too long and causing the flame to flicker or extinguish prematurely.

Additionally, allowing the candle to burn for a sufficient amount of time during each use promotes an even wax melt and helps prevent tunneling. By maintaining the wick and extending the burn time, you can maximize the longevity and performance of your candle.

candles

Now, let’s explore another factor that can affect the candle’s ability to stay lit: the wax pool not reaching the edges.

Wax Pool Not Reaching Edges

One possible cause for a candle not staying lit is when the wax pool fails to reach the edges. This occurs when there’s an improper container size or when unscented wax is used.

Advertisement

Here are three reasons why the wax pool may not reach the edges:

  1. Improper container size: If the container is too large in relation to the size of the wick, the wax will take longer to melt and spread, resulting in a shallow pool that doesn’t reach the edges.
  2. Using unscented wax: Unscented wax typically has a higher melting point, which means it takes longer to liquefy and spread. This can prevent the wax pool from reaching the edges before the flame extinguishes.
  3. Insufficient burning time: If a candle isn’t burned for a sufficient amount of time during each use, the wax pool may not have enough time to fully melt and reach the edges, causing the candle to tunnel instead.

When the wax pool fails to reach the edges, it can lead to other issues, such as soot buildup on the wick.

candles uk

Soot Buildup on Wick

When candles become extinguished due to soot buildup on the wick, it’s important to address the issue promptly to ensure a longer burn time and a cleaner burn.

To prevent excessive soot, regular maintenance of the wick is necessary. This can be done by trimming the wick before each use, ensuring it’s at the recommended length for the specific candle type.

Additionally, avoiding drafts and using quality candles can minimize soot buildup, enhancing the overall candle experience.

Extinguished Due to Soot

To prevent the extinguishing of your candle, we must address the issue of soot buildup on the wick. Soot buildup causes the flame to struggle for oxygen, resulting in an unstable burn and eventual extinguishing. Here are three key ways to prevent soot buildup and keep your candle burning brightly:

Advertisement

candles direct reviews

  1. Trim the wick: Before lighting your candle, ensure that the wick is trimmed to about ¼ inch. A longer wick can produce excessive soot, leading to an extinguished flame.
  2. Avoid drafts: Place your candle in a draft-free area to prevent the flame from flickering and depositing soot on the wick. This will help maintain a steady burn.
  3. Use quality candles: Opt for candles made from high-quality materials, as they tend to produce less soot. Look for candles specifically labeled as low soot or clean-burning.

Wick Maintenance Tips

We recommend regularly cleaning the wick to prevent excessive soot buildup. Soot on the wick can hinder the proper burning of your candle, leading to it extinguishing prematurely.

To maintain your wick and troubleshoot common wick issues, follow these wick maintenance techniques.

First, trim the wick to around 1/4 inch before each use. This helps to control the size of the flame and minimize soot production.

Second, remove any debris or burnt pieces from the wick using a wick trimmer or scissors. This ensures a clean burn and prevents soot buildup.

candle meaning

Lastly, if you notice excessive soot, gently wipe the wick with a soft cloth or paper towel.

Regularly practicing these maintenance tips will help keep your wick clean and your candle burning bright.

Advertisement

Excessive Airflow

Despite the presence of excessive airflow, our candle struggles to stay lit. Airflow control is crucial for maintaining a steady flame, and excessive airflow disrupts the delicate balance necessary for a candle to burn properly. Here are three ways excessive airflow can negatively affect candle flame dynamics:

  1. Flickering flame: When there’s excessive airflow, the flame will constantly flicker and dance around, making it difficult for the candle to stay lit. This rapid movement of the flame reduces the stability and longevity of the burn.
  2. Uneven burning: Excessive airflow can cause the candle to burn unevenly. The flame may burn more intensely on one side, leading to an uneven wax pool and potentially wasting wax.
  3. Shortened burn time: Due to the increased oxygen supply from excessive airflow, the candle may burn faster than usual. This results in a shorter burn time and reduces the overall enjoyment and longevity of the candle.

To overcome these challenges, it’s essential to find ways to regulate and control the airflow around the candle, ensuring a steady and long-lasting burn.

candle in the wind

Low-Quality or Improperly Stored Matches

With the presence of excessive airflow, we often struggle to keep our candle lit due to the use of low-quality or improperly stored matches. It’s important to understand that matches can be affected by moisture damage, which can occur if they’re stored in a damp environment.

Moisture can cause the match heads to become less combustible, making it difficult for them to ignite and stay lit. To prevent this issue, it’s crucial to practice proper match storage. Keep matches in a dry and airtight container to protect them from moisture and ensure their effectiveness.

By taking the necessary steps to store matches correctly, you can avoid the frustration of struggling to keep your candle lit.

Now, let’s explore the impact of high humidity levels on candle burning.

Advertisement

yankee candle coupon

High Humidity Levels

High humidity levels can make it difficult for candles to stay lit. When the air is moist, it can extinguish the flame of the candle, making it frustrating to keep it lit for a long period of time. Additionally, the moisture in the air can affect the wick, causing it to become damp and difficult to ignite.

To combat this issue, it’s important to find solutions for humid conditions. One solution is to use a dehumidifier to reduce the moisture in the air. This can create a more favorable environment for keeping candles lit. Another option is to place the candle in a less humid area of the room. This could be a corner away from windows or vents that may contribute to higher humidity levels. By taking these steps, it is possible to enjoy the ambiance and fragrance of candles even in humid conditions.

Extinguishing Candle’s Flame

We have noticed that candles tend to struggle to stay lit in environments with elevated humidity levels. When faced with high humidity, the moisture in the air can affect the flame of a candle in several ways. Here are three reasons why candles may struggle to stay lit in high humidity:

  1. Moisture condensation: When the air is saturated with moisture, it can cause water droplets to form on the surface of the candle. These droplets can extinguish the flame, preventing it from staying lit.
  2. Difficulty in wax evaporation: High humidity levels can hinder the evaporation of the candle wax. As a result, the fuel supply for the flame is reduced, making it harder for the candle to stay lit.
  3. Weakened wick performance: Humidity can affect the wick’s ability to draw up the melted wax efficiently. If the wick isn’t able to deliver a steady supply of fuel to the flame, it can cause the candle to struggle to stay lit.

Understanding how high humidity affects the flame of a candle is crucial for troubleshooting flame issues and implementing effective wick maintenance techniques. However, high humidity doesn’t just impact the flame itself; it can also affect the wick.

candles direct portugal

Moisture Affecting Wick

In addition to impacting the flame, high humidity levels can also affect the performance of the wick in a candle. Moisture control is crucial in maintaining the optimal burning conditions for a candle. When the air is humid, the wick can become saturated with moisture, making it difficult for the flame to stay lit. This can result in a weak, flickering flame or even cause the candle to extinguish completely. To understand the impact of moisture on wick performance, consider the following table:

Moisture Level Wick Performance
High humidity Wick saturation
Moderate humidity Reduced burning efficiency
Low humidity Optimal burning conditions

As we can see, high humidity levels lead to wick saturation, hindering the candle’s ability to burn properly. This problem calls for effective solutions to combat humid conditions and ensure a consistently lit candle.

Advertisement

[Transition sentence into the subsequent section about ‘solutions for humid conditions’]

Solutions for Humid Conditions

To address the issue of high humidity affecting candle performance, one effective solution is to utilize moisture-absorbing materials. These materials can help prevent moisture from seeping into the candle wax and affecting the wick’s ability to stay lit. Here are three moisture-absorbing materials that can be used:

cheap candles online australia

  1. Silica gel packets: These small packets contain silica gel, a highly effective moisture absorber. Placing a few packets near the candles can help absorb excess moisture in the air.
  2. Charcoal: Activated charcoal is known for its excellent moisture-absorbing properties. Placing a bowl of charcoal near the candles can help eliminate excess moisture and improve their performance.
  3. Rice: Uncooked rice is a natural moisture absorber. Placing a small cloth bag filled with rice near the candles can help prevent moisture from affecting the wick.

By utilizing these moisture-absorbing materials, you can maintain optimal wick performance and prevent moisture-related issues.

However, if the candle size is incorrect for the container, it can also contribute to difficulties in keeping the candle lit.

Incorrect Candle Size for the Container

Using an oversized candle in a small container can prevent it from staying lit. When the candle is too big for its container, the flame can struggle to receive enough oxygen, causing it to flicker or extinguish altogether. Additionally, an oversized candle can create a wax pool that is too wide, which can lead to an uneven burn and an inefficient use of wax. To ensure that your candle stays lit, it is important to choose the right size candle for your container. Consider the diameter of the container and the length of the wick when selecting a candle. A properly sized candle will allow for a steady flame and an even burn, ensuring that your candle stays lit for longer periods of time.

Candle Container Wick Length
Small Short
Medium Medium
Large Long

Now, let’s move on to the next subtopic: ‘Wax pool not fully melted before extinguishing’.

Advertisement

candlelight concerts london

Wax Pool Not Fully Melted Before Extinguishing

After struggling to maintain a steady flame due to an oversized candle in the container, another reason why your candle may not stay lit is if the wax pool isn’t fully melted before extinguishing it.

When the wax pool isn’t completely melted, the flame flickering becomes more pronounced, and the candle is more likely to go out. The wax melting speed plays a crucial role in ensuring that the entire surface of the candle melts evenly.

If the wax pool isn’t fully melted, it creates a tunneling effect where the candle burns unevenly, wasting a significant portion of the wax. To prevent this, make sure to allow the candle to burn long enough for the entire surface to liquefy before extinguishing it.

This will ensure a clean and even burn, allowing your candle to stay lit for longer periods of time.

candle shack europe

Frequently Asked Questions

Can Using Low-Quality or Improperly Stored Matches Affect the Candle’s Ability to Stay Lit?

Using low-quality or improperly stored matches can significantly impact the candle’s ability to stay lit. Additionally, a drafty environment may also hinder the candle’s flame. It is crucial to ensure proper match quality and a draft-free area for optimal candle performance.

Advertisement

How Does High Humidity Levels Impact the Burning of a Candle?

High humidity levels can negatively impact the burning of a candle. The moisture in the air makes it harder for the wick to draw up the wax, resulting in a weaker flame and shorter burn time.

What Are the Consequences of Using an Incorrect Candle Size for the Container?

Using an incorrect candle size for the container can lead to several consequences. The most common issue is poor container suitability, which can result in uneven burning, excessive smoke, and even potential fire hazards.

Can the Wax Pool Not Fully Melting Before Extinguishing Affect the Candle’s Performance?

Yes, the wax temperature and flame flickering can affect the candle’s performance. If the wax doesn’t fully melt, it can prevent the wick from burning properly and cause the candle to go out.

candle making set

How Does Excessive Airflow Affect the Burning of a Candle?

Excessive airflow negatively impacts a candle’s burning efficiency. When the flame is exposed to too much air, it burns faster, causing the wax to melt quickly and the candle to burn out faster.
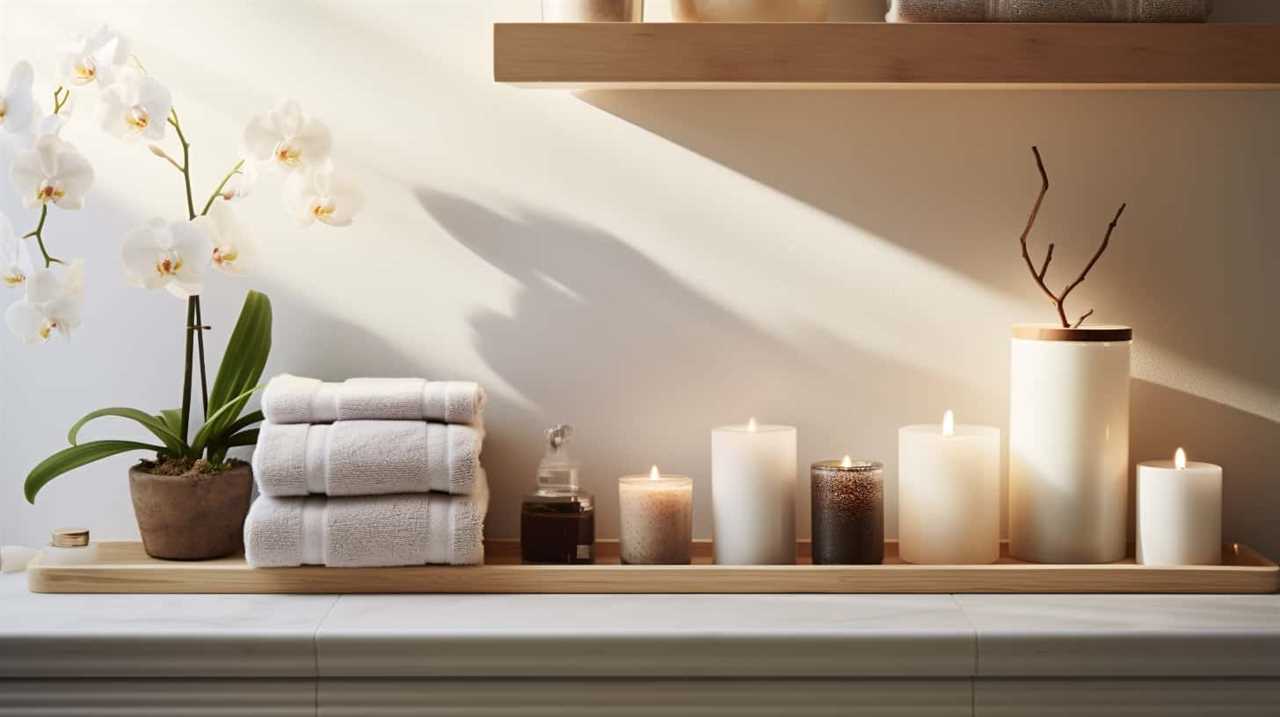
Conclusion

In conclusion, when your candle won’t stay lit, it’s essential to examine various factors such as wick length, candle wax quality, and the environment in which it’s placed.

Advertisement

Just like a delicate flame dancing in the wind, a candle’s ability to stay lit can be influenced by its surroundings.

By understanding and addressing these potential issues, you can ensure a longer-lasting and more enjoyable candle experience.

candle shack clp

My name is Jane and I absolutely adore candles. They can be found all over my house - in every room and on every surface. I am drawn to the delightful scent of candles and how they create a warm and cozy atmosphere. Candles hold a special place in my heart. They help me unwind and destress after a tiring day. They evoke joyful memories and bring me a sense of tranquility and serenity. I truly cannot picture my life without candles!

Continue Reading
Advertisement

Candles

How to Make a Unity Candle

Published

on

By

Are you ready to embark on the journey of crafting a beautiful unity candle? Join us as we guide you through each step in designing your own unique symbol of love and unity.

In this guide, we will take you step by step, sharing our expertise and techniques for creating a masterpiece that will be the highlight of your wedding ceremony.

With our easy-to-follow instructions and helpful tips, you’ll learn how to gather the necessary materials, choose a design that reflects your unique style, and prepare the candle containers.

So, let’s dive in and start making memories that will last a lifetime with our guide on how to make a unity candle.

Advertisement

decorative candle

Key Takeaways

  • The unity candle symbolizes the merging of two lives into one.
  • Customizing the design of the unity candle allows for personal expression and reflection of shared interests.
  • Selecting the perfect wax is crucial for creating a high-quality unity candle.
  • Adding fragrance and color to the unity candle can enhance its aesthetic appeal and complement the wedding theme.

Gather Your Materials

To begin making a unity candle, we need to gather all of our materials.

The materials needed for creating a unity candle are simple yet significant. First and foremost, we require two taper candles, one for the bride and one for the groom, symbolizing their individuality.

Next, we need a larger pillar candle, representing the unity of their lives coming together. Additionally, we’ll need candleholders or stands to keep the candles secure during the ceremony.

It’s essential to choose candles and holders that reflect the couple’s personal style and preferences, as they’ll become a cherished keepsake.

candles uk

The unity candle symbolizes the merging of two lives into one and holds immense meaning in wedding ceremonies.

Choose a Design for Your Unity Candle

Now that we’ve gathered our materials, let’s decide on a design for our unity candle.

Advertisement

The design of a unity candle can vary greatly, allowing couples to express their individuality and personal style. Here are some popular unity candle designs to consider:

  • Classic Design:
  • This design features a simple, elegant candle with the couple’s names and wedding date engraved on it.
  • It symbolizes the unity and commitment of the couple, with the flame representing the eternal bond they’re creating.
  • Customized Design:
  • Couples can opt for a customized design that reflects their shared interests, hobbies, or cultural backgrounds.
  • They can incorporate symbols, images, or colors that hold personal significance, making the unity candle truly unique and meaningful.

Prepare the Candle Containers

After choosing the design for our unity candle, we need to prepare the candle containers. This step is crucial to ensure that the candle decoration is well-executed and the personalized unity candle looks flawless.

candlelight concerts by fever

First, we should select containers that are suitable for holding the candles securely and allowing them to burn evenly. Glass containers are commonly used for unity candles due to their heat resistance and elegant appearance.

Next, we should clean the containers thoroughly to remove any dust or debris that could interfere with the candle’s presentation.

Additionally, consider adding a personal touch by decorating the containers with ribbons, flowers, or other embellishments that complement the overall design.

Select the Perfect Wax for Your Candle

Once we’ve prepared the candle containers, the next step is to select the perfect wax for our unity candle. When it comes to candle waxes, there are several types to choose from, each with its own unique characteristics. To help you make an informed decision, here are two sub-lists that outline the different types of candle waxes and the benefits of soy wax:

Advertisement

uses of candles in daily life

Types of Candle Waxes:

  • Paraffin wax
  • Beeswax
  • Soy wax
  • Coconut wax
  • Palm wax

Benefits of Soy Wax:

  • Eco-friendly and renewable
  • Burns cleaner and longer
  • Produces less soot and toxins
  • Has a lower melting point, making it safer to handle
  • Holds fragrance and color well

Add Fragrance and Color to Your Candle

To enhance our unity candle, we’ll add fragrance and color using a variety of options.

When it comes to fragrance, there are numerous options to choose from. You can opt for essential oils, such as lavender or eucalyptus, which not only provide a pleasant scent but also offer therapeutic benefits. Alternatively, you could go for fragrance oils, which come in a wide range of scents, allowing you to find the perfect aroma to complement your ceremony.

candle in the wind

As for color choices, you can use either liquid dyes or color blocks specifically designed for candle making. These options offer a vast array of vibrant and subtle hues, enabling you to customize your unity candle to match your wedding theme or personal preference.

Now that we’ve selected our fragrance and color, it’s time to move on to the next step: melting and pouring the wax into the containers.

Melt and Pour the Wax Into the Containers

Now that we’ve added fragrance and color to our candle, it’s time to move on to the next step: melting and pouring the wax into the containers.

Advertisement

Safety precautions are crucial during this process, as melting wax can be dangerous. Once we’ve ensured our safety measures, we can proceed with pouring the melted wax into our containers, taking care to decorate the unity candle to our liking.

candlesticks patterns

Safety Precautions for Melting Wax

We always prioritize safety when melting the wax and pouring it into the containers. Here are some important safety precautions to keep in mind:

Wax melting techniques:

  • Use a double boiler or a wax melting pot to ensure even heat distribution and prevent the wax from overheating or catching fire.
  • Stir the wax gently and consistently to avoid hot spots and promote uniform melting.

Proper ventilation while melting wax:

  • Choose a well-ventilated area to melt the wax, preferably near an open window or with a fan running, to prevent the accumulation of harmful fumes.
  • If working in a small space, consider using a fume hood or wearing a respiratory mask to protect yourself from inhaling the vapors.

Decorating the Unity Candle

After ensuring the safety precautions for melting wax have been followed, it’s time for us to decorate our unity candle by melting and pouring the wax into the containers. This step is crucial in creating a beautiful and personalized unity candle for your ceremony.

candlesticks holders

To begin, gather your containers and place them on a heat-resistant surface. Next, melt the wax using a double boiler or a melting pot specifically designed for candle making. Be sure to stir the wax gently and consistently to prevent air bubbles from forming.

Once the wax has reached the desired temperature, carefully pour it into the containers, taking care not to spill or overflow. This is a great opportunity to get creative and add unique touches to your unity candle. Consider adding dried flowers, ribbons, or even personalized decals to make it truly special.

Advertisement

With the wax poured, it’s time to move on to the next step: inserting the wicks and letting the candles cool.

Insert the Wicks and Let the Candles Cool

To begin, it’s important to insert the wicks into the candles and allow them to cool. This step is crucial in candle making techniques as it ensures that the wicks are securely in place and the candles set properly. Here are some key points to keep in mind during this process:

candlelight concerts belfast

  • Choose the right wicks: Select wicks that are appropriate for the size and type of candles you’re making. There are various wick sizes and materials available, such as cotton or wooden wicks, to suit different candle designs.
  • Insert the wicks correctly: Place the wicks at the center of each candle, making sure they’re straight and secure. You can use a wick holder or simply hold the wick in place until the wax cools.

After inserting the wicks, it’s essential to let the candles cool completely. This allows the wax to solidify and ensures that the wicks remain centered. Once the candles have cooled, you can move on to the next step of decorating your unity candle, where you can unleash your creativity and explore alternative unity candle ideas.

[Transition sentence]: Now that the wicks are inserted and the candles have cooled, it’s time to let your imagination run wild and decorate your unity candle.

Decorate Your Unity Candle

Now that we’ve inserted the wicks and allowed the candles to cool, let’s unleash our creativity and decorate our unity candle.

Decorating the unity candle is an opportunity to add personal touches and symbolism to your wedding ceremony. The unity candle holds immense significance as it represents the joining of two individuals and families.

Advertisement

ecoya candles sale

To enhance the symbolism, you can incorporate elements such as ribbons, charms, or engraved names and dates. Consider using colors that hold special meaning to you and your partner.

Alternatively, you can explore alternative unity candle ideas, such as using different-sized candles to represent each partner and their families, or even creating a custom-designed unity candle that reflects your unique style.

Light the Unity Candle in Your Wedding Ceremony

To continue with the ceremony, we light the unity candle, symbolizing the union of two individuals and families. Lighting the unity candle is a significant moment in a wedding ceremony, representing the coming together of two lives.

Here are some lighting techniques and the symbolism behind the unity candle:

candlesticks holders

  • Lighting Techniques:
  • The traditional method involves the bride and groom each taking a lit taper candle and simultaneously lighting the larger unity candle together.
  • Another option is to have the parents of the couple light the taper candles, symbolizing the support and love from both families.
  • Symbolism of the Unity Candle:
  • The two taper candles represent the separate lives of the bride and groom.
  • The larger unity candle represents their new life together as one.
  • As the couple lights the unity candle, it signifies their commitment to each other and the merging of their families.

Frequently Asked Questions

How Long Does It Take for the Candles to Cool After Pouring the Wax?

After pouring the wax, the candles need about 2-3 hours to cool completely. To ensure the best results, use a high-quality wax specifically designed for unity candles, as it will have a longer cooling time.

Can I Use Scented Wax for the Unity Candle?

Using scented wax for the unity candle can add a delightful fragrance to your ceremony. However, it’s important to consider the pros and cons. Alternatively, you can explore other ways to add fragrance.

Advertisement

What Kind of Wicks Should I Use for the Unity Candle?

When making a unity candle, it’s important to choose the right kind of wicks. We recommend using cotton wicks, as they are the most reliable and give a clean, even burn.

Can I Use a Different Type of Container for the Unity Candle?

Using alternative materials for the unity candle allows for endless creativity. Whether it’s a unique container or personalized decorations, the possibilities are exciting. With careful attention to detail, the unity candle can become a true masterpiece.

candles direct discount code

How Long Does the Unity Candle Typically Burn During a Wedding Ceremony?

During a wedding ceremony, the unity candle typically burns for around 5-10 minutes. It symbolizes the joining of two families and the unity of the couple. Alternatives to the unity candle include sand ceremonies or handfasting rituals.

Conclusion

In conclusion, creating a captivating unity candle for your wedding ceremony is an artful and aromatic endeavor. By gathering the necessary materials, choosing a design, and carefully preparing the containers, you can craft a candle that symbolizes the union of two souls.

With the perfect wax, fragrance, and color, your candle will radiate beauty and significance. So, immerse yourself in the process, ignite your creativity, and let the flickering flames of your unity candle illuminate your love story.

Advertisement

Continue Reading

Candles

How to Make a Wickless Candle

Published

on

By

Are you interested in creating a candle without a wick? Look no further! This step-by-step tutorial will guide you through the process of crafting a wickless candle.

By following our expert instructions, you will master the art of crafting these unique candles in no time. We will guide you through the process, from gathering the necessary supplies to decorating your finished creation.

Our language is tailored for those seeking mastery in candle making, providing you with the knowledge and skills to create beautiful wickless candles.

So, let’s get started on this exciting journey and discover the secret behind making your very own wickless candle!

Advertisement

candles direct portugal

Key Takeaways

  • Choose the right wax by considering options like soy, beeswax, paraffin, and coconut wax
  • Consider the benefits of each wax, such as affordability, scent throw, burn time, and toxicity levels
  • Select a suitable container based on size, material, burn time, and the purpose of the candle
  • Explore different ways to decorate the candle, including ribbons, labels, dried flowers, and unique designs

Gather Your Supplies

To start making a wickless candle, we need to gather our supplies.

First, we must consider our container options. Glass jars or heat-resistant containers are ideal for holding the melted wax. Make sure the container is clean and free from any debris.

Next, we need to gather the ingredients for the melting process. We’ll need soy wax flakes, fragrance oils, and dye if desired. Additionally, we’ll need a double boiler or a heat-resistant container and a heat source, such as a stove or a hot plate. It’s important to have a thermometer to monitor the temperature of the wax.

Lastly, don’t forget about the tools like a whisk or a stirrer, a scale for measuring the wax, and a pouring pitcher for easy pouring.

candle shack

With these supplies ready, we can move on to the next step of making our wickless candle.

Choose Your Wax

Now that we’ve gathered our supplies, we need to choose the right wax for our wickless candle.

Advertisement

There are several options available, such as soy, beeswax, paraffin, and coconut wax. Each type of wax has its own benefits and characteristics, so it’s important to consider these factors before making a decision.

Let’s explore the properties of each wax and how they can affect the overall quality of our candle.

candlesticks forex

Soy or Beeswax

We prefer using soy or beeswax as our wax choice when making a wickless candle. Both soy and beeswax have their own benefits and uses, so it ultimately comes down to personal preference. To help you decide, here is a comparison and cost analysis of the two options:

Wax Type Benefits and Uses Cost
Soy – Natural and renewable material
  • Burns longer and cleaner
  • Releases fragrance well
  • Easy to work with | Generally more affordable than beeswax |
    | Beeswax | – Natural and sustainable
  • Burns longer and emits a warm glow
  • Releases a subtle honey scent
  • Purifies the air | Generally more expensive than soy |

Consider your priorities and budget when choosing between soy and beeswax for your wickless candle. Both options have their advantages, so go with the one that aligns with your needs and preferences.

Paraffin or Coconut

When considering the wax for our wickless candle, the choice between paraffin or coconut is an important decision to make. Both paraffin and coconut wax have their own unique properties and benefits. Here is a comparison to help you decide the best wickless candle wax for your needs:

  1. Paraffin wax:
  • Made from petroleum byproducts.
  • Provides a strong scent throw, filling the room with fragrance.
  • Has a longer burn time compared to other waxes.
  1. Coconut wax:
  • Made from the meat of coconuts.
  • Offers a clean and natural burn.
  • Produces a soft, creamy texture that’s easy to work with.

Ultimately, the choice between paraffin and coconut wax depends on your preferences and priorities. If you prioritize a strong scent throw and longer burn time, paraffin wax may be the best option for you. On the other hand, if you value a clean and natural burn, along with a soft and creamy texture, coconut wax may be the better choice.

candle making kit

Consider your desired outcome and experiment with both to find the perfect wax for your wickless candle.

Advertisement

Benefits of Each

The advantages of each wax type should guide our choice when deciding between paraffin and coconut wax for our wickless candle. Understanding the benefits of wickless candles is essential in order to use them effectively.

Paraffin wax is a popular choice due to its affordability and accessibility. It has a high melting point, which means it can hold its shape well. Additionally, paraffin wax has a strong scent throw, meaning it can release fragrance effectively. However, it does produce some soot and may contain toxins.

On the other hand, coconut wax is a natural and sustainable option. It has a lower melting point, which allows for a longer burn time. Coconut wax also has a clean burn, producing minimal soot and no toxins. It has a subtle scent throw, making it perfect for those who prefer a more subtle fragrance.

candlelight concert

Considering these benefits, we can make an informed decision when choosing between paraffin and coconut wax for our wickless candle.

Select a Container

Now that we’ve chosen our wax, it’s time to select a container for our wickless candle.

Advertisement

There are a few points to consider when choosing the right container. First, think about the size options available – do you want a small, travel-sized candle or a larger one for your living room?

Next, consider the material of the container – glass, ceramic, or tin?

dusk candles review

Lastly, let’s explore some decorative container ideas to add a personal touch to your candle-making project.

Container Size Options

We prefer using a glass jar as our container for making wickless candles. When selecting a container size, it’s important to consider the burn time of the candle. Here are three options to choose from:

  1. Small containers: These are great for shorter burn times, typically ranging from 10-15 hours. They’re perfect for small spaces or for trying out different scents without committing to a larger candle.
  2. Medium containers: These provide a longer burn time, usually lasting between 20-30 hours. They’re ideal for medium-sized rooms or for those who enjoy having a candle burning for a longer period.
  3. Large containers: These offer the longest burn time, lasting between 40-50 hours. They’re perfect for larger rooms or for those who prefer to have a candle burning throughout the day.

When selecting a container size, consider the space you intend to use the candle in and how long you want it to burn.

Material Considerations

For our wickless candle, we need to carefully consider the materials used for the container. Choosing the right material is crucial for both the functionality and safety of the candle.

Advertisement

candle holders uk

When selecting a container, it’s important to keep in mind alternative materials that can be used instead of traditional options like glass or ceramic. One alternative material that’s gaining popularity is silicone. Silicone containers are heat-resistant and can withstand high temperatures without melting or warping, making them a safe option for wickless candles.

Another alternative material to consider is stainless steel. Stainless steel containers aren’t only durable and long-lasting, but they also provide excellent heat retention, ensuring that the candle melts evenly and efficiently.

When it comes to wickless candle safety, selecting the right container material is essential for a successful and worry-free candle-making experience.

Decorative Container Ideas

When selecting a container for our wickless candle, it’s important to consider various decorative options available. Here are some ideas for decorative candle holders and repurposing household items:

candlelight concerts bristol

  1. Mason jars: These versatile containers can be found in various sizes and styles. They provide a rustic and cozy feel to your wickless candle. You can decorate them with ribbons, twine, or even paint them to match your decor.
  2. Teacups and saucers: Repurpose vintage teacups and saucers as unique candle holders. They add a touch of elegance and charm to any space. You can find these at thrift stores or flea markets.
  3. Glass bottles: Give a second life to empty glass bottles by turning them into candle holders. Remove the labels, clean them thoroughly, and insert your wickless candle. You can even add decorative elements such as beads or seashells inside the bottle for an extra touch of creativity.

Prepare the Container

To prepare the container for our wickless candle, gather all necessary materials and ensure that it’s clean and free of any debris.

First, consider the size of the container. Wickless candles can be made in various sizes, depending on your preference and the amount of wax you have. Smaller containers are perfect for a personal candle while larger ones are ideal for creating a centerpiece.

Advertisement

Next, think about the material of the container. Glass jars are a popular choice as they’re heat resistant and allow you to see the beautiful glow of the candle. Ceramic or metal containers can also be used, but make sure they’re heat-safe.

Once you have chosen the container, thoroughly clean it with warm soapy water to remove any dirt or dust. Dry it completely to ensure a clean surface for your wickless candle.

dusk meditation candle

Melt the Wax

Now that we’ve prepared our container, it’s time to melt the wax. The temperature for melting wax should be around 180-185 degrees Fahrenheit to ensure that it melts evenly and doesn’t burn.

If you don’t have access to a stove or microwave, you can also consider using alternative wickless materials such as soy or beeswax melts, which can be melted in a wax warmer.

Temperature for Melting Wax

Our recommended temperature for melting the wax is crucial to ensure a smooth and even consistency. It’s important to note that different types of waxes have different melting points.

Advertisement

Here is a step-by-step guide on achieving the optimal temperature for melting your wax:

candlelight concerts bristol

  1. Determine the melting point of your specific wax. This information can usually be found on the packaging or from the supplier.
  2. Set up a double boiler system by placing a heat-resistant container filled with wax pellets or chunks into a larger pot filled with water. This indirect method will prevent the wax from scorching.
  3. Heat the water on low to medium heat and monitor the temperature using a candy or candle thermometer. Aim for a temperature that’s just above the melting point of your wax, usually between 160°F to 180°F (71°C to 82°C).

Alternative Wickless Materials

After determining the optimal temperature for melting the wax, we frequently use alternative wickless materials to achieve the desired consistency. These alternative materials provide different options for making wickless candles, allowing for creative experimentation and customization.

One popular alternative material is soy wax, which is derived from soybean oil and has a lower melting point than traditional candle wax. Soy wax is known for its clean burn and longer-lasting scent.

Another option is beeswax, which has a natural honey scent and a higher melting point. Beeswax is often used for its eco-friendly properties and ability to purify the air.

Lastly, coconut oil can be used as an alternative wickless material. It has a low melting point and provides a smooth and creamy texture to the candle.

candlelight concerts manchester

These alternative materials give you the flexibility to create unique wickless candles with different scents and textures.

Advertisement

Add Fragrance and Color

We enhance the wickless candle by adding fragrance and color. Here’s how to do it:

  1. Fragrance Selection:
  • Choose high-quality fragrance oils specifically designed for candles.
  • Consider the scent’s strength and how it complements the purpose of your candle.
  • Experiment with different combinations to create unique aromas.
  1. Color Combinations:
  • Use candle dye chips or liquid candle dyes for coloring.
  • Start with small amounts and gradually add more until you achieve the desired shade.
  • Mix different colors to create custom shades or use pre-made color combinations.

Adding fragrance and color to your wickless candle enhances its appeal and creates a more enjoyable experience. Remember to test your fragrance and color combinations beforehand to ensure the desired results.

Pour the Wax Into the Container

To complete the process, the wax is poured into the container. Pouring the wax is a crucial step in creating a wickless candle, as it ensures that the wax is evenly distributed and properly sets in the container.

candle picture

There are different methods you can use to pour the wax into the container, depending on your preference and the desired outcome. One method is to slowly pour the melted wax from the pouring pitcher into the container, making sure to leave some space at the top for the fragrance. Another method is to use a ladle or a spoon to carefully transfer the melted wax into the container.

Whichever method you choose, make sure to pour the wax slowly and steadily to avoid any spills or uneven distribution.

Once the wax is poured, it’s time to let it cool and harden, which we’ll discuss in the next section.

Advertisement

Let the Wax Cool and Harden

Once the wax has been poured into the container, we need to allow it to cool and harden. This step is crucial to ensure that our wickless candle sets properly and provides the desired benefits.

Candle

Here are some tips for cooling and hardening the wax:

  1. Patience is key: It’s important to resist the temptation to touch or move the container while the wax is cooling. This can disrupt the process and result in an uneven surface.
  2. Room temperature matters: Find a cool and undisturbed area in your home where the candle can be left to cool. Avoid placing it near drafts or direct sunlight, as these can affect the cooling process.
  3. Give it time: Depending on the size of your candle, it may take several hours or even overnight for the wax to completely cool and harden. Be patient and allow sufficient time for the process to complete.

Trim the Excess Wax

After the wax has cooled and hardened, we can proceed to trim the excess wax. Trimming the excess wax is an important step to ensure that our wickless candle looks neat and professional. To do this, we will need a sharp knife or a wick trimmer. Gently hold the candle and start trimming the excess wax around the edges. Be careful not to cut too deep or damage the candle. As you trim, you can collect the excess wax and use it for future candle making projects. Once you are satisfied with the shape and appearance of your candle, wipe off any wax residue with a clean cloth. Now, our wickless candle is ready to be displayed or gifted to someone special.

Alternatives to Wickless Candles Techniques for Trimming Excess Wax
Battery-operated candles Use a sharp knife or wick trimmer
Flameless LED candles Trim excess wax around the edges
Wax melts Be careful not to cut too deep
Reed diffusers Collect excess wax for future use
Scented plugins Wipe off any wax residue with a cloth

Decorate Your Wickless Candle

How can we creatively enhance the appearance of our wickless candle?

Decorating your wickless candle can make it truly unique and eye-catching. Here are some ideas to get you started:

candle gift

  1. Different types of decorative materials for wickless candles:
  • Gemstones: Add a touch of elegance and sparkle by gluing gemstones onto the outside of your candle.
  • Ribbons and bows: Wrap a colorful ribbon around the base of the candle or tie a bow on top for a charming look.
  • Dried flowers: Press dried flowers onto the surface of the candle using a heat-resistant adhesive.
  1. Techniques for creating unique designs on wickless candles:
  • Wax carving: Use a heated tool to carve intricate patterns, symbols, or words directly onto the surface of the candle.
  • Decoupage: Cut out decorative paper or fabric and adhere it to the candle using decoupage glue for a personalized design.
  • Stenciling: Place a stencil on the candle and apply paint or glitter over it to create a beautiful design.

Store and Enjoy Your Wickless Candle

To store and enjoy our wickless candle, we simply need to find a safe and suitable location in our home. Here is a step-by-step guide on how to properly store and enjoy your wickless candle:

  1. Storage: Find a cool, dry place away from direct sunlight, heat sources, and flammable materials. A cupboard or shelf works well.
  2. Placement: Ensure the candle is on a stable, heat-resistant surface. Avoid placing it near curtains, bedding, or other combustible items.
  3. Enjoyment: To enjoy your wickless candle, place it in a wax warmer or diffuser designed for wickless candles. Turn it on and allow the fragrance to fill the room. Remember to follow the manufacturer’s instructions for your specific wax warmer or diffuser.
  4. Safety: Never leave a wax warmer or diffuser unattended, and keep it out of reach of children and pets. Remember to extinguish the warmer when not in use.

Safety Precautions and Tips

For safe and enjoyable use, it’s important to be aware of the necessary safety precautions and tips when using a wickless candle. Here are some key guidelines to follow:

  1. Preventing Burns
  • Always place the wickless candle on a heat-resistant surface to avoid any accidents.
  • Keep the candle away from flammable objects and ensure it’s out of reach of children and pets.
  • Never leave a burning wickless candle unattended.
  1. Choosing the Right Wax
  • Opt for a high-quality, non-toxic wax that’s specifically designed for wickless candles.
  • Avoid using paraffin wax, as it can release harmful toxins when burned.
  • Consider using soy wax or beeswax, which are natural and environmentally friendly alternatives.

Frequently Asked Questions

How Do I Clean the Container After Using a Wickless Candle?

After using a wickless candle, we have found some helpful cleaning tips for removing residue from the container. First, let the container cool completely. Then, use a cloth or sponge to gently scrub away any leftover wax.

Can I Use Essential Oils Instead of Fragrance Oils for My Wickless Candle?

Yes, you can use essential oils instead of fragrance oils for your wickless candle. Essential oils offer many benefits, such as natural aromas and potential therapeutic effects. However, ensure you use a proper carrier oil to avoid any safety risks or damage to your candle.

Advertisement

the candle library stockists

What Are Some Creative Ways to Decorate a Wickless Candle?

Looking to personalize your wickless candle? Get ready for some creative candle decorating ideas! We’ve got unique ways to make your candle stand out and reflect your style. Let’s dive in!

Can I Use a Different Type of Wax for My Wickless Candle?

Yes, we can use different types of wax for our wickless candles. It offers various benefits, such as the ability to incorporate essential oils for a lovely scent. Let’s explore the step-by-step process of making a wickless candle with different wax options.

How Long Does It Take for the Wax to Cool and Harden Completely?

The wax cooling time can vary depending on factors like room temperature and the type of wax used. It typically takes a few hours for the wax to cool and harden completely.

Conclusion

Now that you’ve learned how to make a wickless candle, you can indulge in the cozy and comforting glow of candlelight without any worries. Imagine the soft flickering flames dancing within your beautifully decorated container, filling your space with a warm and inviting atmosphere.

candlesticks forex

With a bit of creativity and some basic supplies, you can create your own unique wickless candles that will add a touch of magic to any room. So go ahead, unleash your creativity, and enjoy the soothing ambiance of your homemade wickless candles.

Advertisement

Continue Reading

Candles

How to Make Candle Labels on Canva

Published

on

By

Ready to take your candle-making business to the next level? This guide will walk you through creating stunning candle labels with Canva.

With Canva’s user-friendly interface and powerful design tools, you’ll be able to create professional-looking labels that will make your products stand out from the competition.

We’ll walk you through the process step-by-step, from choosing the perfect template to adding text and graphics that reflect your brand.

Plus, we’ll share tips for a polished finish and guide you on how to print and apply your labels.

Advertisement

candles direct

Get ready to elevate your candle packaging game and impress your customers with beautiful, custom-made labels.

Let’s dive in!

Key Takeaways

  • Canva offers a wide range of templates and customization options for designing candle labels.
  • Consider color selection tips, font choices, and graphics to enhance the overall look and feel of the label.
  • Canva allows for easy customization of candle labels with a wide range of font styles, layout options, and image placement techniques.
  • Experiment with colors, backgrounds, and label design elements to create visually appealing and personalized candle labels.

Getting Started With Canva

To begin creating candle labels on Canva, we’ll first need to familiarize ourselves with the platform and its features. Canva is a user-friendly graphic design tool that offers a wide range of templates and customization options.

When designing candle labels, one of the key factors to consider is the color scheme. Choosing the right colors can evoke different emotions and enhance the overall aesthetic of your labels. Canva provides a vast selection of color palettes to choose from, making it easy to find the perfect combination for your candles.

dusk gifts

Additionally, Canva offers a variety of design templates specifically designed for labels. These templates provide a great starting point and can be customized to fit your brand and style.

With Canva’s intuitive interface and helpful features, creating stunning candle labels has never been easier.

Advertisement

Choosing the Perfect Template

We can easily find the ideal template for candle labels by exploring Canva’s extensive selection of design options. When it comes to template selection, Canva offers a wide range of choices to suit any style or theme.

Here are five key considerations to keep in mind when browsing for the perfect template:

candlesticks trading

  • Design Inspiration: Canva provides a plethora of pre-designed templates that can serve as inspiration for your candle label design.
  • Customizability: Look for templates that allow you to customize the colors, fonts, and graphics to match your brand or personal preferences.
  • Layout Options: Consider templates with different layout options, such as circular labels, rectangular labels, or even custom shapes.
  • Theme and Aesthetic: Choose a template that aligns with the theme and aesthetic of your candles, whether it’s rustic, minimalist, or elegant.
  • Label Size: Ensure that the template is the right size for your candle labels, whether you’re using tin containers, glass jars, or any other packaging.

With these considerations in mind, we can now move on to customizing the design elements to create unique and eye-catching candle labels.

Customizing the Design Elements

Now that we’ve chosen the perfect template for our candle labels, let’s dive into customizing the design elements.

The first point to consider is color selection tips, as the right colors can evoke the desired mood or match your brand aesthetic.

Next, we’ll delve into font and typography choices, exploring how different styles can enhance the overall look and feel of the label.

Advertisement

candle holders for pillar candles

Lastly, we’ll discuss the importance of adding graphics and illustrations to make your candle labels visually appealing and unique.

Color Selection Tips

For the color selection tips when customizing the design elements for your candle labels on Canva, consider using an article determiner. The right colors can make a significant impact on the overall appeal and effectiveness of your candle labels. Here are some tips to help you choose the perfect colors for your labels:

  • Understand color psychology and how different colors can evoke specific emotions or convey certain messages.
  • Consider the color coordination with your brand identity and the overall theme of your candles.
  • Use contrasting colors to make important information or elements stand out.
  • Experiment with different color combinations to find the one that best represents your brand and resonates with your target audience.
  • Don’t be afraid to use bold and vibrant colors to grab attention and create a memorable impression.

When you’ve chosen the perfect colors for your candle labels, it’s time to move on to the next important aspect: font and typography choices.

Font and Typography Choices

After considering the color selection tips for your candle labels on Canva, it’s important to now focus on customizing the design elements by choosing the right font and typography. Font pairing plays a crucial role in creating visually appealing and cohesive designs. By combining different fonts that complement each other, you can add depth and personality to your candle labels. It’s essential to stay updated with typography trends to ensure your designs look modern and professional. Here are a few popular font pairings and typography trends to consider:

candle making supplies uk

Font Pairing Typography Trends
Serif + Sans-serif Minimalistic Designs
Script + Sans-serif Handwritten Elegance
Bold + Light Contrast and Hierarchy
Monospace + Sans-serif Retro and Vintage

Adding Graphics and Illustrations

To further enhance the visual appeal of your candle labels, we can now delve into the process of incorporating graphics and illustrations into the design elements. Graphics and branding play a significant role in capturing the attention of your customers and conveying your brand’s identity.

Here are five ways to incorporate illustrations into your candle label design:

Advertisement
  • Add a small icon or symbol that represents your brand or the scent of the candle.
  • Use illustrations to showcase the key ingredients or materials used in the candle.
  • Create custom illustrations that reflect the mood or theme of the candle.
  • Incorporate illustrations of the candle’s packaging or container to give customers a preview of what they can expect.
  • Use graphics to highlight any special features or benefits of the candle, such as long-lasting burn time or eco-friendly ingredients.

By incorporating illustrations strategically, you can create a visually appealing and cohesive candle label design that aligns with your brand’s identity.

Now that we’ve covered the graphics and illustrations, let’s move on to adding text to your candle label.

candlelight inn

Adding Text to Your Candle Label

We love adding text to our candle labels using Canva because it allows us to easily customize and personalize each label. With Canva’s wide range of font selection and label layout options, we can create beautiful and professional-looking designs that capture the essence of our candles. The right font can evoke a sense of elegance, warmth, or playfulness, depending on the mood we want to convey. To give you an idea of the possibilities, here’s a table showcasing different font styles and their emotional impact:

Font Style Emotional Impact
Script Romantic
Sans Serif Modern
Serif Classic
Handwritten Whimsical
Bold Strong

Incorporating Images and Graphics

When it comes to creating candle labels that catch the eye, the visual impact of graphics is crucial. Incorporating images and graphics in your design can elevate the overall look and feel of your label.

From choosing the right images to utilizing image placement techniques, we’ll explore how to design candle labels that leave a lasting impression.

Visual Impact of Graphics

By incorporating eye-catching images and graphics, we enhance the visual impact of our candle labels on Canva. Visual storytelling is an important aspect of branding, and it helps to convey the message and personality of our candles.

Advertisement

candlelight concerts edinburgh

Here are five ways in which we can make our candle labels visually impactful:

  • Choose high-quality images that capture the essence of our candles and align with our brand identity.
  • Use bold and vibrant colors to draw attention and create a cohesive look.
  • Incorporate unique and creative typography to make our labels stand out.
  • Experiment with different shapes and layouts to add visual interest and break away from the traditional label design.
  • Consider adding subtle textures or patterns to add depth and make our labels more tactile.

Designing With Images

One effective way to enhance the visual appeal of candle labels on Canva is by incorporating high-quality images and graphics. Designing with illustrations not only adds a touch of creativity but also helps to convey the essence of the product.

When incorporating product details into the design, using images can be a powerful tool to showcase the unique features and qualities of the candles. For example, you can include images of the different scents or ingredients used in the candles to give customers a better idea of what they can expect.

Furthermore, graphics such as decorative borders or patterns can add visual interest and make the labels more eye-catching. By carefully selecting and incorporating images and graphics, you can create candle labels that aren’t only visually appealing but also effectively communicate the essence of your product.

candles direct reviews

Image Placement Techniques

To incorporate images and graphics effectively into candle labels on Canva, we can utilize various image placement techniques. These techniques allow us to enhance the visual appeal of our labels and create a cohesive and professional design. Here are five image placement techniques that can elevate your candle labels:

  • Blend Modes: Experiment with different blend modes to seamlessly integrate your images with the background and other elements of your label design.
  • Layering: Use multiple layers to create depth and dimension in your design. Arrange your images in a way that complements the overall composition.
  • Masking: Utilize masking techniques to selectively reveal or hide parts of your images. This allows you to create unique effects and highlight specific elements.
  • Alignment: Ensure that your images are properly aligned with other design elements, such as text or graphics. This helps maintain a balanced and visually pleasing layout.
  • Resizing and Scaling: Adjust the size of your images to fit the label dimensions and maintain clarity. Scaling your images proportionally prevents distortion and pixelation.

Playing With Colors and Backgrounds

We frequently experiment with colors and backgrounds to enhance our candle labels on Canva. Color psychology plays a crucial role in creating a cohesive design that resonates with our audience. By understanding the emotions and associations different colors evoke, we can strategically choose hues that reflect the essence of our brand and the mood we want to convey.

For example, warm tones like red and orange can evoke feelings of warmth and comfort, perfect for cozy candle labels. On the other hand, cool tones like blue and green can create a sense of calm and serenity, ideal for relaxing scents. By experimenting with different color combinations and backgrounds, we can create visually appealing labels that capture the attention of our customers.

Advertisement

Now, let’s dive into how we can use Canva’s design tools and features to bring our candle labels to life.

candlesticks trading

Using Canva’s Design Tools and Features

Our favorite design tool on Canva is its user-friendly interface, which allows us to create stunning candle labels with ease. With Canva’s collaboration features, we can work seamlessly with our team members, making the design process more efficient.

Here are five amazing features that Canva offers for creating candle label mockups:

  • Drag-and-drop functionality: Canva’s drag-and-drop feature allows us to effortlessly add and arrange elements on our candle label design.
  • Extensive library of templates: Canva provides a wide range of pre-designed templates specifically tailored for candle labels, saving us time and effort.
  • Customizable text options: We can choose from a variety of fonts and text styles, ensuring that our candle label design perfectly matches our brand.
  • Image editing tools: Canva allows us to edit and enhance our candle label images, making them more visually appealing.
  • Access to a vast collection of graphics and illustrations: Canva’s extensive library of graphics and illustrations gives us endless possibilities for creating unique and eye-catching candle label designs.

With these powerful design tools and features, Canva makes creating candle labels a breeze, allowing us to unleash our creativity and produce professional-looking designs.

Making Your Label Unique With Personalization

Let’s add a personal touch to our candle labels by customizing the design and adding unique elements.

candle light

By using Canva’s design tools and features, we can create labels that truly reflect our brand and style.

Advertisement

Whether it’s choosing a specific font, adding a personal logo, or incorporating meaningful images, personalization allows us to create labels that stand out and leave a lasting impression on our customers.

Customizing Label Design

To customize the design of your candle labels and make them truly unique, incorporate personalized elements that reflect your brand and aesthetics. Here are some ideas to help you create a stunning label design:

  • Custom Label Dimensions: Experiment with different label sizes to find the perfect fit for your candles. Consider square, rectangular, or even circular labels for a distinctive look.
  • Label Printing Options: Explore various printing techniques such as foil stamping, embossing, or matte finishes to add texture and visual appeal to your labels.
  • Color Palette: Choose colors that align with your brand identity and evoke the desired emotions. Consider using complementary or contrasting shades to make your labels stand out.
  • Typography: Select fonts that align with your brand personality and are legible at different sizes. Play with font styles, sizes, and spacing to create visual hierarchy and enhance readability.
  • Graphics and Illustrations: Incorporate custom illustrations or graphics that represent your brand or the scent of your candles. These elements can add a touch of uniqueness and personality to your labels.

Adding Personal Touch

One way to make your candle labels unique and personalized is by incorporating a custom logo or monogram. Adding a personal touch to your labels not only makes them stand out but also reflects your brand and style. There are various personalization techniques you can use to make your candle labels truly one-of-a-kind.

myer

For example, you can experiment with different fonts, colors, and graphics to create a visually appealing design. Another creative label idea is to include a handwritten element, such as a signature or a special message, to add a personal and heartfelt touch. Additionally, you can consider using unique shapes or patterns that align with your brand’s aesthetic. By utilizing these personalization techniques, you can create candle labels that aren’t only visually appealing but also reflect your brand’s identity and resonate with your customers.

Now, let’s move on to some tips for achieving a professional-looking finish on your candle labels.

Tips for a Professional-Looking Finish

To achieve a professional-looking finish for your candle labels, we recommend incorporating clean and minimalist designs that align with your brand aesthetic. Here are some tips to help you create labels that stand out:

Advertisement
  • Font Pairing: Choose fonts that complement each other and reflect the mood of your brand. A combination of a bold, eye-catching font with a more elegant and legible font can create a visually appealing label.
  • Label Sizing: Consider the size and shape of your candle containers when designing your labels. Make sure the labels fit properly and don’t overpower the candles. Experiment with different sizes to find the perfect balance.
  • Consistent Branding: Use consistent colors, fonts, and design elements across all your candle labels to create a cohesive and professional look.
  • High-Quality Images: Use high-resolution images that showcase your candles in the best light. Avoid pixelation and blur, as they can make your labels look unprofessional.
  • Attention to Detail: Pay close attention to spacing, alignment, and overall composition. A well-organized and well-balanced label will give off a professional vibe.

Printing and Applying Your Candle Labels

We recommend using a professional printing service to ensure high-quality results when printing and applying your candle labels. These printing techniques will help bring your designs to life with vibrant colors and sharp details. Look for a printing service that specializes in label printing to ensure they have the necessary equipment and expertise. They can guide you on the best paper and finish options for your labels, such as glossy or matte.

yankee candle

Once you have your beautifully printed labels, it’s time to apply them to your candles. Label application methods can vary depending on the type of label and container you’re using. Some common methods include using adhesive labels, heat shrink sleeves, or printing directly onto the candle itself. Experiment with different methods to find the one that gives you the desired professional finish.

Frequently Asked Questions

How Do I Create a Canva Account?

To create a Canva account, we simply visit the Canva website and click on the "Sign up" button. Then, we fill in our details, choose a password, and voila! We’re ready to start creating amazing designs with Canva.

Can I Use Canva on My Mobile Device?

Yes, you can use Canva on your mobile device. With the Canva mobile app, you have access to a wide range of design templates, allowing you to create stunning candle labels on the go.

Can I Save My Design and Come Back to It Later?

Yes, you can save your design and come back to it later on Canva. This feature ensures the accessibility and convenience of your work, allowing you to easily pick up where you left off and make any necessary adjustments.

candle holders glass

There are copyright restrictions on the images and graphics in Canva. However, Canva offers a range of licensing options to ensure you can use the content legally and avoid any copyright infringement issues.

Advertisement

Can I Print My Candle Labels at Home or Do I Need to Use a Professional Printing Service?

We can print our candle labels at home or use a professional printing service. Home printing offers convenience and control, while professional printing ensures high-quality results. It depends on our preferences and resources.

Conclusion

So there you have it, folks! Making candle labels on Canva is as easy as pie. Who needs professional designers when you can create stunning labels yourself?

With Canva’s user-friendly interface and a plethora of customizable templates, you’ll have your candles looking like they came straight from a high-end boutique.

uses of candles in daily life

So go ahead, unleash your inner artist and start designing your unique candle labels today. Your customers won’t believe you did it yourself!

Advertisement

Continue Reading

Trending

Copyright © 2024 Just Candles Affiliate disclaimer As an affiliate, we may earn a commission from qualifying purchases. We get commissions for purchases made through links on this website from Amazon and other third parties.