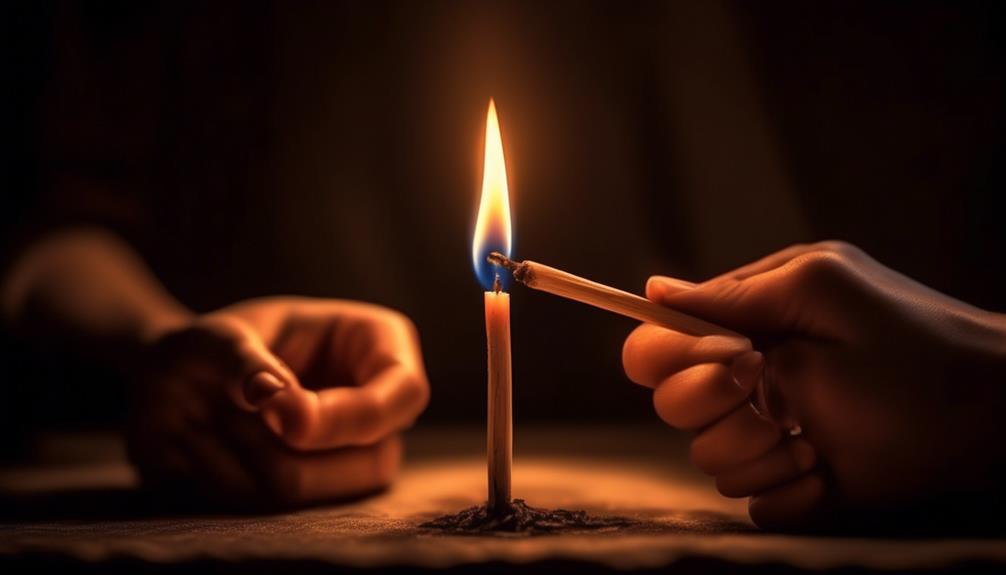
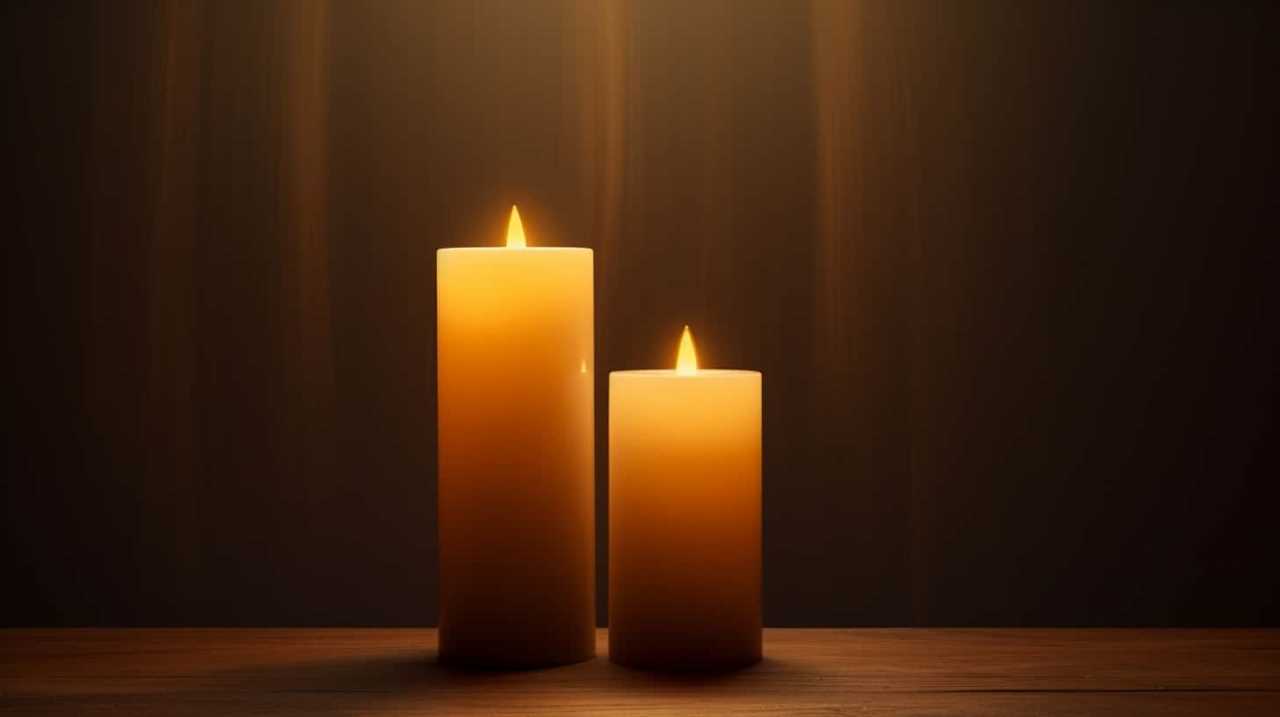
Connect with us

Candles

When a Candle Flickers It Means

Published

on

When a candle’s light dances and shifts, it signifies that there’s more happening than we initially see. Just as a soft wind plays with a candle’s flame, our lives too are intertwined with faint signals and concealed meanings.

In our journey to understand the world around us, we’ve discovered that candle flickering holds a deeper significance. Through history, culture, and spirituality, we’ve unraveled the mysteries behind this mesmerizing phenomenon.

From superstitions and beliefs to the science that underlies it all, we’ve explored every aspect to shed light on the meaning behind a flickering candle. Join us as we delve into the secrets and symbolism of candle flames, uncovering the profound messages they carry.

Key Takeaways

  • Candle flickering has historical and cultural significance, often associated with spiritual presence or communication from the divine.
  • The flickering of a candle holds symbolic meanings such as life, energy, and the eternal cycle of birth and death.
  • Interpretations of candle flickering vary across different cultures, with some believing it is a communication from the spiritual realm or a departed loved one.
  • Candles are recognized as powerful metaphors for spiritual enlightenment and illumination, representing the inner light within each individual.

Historical Significance of Flickering Candles

When a candle flickers, it signifies something significant in our history. The historical origins of candle flickering can be traced back to ancient times, where candles were used as a primary source of light. In those times, people believed that the flickering flame was a sign of spiritual presence or communication from the divine. This belief was reinforced by the fact that candles were often lit during religious ceremonies and rituals.

candlesticks forex

From a psychological perspective, the flickering flame of a candle has been interpreted as a symbol of uncertainty and instability. It can evoke feelings of vulnerability and unease, reminding us of the impermanence of life.

Advertisement

With this understanding, we can now transition into the subsequent section about the cultural interpretations of candle flickering.

Cultural Interpretations of Candle Flickering

As we explore the cultural interpretations of candle flickering, we aim to understand the symbolic meanings behind this phenomenon.

Across various cultures, the flickering of a candle holds significant significance and is often associated with spiritual or supernatural elements. These interpretations vary from culture to culture, shedding light on the diverse ways in which people perceive and interpret the natural behavior of a flickering flame.

how does a candle burn

Symbolic Meanings of Flickering

Although cultural interpretations may vary, the flickering of a candle holds symbolic meanings that are deeply rooted in different societies around the world.

The historical origins of these interpretations can be traced back to ancient times when candles were used for religious ceremonies, rituals, and celebrations.

Advertisement

In many cultures, the flickering of a candle is seen as a symbol of spiritual presence or divine intervention. The rhythmic dance of the flame is often associated with life, energy, and the eternal cycle of birth and death.

In some traditions, a flickering candle is believed to be a sign of communication with the spirit world or a message from the divine. It’s also considered a symbolic gesture of hope, guidance, and protection.

candlelight concerts belfast

The flickering flame can be seen as a metaphor for the human soul, constantly striving and seeking enlightenment.

Cross-Cultural Interpretations Explained

We will now delve into the cross-cultural interpretations and explanations of candle flickering, shedding light on the various cultural perspectives surrounding this phenomenon.

The historical origins of candle flickering interpretations can be traced back to ancient civilizations, where it was believed to be a communication from the spiritual realm. In some cultures, a flickering candle is seen as a sign of a departed loved one trying to communicate with the living. Other cultural interpretations suggest that a flickering candle represents the presence of a guardian spirit or a divine presence.

Advertisement

From a psychological standpoint, some believe that the flickering of a candle can be attributed to air currents or changes in temperature. These interpretations highlight the rich diversity of beliefs and traditions across different cultures.

candlelight concerts belfast

As we transition into the next section about symbolism in spiritual practices, we’ll explore how candle flickering is deeply intertwined with spiritual rituals and ceremonies.

Symbolism in Spiritual Practices

Symbolism in spiritual practices encompasses the use of various objects and actions to represent deeper meanings.

One such object is the candle, which has long been recognized as a powerful metaphor for spiritual enlightenment and illumination.

The flickering of a candle flame holds significant spiritual significance, often believed to symbolize the presence of divine energy or the communication between the physical and spiritual realms.

Advertisement

candle making

Moreover, the interpretation of candle flickering can vary across different cultures, each attributing their own unique meanings to this phenomenon.

Candle as Metaphor

In our spiritual practices, candles serve as a powerful metaphor, embodying the essence of light and illumination. Candles have a long history and their use can be traced back to ancient civilizations such as the Egyptians and Romans. They’ve been used in religious ceremonies, rituals, and meditation practices, symbolizing the presence of the divine and the awakening of spiritual consciousness.

From a psychological perspective, candles can represent the inner light within each individual. The act of lighting a candle can be seen as a symbolic gesture of igniting the spark of enlightenment and self-discovery. The flickering flame of a candle can also be interpreted as the fluctuations of the mind, representing the constant movement of thoughts and emotions.

This brings us to the spiritual significance of flickering, which will be discussed in the subsequent section.

yankee candle singapore

Spiritual Significance of Flickering

Continuing our exploration of candles as a metaphor, let’s delve into the spiritual significance of flickering and its symbolism in our spiritual practices.

Advertisement

Candles have long been used as a tool for meditation, prayer, and other spiritual practices. The flickering flame represents the presence of the divine and the connection between the physical and spiritual realms.

In spiritual practices, the flickering of a candle can hold hidden messages and provide guidance. The intensity of the flickering can indicate the strength of one’s spiritual energy or the presence of spiritual beings. A steady, consistent flame suggests stability and balance, while a flickering flame may suggest the need for inner reflection or the presence of spiritual transformation.

Interpretations in Different Cultures

As we delve deeper into the spiritual significance of flickering candles, it is important to explore the interpretations of this symbolism in various cultures and their respective spiritual practices. The historical origins of candle symbolism can be traced back to ancient civilizations such as the Egyptians and the Romans, who believed that candles had the power to connect the earthly realm with the divine. In different cultures, candles are used in a variety of rituals and ceremonies to invoke spiritual energy, bring blessings, and ward off negative forces. Let’s take a closer look at some cultural interpretations of flickering candles:

yankee candle

Culture Interpretation
Hinduism A flickering candle symbolizes the presence of deities or divine energy.
Buddhism A flickering candle represents the impermanence of life and the transient nature of existence.
Christianity A flickering candle signifies the presence of the Holy Spirit and divine guidance.
Native American A flickering candle is believed to attract spirits and facilitate communication with the spiritual realm.

These interpretations highlight the rich diversity of cultural rituals and their unique perspectives on the symbolism of flickering candles.

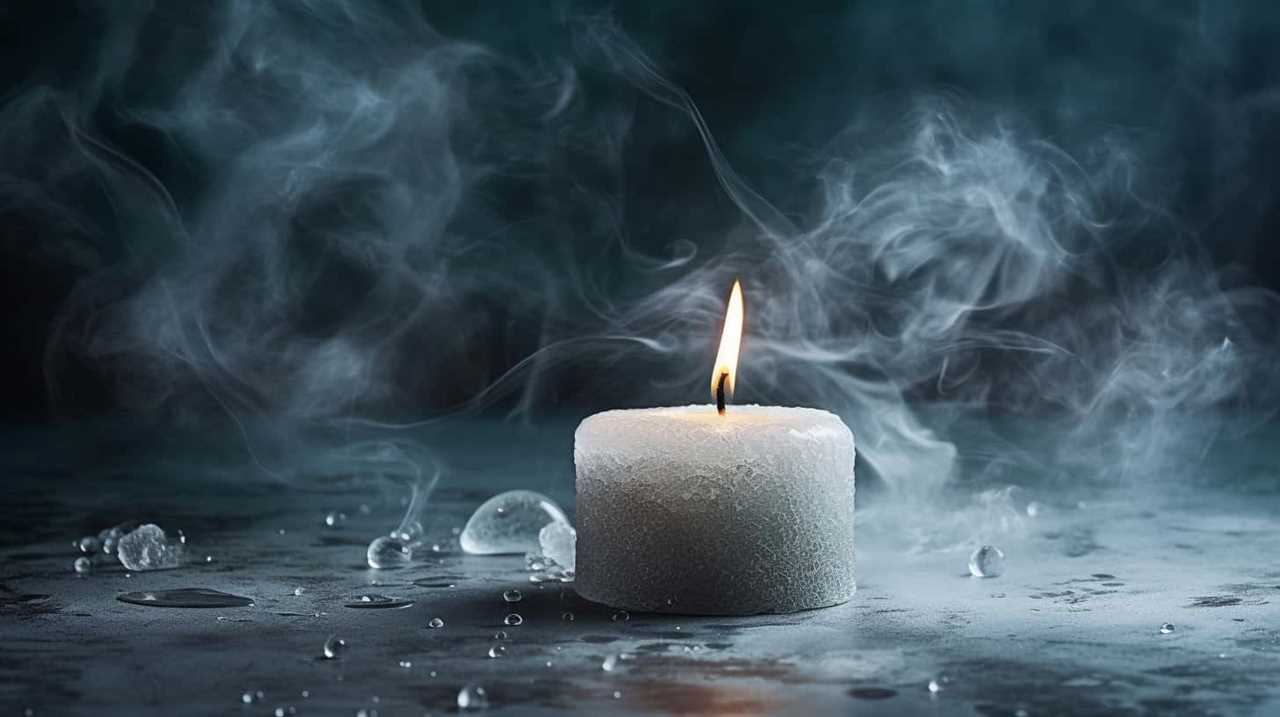
Superstitions and Beliefs Around Flickering Candles

We often associate flickering candles with various superstitions and beliefs. These beliefs have historical origins, dating back to ancient times when candles were used for religious ceremonies and rituals.

Advertisement

One common superstition is that a flickering candle symbolizes the presence of a spirit or ghost. However, this belief has been debunked by scientific explanations. The flickering of a candle flame is primarily caused by air currents in the surrounding environment. When there’s a draft or movement of air, it disrupts the flow of oxygen to the flame, causing it to flicker.

Additionally, the wax and wick of the candle can also affect the stability of the flame, leading to flickering. Therefore, while flickering candles may hold symbolic meaning in some cultures and traditions, it’s important to understand the scientific reasons behind it and not attribute it solely to supernatural forces.

ecoya candles myer

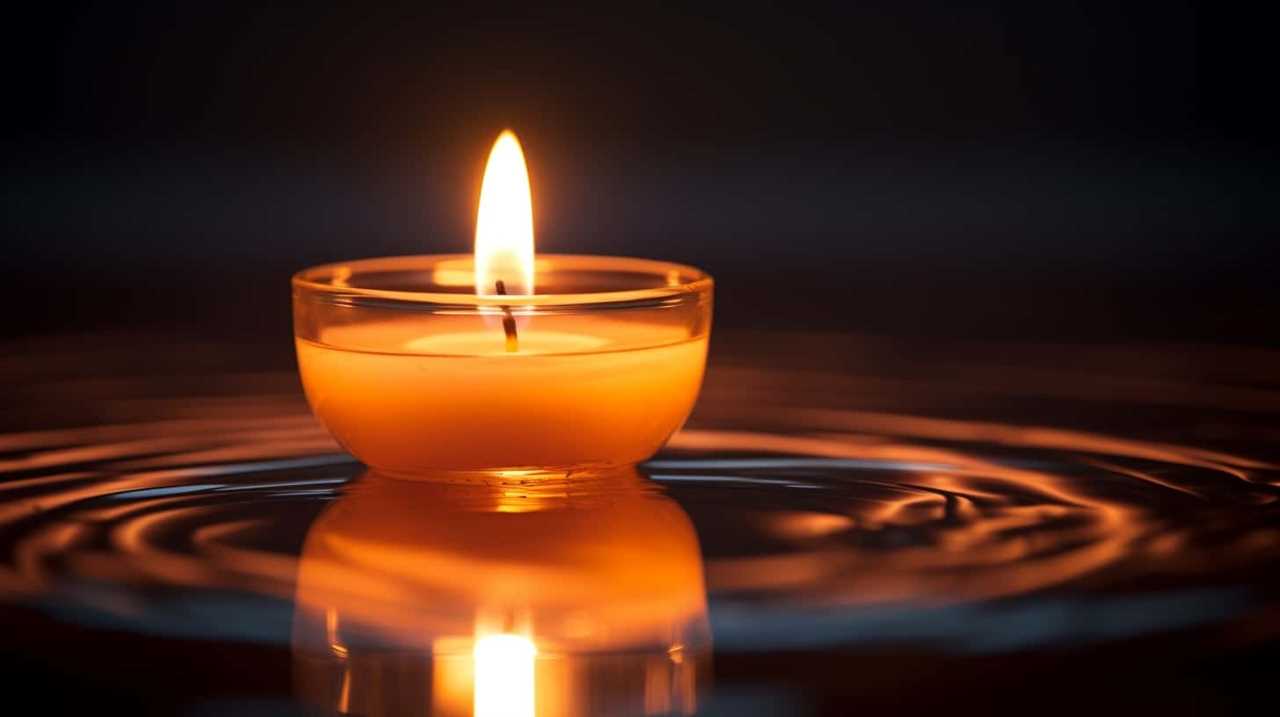
Hidden Messages in Candle Flames

Candle flames can convey hidden messages through their behavior and characteristics. Interpreting symbolism from candle flames requires careful observation and understanding of their various traits. Here are three sub-lists that delve into the deeper meanings that can be derived from candle flames:

  • Flame Height:
  • A tall flame may indicate success, progress, or positive energy.
  • A low flame could suggest a need for protection, caution, or introspection.
  • An inconsistent flame height may signify uncertain or unstable circumstances.
  • Flame Color:
  • A blue flame may symbolize tranquility, healing, or spiritual energy.
  • A yellow flame often represents intellectual stimulation, creativity, or communication.
  • A red flame can signify passion, courage, or intense emotions.
  • Flame Movement:
  • A steady flame suggests stability, focus, or a balanced state.
  • A flickering or dancing flame may imply change, excitement, or the presence of spirits.
  • A turbulent or erratic flame could indicate conflict, uncertainty, or a need for resolution.

Through careful observation and interpretation, hidden messages can be deciphered from the behavior and characteristics of candle flames, offering insights into various aspects of life.

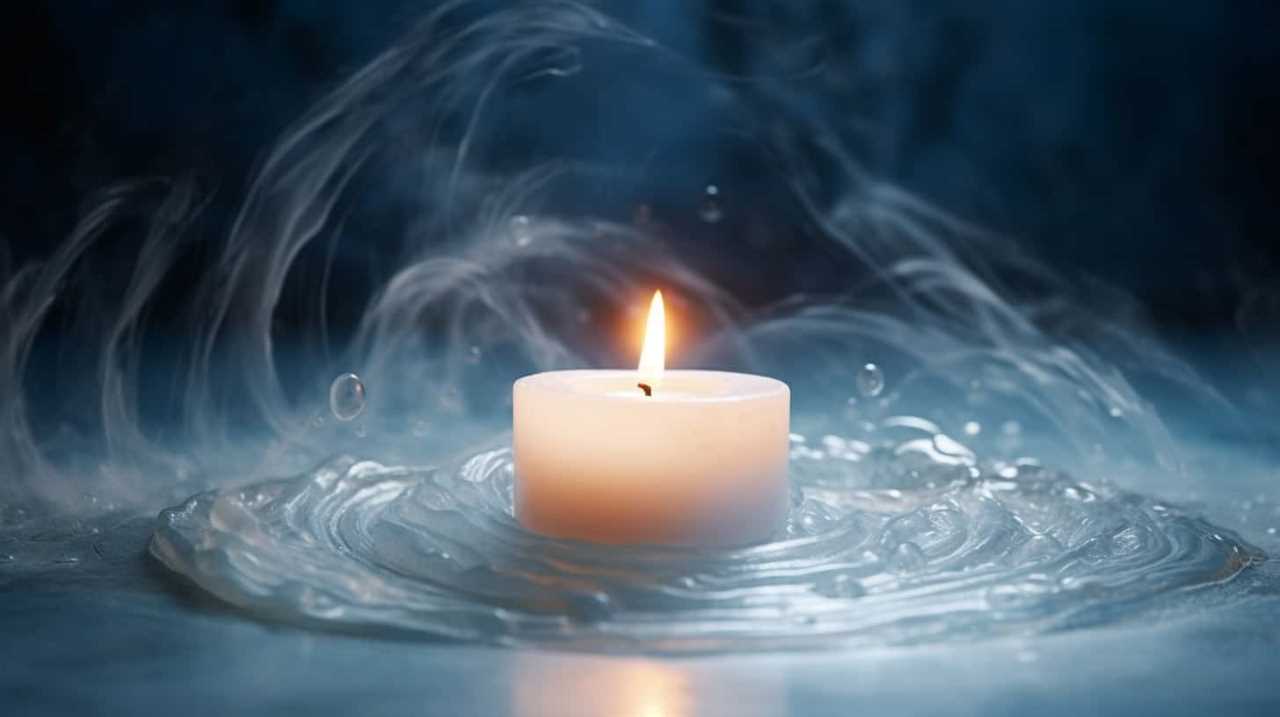
Exploring the Science Behind Candle Flickering

Understanding the reasons behind candle flickering requires an examination of the scientific principles at play.

Candle flickering has long fascinated humans, with its mesmerizing dance of light and shadow. Scientific studies have delved into the underlying mechanisms behind this phenomenon.

Advertisement

candlelighters charity

It’s known that the flickering of a candle flame is caused by the interaction between the heat of the flame and the surrounding air currents. These air currents, also known as convection, create variations in the temperature and density of the air, leading to the characteristic flickering motion.

Additionally, psychological effects such as the perception of warmth and comfort associated with candlelight can also influence the flickering pattern.

Candle Flickering as a Sign From the Universe

As we delve deeper into the mesmerizing dance of candle flickering, it becomes intriguing to consider the possibility of it being a sign from the universe. While it’s easy to dismiss candle flickering as a mere result of air currents and temperature fluctuations, many believe that there’s a deeper meaning behind this natural phenomenon.

Here are three sub-lists that explore the potential significance of candle flickering as a sign from the divine:

uses of candles in daily life

  1. Candle Flickering Rituals:
  • In various cultures and spiritual practices, candle flickering is often incorporated into rituals as a means of communicating with the divine.
  • People light candles and observe their flickering patterns to seek guidance, protection, or to send intentions out into the universe.
  • The specific way a candle flickers is believed to hold symbolic messages depending on the direction, intensity, and duration of the flickering.
  1. Signs from the Divine:
  • Many individuals interpret candle flickering as a form of communication from a higher power or the universe.
  • It’s believed that the flickering can indicate the presence of spiritual beings or the alignment of energies.
  • Those who believe in signs from the divine often seek meaning in the flickering patterns and associate them with specific messages or guidance.
  1. Personal Interpretation:
  • The interpretation of candle flickering as a sign from the universe is subjective and personal.
  • Individuals often rely on their intuition and spiritual beliefs to decipher the meaning behind the flickering patterns.
  • It’s important to approach these interpretations with an open mind and to trust one’s own inner guidance when seeking meaning in candle flickering.

While science may provide explanations for the physical causes of candle flickering, the belief in its potential as a sign from the universe remains a deeply personal and spiritual matter.

Interpreting Candle Flickers in Different Settings

Let’s explore how we can interpret candle flickers in various settings.

Advertisement

The practice of interpreting candle flickers has its historical origins in ancient cultures, where it was believed to be a form of communication from the spiritual realm. However, in modern times, scientific explanations provide a more rational understanding of this phenomenon.

Candle flickering can be influenced by factors such as air movement, temperature changes, and the quality of the candle itself. For example, a drafty room may cause a candle to flicker more vigorously, while a still environment may result in a steady flame.

candles direct discount code

By observing the specific characteristics of the flicker, such as its intensity, duration, and pattern, we can gain insights into the environment and conditions surrounding us.

Understanding these interpretations sets the stage for harnessing the power of flickering candles for manifestation.

Harnessing the Power of Flickering Candles for Manifestation

To harness the power of flickering candles for manifestation, we can carefully observe their unique characteristics and utilize them as tools for manifestation. By understanding the science behind the flickering flame, we can tap into its energy and channel it towards our desires.

Advertisement

Here are three manifestation techniques using flickering candles:

candle making supplies

  1. Intention Setting: Before lighting the candle, clearly state your intention for manifestation. Focus on your desires and visualize them coming to life. As the candle flickers, imagine the energy of your intention being released into the universe.
  2. Affirmations: Write down positive affirmations that align with your desires. As you light the candle, repeat these affirmations with conviction. Watch the flame flicker and imagine it amplifying the power of your affirmations, sending them out into the world.
  3. Meditation: Sit in front of the flickering candle and enter a meditative state. Focus on your desires and let go of any doubts or negative thoughts. Allow the energy of the candle’s flickering flame to guide you towards manifestation.

Frequently Asked Questions

How Can I Interpret the Flickering of a Candle in a Religious Ceremony?

When interpreting symbolism and spiritual significance of a candle flickering in a religious ceremony, we observe its movements and intensity. It can symbolize divine presence, communication, or even indicate the presence of spirits.

Are There Any Specific Superstitions or Beliefs Associated With a Candle Flickering During a Thunderstorm?

Superstitions and beliefs often surround the flickering of a candle during a thunderstorm. Some interpret it as a sign of supernatural presence, while others see it as a warning of impending danger.

What Are Some Common Hidden Messages That Can Be Found in Different Types of Candle Flames?

Hidden messages in candle flames can reveal symbolism and meaning. The flickering of candles can signify spiritual presence or energy fluctuations. By observing the flame’s color, shape, and movement, one can uncover profound insights into the unseen world.

Can the Science Behind Candle Flickering Be Used to Predict Future Events or Outcomes?

The flickering of a candle holds no predictive power or scientific explanations. It is simply a natural phenomenon caused by air currents. The candle’s dance is mesmerizing, but it reveals no secrets.

candle making

How Can I Use the Power of Flickering Candles to Manifest My Desires and Intentions?

Using flickering candles for manifestation involves understanding the symbolism of candle flickering. By observing the patterns and intensity of the flicker, we can align our intentions and desires with the energy emitted, enhancing the power of manifestation.

Advertisement

Conclusion

In conclusion, the flickering of a candle holds a rich tapestry of historical, cultural, and spiritual significance. It symbolizes hidden messages, superstitions, and even acts as a sign from the universe.

Exploring the science behind candle flickering unveils the intricate dance of heat, air currents, and wax composition.

Whether in a sacred ritual or a cozy living room, the flickering flame captivates our senses and holds the power to manifest our deepest desires.

candlelight concerts by fever

Embrace the power of the flickering candle and let its rhythmic dance guide you on your journey.

Advertisement

I'm Jane and I love candles. I have candles everywhere in my house--in every room, on every surface. I love the smell of candles, and I love how they make my place feel warm and cozy. Candles are really important to me. They help me relax and de-stress after a long day. They remind me of happy memories, and they make me feel calm and peaceful. I can't imagine my life without candles!

Continue Reading
Advertisement

Candles

How to Fix Wick in Candle

Published

on

By

Feeling frustrated with a wick that won’t stay straight in your candle? Worry no more! We’re on hand to assist. This tutorial will demonstrate how to adjust your candle’s wick effortlessly and accurately.

By following our simple steps, you’ll be able to master the art of wick-fixing in no time. So, let’s get started and bring that wick back to its rightful place.

  1. Retrieve your wick trimmer or scissors.
  2. Trim the wick to the appropriate length.
  3. Realign the wick in the center of the candle.
  4. Secure it with a wick holder or pencil.
  5. Patiently wait for the wax to harden.

Once your candle is fixed, you can test the wick and enjoy the soothing glow of a perfectly functioning candle.

Key Takeaways

  • Observing the wick’s location and centering it in the wax pool is important for proper burning.
  • Using clean tools like a wick trimmer or sharp scissors is essential for trimming the wick.
  • Trimming the wick to about 1/4 inch length helps maintain a clean and efficient burn.
  • Realigning and securing the wick with a wick holder or pencil prevents uneven burning and wasted wax.

Assess the Wick Position

In this step, we’ll assess the position of the wick in the candle. Wick position assessment is crucial for troubleshooting wick issues and ensuring a clean, even burn.

candlelight concerts aberdeen

Start by observing the wick’s location in relation to the wax pool. Ideally, the wick should be centered and upright, with a small amount of wick protruding from the wax.

If the wick is off-center or leaning towards one side, gently nudge it back to the center using a wick trimmer or a pair of tweezers.

Advertisement

Additionally, check for any debris or buildup around the wick that could obstruct the flame. If necessary, carefully remove any obstructions.

Once the wick is properly positioned, it’s time to retrieve a wick trimmer or scissors to move on to the next step.

candle drawing

Retrieve a Wick Trimmer or Scissors

Let’s grab a wick trimmer or a pair of scissors to continue fixing the wick in the candle. These tools are essential for trimming the wick to the appropriate length, which is crucial for preventing common wick problems such as excessive smoking, flickering, and uneven burning.

While a wick trimmer is specifically designed for this task, you can also use a pair of sharp scissors as a trimmer alternative. To retrieve a wick trimmer or scissors, make sure they’re clean and free from any debris or wax residue. This will ensure a clean cut and optimal performance.

Now that we have our trimming tool ready, let’s move on to the next step: trimming the wick to the appropriate length.

Advertisement

Trim the Wick to the Appropriate Length

Now that we’ve retrieved a wick trimmer or scissors, it’s time to trim the wick to the appropriate length.

candlesticks trading

This step is crucial in maintaining a clean and efficient burn for your candle. By ensuring the wick is at the proper length, we can prevent excess smoke, soot, and uneven burning.

Let’s dive into the details of how to achieve the perfect wick length to maximize the enjoyment of your candle.

Proper Wick Length

Trimming the wick to the appropriate length is essential for fixing the wick in a candle. Proper wick length is crucial for optimal wick maintenance and troubleshooting wick issues. Here’s a step-by-step guide to help you trim your wick correctly:

  1. Start by extinguishing the candle and allowing it to cool completely.
  2. Remove any debris or burnt wick fragments from the candle.
  3. Use a wick trimmer or sharp scissors to trim the wick. The ideal length is about 1/4 inch.
  4. Trim the wick in a straight line to prevent uneven burning.
  5. Avoid cutting the wick too short as it may cause the flame to extinguish or lead to poor burn performance.
  6. Dispose of the trimmed wick properly.
  7. Relight the candle and enjoy its improved performance.

Preventing Candle Smoke

To prevent candle smoke, we need to ensure that the wick is trimmed to the appropriate length. Maintaining the wick is crucial in preventing smoke and ensuring a clean burn. The length of the wick affects how the flame burns, and if it’s too long, it can cause excessive smoke. Here’s a step-by-step guide on how to trim the wick for optimal performance:

yankee candle coupon

Step Action
1 Extinguish the candle and let it cool completely.
2 Gently remove any debris or charred pieces from the wick.
3 Measure the recommended length for your specific candle type and diameter.
4 Use sharp scissors or a wick trimmer to trim the wick to the appropriate length.
5 Dispose of the trimmed wick pieces properly.

Realign the Wick in the Center of the Candle

Now let’s address the issue of an off-centered wick in a candle. When the wick isn’t in the center, it can cause uneven burning and a shorter lifespan for the candle.

Advertisement

To realign the wick, there are a few techniques you can try. By gently pushing or nudging the wick towards the center, you can ensure a more even burn and prolong the life of your candle.

Off-Centered Wick Solutions

Let’s realign the off-centered wick in the center of the candle. When the wick is not properly centered, it can lead to uneven burning and wasted wax. There are a few common causes for an off-centered wick, including improper placement during the initial pouring or movement of the candle while it is still hot. To troubleshoot these wick issues, follow these steps:

  1. Prepare a heat-resistant surface and place the candle on it.
  2. Light the candle and allow it to burn for a few minutes to create a small pool of melted wax.
  3. Carefully extinguish the flame and let the wax cool for a minute or two.
  4. Use a pair of tweezers or a toothpick to gently nudge the wick back to the center of the candle.

By realigning the off-centered wick, you can ensure a more even burn and maximize the lifespan of your candle. Below is a table summarizing the steps:

yankee candle malaysia

Steps
1. Prepare a heat-resistant surface and place the candle on it.
2. Light the candle and allow it to burn for a few minutes to create a small pool of melted wax.
3. Carefully extinguish the flame and let the wax cool for a minute or two.
4. Use a pair of tweezers or a toothpick to gently nudge the wick back to the center of the candle.

Wick Realignment Techniques

We can realign the off-centered wick in the center of the candle using specific techniques. Proper wick maintenance is essential to ensure a clean and even burn, and to avoid common wick problems.

Here are four steps to realign the wick:

  1. Extinguish the candle: Before attempting to realign the wick, make sure the candle is completely extinguished. This will prevent any accidents or injuries.
  2. Use a wick trimmer: Gently trim the wick to a length of about ¼ inch. This will help the wick burn evenly and prevent excessive smoke.
  3. Center the wick: Gently push the wick towards the center of the candle using a wick centering tool or a pair of tweezers. Be careful not to apply too much pressure to avoid damaging the wick.
  4. Trim the wick again: After realigning the wick, trim it once more to ensure it’s at the proper length for optimal burning.

Secure the Wick With a Wick Holder or Pencil

How can we ensure that the wick in a candle is securely held in place? One of the most effective methods is to use a wick holder or a pencil as an alternative. This step is crucial in troubleshooting wick issues and preventing them from detaching or leaning to one side.

Here’s how to securely hold the wick:

Advertisement

candle birthday

  1. Choose a wick holder or a pencil that’s long enough to reach the bottom of the candle.
  2. Position the wick holder or pencil in the center of the candle, ensuring that it’s straight and upright.
  3. Gently wrap the excess wick around the wick holder or pencil, leaving a small amount of slack.
  4. Adjust the tension of the wick by pulling gently, ensuring it remains centered.
  5. Press the bottom of the wick holder or pencil into the softened wax at the bottom of the candle to secure it in place.
  6. Wait for the wax to harden, and then remove the wick holder or pencil, leaving the wick securely held in place.

Wait for the Wax to Harden

After securing the wick with a wick holder or pencil, it’s important to wait for the wax to harden. This step is crucial to prevent wick issues and troubleshoot any problems that may arise during the candle-making process. Here is a step-by-step guide to waiting for the wax to harden:

  1. Avoid disturbing the candle: Once the wick is secured, refrain from moving or touching the candle. Any movement can disrupt the wax and cause the wick to shift or become misaligned.
  2. Allow sufficient cooling time: Depending on the type and size of the candle, the wax may take anywhere from a few hours to overnight to completely harden. Patience is key during this process.
  3. Maintain optimal temperature: Make sure the room temperature is consistent and not too cold or hot. Extreme temperature fluctuations can affect the wax’s ability to harden properly.
  4. Check for any imperfections: Once the wax has hardened, inspect the candle for any issues such as air bubbles, uneven surfaces, or wick problems. Address these concerns before proceeding to the next steps of the candle-making process.

Test the Wick and Enjoy Your Fixed Candle

To test the wick and enjoy our fixed candle, we can now proceed with the final steps of the candle-making process.

Testing the wick stability is crucial to ensure that our candle burns properly and safely. Light the candle and observe the flame. It should burn steadily, without flickering excessively or producing excessive smoke.

If the flame is too small or extinguishes easily, the wick may be too short or have too much wax coating. Troubleshoot these issues by trimming the wick to a longer length or removing excess wax.

candle holders for pillar candles

Additionally, if the flame is too large, it may indicate that the wick is too long, causing the candle to burn too quickly. In this case, trim the wick to a shorter length.

Once you have achieved a stable flame, sit back, relax, and enjoy the beautiful glow of your fixed candle.

Frequently Asked Questions

How Do I Know if the Wick Position Is Incorrect in My Candle?

If the wick position is incorrect in a candle, it can lead to issues like a crooked wick or flickering flame. To troubleshoot, check if the wick is centered and trim it if necessary.

Advertisement

Can I Use Regular Scissors Instead of a Wick Trimmer to Trim the Wick?

Yes, you can use regular scissors instead of a wick trimmer to trim the wick. However, it’s important to follow these tips for fixing a misaligned wick to ensure a clean and even burn.

candle brand

What Is the Appropriate Length to Trim the Wick To?

To achieve the appropriate wick length, it is essential to trim it regularly. Trimming promotes even burning, reduces soot and smoke, and prevents the flame from becoming too large. Follow these steps for mastery.

How Do I Align the Wick in the Center of the Candle?

To fix a tilted wick in a candle and prevent it from leaning to one side, start by gently pushing the wick back to the center using a toothpick or a wick centering tool.

Can I Use Something Other Than a Wick Holder or Pencil to Secure the Wick?

When securing a wick in a candle, we can explore alternatives to a wick holder or pencil. DIY methods include using paperclips, chopsticks, or even clothespins to keep the wick centered and secure.

Conclusion

In conclusion, fixing a wick in a candle is a simple process that can be done with just a few steps.

Advertisement

candlelight carol

By assessing the wick position, trimming it to the right length, realigning it in the center, and securing it with a wick holder, you can easily fix your candle.

Don’t worry about the wax hardening as you wait, as it will ensure a longer-lasting burn.

By following these steps, you can enjoy your fixed candle and create a cozy atmosphere in your home.

Continue Reading

Candles

How to Fix a Candle Wick That Won’t Burn

Published

on

By

Ever curious about why your candle wick just won’t light? Don’t worry, we have the answers! This guide will unveil the techniques to mend a defiant candle wick that seems to resist ignition.

Whether you’re a seasoned candle enthusiast or simply looking to master the art of candle care, our step-by-step instructions will help you achieve a perfectly burning wick every time.

From trimming and straightening the wick to priming and re-positioning it, we will teach you the expert techniques to troubleshoot and resolve any wick-related issues.

So, let’s dive in and learn how to effortlessly fix a candle wick that won’t burn.

Advertisement

candle meaning

Key Takeaways

  • Proper wick maintenance is essential for troubleshooting wick-related issues.
  • Trimming the wick to about ¼ inch before each use helps prevent uneven burn, excessive smoke, and wick drowning in wax.
  • Straightening and positioning the wick ensures even heat distribution and a stronger flame.
  • Priming the wick enhances the candle’s burning performance, improves wax absorption, and reduces sooting.

Trim the Wick

First, we need to trim the candle wick to ensure an even and consistent burn. Proper wick maintenance is essential for troubleshooting wick-related issues. When a candle’s wick is too long, it can lead to an uneven burn, excessive smoke, and even the wick drowning in melted wax. To avoid these problems, trim the wick to about ¼ inch before each use.

This will help the candle burn evenly and prevent mushrooming, where the wick develops a bulbous shape at the top. To trim the wick, use a pair of scissors or a wick trimmer. Gently cut the excess wick, making sure to remove any charred or burnt parts. By keeping the wick at the correct length, you’ll promote a clean and efficient burn.

Now, let’s move on to the next section and discuss how to use a wick trimmer.

Use a Wick Trimmer

To ensure a properly trimmed wick, we can utilize a wick trimmer. This tool is specifically designed for wick maintenance and can help optimize wick burning techniques. Here are five key benefits of using a wick trimmer:

candle shack clp tool

  • Precision: A wick trimmer allows for precise trimming, ensuring the wick is at the ideal length for optimal burning.
  • Safety: Trimming the wick with a trimmer reduces the risk of accidents such as excessive smoke or a flickering flame.
  • Cleanliness: The trimmer collects the trimmed wick, preventing it from falling into the candle and causing unwanted debris.
  • Longevity: Regular wick trimming with a trimmer helps extend the life of your candle by preventing mushrooming and excessive soot.
  • Efficiency: A well-trimmed wick promotes even burning and prevents tunneling, ensuring that you get the most out of your candle.

Straighten the Wick

One solution we’ve found effective for fixing a misaligned candle wick is gently adjusting it with a wick straightener. Straightening the wick is crucial for ensuring an even and clean burn.

To straighten the wick, follow these troubleshooting tips. First, ensure that the candle is completely extinguished and cooled before attempting to straighten the wick. Using a wick straightener, gently push the wick back into the desired position, making sure it’s centered and upright. Be careful not to apply too much pressure, as this can cause the wick to break or become misaligned again.

Once the wick is straightened, trim it to the recommended length, typically around 1/4 inch, to optimize the burn. Straightening the wick will help improve the candle’s performance and prevent any potential issues during burning.

Advertisement

Prime the Wick

Now let’s talk about the importance of priming the wick.

candlelighters charity

Priming the wick before lighting it can enhance the candle’s burning performance. It helps the wax melt evenly and provides a steady flame.

Wick Priming Benefits

We highly recommend priming the wick before lighting it to maximize the benefits of a properly burning candle. Wick priming techniques are essential to ensure a consistent and clean burn throughout the candle’s lifespan.

Here are five benefits of wick priming:

  • Improved wax absorption: Priming the wick allows it to absorb the melted wax more efficiently, ensuring a steady fuel supply for the flame.
  • Reduced sooting: A properly primed wick produces minimal soot, preventing black smoke and residue buildup.
  • Enhanced fragrance throw: By priming the wick, you create optimal conditions for the fragrance oils to evaporate, resulting in a stronger and longer-lasting scent.
  • Longer burn time: Primed wicks burn more evenly and slowly, extending the candle’s overall burn time.
  • Minimized mushrooming: Primed wicks experience less mushrooming, where carbon deposits form at the tip, reducing the need for frequent trimming.

Wick Priming Techniques?

After understanding the benefits of wick priming, let’s now delve into the various techniques to effectively prime the wick and ensure a successful burn. Wick priming is an essential step in troubleshooting wick issues and can greatly improve the performance of your candles. Here are some tried and tested wick priming techniques:

candle drawing

Technique Description
Dip and Roll Dip the wick in melted wax, then roll it between your fingers to remove excess wax and straighten.
Brushing Use a small brush to coat the wick with melted wax, ensuring all parts are evenly covered.
Pre-burning Light the wick and let it burn for a few seconds, then extinguish. Trim any charred ends.

Remove Excess Wax

To remove excess wax from a candle wick that won’t burn, gently scrape it off using a butter knife or a similar tool. Here are some steps to effectively remove excess wax and maintain your wick:

Advertisement
  • Carefully slide the butter knife under the excess wax buildup.
  • Apply gentle pressure to lift the wax off the wick.
  • Be cautious not to damage the wick while scraping off the wax.
  • If the wax is stubborn, try using a hairdryer to soften it before scraping.
  • Clean the wick with a soft cloth to remove any remaining residue.

By removing excess wax, you ensure a clean and unobstructed wick, allowing for proper combustion.

Now that we’ve removed the excess wax, let’s proceed to the next step and re-position the wick for optimal burning.

Re-position the Wick

To re-position the wick, carefully hold the base of the wick with a pair of tweezers and gently guide it to a more central position within the candle.

candle making workshop

This technique is essential when troubleshooting a candle wick that won’t burn properly. Sometimes, the wick may shift or lean towards one side, causing an uneven burn or a weak flame.

By re-positioning the wick, you can ensure a more even distribution of heat and a stronger flame. It’s important to be gentle and precise when using tweezers to avoid damaging the wick or the surrounding wax. Take your time and make small adjustments until the wick is centered.

This simple re-positioning technique is one of the effective troubleshooting tips to fix a candle wick that won’t burn.

Advertisement

Use a Wick Sustainer

Now let’s talk about the benefits of using a wick sustainer and the alternatives available.

candles direct reviews

A wick sustainer is a small metal device that helps keep the wick centered and upright, ensuring a consistent burn. It prevents the wick from leaning to one side or falling into the wax, which can cause the candle to burn unevenly or not burn at all.

If you don’t have a wick sustainer, there are other DIY alternatives you can try to achieve a similar effect.

Wick Sustainer Benefits

Using a wick sustainer ensures that the candle wick remains in the optimal position for a consistent and efficient burn. Here are five benefits of using a wick sustainer:

  • Improved Burn Stability: A wick sustainer keeps the wick centered and straight, preventing it from leaning or drowning in the wax, resulting in a more stable and even burn.
  • Reduced Smoking and Sooting: By keeping the wick properly positioned, a wick sustainer helps minimize smoking and sooting, leading to a cleaner and healthier burning experience.
  • Extended Candle Lifespan: With a wick sustainer, the candle burns evenly, allowing it to last longer and maximizing its lifespan.
  • Enhanced Safety: By preventing the wick from becoming too long or falling into the wax, a wick sustainer reduces the risk of accidental fires and ensures a safer burning environment.
  • Easy Maintenance: Wick sustainers make it easy to trim the wick and replace it when needed, simplifying candle maintenance and prolonging its usability.

Transitioning into the subsequent section about ‘wick sustainer alternatives,’ let’s explore some other options that can be used in place of a wick sustainer.

candle flame zones

Wick Sustainer Alternatives

Let’s explore some other options for wick sustainer alternatives that we can use instead. When troubleshooting wick problems, it’s important to consider different solutions. Here are a few alternatives to using a traditional wick sustainer:

Advertisement
Alternative Description
Paperclip A simple and easily accessible option. Unfold a paperclip and shape it into a small loop to hold the wick in place.
Bobby Pin Another readily available option. Use a bobby pin to secure the wick by opening it up and sliding the wick through the looped end.
Safety Pin Similar to the bobby pin method, a safety pin can be used to secure the wick. Make sure the pin is closed tightly to prevent any accidents.

These alternatives can be useful when you don’t have a wick sustainer on hand or if you want to try something different. Remember to always monitor your candle while it burns to ensure safety and proper functioning.

Frequently Asked Questions

How Do I Prevent My Candle Wick From Tunneling?

To prevent tunneling in candle wicks, we troubleshoot common problems like wicks that won’t stay lit. By trimming the wick before each use, providing proper air circulation, and using quality candles, we can fix this issue.

Can I Use a Regular Pair of Scissors Instead of a Wick Trimmer to Trim the Wick?

Using regular scissors instead of a wick trimmer may seem convenient, but it can negatively affect the burn of your candle. Wick trimmers are designed to create a precise angle that promotes an even and clean burn, preventing tunneling and prolonging the candle’s lifespan.

candlelight concert

Is It Necessary to Prime the Wick Every Time I Light the Candle?

Yes, it is necessary to prime the wick every time you light the candle. Using a different type of wick may affect the burn. Common reasons for a wick not burning include buildup, moisture, or an incorrect wick size.

What Should I Do if My Candle Wick Is Too Short to Light?

If your candle wick is too short, gently push it up using a toothpick or a wick trimmer. Be careful not to damage the wax or disturb the surrounding area.

Advertisement

Are There Any Alternative Methods to Fix a Candle Wick That Won’t Burn?

Alternative methods and troubleshooting tips can be used to fix a candle wick that won’t burn. Understanding the cause, such as excess wax or a clogged wick, is crucial. Techniques like trimming, relighting, or using a lighter can help resolve the issue.

Conclusion

In conclusion, by following these simple steps, you can easily fix a stubborn candle wick that refuses to burn.

candles direct discount code

  • Trim and straighten the wick
  • Prime the wick
  • Remove any excess wax for optimal burning

If needed, re-position the wick or use a wick sustainer.

Remember, with these techniques at your disposal, you’ll never have to suffer from a non-burning candle again. Say goodbye to wick troubles and enjoy the soothing ambiance of a perfectly burning candle.

Continue Reading

Candles

How to Get a Candle Out of a Mold

Published

on

By

Are you eager to discover how to easily release your candles from their molds without any hassle? Search no more!

In this guide, we, the candle enthusiasts, will share with you the art of liberating your creations with finesse and precision. No more struggling or frustration – we’ve got you covered.

Discover the mastery of getting a candle out of a mold, using tried and true techniques that will have you feeling like a candle-making maestro. From preparing your mold to the final twist and turn, we’ll guide you step by step, ensuring a smooth and successful extraction every time.

So, let’s dive in and unveil the mystery of mold removal, empowering you to create stunning candles with ease.

Advertisement

candle salad

Key Takeaways

  • Applying a release agent such as cooking spray, vegetable oil, or silicone spray is important to prevent sticking.
  • Chilling the mold helps solidify the wax and prevent sticking or breaking.
  • Gentle tapping, applying pressure, and coaxing the candle out with nimble hands can help remove it from the mold.
  • Alternative methods such as tapping with a rubber mallet, using hot water, freezing, or using a hairdryer can also aid in candle removal.

Prepare Your Mold

To prepare our mold for removing the candle, we’ll start by applying a release agent. This is a crucial step that will prevent the candle from sticking to the mold, making it easier to remove later on. There are various release agents available in the market, but if you prefer alternative mold materials, you can use alternatives like cooking spray or vegetable oil.

Simply spray or brush the release agent onto the inside of the mold, ensuring that all surfaces are covered.

Next, check for any potential mold issues such as cracks or uneven surfaces. These can affect the quality of the final candle and make it difficult to release from the mold. If you encounter any issues, troubleshoot them by repairing the mold or using a different mold altogether.

Use a Release Agent

Now let’s talk about using a release agent when getting a candle out of a mold.

dusk meditation candle

One alternative release agent is cooking spray, which can be sprayed directly onto the mold. This lubricates the surface and makes it easier for the candle to slide out smoothly.

Using a release agent is important as it prevents the candle from sticking to the mold and potentially breaking during the removal process.

Advertisement

Alternative Release Agent

We can achieve an easier release of the candle from the mold by applying an alternative release agent.

While using a traditional release agent like cooking spray or vegetable oil is effective, there are alternative options available that can yield even better results.

candle shack calculator

One alternative release agent is silicone spray, which can be applied to the mold before pouring the wax. Silicone spray provides a smooth and slippery surface, allowing the candle to easily slide out of the mold once it has cooled and hardened.

Another alternative option is using a mixture of rubbing alcohol and water as a release agent. This solution helps to remove any residue left behind by the candle wax, ensuring a clean and easy release.

Importance of Lubrication

After applying an alternative release agent, such as silicone spray or a mixture of rubbing alcohol and water, we can now discuss the importance of lubrication in easily removing a candle from its mold. Lubrication techniques and the benefits of using a release agent are crucial to ensure a smooth and effortless candle removal process. Here are five key points to consider:

Advertisement
  • Prevents sticking: A release agent creates a barrier between the candle and the mold, preventing the wax from sticking and making it easier to remove.
  • Preserves mold integrity: By using a release agent, you reduce the risk of damaging the mold during the removal process.
  • Saves time: Lubrication techniques help the candle slide out smoothly, saving you time and effort in removing each candle from the mold.
  • Ensures a clean finish: A release agent helps in achieving a clean and polished appearance for your candles, without any unsightly marks or imperfections.
  • Increases mold lifespan: Regular use of a release agent prolongs the life of your molds, allowing you to create multiple candles without the need for frequent replacements.

Preventing Sticking and Breaking

To prevent sticking and breaking during the candle removal process, we need to utilize a release agent. This is a crucial step in ensuring that the candle comes out smoothly and without any damage.

candle making near me

A release agent is a substance that’s applied to the mold before pouring the wax. It creates a barrier between the wax and the mold, preventing sticking and avoiding cracks. There are various types of release agents available, such as silicone sprays, vegetable oils, or even non-stick cooking sprays.

When applying the release agent, make sure to cover every nook and cranny of the mold to ensure a thorough coating. Once the release agent is applied, it’s time to move on to the next step: chilling the mold.

Chill the Mold

The effectiveness of chilling the mold is enhanced by the use of refrigeration. Chilling the mold before attempting to remove the candle helps solidify the wax, making it easier to release from the mold without breaking or sticking. Here are some chilling techniques and the benefits of chilling:

  • Refrigeration: Placing the mold in the refrigerator for a few hours helps cool down the wax, making it less likely to stick to the mold walls.
  • Freezer Method: For a quicker chill, the mold can be placed in the freezer for about 30 minutes. This rapid cooling reduces the chances of the candle sticking.
  • Ice Bath: Another option is to submerge the mold in an ice bath. The cold water helps chill the mold evenly, promoting easy release.
  • Chilling Spray: Using a chilling spray specifically designed for candle making can provide a quick and effective way to cool the mold and prevent sticking.
  • Chilling Plate: Placing the mold on a chilled plate or surface can help cool the wax uniformly, ensuring an even release.

Chilling the mold before attempting to remove the candle offers several benefits, such as minimizing the risk of breaking the wax and ensuring a smooth release. By following these chilling techniques, you can achieve mastery in getting a candle out of a mold.

candlescience

Apply Gentle Pressure

We gently apply pressure to the mold to release the candle without causing any damage or sticking. After chilling the mold and allowing it to sit for a few minutes, we’re ready to proceed with the next step.

First, we inspect the edges of the mold to ensure there are no obstructions or excess wax buildup. Then, we begin by gently tapping around the sides of the mold with our fingertips. This helps to loosen the candle and create small gaps between the wax and the mold.

Advertisement

If the candle still doesn’t budge, we can try the warm water method. By submerging the bottom of the mold in warm water for a few seconds, the heat will cause the wax to expand slightly, making it easier to release the candle.

With a gentle twist and a slight push, the candle should slide out smoothly from the mold.

candlelighters charity

Tap the Mold

Now that we’ve applied gentle pressure to the mold, the next step is to tap it.

Tapping the mold helps to loosen the candle and encourage it to release from the sides.

To tap the mold, firmly but gently tap all around the outside of the mold with the palm of your hand or a soft mallet.

Advertisement

This technique can be especially effective for stubborn candles that aren’t easily coming out with just pressure alone.

yankee candle

Candle Release Techniques

To release the candle from the mold, gently tap the sides of the mold using a soft object. This candle release technique is effective in loosening the candle and allowing it to easily slide out of the mold.

Here are some candle release tips and troubleshooting mold removal techniques to help you in this process:

  • Use a rubber mallet or a wooden spoon to tap the sides of the mold.
  • Start tapping at the top of the mold and work your way down to the bottom.
  • Apply light to medium pressure while tapping to avoid damaging the mold or the candle.
  • Rotate the mold as you tap to ensure even pressure distribution.
  • If the candle doesn’t release, try placing the mold in the freezer for a few minutes to shrink the wax and make it easier to release.

Alternative Mold Removal Methods

An effective method to remove a candle from a mold is by gently tapping the sides of the mold with a soft object. This technique is one of the alternative mold release techniques that can be used when dealing with stubborn or stuck candles.

When a candle gets stuck in the mold, it can be frustrating, but tapping the mold can help loosen it and make it easier to remove. To tap the mold, take a soft object like a rubber mallet or a wooden spoon and gently tap the sides of the mold all around. The vibrations created by tapping can help to loosen the candle and release it from the mold.

candlesticks stamford

If tapping alone doesn’t work, don’t worry, there are other methods you can try, such as using hot water.

Advertisement

Use Hot Water

We can easily remove a candle from a mold by using hot water. This method is effective and prevents candle deformation, especially if the candle has been stuck in the mold for too long. Here is a step-by-step guide on how to use hot water to remove a candle from a mold:

  • Fill a large bowl or sink with hot water, making sure it’s not boiling.
  • Place the mold in the hot water, ensuring that the water level is high enough to cover the sides of the mold.
  • Let the mold sit in the hot water for a few minutes to allow the heat to soften the wax.
  • Gently twist and turn the mold to loosen the candle.
  • Carefully pull the candle out of the mold, ensuring not to damage it.

By using hot water, you can successfully remove a candle from the mold without any deformation.

Now, let’s move on to the next method: freezing the candle.

candle shack clp

Freeze the Candle

We can freeze the candle to make it easier to remove from the mold. Freezing the candle helps to shrink it slightly, allowing it to contract away from the sides of the mold. This makes it less likely to stick and prevents any damage to the candle during removal.

To freeze the candle, place the mold in the freezer for at least 30 minutes or until the candle feels firm. It’s important to ensure that the candle is completely solid before attempting to remove it from the mold.

Once frozen, gently tap the mold on a hard surface to loosen the candle. If it still doesn’t come out easily, you can try running warm water over the outside of the mold to further melt any remaining wax.

Advertisement

These preventive measures and troubleshooting tips will help you successfully remove a candle from the mold using the freezing method.

candlelight orchestra

Twist and Rotate the Mold

Now that the candle is frozen and ready to be removed from the mold, it’s important to twist and rotate the mold to loosen the candle. This technique helps to release any suction or adhesion between the candle and the mold, making it easier to slide the candle out.

Mold Removal Techniques

To successfully remove a candle from a mold, it’s important to employ the technique of twisting and rotating the mold. This method helps loosen the candle and allows for easy extraction.

Here are some mold removal techniques to help you with this process:

  • Inspect the mold: Before attempting to remove the candle, inspect the mold for any signs of stubborn mold. If you notice any, you may need to clean it using appropriate mold cleaning techniques before proceeding.
  • Apply gentle pressure: Hold the mold firmly and apply gentle pressure while twisting and rotating it. This will help break the seal between the candle and the mold.
  • Use a lubricant: If the candle is still stuck, try using a small amount of lubricant, such as vegetable oil or cooking spray, to make it easier to remove.
  • Tap the mold: Lightly tap the mold on a flat surface to further loosen the candle.
  • Slowly extract the candle: Once the candle is loosened, slowly and carefully extract it from the mold by continuing to twist and rotate.

Preventing Candle Breakage

Continuing with inspecting the mold for any signs of stubborn mold, we can now focus on preventing candle breakage by employing the technique of twisting and rotating the mold. This simple yet effective method ensures that the candle releases from the mold smoothly and without any damage. By gently twisting and rotating the mold, you create movement that prevents the wax from sticking to the sides. This technique is especially crucial when using silicone or rubber molds, as they tend to hold on to the candle more tightly.

candle making supplies

To further prevent mold buildup and increase the chances of a successful release, it is important to choose the right mold size for your candle. A mold that is too small can cause the wax to expand and crack the mold, while a mold that is too large can lead to an uneven burn and a weaker candle. Refer to the table below to find the appropriate mold size for your candle:

Advertisement
Candle Diameter (inches) Mold Diameter (inches)
2 2.5
3 3.5
4 4.5
5 5.5
6 6.5

Use a Hairdryer

We can easily remove a candle from a mold by utilizing a hairdryer. This hairdryer technique is especially useful when dealing with stubborn or stuck candles. Here’s how to do it:

  • Start by plugging in the hairdryer and setting it to the highest heat setting.
  • Hold the hairdryer about 6-8 inches away from the mold and direct the hot air towards the base of the candle.
  • Move the hairdryer in a circular motion, evenly heating the entire circumference of the mold.

After a few minutes, gently twist and wiggle the candle to see if it starts to loosen. If the candle is still stuck, continue applying heat with the hairdryer and repeat the twisting and wiggling until the candle comes out.

Using this hairdryer technique, you’ll be able to effortlessly remove even the most stubborn candles from their molds. Mastery of this method will ensure a smooth candle-making process every time.

dusk candles careers

Utilize a Candle Release Spray

To efficiently remove a candle from a mold, we can make use of a candle release spray. This spray acts as a lubricant and creates a barrier between the candle and the mold, making it easier to slide the candle out. Candle release sprays are designed specifically for candle making and are available in craft stores or online.

However, if you don’t have a candle release spray on hand, there are alternative options you can try. For example, you can use cooking oil or non-stick cooking spray as a substitute. When using a candle release spray or alternative, it’s important to consider the type of mold material you’re working with. Common candle mold materials include silicone, metal, and plastic.

Ensure that the spray or alternative you choose is compatible with the material to avoid any damage or sticking.

Advertisement

Frequently Asked Questions

How Long Does It Take for a Candle to Fully Harden in a Mold?

When getting a candle out of a mold, it’s important to consider the hardening time. Depending on the type of wax used, candles can take anywhere from a few hours to a few days to fully harden.

candlescience

Can I Use Any Type of Mold to Make a Candle, or Are There Specific Requirements?

Can any mold be used for candle making? Well, let us enlighten you. When it comes to candle mold types, there are specific requirements. Suitable materials like silicone, metal, and plastic ensure successful candle making endeavors.

Do I Need to Use a Release Agent Every Time I Make a Candle in a Mold?

We always use a release agent when making candles in molds to ensure easy removal. However, there are alternative methods such as using vegetable oil or non-stick cooking spray. Additionally, we have found that freezing the mold can help remove stubborn candles.

What Is the Best Type of Wax to Use for Candle Making in a Mold?

The best wax types for candle making in a mold depend on various factors. Natural waxes like soy and beeswax offer a clean burn, while synthetic waxes like paraffin provide a longer burn time. Beginners may find soy wax easier to work with due to its lower melting point.

Can I Add Color or Fragrance to the Wax Before Pouring It Into the Mold?

Yes, we can add color and fragrance to the wax before pouring it into the mold. The pros are that it enhances the aesthetic appeal and scent of the candle. However, it requires careful measurement and testing to achieve the desired results.

Advertisement

candlestick holders

Conclusion

In conclusion, removing a candle from a mold is a simple process that requires careful preparation and the right techniques. By following the steps outlined in this article, you can easily release your candle from the mold without any hassle.

Remember the adage ‘Patience is a virtue’ and take your time to ensure a successful outcome. With a little patience and practice, you’ll be able to create beautiful candles that are ready to light up any room.

Continue Reading

Trending