Connect with us

Candles

What Is a Kwanzaa Candle Holder Called

Published

on

Everyone desires to help others and expand their knowledge about various cultures. Therefore, let’s immerse ourselves in the intriguing universe of Kwanzaa and explore the name of a Kwanzaa candle holder.

Kwanzaa, a celebration of African heritage, is marked by the lighting of seven candles. Each candle represents a different principle, such as unity, creativity, and faith. The Kwanzaa candle holder, known as a kinara, holds these candles and plays a significant role in the festivities.

Made from various materials like wood, brass, or clay, the kinara beautifully showcases the values and traditions of Kwanzaa. Join us as we explore the symbolism, meaning, and proper display of the Kwanzaa candle holder, enriching our understanding of this vibrant cultural celebration.

Key Takeaways

  • The Kwanzaa candle holder is called the Kinara.
  • It holds seven candles representing the Seven Principles of Kwanzaa.
  • The Kinara is made from various materials like wood, brass, or clay.
  • It represents African heritage and values and fosters a sense of unity and shared values.

The Origins of the Kwanzaa Candle Holder

The origins of the Kwanzaa candle holder can be traced back to the 1960s when Maulana Karenga, the founder of Kwanzaa, created the symbolic centerpiece known as the Kinara.

candlesticks

The Kinara holds seven candles, each representing one of the seven principles of Kwanzaa: unity, self-determination, collective work and responsibility, cooperative economics, purpose, creativity, and faith.

Advertisement

The Kinara isn’t only a practical tool for lighting the candles during the Kwanzaa celebration, but it also holds deep cultural significance. It serves as a visual representation of the principles that guide the holiday and a reminder of African heritage and values.

The act of lighting the candles on the Kinara each night of Kwanzaa symbolizes the collective effort to uphold these principles and the commitment to building strong communities.

The origins and cultural significance of the Kwanzaa candle holder, the Kinara, make it an essential element of the Kwanzaa celebration.

candle shack

The Significance of the Kwanzaa Candle Holder

The Kwanzaa candle holder, known as the kinara, holds great significance in the celebration of Kwanzaa. It serves as a symbolic representation of unity, with its seven candles representing the Seven Principles of Kwanzaa.

Lighting each candle on its respective day allows individuals to reflect on and embody these principles, fostering a sense of cultural and spiritual importance.

Advertisement

Through the kinara, Kwanzaa participants are able to honor their African heritage and embrace the values that are central to the holiday.

Symbolic Representation of Unity

In our celebration of Kwanzaa, the Kwanzaa candle holder serves as a symbolic representation of unity through its use of a compound preposition.

candles direct portugal

The symbolism in Kwanzaa candle lighting lies in the seven candles that are placed in the holder, known as the Kinara. Each candle represents one of the seven principles of Kwanzaa, known as the Nguzo Saba, which include unity, self-determination, collective work and responsibility, cooperative economics, purpose, creativity, and faith.

As the candles are lit each night, it signifies the progress and growth of the African American community in upholding these principles.

The cultural significance of the Kwanzaa candle holder lies in its ability to bring families and communities together, fostering a sense of unity and shared values. It serves as a reminder of the importance of collective efforts and the power of unity in building a stronger community.

Advertisement

Lighting the Principles

As we continue exploring the symbolic representation of unity through the Kwanzaa candle holder, it’s important to understand the significance of lighting the principles it represents.

candle holders wood

Lighting the principles during Kwanzaa is a powerful ritual that symbolizes the illumination of knowledge and the spreading of positive values within the community. The lighting techniques used vary, but the most common method involves lighting the central black candle, known as the ‘Mishumaa Saba,’ and then using it to light the other candles.

This act not only physically illuminates the principles but also serves as a metaphor for the sharing of knowledge, unity, and collective responsibility.

The cultural significance of lighting the Kwanzaa candle holder lies in its ability to reinforce the principles of Kwanzaa and bring people together in a spirit of unity and purpose. It’s a reminder of the importance of community and the collective effort needed to achieve progress and upliftment.

Cultural and Spiritual Importance

During Kwanzaa, we celebrate the cultural and spiritual importance of the Kwanzaa candle holder by reflecting on its significance in our community.

Advertisement

candlelight carol

The candle holder, known as the Kinara, holds great significance in our cultural traditions and serves as a symbol of unity, heritage, and faith.

The Kinara is typically made of wood and holds seven candles, representing the Seven Principles of Kwanzaa. Each candle represents one of these principles, such as unity, self-determination, and collective work and responsibility.

As we light each candle throughout the celebration, we’re reminded of the importance of these principles in our lives and in our community.

The Kinara’s spiritual symbolism connects us to our African roots and serves as a reminder of our ancestors’ resilience and wisdom.

yankee candle uk

The Traditional Materials Used for Kwanzaa Candle Holders

We typically make Kwanzaa candle holders out of various traditional materials. These materials are carefully chosen for their cultural significance and symbolic representation of the values and principles of Kwanzaa.

Advertisement

One of the most common materials used for making Kwanzaa candle holders is wood. Wood represents the importance of growth and the roots of the African diaspora.

Other traditional materials include clay, which symbolizes the earth and the connection to the land, and metal, which represents strength and resilience.

These materials not only serve as the foundation for the candle holders but also embody the spirit of Kwanzaa itself.

jo malone candle

The use of traditional materials in the creation of Kwanzaa candle holders helps to preserve and honor the rich cultural heritage and traditions of African people.

The Symbolism Behind Each Candle on the Kwanzaa Candle Holder

The meaning behind each candle on the Kwanzaa candle holder holds significant symbolism. Lighting the candles during Kwanzaa represents the principles and values celebrated during this cultural holiday.

Advertisement

There are seven candles in total, each representing one of the seven principles of Kwanzaa: unity, self-determination, collective work and responsibility, cooperative economics, purpose, creativity, and faith.

The first candle, located in the center and black in color, represents unity. The three red candles symbolize self-determination, collective work and responsibility, and cooperative economics. The three green candles represent purpose, creativity, and faith.

candle making kits

Lighting these candles throughout the seven days of Kwanzaa serves as a reminder of the importance of these principles in building a strong and prosperous community.

This symbolism behind lighting the candles is deeply rooted in African cultural traditions and serves as a way to honor and celebrate African heritage.

The Role of the Kwanzaa Candle Holder in the Kwanzaa Celebration

The Kwanzaa candle holder, also known as the kinara, plays a significant role in the Kwanzaa celebration. It serves as a central symbol of unity and collective purpose.

Advertisement

The traditional design variations of the kinara reflect the diverse cultural heritage of African people, highlighting the principles and values of Kwanzaa.

candlesticks hotel stamford

During the lighting ceremony, each candle represents one of the seven principles of Kwanzaa, and the kinara serves as a visual reminder of the importance of these principles in daily life.

Symbolic Significance of Holder

During Kwanzaa, the candle holder known as a kinara plays a vital role in our celebration, symbolizing the principles and values we honor as a community.

The kinara serves as a symbolic representation of African culture and heritage, reflecting the cultural significance of Kwanzaa itself.

The kinara typically consists of seven candle holders, each representing one of the seven principles of Kwanzaa. These principles, known as the Nguzo Saba, include unity, self-determination, collective work and responsibility, cooperative economics, purpose, creativity, and faith.

Advertisement

candle warmer

Each candle is lit on a specific day of the celebration, with the center candle, known as the ‘Mishumaa Saba,’ representing the African people and their shared ancestry.

The kinara, therefore, serves as a visual reminder of the values and ideals that unite us as a community.

As we explore traditional design variations of the kinara, we further appreciate the rich diversity and artistic expressions within our African heritage.

Traditional Design Variations

As we explore the traditional design variations of the kinara, we gain a deeper understanding of its role in the Kwanzaa celebration. The kinara, or Kwanzaa candle holder, holds great cultural significance and embodies the principles and values of Kwanzaa.

candle holders ikea

Here are three traditional design variations of the kinara:

Advertisement
  1. Material: Kinara is typically made from wood, symbolizing the importance of nature and the earth in African culture. Different types of wood, such as mahogany or ebony, may be used to create unique and intricate designs.
  2. Shape: The shape of the kinara can vary, but it commonly consists of a long rectangular base with seven candle holders. Some designs may incorporate curves or African-inspired motifs, representing the diversity and richness of African heritage.
  3. Symbolism: Each candle holder on the kinara represents one of the seven principles of Kwanzaa. The central black candle represents unity, surrounded by three red candles symbolizing self-determination, cooperative economics, and creativity, and three green candles representing collective work and responsibility, purpose, and faith.

Through these traditional designs, the kinara serves as a visual representation of the principles and cultural significance of Kwanzaa, fostering unity, self-reflection, and community building.

Lighting Ceremony Traditions

While lighting the candles, we honor the role of the Kwanzaa candle holder in the Kwanzaa celebration. The lighting ceremony symbolism holds deep cultural and spiritual significance.

The Kwanzaa candle holder, also known as the kinara, is a central element in the celebration. It typically consists of seven candle holders, representing the seven principles of Kwanzaa, called the Nguzo Saba. Each candle represents one of these principles: Umoja (unity), Kujichagulia (self-determination), Ujima (collective work and responsibility), Ujamaa (cooperative economics), Nia (purpose), Kuumba (creativity), and Imani (faith).

candle shack calculator

The kinara serves as a visual reminder of the importance of these principles in our lives and in the community. As we light each candle, we’re reminded to reflect on these principles and strive to incorporate them into our daily lives.

The Kwanzaa candle holder plays a vital role in emphasizing the values and principles that Kwanzaa represents.

Different Styles and Designs of Kwanzaa Candle Holders

We have observed various styles and designs of Kwanzaa candle holders, each uniquely crafted to symbolize the principles and values of the holiday. These candle holders aren’t only functional but also hold cultural significance, reflecting the rich traditions of Kwanzaa.

Advertisement

Here are three different styles and designs of Kwanzaa candle holders:

candle making set

  1. Kinara: The most common type of Kwanzaa candle holder is the kinara, which typically holds seven candles. It’s often made from wood, symbolizing the African roots of the holiday. The seven candles represent the seven principles of Kwanzaa, known as the Nguzo Saba.
  2. Handcrafted ceramics: Another popular style of Kwanzaa candle holder is made from handcrafted ceramics. These pieces are often adorned with colorful African-inspired patterns and motifs, celebrating African heritage and craftsmanship.
  3. Metalwork: Kwanzaa candle holders made from metalwork, such as brass or copper, are also prevalent. These pieces showcase intricate designs and symbols, reflecting the importance of unity and community in Kwanzaa celebrations.

These diverse styles and designs of Kwanzaa candle holders allow individuals to express their cultural identity and celebrate the values of Kwanzaa in a meaningful way.

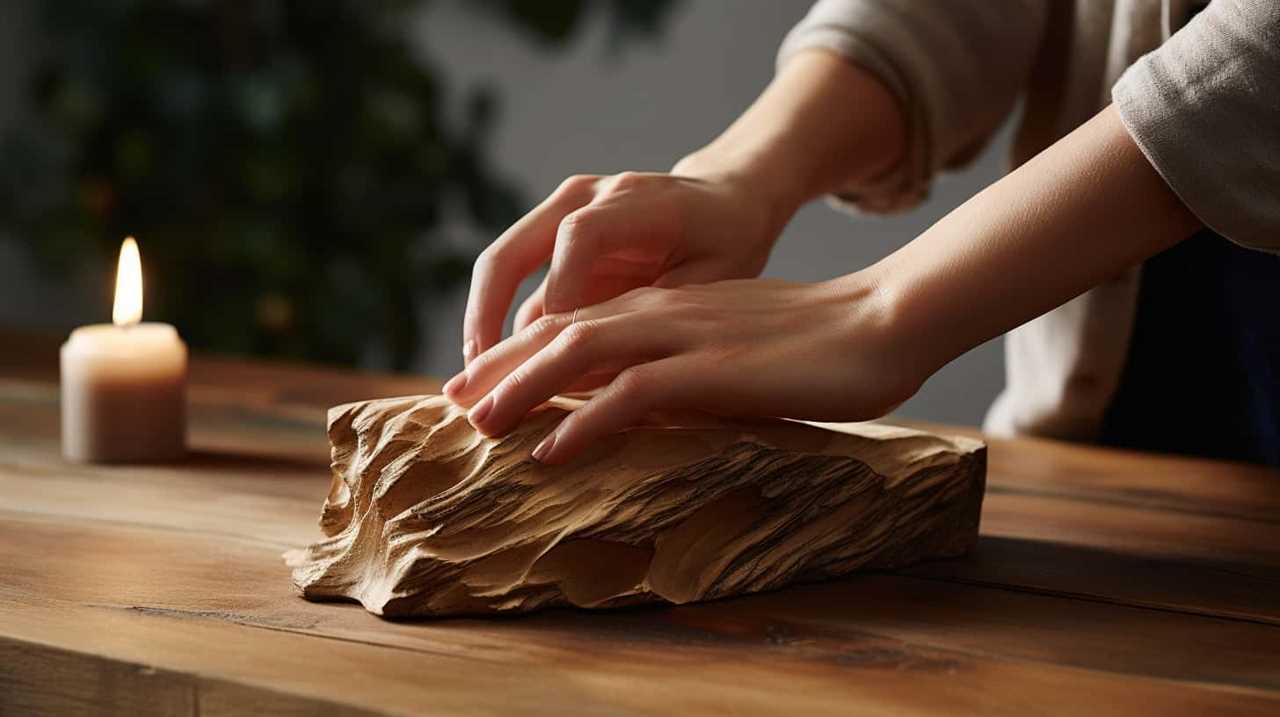
How to Make Your Own Kwanzaa Candle Holder

To create your own Kwanzaa candle holder, you can start by gathering the necessary materials and following these step-by-step instructions.

Making a DIY candle holder for Kwanzaa is a meaningful way to celebrate the holiday and honor its principles.

Here’s what you’ll need: a wooden block, sandpaper, acrylic paint in the colors of Kwanzaa (red, black, and green), paintbrushes, a ruler, and 7 candle holders.

candle making kits

Start by sanding the wooden block to create a smooth surface.

Advertisement

Next, use the ruler to measure and mark the placement of the candle holders evenly across the block.

Then, paint the block with the Kwanzaa colors, using a different color for each side.

Allow the paint to dry before attaching the candle holders to the marked spots.

yankee candle malaysia

Once the candle holders are securely in place, your DIY Kwanzaa candle holder is ready to be used during the celebration.

Remember to light each candle on its corresponding day to honor the principles of Kwanzaa.

Advertisement

The Names and Meanings of the Seven Candles on the Kwanzaa Candle Holder

Continuing from the previous subtopic, let’s explore the names and meanings of the seven candles on the Kwanzaa candle holder.

The candles hold deep symbolic meanings and cultural significance in the celebration of Kwanzaa.

candlelight concert

  1. Mishumaa Saba: This is the central candle, also known as the Unity Candle. It represents the unity and collective work of the African American community.
  2. Kinara: The Kinara is the candle holder that holds the seven candles. It symbolizes the ancestral roots and heritage of African Americans.
  3. Nguzo Saba: The seven candles on the Kinara are collectively known as the Nguzo Saba, which means the Seven Principles in Swahili. Each candle represents one of the seven principles of Kwanzaa: Umoja (Unity), Kujichagulia (Self-determination), Ujima (Collective work and responsibility), Ujamaa (Cooperative economics), Nia (Purpose), Kuumba (Creativity), and Imani (Faith).

These candles, with their symbolic meanings and cultural significance, serve as a reminder of the values and principles that guide the African American community during the celebration of Kwanzaa.

The Importance of Lighting the Candles in a Specific Order

When it comes to lighting the candles on a Kwanzaa candle holder, the specific order holds great symbolic meaning and ritual significance. Each candle represents one of the seven principles of Kwanzaa, and the order in which they’re lit reflects the journey of the celebration.

Understanding the importance of lighting the candles in a specific order helps to deepen our understanding of the values and principles that Kwanzaa seeks to promote.

Symbolic Meaning Behind Order

We light the candles on a Kwanzaa candle holder in a specific order to symbolize the values and principles of the holiday. This symbolic order holds cultural significance and serves as a powerful reminder of the importance of community and unity.

Advertisement

candle holders

  1. The First Candle: The black candle, known as the ‘Umoja’ candle, is lit on the first day of Kwanzaa. It represents unity and reminds us of the collective responsibility we’ve towards one another.
  2. The Second Candle: The red candle, also known as the ‘Kujichagulia’ candle, is lit on the second day. It symbolizes self-determination, encouraging individuals to define and shape their own destinies.
  3. The Third Candle: The green candle, called the ‘Ujima’ candle, is lit on the third day. It signifies collective work and responsibility, reminding us of the importance of coming together to build and uplift our communities.

Ritual Significance of Sequence

Highlighting the significance of lighting the candles in a specific order, the ritual sequence holds profound meaning in the celebration of Kwanzaa.

The specific order in which the candles are lit is an essential part of the Kwanzaa ritual practices and has deep cultural significance.

Each of the seven candles represents one of the seven principles of Kwanzaa, known as the Nguzo Saba. These principles include unity, self-determination, collective work and responsibility, cooperative economics, purpose, creativity, and faith.

The lighting of the candles in a specific order symbolizes the progressive growth and development of these principles throughout the week-long celebration.

candle in the wind

How to Properly Display and Arrange the Kwanzaa Candle Holder

How can we effectively showcase and arrange the Kwanzaa candle holder? Proper display techniques not only highlight the cultural significance of the candle holder but also create an inviting and meaningful atmosphere for celebrating Kwanzaa. Here are three key considerations:

  1. Placement:
    Position the Kwanzaa candle holder, known as a kinara, on a central location such as a table or a mantel. This allows for easy visibility and ensures that it becomes the focal point of the celebration.
  2. Lighting:
    Light the candles in the kinara from left to right, starting with the black candle in the center. This symbolizes the seven principles of Kwanzaa, with each candle representing a different principle. Keep the candles lit during the entire week of Kwanzaa.
  3. Decorations:
    Enhance the display by incorporating traditional African fabrics, symbols, and colors. Adorn the surrounding area with African artwork, baskets, or fruits to further honor and embrace African heritage.

Where to Find and Purchase a Kwanzaa Candle Holder

To find and purchase a Kwanzaa candle holder, start by exploring local African markets or online retailers specializing in cultural and holiday decor. These markets and online retailers often offer a wide range of traditional Kwanzaa items, including candle holders.

Additionally, consider visiting local African craft fairs or cultural events, where you may find unique and handmade candle holders.

Advertisement

When searching online, use keywords such as ‘Kwanzaa candle holder’ or ‘Kwanzaa candle holder where to buy’ to narrow your search and find reputable sellers. It’s important to ensure that the candle holder you choose is authentic and represents the values and principles of Kwanzaa.

yankee candle

Take the time to read reviews and compare prices before making a purchase. By supporting local businesses or online retailers specializing in cultural items, you can serve both your own needs and contribute to the preservation of cultural traditions.

Frequently Asked Questions

Can I Use Any Type of Candle Holder for Kwanzaa, or Does It Have to Be Specifically Designed for the Celebration?

For Kwanzaa, it is important to have a candle holder specifically designed for the celebration. While there may be alternative options, the traditional candle holder, called a kinara, holds great significance in the placement of the candles.

Are There Any Specific Colors or Patterns That Are Traditionally Used for Kwanzaa Candle Holders?

Traditional colors and patterns for Kwanzaa candle holders vary, but they often incorporate the symbolic colors of Kwanzaa: red, black, and green. However, individuals are free to customize their candle holders to reflect their personal style and preferences.

Can I Use Electronic or Battery-Operated Candles Instead of Traditional Candles for the Kwanzaa Candle Holder?

Yes, you can use battery-operated candles instead of traditional candles for the Kwanzaa candle holder. This allows for a safer and more convenient option, while still maintaining the symbolic significance of the candles.

Advertisement

candle holders ikea

How Long Should the Candles Burn Each Day During the Kwanzaa Celebration?

During the Kwanzaa celebration, the candles symbolize the principles of Kwanzaa. Each candle represents one of the seven principles and is lit every day. Children can participate by helping to light the candles each day.

Are There Any Specific Safety Precautions I Should Take When Using a Kwanzaa Candle Holder?

When using a Kwanzaa candle holder, it is important to observe safety precautions. Alternatives to traditional candle holders include electric ones or placing the candles in a fireproof container.

Conclusion

In conclusion, the Kwanzaa candle holder, also known as a kinara, is a significant symbol in the celebration of Kwanzaa. It holds seven candles, each representing a principle of the holiday.

One interesting statistic is that over the years, the popularity of Kwanzaa and the use of kinara have been steadily increasing, with more people embracing and practicing this cultural tradition.

candle holders wood

This shows the enduring relevance and importance of Kwanzaa in celebrating African-American heritage and values.

Advertisement

I'm Jane and I love candles. I have candles everywhere in my house--in every room, on every surface. I love the smell of candles, and I love how they make my place feel warm and cozy. Candles are really important to me. They help me relax and de-stress after a long day. They remind me of happy memories, and they make me feel calm and peaceful. I can't imagine my life without candles!

Continue Reading
Advertisement

Candles

How to Smooth Candle Surface

Published

on

By

Are you curious about how to achieve a flawless surface on your candles? You’re in luck! This guide has all the tips and tricks you need for smooth candle exteriors.

Whether you’re a candle-making enthusiast or just want to enhance the beauty of your candles, we’ve got you covered. From choosing the right wax to applying a top coat, we’ll walk you through each step with ease.

No need to worry about rough or uneven surfaces anymore. With our techniques, you’ll be able to create candles that are not only visually appealing but also feel delightful to the touch.

So, let’s dive in and discover the art of smoothing candle surfaces together!

Advertisement

candle holders glass

Key Takeaways

  • Use heat from a hairdryer or heat gun to smooth the candle surface.
  • Sand the candle with different grits of sandpaper for a polished finish.
  • Avoid oversanding and constantly check for evenness.
  • Apply a top coat using a blow dryer to achieve a perfectly smooth surface and provide a protective layer.

Choosing the Right Candle Wax

To achieve a smooth candle surface, we need to start by choosing the right candle wax. The melting temperature and fragrance options play a crucial role in this decision.

When it comes to melting temperature, it’s important to consider the environment in which the candle will be used. If you live in a warmer climate, a low melting point wax would be ideal as it will prevent the candle from melting too quickly. On the other hand, if you live in a colder climate, a high melting point wax would be more suitable to ensure the candle burns evenly.

As for fragrance options, there are a wide variety of scents available to suit different preferences. From floral to fruity, or even musky, selecting the right fragrance will enhance the overall candle experience.

Preparing Your Candles for Smoothing

To achieve a smooth candle surface, we begin by preparing our candles for smoothing. This involves ensuring that the wax is melted and ready for pouring. We follow a systematic process to ensure the best results.

candle holders for pillar candles

First, we gather all the necessary materials and tools, including the chosen candle wax, a heat-resistant container for melting the wax, a double boiler or a wax melting pot, a thermometer, and a stirring utensil.

Next, we carefully measure the desired amount of wax and place it into the heat-resistant container. We then heat the wax using a double boiler or a wax melting pot, ensuring that the temperature is within the recommended range for the specific type of wax.

Advertisement

Once the wax has melted completely, we remove it from the heat source and allow it to cool slightly. This step is crucial to ensure that the wax is at the optimal pouring temperature.

Finally, we pour the melted wax into the chosen candle mold or container, being careful to avoid any air bubbles or spills.

candlestick holders

Using Heat to Smooth Candle Surfaces

We use a heat source to smooth the surfaces of our candles. There are two common ways to apply heat for this purpose: using a hairdryer or a heat gun.

  • Using a hairdryer to smooth candle surfaces:
  • Set the hairdryer to medium heat and medium speed.
  • Hold the hairdryer about 6 inches away from the candle surface.
  • Move the hairdryer in a circular motion, evenly distributing the heat.
  • Continue until the surface becomes smooth and glossy.
  • Using a heat gun to smooth candle surfaces:
  • Set the heat gun to a low heat setting.
  • Hold the heat gun about 6 inches away from the candle surface.
  • Move the heat gun in a back-and-forth motion, gradually heating the surface.
  • Be careful not to overheat the candle, as it may melt or warp.

Both methods require caution and patience. Always test on a small area first and be mindful of the candle’s melting point.

Sanding Techniques for a Polished Finish

For achieving a polished finish on your candle, sanding is an essential technique that enhances the smoothness and texture of the surface. To start, gather the necessary tools such as sandpaper with different grits, a sanding block, and a soft cloth.

Begin by using a coarse grit sandpaper to remove any rough areas or imperfections on the candle’s surface. Then, gradually switch to finer grits to achieve a smoother finish. It’s important to sand in a circular motion, applying gentle pressure to avoid damaging the candle.

Advertisement

candle shack discount code

Troubleshooting common sanding issues includes being careful not to oversand and constantly checking the surface for evenness.

In the next section, we’ll explore the process of applying a top coat for a perfectly smooth surface.

Applying a Top Coat for a Perfectly Smooth Surface

To achieve a perfectly smooth surface on your candle, we can apply a top coat using a glossy finish. This won’t only enhance the appearance of the candle but also provide a protective layer.

Here are two important steps to follow when applying the top coat:

candlelight concerts manchester

  • Prepare the candle: Before applying the top coat, ensure that the candle is clean and free from any dust or debris. Wipe it gently with a soft cloth to remove any residue.
  • Use a blow dryer: To achieve a smooth surface, use a blow dryer on a low heat setting. Hold the dryer about 6-8 inches away from the candle and move it in a circular motion. The heat will help the top coat to melt slightly and level out, creating a smooth finish.

Frequently Asked Questions

Can I Use Any Type of Candle Wax to Smooth the Surface?

We can use different types of candle wax to smooth the surface effectively. There are techniques available that allow us to achieve smooth results without using an open flame.

How Long Should I Let My Candle Cool Before Attempting to Smooth the Surface?

We’ve found that giving the candle enough cooling time ensures a smoother surface. Techniques like using a spoon or a butter knife help without applying heat.

Advertisement

Is It Safe to Use an Open Flame to Heat and Smooth the Candle Surface?

We recommend exploring alternative methods, such as using a heat gun or hot water, to smooth candle surfaces without the risk of an open flame. If using an open flame, exercise caution and ensure proper ventilation.

Can I Use Any Type of Sandpaper to Achieve a Polished Finish?

We’ve tried every type of sandpaper under the sun to achieve a polished finish on our candles. Different sandpapers create different finishes, so be sure to experiment. Just watch out for common mistakes like using too much pressure or the wrong grit.

candlesticks stamford

Should I Apply a Top Coat to My Candle Surface After Smoothing It?

Applying a top coat to a smoothed candle surface can provide several benefits such as enhancing the shine, protecting the surface from dust and dirt, and extending the longevity of the finish. However, there are alternative methods to achieve a smooth surface without a top coat.

Conclusion

In conclusion, smoothing the surface of your candles can be achieved by choosing the right wax, preparing them properly, using heat techniques, and applying a top coat.

By following these steps, you can achieve a perfectly smooth finish that will enhance the beauty of your candles.

Advertisement

Remember, a smooth candle surface is like a mirror reflecting the light, adding a touch of elegance to any space.

candle holders amazon

Continue Reading

Candles

How to Remove Candle Wax From Wall Paint

Published

on

By

Are you annoyed by unsightly candle wax stains ruining your beautifully painted walls? No need to fret! We have a simple solution for removing candle wax from wall paint.

With just a few supplies and a little bit of elbow grease, you’ll have your walls looking as good as new in no time.

So, let’s roll up our sleeves and get to work!

Key Takeaways

  • Use a plastic scraper or credit card to gently scrape off excess wax from the wall
  • Use a hairdryer to melt the wax and wipe it away with a cloth or paper towel
  • Alternatively, try the ice method by freezing the wax and then scraping it off
  • Use rubbing alcohol or a mild detergent solution to remove any residue left on the wall

Gather Necessary Supplies

To remove candle wax from wall paint, we’ll need to gather the necessary supplies. The most common and effective method involves using a few basic items: a plastic scraper or credit card, a clean white cloth or paper towel, a hairdryer, and some rubbing alcohol. However, if you don’t have rubbing alcohol on hand, there are alternative supplies you can use. Vinegar or dish soap mixed with warm water can also be effective in removing wax. Just remember to test these alternative supplies on a small, inconspicuous area of the wall first to ensure they won’t damage the paint.

floral candle

There are a few different wax removal techniques you can try, but first, let’s gather the supplies you’ll need.

Advertisement

Scrape off Excess Wax

We will begin by using a plastic scraper or credit card to remove any excess wax from the wall paint. Here are some scraping techniques to effectively remove wax stains:

  1. Hold the scraper or credit card at a slight angle against the wall, ensuring that it doesn’t damage the paint.
  2. Gently scrape off the excess wax in a downward motion, being careful not to apply too much pressure.
  3. If the wax is stubborn, try using the edge of the scraper to carefully lift and loosen it.
  4. Keep a cloth or paper towel nearby to wipe off any wax residue as you scrape.

By following these scraping techniques, you can successfully remove the excess wax from your wall paint.

Once you have removed as much wax as possible, it’s time to move on to the next step: using a hairdryer to melt the remaining wax.

candle holders

Use a Hairdryer to Melt the Wax

Let’s talk about using a hairdryer to melt the wax on the wall paint.

This technique can be effective in loosening the wax and making it easier to remove.

However, it’s important to use caution to avoid damaging the paint.

Advertisement

Hairdryer Melting Technique

We can easily eliminate candle wax from wall paint by utilizing a hairdryer to melt it off. This is a convenient and cost-effective method, especially if you don’t have access to a heat gun. Here’s how to do it:

yankee candle

  1. Set the hairdryer to a medium or high heat setting. Make sure to hold it at least a few inches away from the wax to avoid damaging the paint.
  2. Direct the warm air from the hairdryer onto the wax. Move the hairdryer in a circular motion to evenly distribute the heat.
  3. As the wax begins to melt, use a clean cloth or paper towel to gently wipe away the softened wax. Be careful not to rub too hard, as this might smear the wax and make the stain worse.
  4. Repeat the process if any residue remains, until the wall is clean and free of wax.

Using a blow dryer as a heat gun alternative is a simple and effective way to remove candle wax from wall paint.

Wall Paint Protection

To protect the wall paint while using a hairdryer to melt the wax, we should take certain precautions.

Wall paint maintenance is essential for preventing wax stains and maintaining the appearance of your walls.

Before using the hairdryer, cover the surrounding area with a protective sheet or plastic to shield the paint from heat and melting wax.

candle making

Ensure that the hairdryer is set to low heat to avoid damaging the paint.

Advertisement

Hold the hairdryer a few inches away from the wax stain and move it in a circular motion to gradually melt the wax.

Use a clean cloth or paper towel to blot the melted wax gently.

Be careful not to smear the wax on the wall while removing it.

yankee candle uk

Wax Removal Method

What precautions should we take when using a hairdryer to melt the wax in order to protect the wall paint? Here are some important steps to follow:

  1. Set the hairdryer to a low heat setting: Using high heat can damage the paint or cause it to bubble. Start with the lowest setting and gradually increase if needed.
  2. Maintain a safe distance: Hold the hairdryer at least 6 inches away from the wall to prevent overheating the paint or causing it to blister.
  3. Move the hairdryer in a circular motion: This helps distribute the heat evenly and prevents concentrated heat in one area, which could damage the paint.
  4. Wipe away the melted wax: As the wax begins to melt, use a clean cloth or paper towel to gently wipe it away. Be careful not to smear the wax onto other areas of the wall.

Blot the Melted Wax With Paper Towels

Now that the candle wax has been melted, it’s time to tackle the next step: blotting the melted wax with paper towels.

This step is crucial in removing as much wax as possible from the wall paint. By gently blotting the wax with paper towels, we can absorb the melted wax and prevent it from seeping further into the paint.

Advertisement

Heat and Scrape

We can efficiently remove the melted wax from wall paint by utilizing the technique of heating and scraping while blotting it with paper towels. This method is effective and can be done easily at home. Here’s how to do it:

uses of candles in daily life

  1. Ensure hairdryer safety: Before using a hairdryer to melt the wax, make sure to read the manufacturer’s instructions and follow all safety precautions.
  2. Apply heat: Use the hairdryer on a low heat setting and direct the warm air towards the wax. Move the hairdryer in a circular motion to evenly heat the wax.
  3. Scrape off the wax: Once the wax starts to melt, take a plastic scraper or a credit card and gently scrape off the softened wax. Be careful not to damage the paint.
  4. Blot with paper towels: Immediately after scraping, blot the remaining wax with paper towels to absorb any residual wax and oil.

By following these steps, you can effectively remove melted wax from wall paint.

Now, let’s explore another method to remove wax using ice.

Use Ice Method

Continuing with the process of removing melted wax from wall paint, another effective method is to use the ice method and blot the melted wax with paper towels.

This method is particularly useful for preventing wax stains from setting into the paint. To start, place a few ice cubes in a plastic bag and hold it against the wax until it hardens.

candles direct portugal

Once the wax is frozen, gently scrape it off with a plastic scraper or a credit card. Be careful not to damage the paint.

Advertisement

After removing as much wax as possible, take a paper towel and blot the remaining residue. Apply slight pressure and continue blotting until all the wax is absorbed.

This method is a great alternative to using heat and can be just as effective in removing wax stains from wall paint.

Apply Rubbing Alcohol to Remove Residue

To remove residue from candle wax on wall paint, start by applying rubbing alcohol. Rubbing alcohol is an effective solution for breaking down the wax and removing any leftover residue. Here’s how to do it:

candles direct voucher code

  1. Gather your supplies: rubbing alcohol, cotton balls or a soft cloth, and a clean towel.
  2. Moisten a cotton ball or cloth with rubbing alcohol.
  3. Gently dab the affected area with the alcohol-soaked cotton ball or cloth.
  4. Continue dabbing until the residue is completely dissolved and removed.

Using rubbing alcohol is a convenient and efficient method for removing wax residue from wall paint. It’s a safer alternative to using heat sources like a hairdryer or iron, which can potentially damage the paint.

Once you have successfully removed the residue, you can proceed to the next step of using a sponge and mild detergent for stubborn stains.

Use a Sponge and Mild Detergent for Stubborn Stains

After applying rubbing alcohol to remove residue from candle wax on wall paint, the next step is to tackle stubborn stains by using a sponge and mild detergent.

Advertisement

Start by dampening the sponge with warm water and gently scrubbing the stained area. Be careful not to apply too much pressure, as this could damage the paint.

candlelighters

For tougher stains, create a vinegar solution by mixing equal parts vinegar and warm water. Dip the sponge into the solution and continue scrubbing until the stain begins to fade.

Rinse the sponge with clean water and wipe away any remaining detergent or vinegar residue.

Finally, allow the wall to air dry.

This method should effectively remove stubborn candle wax stains from your wall paint.

Advertisement

candle making kits

Rinse the Area With Clean Water

We will now proceed to rinse the area with clean water. This step is crucial in removing any remaining residue from the wall paint and ensuring a thorough cleaning. Here are some cleaning techniques and alternative methods you can use during the rinsing process:

  1. Use a clean sponge or cloth soaked in clean water to gently wipe the area. Make sure to remove any soap or detergent residue that may still be present.
  2. If the wax stain is stubborn and difficult to remove, you can try using a mixture of water and white vinegar. This solution can help break down the wax and make it easier to rinse off.
  3. Another alternative method is to use a commercial wax remover specifically designed for wall paint. Follow the instructions provided by the manufacturer for the best results.
  4. After rinsing, make sure to dry the area thoroughly with a clean towel or cloth to prevent any water spots or damage to the wall paint.

Dry the Wall Thoroughly

How can we ensure that the wall is completely dry after rinsing off the candle wax residue?

To dry the wall thoroughly, there are a few techniques you can use.

First, you can use a clean, dry cloth to gently pat the wall dry. Make sure to apply gentle pressure to avoid damaging the paint.

ecoya penrith

If the wax residue has left any moisture behind, you can use a hairdryer on a low heat setting to evaporate the remaining water. Remember to keep the hairdryer at a safe distance from the wall to prevent any heat damage.

Once the wall is dry, you can take steps to prevent future wax spills. Consider using candle holders or trays to catch any drips and avoid placing lit candles near walls.

Advertisement

Assess for Any Remaining Wax and Repeat Steps if Necessary

To ensure thorough removal of candle wax residue from the wall paint, it’s important to assess if any wax remains and repeat the necessary steps. Here’s how you can effectively assess the effectiveness of the wax removal process and consider alternative removal methods if needed:

  1. Inspect the wall: Carefully examine the treated area to check for any remaining wax residue. Look for any discoloration or greasy spots that may indicate leftover wax.
  2. Touch test: Gently touch the area to feel for any waxy or sticky residue. If you notice any, it means that the wax removal process wasn’t completely successful.
  3. Repeat steps: If there’s still wax residue, repeat the removal steps mentioned earlier. Use a clean cloth and apply heat or rubbing alcohol to dissolve and remove the remaining wax.
  4. Consider alternatives: If repeating the steps doesn’t fully remove the wax, consider alternative removal methods such as using an iron with a brown paper bag or using a hairdryer on a low setting to melt and absorb the wax.

Apply Touch-Up Paint if Needed

To ensure a seamless finish, assess the painted surface and determine if touch-up paint is necessary. If there are any areas where the wax has caused damage or discoloration, touch-up paint can be applied to restore the original appearance of the wall.

candlelight concerts aberdeen

Begin by thoroughly cleaning the affected area and allowing it to dry completely. Then, using a small brush or roller, carefully apply the touch-up paint to the damaged spots, blending it into the surrounding painted surface. Make sure to follow the manufacturer’s instructions for the specific type of paint being used.

Frequently Asked Questions

Can I Use a Different Heat Source Instead of a Hairdryer to Melt the Wax?

Using a blow torch instead of a hairdryer is not recommended for removing candle wax from wall paint. It can cause more damage to the paint. However, using a heat gun can be effective.

How Long Should I Let the Rubbing Alcohol Sit on the Residue Before Wiping It Off?

We usually let the rubbing alcohol sit on the residue for about 5-10 minutes before wiping it off. If you don’t have rubbing alcohol, try using alternative methods like heat or freezing to remove candle wax from wall paint.

Is It Safe to Use a Harsh Detergent on the Wall Paint?

Using a harsh detergent on wall paint may not be safe as it can damage the paint. Instead, consider using alternative heat sources like a hairdryer to melt the wax and then gently wipe it off.

Advertisement

candlesticks patterns

Should I Use Warm or Cold Water to Rinse the Area?

We should use warm water to rinse the area. Warm water helps to soften the wax, making it easier to remove. It is important to avoid using hot water as it can damage the wall paint.

Can I Skip the Step of Drying the Wall Thoroughly?

We recommend thoroughly drying the wall after removing candle wax. Skipping this step may lead to lingering moisture which can cause damage. Additionally, consider using alternative heat sources like a hairdryer to safely remove wax.

Conclusion

Well, congratulations! You now have the necessary knowledge to remove pesky candle wax from your wall paint. Who knew that a hairdryer and some rubbing alcohol could work wonders?

So, the next time you accidentally spill wax on your walls, don’t panic. Just follow these simple steps, and you’ll be amazed at how easily the wax disappears.

candlelight concert

Remember, knowledge is power, and now you have the power to conquer any wax-related mishaps. Good luck!

Advertisement

Continue Reading

Candles

How to Refill Candle

Published

on

By

Have you ever treasured a candle that burned out too quickly? It’s like a beautiful sunset fading away too soon before you can fully appreciate its warmth and glow.

Well, fear not! We’re here to show you how to refill your candle and bring back that cozy ambiance.

In just a few simple steps, we’ll guide you through the process of gathering supplies, preparing the jar, choosing the perfect wax and fragrance, and adding the finishing touches.

By the end, you’ll have a newly refilled candle that’s ready to light up your space once again.

Advertisement

candle shack

So, let’s get started and bring back the magic of your favorite candle!

Key Takeaways

  • Choose a suitable wax for refilling, considering factors such as melting point and fragrance compatibility.
  • Clean the empty candle container thoroughly to remove any residue or debris.
  • Slowly pour the melted wax into the container, avoiding overfilling.
  • Allow the wax to cool and solidify in the container, ensuring a level and smooth surface.

Gather Necessary Supplies

To begin refilling a candle, we need to gather the necessary supplies. Choosing the right fragrance is essential in creating a pleasant and inviting atmosphere. Consider the mood you want to set and select a fragrance that aligns with it. Whether you prefer fruity, floral, or woody scents, there’s a wide variety of options available.

Once you have chosen the fragrance, the next step is to properly melt the wax. This can be done using a double boiler or a microwave-safe container. Ensure that the wax is heated gently and evenly to avoid any damage to the candle or the fragrance.

Prepare the Candle Jar

Now let’s move on to preparing the candle jar.

candlesticks hotel stamford

The first step is to clean the jar thoroughly to remove any residue from the previous candle.

Next, choose a new scent that you’d like to fill your space with.

Advertisement

Clean Candle Jar

We begin by cleaning the candle jar using warm, soapy water. This step is essential in preparing the candle jar for refilling. By removing any residue or wax remnants, we ensure a clean and fresh base for our new candle. To facilitate the cleaning process, consider using different cleaning techniques based on the material of your candle jar. Glass jars can be easily cleaned with warm water and mild dish soap. For ceramic or metal jars, a soft cloth or sponge can be used to gently scrub away any dirt or grime. Once the candle jar is clean, it opens up numerous repurposing options, such as using it as a storage container or a decorative piece in your home.

Material Cleaning Technique Repurposing Options
Glass Warm water and mild dish soap Storage container, decorative piece
Ceramic Soft cloth or sponge Planter, pencil holder
Metal Soft cloth or sponge Candle holder, flower vase

Choose New Scent

After cleaning the candle jar, we can now move on to selecting a new scent and preparing the candle jar accordingly. Choosing a new fragrance is an exciting part of the candle refilling process. Here are some tips to help you explore different scents:

candles shoes

  1. Consider the occasion or mood: Are you looking for a relaxing scent for a cozy night in, or a refreshing scent for a summer gathering?
  2. Test before committing: Purchase small samples or visit a candle store to smell different fragrances before making a decision.
  3. Blend scents: Get creative by mixing different fragrances to create a unique scent that suits your preferences.
  4. Think about the season: Match your candle scent to the time of year to enhance the ambiance.

Now that you have chosen your new scent, we can move on to the next step: melting and pouring the candle wax.

Melt and Pour

To prepare the candle jar for refilling, we need to melt the wax and pour it into the container. Melt and pour is a popular method for refilling candles as it allows for easy customization and control over the process.

However, it’s important to follow safety precautions when working with hot wax. Always use a double boiler or a heat-resistant container and never leave the melting wax unattended. To prevent accidents, keep a fire extinguisher nearby and work in a well-ventilated area.

Additionally, troubleshooting common issues such as air bubbles or uneven pouring can be resolved by gently tapping the jar to release any trapped air and ensuring a steady hand when pouring.

Advertisement

candles shoes

Choose Your Wax and Fragrance

When it comes to refilling a candle, choosing the right wax and fragrance is essential. Understanding the different wax options available, such as soy, beeswax, and paraffin, will help you make an informed decision.

Additionally, selecting the perfect fragrance that suits your preferences and creates the desired ambiance is crucial. Combining the right wax and fragrance will ensure a successful candle refill that enhances your space with a pleasant scent.

Wax Options Explained

Our preferred wax option for candle refills is soy wax due to its clean burn and long-lasting fragrance. When choosing the right wax for your candle refill, it’s important to consider factors such as burn time, scent throw, and sustainability. Here are some wax options explained to help you make an informed decision:

  1. Soy Wax: Made from soybean oil, this natural wax burns cleanly and slowly, ensuring a longer-lasting candle. It also has a great scent throw and is environmentally friendly.
  2. Beeswax: Known for its natural golden color and sweet aroma, beeswax candles have a long burn time and purify the air when burned. However, they can be more expensive compared to other options.
  3. Paraffin Wax: This synthetic wax is popular due to its affordability and wide availability. However, it may release toxins when burned and has a shorter burn time.
  4. Coconut Wax: Derived from coconut oil, this wax has a creamy texture and excellent scent throw. It has a longer burn time compared to other natural waxes but can be more expensive.

Now that you know about the different wax options, let’s move on to selecting the perfect fragrance for your candle refill.

ecoya candles sale

Selecting the Perfect Fragrance

Now that we have explored the different wax options, let’s delve into the process of selecting the perfect fragrance for your candle refill. Choosing a fragrance that matches your mood or selecting a fragrance based on the season can enhance the ambiance of your space and create a more enjoyable experience. To help you select the perfect fragrance, consider the following table:

Fragrance Mood
Citrus Energizing and uplifting
Floral Relaxing and calming
Woody Cozy and warm
Spicy Invigorating and exotic

Combining Wax and Fragrance

To begin combining the wax and fragrance for your candle refill, we’ll need to select the appropriate wax and fragrance that best suits your preferences. Here are the steps to follow:

Advertisement
  1. Choose Your Wax: There are different types of wax available, such as soy wax, beeswax, and paraffin wax. Consider factors like burn time, scent throw, and eco-friendliness when selecting your wax.
  2. Select Your Fragrance: When it comes to fragrance, you have a wide range of options. You can choose from essential oils, which not only provide a beautiful aroma but also offer various health benefits. Alternatively, you can opt for fragrance oils that come in a variety of scents and intensities.
  3. Experiment with Blending: If you’re feeling adventurous, try blending different fragrances to create a unique scent. Be mindful of the proportions to ensure a balanced aroma.
  4. Test and Adjust: Once you’ve combined your wax and fragrance, make a small test candle to assess the scent throw and burn quality. If needed, adjust the fragrance or wax quantities accordingly.

Melt the Wax

We will begin by melting the wax for the candle refill. Choosing the right melting method is crucial to ensure a successful refill.

The two common methods are the double boiler and microwave methods. The double boiler method involves placing a heatproof container with wax in a pot of simmering water. This method offers a gentle and controlled heat, preventing the wax from overheating.

candles direct portugal

On the other hand, the microwave method is quicker but requires caution to avoid overheating or burning the wax. Regardless of the method chosen, achieving the perfect wax consistency is essential for a smooth and even burn.

To achieve this, it’s important to heat the wax slowly and stir it regularly to prevent any lumps or clumps. This will ensure a beautiful and professional-looking candle refill.

Add Fragrance Oil

When it comes to adding fragrance oil to a candle refill, there are a few key points to keep in mind.

First, choosing the right scent is crucial in creating the desired ambiance.

Advertisement

scented candle

Next, measuring the fragrance oil accurately ensures the right balance of scent.

Finally, mixing the oils properly ensures an even distribution of fragrance throughout the wax.

Paying attention to these points will result in a beautifully scented candle refill.

Choosing the Right Scent

Once you have determined the type of fragrance oil you want to use, it’s important to consider the scent intensity and compatibility with your chosen candle. Choosing the right fragrance for your candle refill is crucial in creating a pleasant and inviting atmosphere.

candle making supplies uk

Here are some tips for scent selection:

Advertisement
  1. Consider the occasion: Different scents evoke different moods, so think about the purpose of your candle. Are you looking for a relaxing scent for a spa-like experience or a fresh scent for a clean and vibrant ambiance?
  2. Test it out: Before committing to a fragrance, try a sample or small jar candle to see how it smells when burned. This will help you gauge the scent intensity and ensure it complements your space.
  3. Match the season: Consider scents that align with the time of year. Choose warm and cozy fragrances like vanilla or cinnamon for the colder months, and opt for light florals or citrus scents for the spring and summer.
  4. Personal preference: Ultimately, choose a fragrance that you enjoy and that reflects your personal taste. After all, you’ll be the one enjoying it!

Once you have chosen the perfect fragrance, it’s time to move on to measuring the fragrance.

Measuring the Fragrance

How do we accurately measure the fragrance oil for our candle refill?
When it comes to measuring the fragrance oil, it’s essential to use precise techniques to ensure the right amount is added. One common method is to use a scale that measures in grams or ounces. This allows for accurate measurement and consistency in scent strength.
Another technique is to use a dropper or pipette to carefully measure out the desired amount of fragrance oil. It’s important to follow the recommended guidelines for fragrance concentration, which can vary depending on the size of the candle.
During the fragrance selection process, it’s crucial to consider the potency of the scent and how it will complement the candle’s wax. With the right measuring techniques, we can ensure a perfectly scented candle refill.

Now, let’s move on to the next step: mixing the oils.

dusk candles careers

Mixing the Oils

To begin mixing the oils, we’ll add the fragrance oil using a dropper or pipette. This step is crucial in creating the perfect scent combination for your candle refill. Here are some mixing techniques to help you achieve the desired fragrance:

  1. Start with a small amount: Begin by adding a few drops of fragrance oil and gradually increase the amount until you reach the desired strength. This will prevent overpowering the scent.
  2. Blend different oils: Experiment with different fragrance oils to create unique scent combinations. You can mix floral and citrus oils for a refreshing aroma or combine vanilla and spice oils for a cozy ambiance.
  3. Stir gently: After adding the fragrance oil, use a stirrer to gently mix the oils together. Avoid vigorous stirring as it may create air bubbles in the mixture.
  4. Allow the oils to settle: Give the oils some time to blend together and settle before pouring them into your candle container. This will ensure that the fragrance is evenly distributed throughout the candle.

Pour the Melted Wax Into the Jar

We carefully pour the melted wax into the jar, ensuring that it fills the container to the desired level. This step is crucial in the candle refilling process, as it determines the final appearance and performance of the candle.

When choosing the right container for your candle refill, consider factors such as size, material, and design. A well-chosen container will enhance the overall aesthetic and functionality of the candle.

Additionally, there are alternative methods for refilling candles, such as using candle wax beads or pre-made candle refill kits. These options provide convenience and ease of use for those who prefer a quicker approach.

Advertisement

uses of candles in daily life

Once the melted wax is poured into the jar, it’s important to let the candle cool and set before using it. This allows the wax to solidify and ensures a safe and optimal burning experience.

Let the Candle Cool and Set

After pouring the melted wax into the jar, we must allow the candle to cool and set before it can be used. Here are some tips for handling hot wax and common mistakes to avoid during this crucial step:

  1. Avoid moving the candle: Once the wax is poured, it’s important to let it cool undisturbed. Moving the candle can cause uneven cooling and result in a lopsided or uneven surface.
  2. Provide proper ventilation: Make sure the room is well-ventilated to allow for proper cooling. This will help the candle set evenly and prevent any unpleasant odors.
  3. Be patient: It may be tempting to check if the candle has set, but resist the urge. Allow sufficient time for the wax to cool completely, usually a few hours or overnight.
  4. Avoid drafts: Keep the candle away from drafts, as they can interfere with the cooling process and cause the wax to set unevenly.

Once the candle has cooled and set, it’s time to move on to the next step: trimming the wick.

Trim the Wick

Once the candle has cooled and set, we can now proceed to trim the wick for optimal burning. Wick maintenance is essential for candle safety and ensuring a clean, even burn.

candle making workshop

To trim the wick, you’ll need a pair of scissors or a wick trimmer. First, extinguish the candle if it’s still burning. Then, remove any debris or soot from the candle using a tissue or a small brush.

Trim the wick to a length of about ¼ inch, as this helps prevent excessive smoke and soot. A longer wick can cause the candle to burn too hot and create a larger flame, increasing the risk of accidents.

Advertisement

Label Your Refilled Candle

To properly label our refilled candle, we’ll need a permanent marker or a label maker. Proper labeling is important for homemade candles for several reasons:

  1. Safety: Labeling your candle with the type of wax and any added fragrance or essential oils can help prevent any allergic reactions or mishaps. It also ensures that the candle is used safely.
  2. Identification: Clear labeling helps you easily identify the scent, color, and other characteristics of your candle. This is especially useful if you plan to make different types of candles or give them as gifts.
  3. Professionalism: A well-designed and personalized label adds a touch of professionalism to your homemade candles. It gives them a polished and finished look, making them more appealing to buyers or gift recipients.
  4. Creativity: Labeling your candle also gives you the opportunity to showcase your creativity. Experiment with various fonts, colors, and designs to create unique and eye-catching labels that reflect your style and personality.

Clean up Any Spills or Mess

To clean up any spills or mess, we’ll need a cloth or paper towel and a mild cleaning solution. If you accidentally spill any wax or oil during the refilling process, it’s important to act quickly to prevent any permanent stains or damage.

the candle library stockists

Gently blot the spill with a cloth or paper towel to absorb as much liquid as possible. Avoid rubbing, as this can push the spill deeper into the fabric or surface. If the spill leaves a residue, use a mild cleaning solution to remove it. Be sure to follow the manufacturer’s instructions for the specific cleaning solution you’re using.

Once the spill is cleaned up, take a moment to assess what caused the spill and consider implementing preventive measures for future refills. This will help you avoid any spills or messes in the future.

Now that your clean-up is complete, let’s move on to the next step and enjoy your newly refilled candle.

Enjoy Your Newly Refilled Candle

Now that we’ve completed the refill process, let’s sit back and enjoy our freshly refilled candle. Here are a few things to keep in mind to maximize your enjoyment and ensure candle safety precautions:

Advertisement

candle holders uk

  1. Choose the right location: Find a safe and suitable place to burn your candle, away from flammable materials and out of reach of children or pets.
  2. Trim the wick: Before lighting the candle, make sure to trim the wick to about 1/4 inch. This will help prevent excessive soot and ensure a clean burn.
  3. Burn in intervals: To prolong the life of your candle, burn it in shorter intervals of 2-3 hours. This prevents the wax from overheating and extends the overall burn time.
  4. Enjoy the benefits: As you light your newly refilled candle, take a moment to appreciate the warm glow and soothing fragrance it brings to your space. Relax, unwind, and enjoy the ambiance.

Tips for Maintaining Your Refilled Candle

What are some important tips we should keep in mind to maintain our newly refilled candle? Taking proper care of your candle not only helps to maintain its fragrance but also ensures its longevity. Here are some essential tips for candle care:

Tip Description
Trim the Wick Before each use, trim the wick to ¼ inch to prevent excessive smoke and uneven burning.
Burn in Intervals Allow the candle to burn for 2-3 hours at a time to create an even melt pool and prevent tunneling.
Store Properly Store candles in a cool, dry place away from direct sunlight to maintain their fragrance and color.

Frequently Asked Questions

How Long Does It Take for the Melted Wax to Cool and Set in the Jar?

Cooling time and setting time for the melted wax in the jar depend on various factors such as the amount of wax, room temperature, and ventilation. It’s important to let it cool completely before using the candle again.

Can I Use Any Type of Wax to Refill My Candle?

Yes, you can use different types of wax to refill your candle. However, it’s important to choose a wax that is compatible with your candle’s original wax. Follow these tips for successful candle refilling.

How Often Should I Trim the Wick?

We should trim the wick regularly to keep our candle burning bright. By following best practices for wick maintenance, we ensure a clean and even burn, enhancing the ambiance of our space.

candle holders for pillar candles

What Kind of Fragrance Oils Are Safe to Use in Candles?

Natural fragrance oils and essential oils are safe options to use in candles. They provide a variety of benefits such as aromatherapy and a more eco-friendly choice compared to synthetic fragrance oils.

Are There Any Special Cleaning Products I Should Use to Clean up Spills or Messes?

Special cleaning products are not necessary to clean up spills or messes when refilling candles. Simply wipe up any spills with a damp cloth and use a gentle soap and water solution for cleaning messes.

Advertisement

Conclusion

In conclusion, refilling a candle is a simple and rewarding process that allows you to enjoy your favorite scents for longer.

Did you know that approximately 35% of candle users refill their candles to reduce waste? By refilling your candle, you not only save money but also contribute to a more sustainable environment.

candle picture

So why not give it a try and enjoy the cozy ambiance of a freshly refilled candle in your home?

Continue Reading

Trending

Copyright © 2024 Just Candles Affiliate disclaimer As an affiliate, we may earn a commission from qualifying purchases. We get commissions for purchases made through links on this website from Amazon and other third parties.