
Have you ever noticed unsightly black stains on your ceiling from candle soot? Don’t worry, we have a solution for you!
In this guide, we will show you how to effectively remove candle soot from your ceiling. With just a few simple steps and some basic supplies, you’ll be able to restore your ceiling to its pristine condition.
No need to panic or call in professionals, as we will walk you through the process in a clear and concise manner.
So, let’s roll up our sleeves and get ready to banish that pesky candle soot from your ceiling once and for all!

Key Takeaways
- Gathering necessary supplies and preparing the area before cleaning
- Using appropriate cleaning techniques and tools, such as a dry sponge or cloth and vacuuming the ceiling
- Taking proactive measures to prevent soot buildup, such as regular vacuuming
- Following safety precautions, including wearing protective gear and using proper cleaning techniques
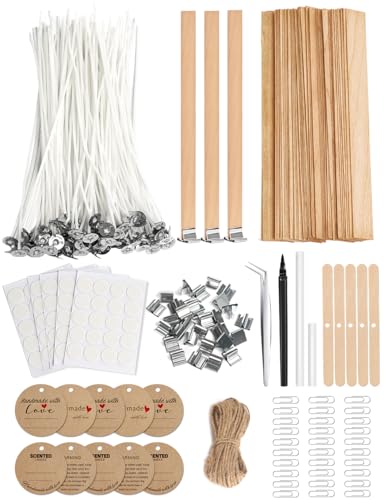
130 Pcs Candle Wicks for Candle Making Kit: 100 Cotton & 30 Wood Wicks with Complete Tool Set (Wick Holders, Wick Stickers, Candle Tabs, Tweezers, Pen), for Soy Beeswax DIY Candles
Ultimate Candle Making Kit - Includes 100 pre-waxed cotton wicks (6"), 30 wooden wicks (5"), 5 wick holders,...
As an affiliate, we earn on qualifying purchases.
Gather Necessary Supplies
We will gather the necessary supplies to remove candle soot from the ceiling. Before starting the cleaning process, it’s important to have the right cleaning tools on hand.
First, you’ll need a sturdy ladder to reach the ceiling safely. Ensure the ladder is stable and secure before climbing up.
Next, gather a vacuum cleaner with a brush attachment to remove loose soot particles. Additionally, you’ll need a clean cloth or sponge, mild detergent, and warm water for wiping the ceiling.
Remember to wear protective gloves and safety goggles to protect yourself from any potential hazards. It’s crucial to follow safety precautions to avoid any accidents while cleaning.

Multiwins 130 Pcs Candle Wicks for Candle Making Kit: 100 Cotton & 30 Wood Wicks with Complete Tool Set (Wick Holders, Wick Stickers, Candle Tabs, Tweezers, Pen), for Soy Beeswax DIY Candles
Ultimate Candle Making Kit - Includes 100 pre-waxed cotton wicks (4"), 30 wooden wicks (5"), 5 wick holders,...
As an affiliate, we earn on qualifying purchases.
Prepare the Area
Before starting the process of removing candle soot from the ceiling, it’s important to prepare the area properly.
To avoid any damage or staining, cover furniture and belongings with drop cloths or plastic sheets.
This will ensure that the cleaning process is focused and mess-free, allowing for a more efficient and effective removal of the soot.
Cover Furniture Properly
To adequately protect our furniture, it’s essential to carefully cover it before beginning the process of removing candle soot from the ceiling. This step is crucial in preventing damage to our valuable pieces.

Dust sheets or plastic covers can be used to protect furniture from potential drips or spills during the cleaning process. Ensure that the covers are securely fastened and properly draped over the furniture, leaving no exposed areas.
Additionally, consider moving any delicate or fragile items away from the area altogether to eliminate the risk of accidental damage.
Use Drop Cloths
To properly prepare the area for removing candle soot from the ceiling, it’s important to use drop cloths. Here are three reasons why drop cloths are essential in this cleaning process:
- Protection:
Drop cloths provide a protective barrier for your floors, furniture, and other items in the room. They prevent any residue or debris from falling onto these surfaces, ensuring that they remain clean and unaffected. - Easy Cleanup:
The use of drop cloths makes the cleanup process much easier. Once you have finished removing the candle soot from the ceiling, you can simply gather up the drop cloths and dispose of any soot or debris they’ve collected. - Versatility:
Drop cloths can be used in various cleaning techniques and alternative methods. Whether you’re using a vacuum, brush, or other cleaning tools, the drop cloths will catch any falling soot, making the cleaning process more efficient.

WFPLUS 100 Pcs Aluminum Tea Lights Cups, Empty Case Candle Wax Containers, Metal Tea Light Tins with 100 Pcs Candle Wicks Packaged in Carton Box, Candle Mold for DIY Candles Making Supplies
Size and Material: Round Tin Tea Light Cups Diameter: 3.7cm/1.5 Inch, Height: 1.5cm/0.6 Inch, made of aluminum, high...
As an affiliate, we earn on qualifying purchases.
Put on Protective Gear
We should wear appropriate protective gear before starting the process of removing candle soot from the ceiling. Safety measures are crucial when dealing with any cleaning task, and protecting ourselves from potential hazards is no exception. To ensure our safety, it is essential to choose the right cleaning agent for the job. Here is a table outlining the protective gear needed for removing candle soot:
| Protective Gear | Purpose |
|---|---|
| Safety goggles | Protects eyes from falling debris and cleaning agents |
| Dust mask | Prevents inhalation of soot particles |
| Disposable gloves | Shields hands from chemicals and dirt |

YJHSS 24-Pack 8oz Candle Tins with Lids, Metal Candle Jars for Candle Making, Bulk Empty Containers for Beginners & DIY Storage -Black
Capacity: 8oz =235ml; Dimensions : 3.15" (Diameter) x 2.35" (Height); Each candle tins are made of premium tinplate,...
As an affiliate, we earn on qualifying purchases.
Use a Dry Sponge or Cloth to Remove Loose Soot
After donning the necessary protective gear, we can now proceed to remove loose soot from the ceiling using a dry sponge or cloth. Here’s how to effectively prevent soot stains and remove stubborn soot:
- Start by gently blotting the affected area with the dry sponge or cloth. Avoid rubbing or pushing the soot further into the ceiling.
- Move the sponge or cloth in a circular motion, gradually expanding outward from the center of the stain. This helps to lift the loose soot particles without spreading them.
- If the soot is stubborn and doesn’t come off easily, try using a slightly dampened sponge or cloth. Be careful not to saturate the ceiling, as excessive moisture can cause damage.
Vacuum the Ceiling
Now let’s move on to the next step in removing candle soot from the ceiling: vacuuming.
When it comes to cleaning methods for soot, using a vacuum can be quite effective in removing any remaining residue. Additionally, vacuuming regularly can help prevent soot buildup in the future.
However, it’s important to take safety precautions while cleaning, such as wearing a mask to avoid inhaling any particles.

Cleaning Methods for Soot
To begin the cleaning process, first, we’ll need to gather a vacuum cleaner with a brush attachment. Here are three cleaning techniques to help you remove stubborn soot stains from your ceiling:
- Start by attaching the brush to the vacuum cleaner and ensuring it’s securely in place. This will allow you to effectively loosen and remove the soot from the ceiling surface.
- Begin vacuuming the ceiling in a gentle, circular motion. Make sure to cover the entire area affected by the soot. The brush attachment will help agitate the particles and ensure a thorough cleaning.
- Pay special attention to corners and edges, as soot tends to accumulate in these areas. Use the brush attachment to reach and clean these hard-to-reach spots effectively.
Preventing Soot Buildup
To prevent soot buildup on the ceiling, we regularly vacuum the area using a brush attachment to effectively remove any loose particles.
Vacuuming is an essential step in preventing soot stains and minimizing candle soot accumulation. When vacuuming, make sure to use a brush attachment specifically designed for ceilings to ensure thorough cleaning without causing damage.
Start from one corner of the ceiling and work your way across, using slow and steady motions to capture as much soot as possible. Pay extra attention to areas near candles or where soot is more likely to accumulate.

Safety Precautions While Cleaning
When vacuuming the ceiling, we should take safety precautions into consideration. Here are three important steps to follow to ensure a safe cleaning process:
- Wear appropriate safety equipment: Before starting the cleaning process, make sure to wear safety goggles and a dust mask to protect your eyes and respiratory system from any potential debris or dust particles that may be released during vacuuming.
- Use proper cleaning techniques: When using a vacuum cleaner on the ceiling, ensure that you have a stable and secure ladder or platform to stand on. Move the vacuum cleaner slowly and steadily, using long, sweeping motions to cover the entire ceiling surface. Avoid applying excessive pressure to prevent any damage to the ceiling material.
- Check and maintain the vacuum cleaner: Before starting, ensure that the vacuum cleaner is in good working condition. Check the filters and empty the dust bag or canister to prevent clogs and maintain optimal suction power.
By taking these safety precautions and using the correct cleaning techniques, you can effectively remove candle soot from your ceiling.
Now, let’s move on to the next step: creating a cleaning solution.
Create a Cleaning Solution
We mix a solution of warm water and mild dish soap to create our cleaning solution. This simple mixture is effective in removing candle soot from the ceiling. Warm water helps to loosen the soot particles, while the mild dish soap helps to break down any grease or grime. It’s important to use a mild dish soap to avoid damaging the ceiling surface.

Other alternative cleaning methods, such as vinegar or baking soda, may also be effective, but we find that the warm water and dish soap solution works best. The cleaning solution should be mixed in a bucket or spray bottle, depending on your preference and the size of the affected area.
Now that we have our cleaning solution ready, let’s move on to the next step: testing it on a small area.
Test the Cleaning Solution on a Small Area
Now that we’ve our cleaning solution ready, it’s important to test it on a small area of the ceiling first.
This will allow us to assess its effectiveness in removing the candle soot without causing any damage to the surface.

Solution Effectiveness on Soot
To assess the effectiveness of the cleaning solution on soot, we recommend conducting a small area test. This will help you determine if the solution is suitable for removing the candle soot from your ceiling.
Here are three things to consider when evaluating the solution’s effectiveness:
- Coverage: Apply the cleaning solution to a small area of the ceiling and observe how well it covers the soot. If the solution doesn’t penetrate the soot or fails to remove it completely, it may not be effective for the entire ceiling.
- Time: Monitor the time it takes for the cleaning solution to break down the soot. If it requires excessive scrubbing or an extended soaking period, it mightn’t be the most efficient option.
- Residue: After using the cleaning solution, check for any residue left on the ceiling. If the solution leaves behind a sticky or greasy residue, it may require additional cleaning or leave a noticeable mark.
Potential Damage to Surface
To determine if the cleaning solution may cause potential damage to the surface, it is advisable to conduct a small area test. This will help prevent any unwanted harm to your ceiling while still allowing you to effectively remove the candle soot. Here is a table that outlines the steps for conducting a small area test:
| Step | Action | Result |
|---|---|---|
| 1 | Apply a small amount of the cleaning solution to an inconspicuous area of the ceiling. | Observe for any changes or damage to the surface. |
| 2 | Wait for a few minutes to see if there are any negative reactions. | Note any discoloration, peeling, or other signs of damage. |
| 3 | If there is no damage, proceed with applying the cleaning solution to the rest of the ceiling. | Ensure that the solution is safe to use on the entire surface. |
| 4 | If there is damage, try a different cleaning solution or consult a professional. | Prevent further harm to your ceiling. |
Apply the Cleaning Solution to the Ceiling
We will apply the cleaning solution to the ceiling.

To effectively remove stubborn soot stains, follow these steps:
- Prepare the cleaning solution: Mix warm water with mild dish soap or a specialized cleaning solution for smoke damage. This will help break down the soot particles and make them easier to remove.
- Use a sponge or cloth: Dip the sponge or cloth into the cleaning solution and wring out any excess liquid. It should be damp, but not dripping.
- Apply the solution: Gently and evenly apply the cleaning solution to the soot stains on the ceiling. Work in small sections and make sure to cover the entire stain.
Gently Scrub the Soot Stains
After applying the cleaning solution, we gently scrub the soot stains on the ceiling. To effectively clean the soot stains, it’s important to use the right cleaning techniques.
Start by dampening a soft cloth or sponge with the cleaning solution. Make sure not to saturate the cloth, as excess moisture can damage the ceiling.
Begin scrubbing the stained area in a circular motion, applying gentle pressure. For stubborn stains, you may need to use a soft-bristled brush. Be careful not to scrub too aggressively, as this can cause damage to the ceiling surface.

Continue scrubbing until the stains are completely removed. Remember to rinse the cloth or sponge regularly to avoid spreading the soot around.
Rinse the Ceiling With Clean Water
Once the soot stains have been gently scrubbed from the ceiling, it’s important to thoroughly rinse the area with clean water. This step is crucial for removing any remaining residue and ensuring a clean surface. Here are three cleaning techniques to help you effectively rinse your ceiling and remove stubborn stains:
- Fill a bucket with clean water: Start by preparing a bucket filled with clean water. Make sure the water is at a comfortable temperature to work with.
- Use a sponge or cloth: Dip a sponge or cloth into the water and wring out any excess. Gently wipe the ceiling, moving in circular motions to cover the entire area.
- Change the water as needed: As the water becomes dirty, replace it with fresh, clean water. This will prevent any dirt or soot from being redeposited onto the ceiling.
By following these cleaning techniques, you can ensure that your ceiling is thoroughly rinsed and free from any remaining soot stains.
Next, we’ll discuss how to dry the ceiling to complete the cleaning process.

Dry the Ceiling
To ensure a thorough cleaning, it’s important to dry the ceiling completely after rinsing away the soot stains. Drying the ceiling helps prevent any moisture-related issues, such as mold or mildew growth.
After rinsing, use a clean, dry cloth or towel to gently pat the ceiling dry. Make sure to cover the entire surface area, paying extra attention to any remaining damp spots.
If needed, you can also use a fan or open windows to aid in the drying process. Alternatively, you can use a hairdryer on a low heat setting to speed up drying.
Once the ceiling is completely dry, you can proceed to the next step of inspecting and touching up if necessary.

Inspect and Touch up if Necessary
To ensure a thorough cleaning, we carefully examine the ceiling for any remaining soot stains and address them accordingly. Here’s what you need to do to inspect and touch up if necessary:
- Use a bright flashlight to inspect the entire ceiling surface. Look for any areas where the soot may have been missed or where there’s potential damage to the surface.
- If you find any remaining soot stains, use a damp cloth or sponge to gently wipe the area. Be careful not to apply too much pressure, as this could cause further damage to the surface.
- For more stubborn stains, you may need to use a mild detergent or cleaning solution. Apply the solution to a clean cloth and gently dab at the stain until it’s removed.
Frequently Asked Questions
How Long Does It Usually Take to Remove Candle Soot From a Ceiling?
On average, it usually takes some time to remove candle soot from a ceiling. However, using effective methods like gentle wiping with a microfiber cloth or vacuuming can speed up the process.
Can I Use a Regular Household Cleaner Instead of Creating a Cleaning Solution?
Regular household cleaners can effectively remove candle soot from ceilings, but there are potential risks. It’s important to consider the type of cleaner and its ingredients to avoid any damage to the ceiling surface.
Is It Necessary to Wear Protective Gear While Removing Candle Soot From the Ceiling?
Yes, wearing protective gear is necessary when removing candle soot from the ceiling. It helps to minimize health risks associated with inhaling or coming into contact with the soot, ensuring our safety.

What Should I Do if the Cleaning Solution Damages the Paint on the Ceiling?
If the cleaning solution damages the paint on the ceiling, we should act quickly to prevent further damage. One alternative is to try a milder cleaning agent, or consider repainting the ceiling if necessary.
Are There Any Specific Types of Sponges or Cloths That Work Best for Removing Candle Soot?
For removing candle soot from the ceiling, it’s best to use a soft sponge or cloth. Avoid abrasive materials that could damage the paint. Additionally, there are alternative cleaning methods and specialized cleaning products available for this task.
Conclusion
So there you have it! Removing candle soot from your ceiling is a simple and straightforward process.
Did you know that candles are responsible for 10% of all house fires? By regularly cleaning your ceiling from soot buildup, you can help reduce the risk of fire and keep your home safe.

Remember to gather your supplies, prepare the area, and follow the steps we’ve outlined for a clean and soot-free ceiling.
Stay safe and happy cleaning!