“Why go through the trouble of melting wax to create candles when I can simply purchase pre-made ones?”
Well, let me tell you, there’s something incredibly satisfying about creating your own candles from scratch. Not only do you have the freedom to choose your own fragrance and color, but you also get to experience the joy of crafting something with your own hands.
In this article, I’m going to walk you through the process of melting wax for candle making. Trust me, it’s easier than you might think. We’ll start by gathering all the necessary materials and equipment, including the right type of wax for your candles.
Then, I’ll show you how to prepare your workspace for safe and efficient melting. We’ll explore different methods, like the double boiler technique or using a wax melting pot, to ensure even heating. And of course, I’ll share tips on adding fragrance and color to your melted wax.
So, if you’re ready to embark on a candle making journey, let’s dive in and learn how to melt wax like a pro!
Key Takeaways
- The double boiler method is the preferred method for melting wax for candle making.
- Different types of wax have different melting points, with soy wax being a popular choice.
- Proper workspace preparation and safety precautions are important when melting wax.
- Adding fragrance and color to melted wax is crucial, using essential oils and natural dyes.

Yankee Candle Pink Sands Scented Candle, 22oz Large Jar with up to 150 Hour Burn Time, Giftable, Birthdays
Pink Sands: Pink Sands is the exotic island escape you've always dreamed of. Juicy melon scents are softened...
As an affiliate, we earn on qualifying purchases.
Gather the Necessary Materials and Equipment
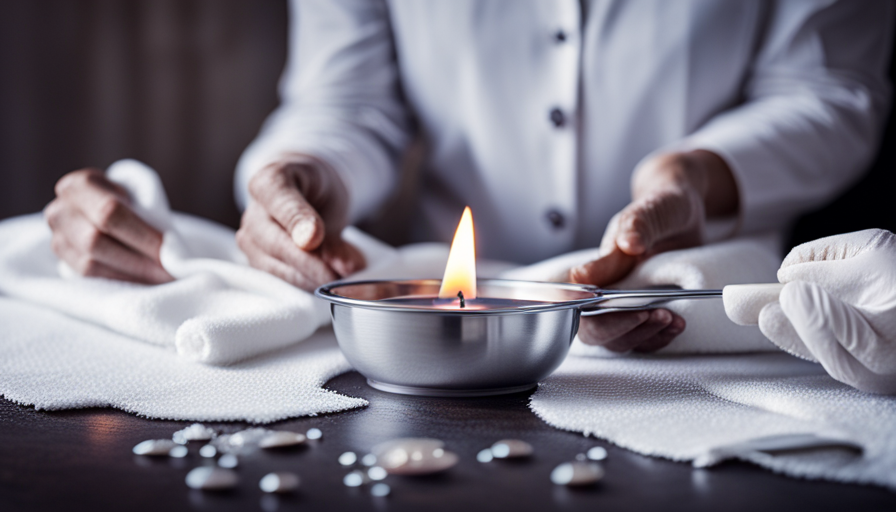
Now that you’ve got all your materials and equipment ready, it’s time to dive into the exciting world of candle making! The first step in creating beautiful candles is melting wax safely. It’s crucial to ensure that you have a proper ventilation system in place when melting wax. This will help to prevent any potential hazards and ensure a safe working environment.
To melt wax, you’ll need a double boiler or a dedicated wax melter. A double boiler is the preferred method as it provides gentle, indirect heat. Simply fill the bottom pot with water and place the wax in the top pot. Heat the water on low to medium heat, and the wax will slowly melt without the risk of overheating or burning.
It’s important to note that different types of wax have different melting points. So, it’s essential to choose the right type of wax for your candles. This will ensure that your candles burn evenly and have a smooth finish.
In the next section, we’ll explore the various types of wax available and help you select the perfect one for your candle making journey.
Now that you know how to melt wax safely and have an understanding of the importance of proper ventilation, let’s move on to choosing the right type of wax for your candles.
Chesapeake Bay Candle Scented Candle Serenity + Calm (Lavender Thyme) Coffee Table Home Décor
Tranquil notes of exotic jasmine, delicate cashmere woods, white musk, and sandalwood create a soft and peaceful escape
As an affiliate, we earn on qualifying purchases.
Choose the Right Type of Wax for Your Candles
To create the perfect candles, you’ll want to make sure you select the ideal type of wax for your project. Did you know that soy wax has become increasingly popular in candle making, accounting for over 50% of the market share? Soy wax is just one of the many different types of waxes available for candle making. It is derived from soybean oil and is considered a natural wax. Other popular options include beeswax, palm wax, and coconut wax. Each type of wax has its own unique characteristics and benefits, so it’s important to choose the right one for your specific needs.
Using natural waxes in your candles offers several advantages. First, they are eco-friendly and biodegradable, making them a great choice for those who prioritize sustainability. Natural waxes also tend to burn cleaner and produce less soot compared to synthetic waxes. Additionally, they have a lower melting point, which means they can release fragrance more easily and provide a longer burn time.
Now that you understand the different types of waxes for candle making and the benefits of using natural waxes, let’s move on to preparing your workspace for melting wax.

Yankee Candle Lemon Lavender Scented Candle, 22oz Large Jar with up to 150 Hour Burn Time, Giftable, Birthdays
Lemon Lavender: The uplifting, zesty scent of lemon combines with soothing lavender aromas to create Lemon Lavender —...
As an affiliate, we earn on qualifying purchases.
Prepare Your Workspace for Melting Wax
Before you dive into the process of melting wax, it’s crucial to set up your workspace properly. Workspace organization is key to ensure a smooth and efficient candle-making experience.
Start by clearing any clutter from your work area, providing ample space for your materials and tools. Arrange your equipment, such as the wax melting pot, thermometer, and stirring utensils, within easy reach. This will save you time and prevent accidents caused by reaching over hot surfaces.
Safety precautions are of utmost importance when working with hot wax. Always wear protective gear, such as heat-resistant gloves and safety goggles, to shield yourself from potential burns or splatters. Additionally, place a fire extinguisher nearby and keep a clean, dry cloth handy for any spills. It’s also crucial to work in a well-ventilated area to prevent the buildup of fumes.
By organizing your workspace and taking necessary safety measures, you can ensure a smooth and hazard-free wax melting process. Once your workspace is ready, it’s time to move on to the next step: using a double boiler method for safe and even heating.

100pcs ECO 2 Wicks for Soy Candles, 6 inch Pre-Waxed Candle Wick for Candle Making,Thick Candle Wick with Base
Product: Metal base pre-waxed, 100 pieces/6" long, 1.5mm thick. Suitable for extra small candle jars or 3XL (3.8-4.5in)
As an affiliate, we earn on qualifying purchases.
Use a Double Boiler Method for Safe and Even Heating
Once you’ve got your workspace organized, it’s time to show off your mad scientist skills and safely heat your ingredients using the double boiler method. This method is perfect for melting wax because it provides a gentle and even heat, preventing any hot spots or scorching.
To set up your double boiler, you’ll need a large pot filled halfway with water and a smaller heat-resistant container that fits snugly on top. This creates a barrier between the heat source and the wax, ensuring that it heats up slowly and evenly.
Using the double boiler method has several advantages. First, it eliminates the risk of direct heat, which can be dangerous when working with flammable materials like wax. Second, it allows for precise temperature control, preventing the wax from overheating and potentially catching fire.
If you don’t have a double boiler, there are some alternatives you can try. One option is to use a heat-resistant glass or metal bowl placed on top of a pot of simmering water. Another option is to use a slow cooker on the lowest setting, although you’ll need to monitor the temperature closely.
Now that you know how to safely melt wax using the double boiler method, you may also want to consider using a wax melting pot or an electric wax melter for added convenience and efficiency. These tools provide a controlled and consistent heat source, making the candle-making process even easier.
Consider Using a Wax Melting Pot or Electric Wax Melter
Are you looking for a convenient and efficient way to heat your ingredients without the hassle of a double boiler? Consider using a wax melting pot or an electric wax melter. These tools are specifically designed for melting wax and offer several benefits over traditional methods.
Wax melting pots are specially designed containers that provide a controlled and even heat source for melting wax. They often come with adjustable temperature settings, allowing you to precisely heat your wax to the desired temperature. This is especially important for candle making, as different types of wax require different melting temperatures. Additionally, wax melting pots typically have a spout or pouring feature, making it easy to pour the melted wax into your candle molds or containers.
Using a wax melting pot offers several advantages. First, it eliminates the need for a double boiler setup, saving you time and effort. Second, it provides a safe and controlled heating environment, reducing the risk of accidents or burns. Finally, it ensures that your wax melts evenly and consistently, resulting in better quality candles.
Now, let’s transition into the subsequent section about using a microwave for quick and convenient wax melting.
Use a Microwave for Quick and Convenient Wax Melting
Looking for a fast and easy way to heat your ingredients? Look no further than using a microwave for quick and convenient wax melting. The microwave is a great alternative to traditional wax melting methods, as it provides a quick and efficient way to melt your wax without the need for a wax melting pot or electric wax melter.
However, it’s important to keep in mind some safety precautions when using a microwave for wax melting. Firstly, it’s essential to use a microwave-safe container to melt your wax. Glass or microwave-safe plastic containers are ideal for this purpose. Avoid using metal containers as they can cause sparks and damage the microwave.
Additionally, it’s crucial to heat the wax in short intervals to prevent overheating. Start by melting the wax for 30-second intervals, stirring in between each interval. This will help ensure even heating and prevent the wax from becoming too hot.
Once your wax is melted, you can transition into the subsequent section about adding fragrance and color to your melted wax.
Add Fragrance and Color to Your Melted Wax
Enhance the sensory experience of your homemade candles by infusing your melted wax with delightful fragrances and vibrant colors. Adding fragrance and color to your melted wax is a simple yet crucial step in candle making. To create scented candles, you can use essential oils that not only provide a pleasant aroma but also offer therapeutic benefits.
Popular choices include lavender for relaxation, citrus for an uplifting ambiance, and vanilla for a comforting scent. Remember to use high-quality essential oils and add them in the correct proportions to avoid overpowering or weak fragrances.
When it comes to coloring your melted wax, natural dyes are the way to go. They not only add vibrant hues but also ensure a safer and healthier candle. Natural dyes can be derived from plants, fruits, or even insects.
For example, beetroot powder can give a beautiful red color, turmeric can create a warm yellow, and alkanet root can produce a soothing purple. Experiment with different natural dyes to achieve the desired shade for your candles.
Now that you have infused your melted wax with captivating fragrances and stunning colors, it’s time to move on to the next step of the candle making process. Stirring and monitoring the temperature of the melted wax is crucial to ensure a smooth and even distribution of fragrance and color.
Stir and Monitor the Temperature of the Melted Wax
Once your melted wax is infused with fragrance and color, it’s time to give it a good stir and carefully monitor its temperature to ensure a flawless result. The monitoring techniques and importance of temperature control can’t be overstated when it comes to candle making. A slight variation in temperature can make a significant difference in the quality and appearance of your final product.
To start, grab a clean, heat-resistant stirring utensil and gently stir the melted wax in a circular motion. This’ll help distribute the fragrance and color evenly throughout the wax. Be sure to scrape the sides and bottom of the container to prevent any clumps or uneven distribution.
While stirring, it’s crucial to monitor the temperature of the wax using a thermometer specifically designed for candle making. Different types of wax have different melting and pouring temperatures, so it’s important to follow the guidelines provided by the wax manufacturer. Keeping a close eye on the temperature will prevent the wax from overheating or cooling too quickly, which can result in cracks, sinkholes, or uneven burning.
With the melted wax thoroughly stirred and the temperature under control, you’re now ready to pour it into your chosen candle containers or molds. Carefully transition to the next step and ensure a smooth pouring process for your candles.
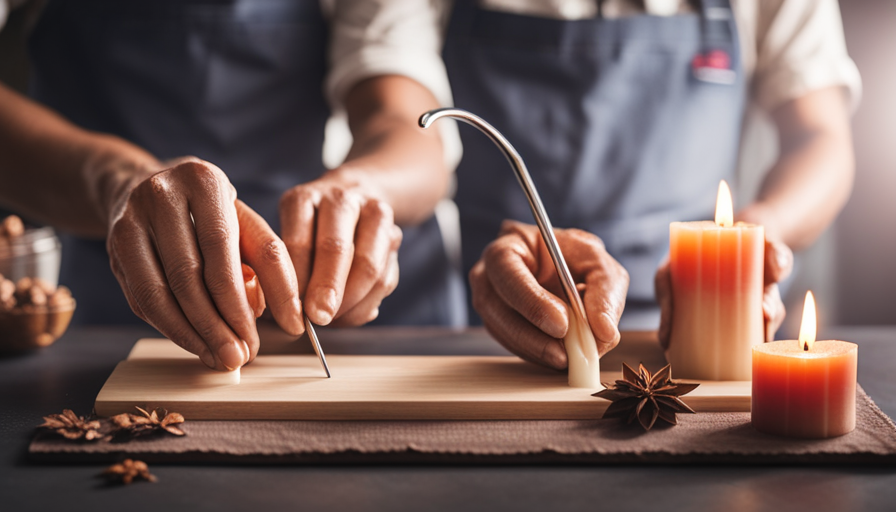
Pour the Melted Wax Into Candle Containers or Molds
After carefully stirring and monitoring the temperature of the melted wax, it’s time to move on to the exciting part of candle making: pouring the wax into the containers or molds.
This step requires precision and attention to detail to ensure that your candles turn out beautifully.
When it comes to pouring the melted wax, there are a few different techniques you can try. One popular method is to slowly and steadily pour the wax into the containers, starting from the center and working your way outwards. This helps to prevent air bubbles from forming and ensures an even distribution of the wax.
Another technique is called the double pour method, where you pour a small amount of wax into the container, let it cool slightly, and then pour the remaining wax on top. This can create a layered effect and add visual interest to your candles.
As you pour the wax, be mindful of any common issues that may arise. For example, if you notice that the wax starts to solidify too quickly, you can use a heat gun or a hairdryer to gently warm the surface and smooth out any imperfections. Additionally, if you accidentally spill wax or create a mess, it’s best to clean it up immediately before it hardens and becomes difficult to remove.
Now that the melted wax has been poured into the containers or molds, it’s time to allow the candles to cool and set before use. This step is crucial in ensuring that your candles solidify properly and maintain their shape.
Allow the Candles to Cool and Set Before Use
Now that you’ve poured the melted wax into your containers or molds, it’s time to kick back and let the candles cool and set before you can start enjoying their gentle glow. But before you do, it’s important to keep some candle safety precautions in mind. Make sure to place your candles on a heat-resistant surface and away from any flammable materials. Never leave a burning candle unattended and keep them out of the reach of children and pets. It’s also a good idea to trim the wick to about 1/4 inch before lighting the candle, as this helps prevent the flame from getting too high.
As the candles cool and solidify, it’s possible to encounter some common candle cooling issues. One common issue is sinkholes, which are small depressions that form in the center of the candle as it cools. To prevent sinkholes, you can pour the wax at a slightly higher temperature or use a heat gun to carefully heat the surface of the candle and fill in any depressions. Another issue is cracking, which can occur when the wax cools too quickly. To avoid cracking, ensure that the candles cool at room temperature and avoid placing them in a drafty area.
By following these candle safety precautions and troubleshooting any common cooling issues, you’ll be able to enjoy your homemade candles in no time. So sit back, relax, and let the candles cool and set before you bask in their beautiful glow.
Frequently Asked Questions
How long does it take for the melted wax to cool and set before it can be used?
The cooling time and wax setting time can vary depending on various factors, such as the type of wax used and the temperature of the surrounding environment. Typically, it takes around 1-2 hours for the melted wax to cool and set completely. However, it’s important to note that larger candle molds or containers may require additional time for the wax to cool and solidify properly. It’s crucial to allow sufficient time for the wax to set before using the candle to ensure a clean and even burn.
Can I use any type of fragrance or color in my melted wax?
Yes, you can use a wide variety of fragrance options and color choices in your melted wax. You can choose from essential oils, fragrance oils, or even create your own unique scent blends. For color, you can use liquid or powdered dyes specifically made for candle making. It’s important to follow the recommended usage rates for both fragrance and color to ensure a successful and well-balanced candle.
Is it safe to use a microwave for melting wax?
Using a microwave to melt wax may seem convenient, but it’s important to prioritize safety.
Did you know that according to a study by the National Fire Protection Association, microwave-related fires account for an estimated 1,440 home fires each year?
To ensure safety, always follow microwave safety precautions such as using a microwave-safe container and never leaving the wax unattended.
Alternatively, you can use a double boiler or a wax melter specifically designed for candle making.
Can I reuse the leftover melted wax from my candles?
Yes, you can definitely reuse the leftover melted wax from your candles. There are several alternative uses for melted wax that you can explore. For example, you can create new candles by pouring the melted wax into new molds or containers.
Additionally, you can use the wax to make wax melts or wax sachets for a lovely fragrance around your home. The possibilities are endless when it comes to repurposing your leftover wax.
What is the best type of container or mold to use for pouring the melted wax into?
When it comes to choosing the best type of container for pouring melted wax, it’s important to consider both glass and metal options. A fascinating statistic to keep in mind is that glass containers are preferred by 70% of candle makers due to their heat resistance and ability to retain fragrance.
Glass provides a clear view of the wax and allows for easy monitoring of the candle’s progress. However, metal containers are also popular for their durability and heat conductivity, ensuring an even burn.
Ultimately, the choice between glass and metal depends on personal preference and the desired aesthetic for your candles.
Conclusion
In conclusion, melting wax for candle making is a fun and rewarding process. By gathering the necessary materials and equipment, choosing the right type of wax, and preparing your workspace, you can ensure a safe and successful melting experience.
Whether you opt for the double boiler method or a wax melting pot, it’s important to stir and monitor the temperature of the melted wax for optimal results. Adding fragrance and color allows for personalization, and pouring the wax into containers or molds creates beautiful candles.
Finally, allowing the candles to cool and set before use ensures a long-lasting and enjoyable burning experience. So go ahead and embrace your creative side, and start melting wax for your own handmade candles today!