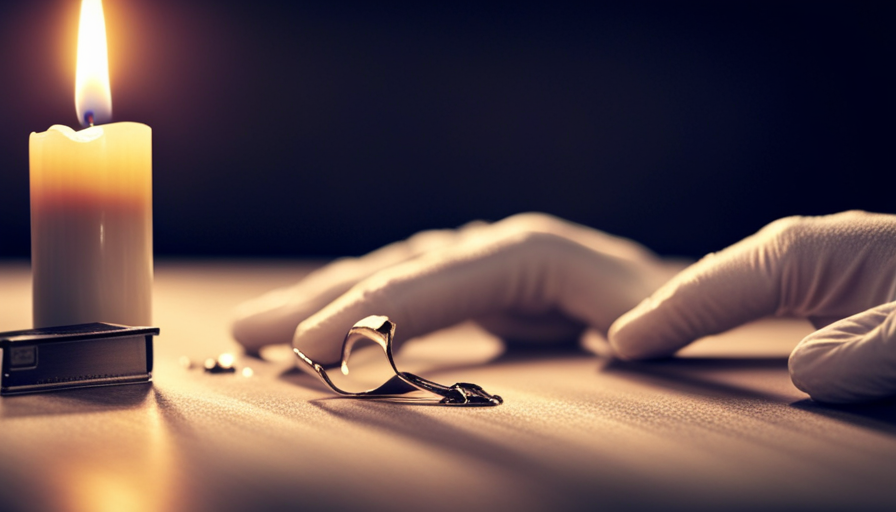

Hello, wax enthusiasts! Have you ever wanted to start making candles but realized you don’t have a fancy wax melter? Don’t worry! In this tutorial, I will show you how to melt your candle wax using a simple stove in your home. This age-old method, passed down through generations, is still just as effective today.
In this step-by-step guide, I’ll walk you through the process of melting candle wax on your stove using a double boiler technique. We’ll break down the necessary supplies, set up the perfect work area, and carefully monitor the melting process.
But hold on tight because safety is key here. We’ll also cover some important clean-up tips and safety precautions to ensure a smooth and accident-free experience.
So grab your apron and let’s get started on this journey of transforming solid blocks of wax into beautiful handcrafted candles!
Key Takeaways
- Use a double boiler technique to melt candle wax on the stove for precise temperature control and even heat distribution.
- Prioritize safety by wearing heat-resistant gloves and safety goggles, selecting a sturdy and heat-resistant surface, and ensuring proper ventilation.
- Break wax into smaller pieces before melting, either by using a sharp knife, freezing and tapping with a hammer, or heating and snapping off with hands.
- When pouring the melted wax into a container, do so slowly and steadily to avoid spills, consider adding colorants or fragrances, and be cautious of hot surfaces and steam to prevent burns and accidents.
Gather the Necessary Supplies
First, gather all the supplies you’ll need to melt candle wax on the stove. Ensuring workplace safety is crucial, so start by putting on a pair of heat-resistant gloves and safety goggles. These will protect your hands and eyes from potential burns or splatters.
Additionally, find a stainless steel or heat-resistant glass container that can withstand high temperatures. Using a double boiler setup is recommended to prevent direct contact between the flame and the wax, reducing the risk of fire hazards.
Next, consider alternative melting methods if you don’t have access to a double boiler. One option is using a metal can or tin filled with water as an improvised double boiler. Simply place the wax in another container inside the can and let it melt as the water heats up on the stove. Alternatively, you can use a microwave-safe container and melt small amounts of wax in short intervals in the microwave.
Once you have gathered all these supplies for melting candle wax, it’s time to prepare your work area for safe handling and easy cleanup without any spills or accidents occurring during this process.
Prepare Your Work Area
To get started, make sure your work area is properly set up for the fiery transformation that awaits. Begin by selecting a sturdy work surface, such as a heat-resistant countertop or table. Avoid using surfaces that can easily be damaged or catch fire, such as wooden tables or flammable materials.
Next, lay down a protective covering on your chosen work surface to prevent any wax spills or stains. This can be achieved by using newspaper, old towels, or even a silicone mat specifically designed for crafting.
Additionally, it’s crucial to take adequate safety measures before melting candle wax on the stove. Wear heat-resistant gloves to protect your hands from potential burns and use safety goggles to shield your eyes from splattering wax. Keep in mind that melting wax produces fumes, so ensure proper ventilation in your workspace by opening windows or turning on an exhaust fan.
Now that your work area is prepared and you’ve taken necessary safety precautions, you’re ready to break the wax into smaller pieces for easier melting.
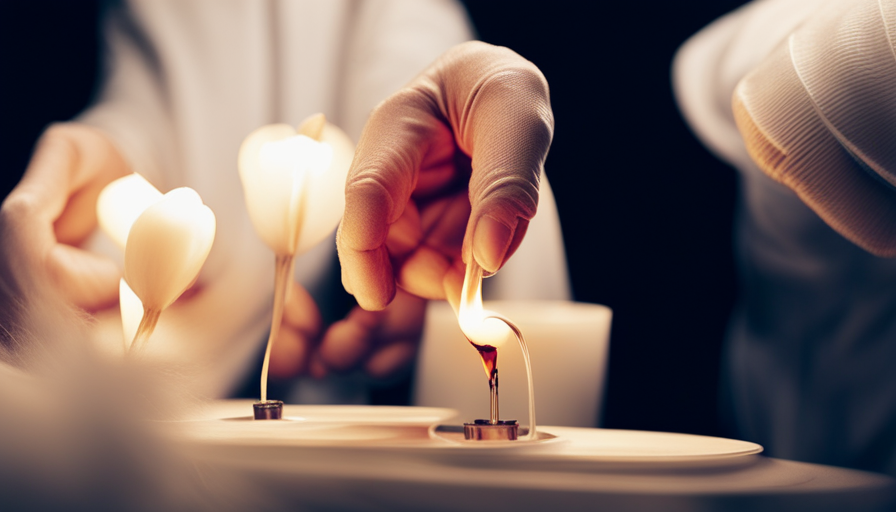
Break the Wax into Smaller Pieces
Get ready to unleash your inner artist by breaking the wax into smaller, more manageable pieces. This step is essential to ensure even melting and a smooth consistency for your candle making project. To break the wax, you can use various techniques depending on your preferences and available tools.
One common method is to place the wax block on a clean cutting board or surface. Then, using a sharp knife or a candle cutter, carefully cut the wax into smaller chunks. Aim for pieces that are roughly the same size to promote uniform melting.
Another technique is freezing the wax before breaking it. Simply wrap the wax block in plastic wrap and place it in the freezer for about 30 minutes. Once frozen, remove it from the freezer and tap it gently with a hammer or mallet to break it into smaller fragments.
If you don’t have access to a knife or prefer not to freeze the wax, an alternative method involves using heat. Hold one end of the wax block over a heat source like a stove flame or hairdryer until it becomes pliable. Then, bend and snap off small sections with your hands.
Now that you have broken down the wax into manageable pieces, let’s move on to setting up the double boiler for melting them smoothly without direct heat exposure.
Set Up the Double Boiler
Now it’s time to prepare your double boiler for effortlessly melting the wax, ensuring a smooth and professional result without any direct exposure to heat. If you don’t have a double boiler, there are alternatives you can use.
One option is to create a makeshift double boiler by placing a heat-resistant bowl on top of a pot filled with water. Another alternative is melting the candle wax in the microwave. However, using a double boiler is recommended as it provides more controlled and even heating.
To set up your double boiler, follow these steps:
-
Fill the bottom pot of your double boiler with water, making sure not to fill it past two-thirds full.
-
Place the top pot or bowl securely on top of the bottom pot.
-
Ensure that the bottom of the top pot or bowl does not touch the water in the bottom pot.
-
Turn on your stove and adjust it to low or medium-low heat.
By using a double boiler or one of its alternatives, you can safely melt candle wax without risking overheating or burning it. Once your setup is ready, we can move on to heating the water in order to start melting the wax effectively and efficiently while maintaining optimal temperature control for excellent results.
Heat the Water
Start by filling the bottom pot of your double boiler with water, ensuring it’s not filled past two-thirds full. This will provide a steady source of indirect heat to melt the candle wax without risking direct contact with an open flame. Using a double boiler is essential because it creates a gentle and controlled heating environment, preventing the wax from burning or overheating.
When heating the water in the bottom pot, it is important to take some precautions for using a double boiler. Make sure that the top pot fits securely on top of the bottom one and ensure there are no gaps between them. This will prevent steam from escaping and maintain consistent heat distribution. Additionally, always monitor the water level during melting to avoid running out and potentially damaging your pots.
Melting candle wax on a stove offers several benefits over alternative methods. Firstly, it allows for precise temperature control, ensuring that the wax reaches its melting point without exceeding it. Secondly, using a stove enables efficient melting as it evenly distributes heat across all sides of the container.
To add the melted wax to your desired container, carefully pour it while avoiding any spills or drips. With caution taken during each step of this process, you can now move onto adding the wax to your container and continuing with your candle-making journey seamlessly.
Add the Wax to the Container
Once the liquid gold has transformed into a shimmering pool of molten goodness, delicately pour it into your chosen vessel, like pouring warm honey into a glass jar. To ensure a smooth and controlled pour, it’s important to master proper pouring techniques. Start by holding the container at an angle and slowly pour the wax in a steady stream. Avoid splashing or spilling as this can lead to uneven distribution and potential burns.
As you pour, be mindful of any additives you may want to incorporate, such as colorants or fragrances. Adding these extras can enhance the aesthetic appeal and aroma of your candle.
When adding color to your melted wax, remember that a little goes a long way. Begin by adding small amounts of colorant and stir well before evaluating if more is needed. This gradual approach allows for precise control over the final hue. Keep in mind that certain colors may require more pigment than others to achieve desired results.
As we move forward into the next step of monitoring the wax temperature, it’s crucial to maintain vigilance over its consistency and heat levels without compromising safety precautions.
Monitor the Wax
As I’m melting the wax on the stove, I make sure to keep a close watch on it. This is important because if the wax gets too hot, it can stick to the bottom of the container or even burn.
To prevent this, I stir the wax occasionally to ensure that it melts evenly and doesn’t clump together. Additionally, I adjust the heat as needed to maintain a steady and controlled temperature throughout the melting process.
Keep an eye on the wax as it melts
Make sure to keep a close eye on the wax as it melts, so you don’t miss the mesmerizing transformation. It’s crucial to maintain a consistent temperature throughout the melting process. Sudden spikes in temperature can cause the wax to overheat, resulting in an uneven melt or even potential hazards.
To prevent this, monitor the heat source closely and adjust it accordingly to maintain a steady temperature. Additionally, preventing the wax from overheating also helps preserve its quality and fragrance.
As you keep an eye on the melting wax, remember to stir occasionally to prevent sticking or burning. This will ensure that the wax melts evenly and smoothly without any unwanted residue or scorching.
Now let’s move on to stirring techniques for optimal results without compromising safety or efficiency.
Stir occasionally to prevent sticking or burning
Remember to occasionally give the mixture a gentle swirl to ensure that it doesn’t adhere to the sides or scorch, allowing for a seamless and worry-free melting process.
As the candle wax begins to liquefy on the stove, it’s crucial to stir it intermittently. This will prevent any potential sticking or burning of the wax, ensuring a smooth and consistent melt. By stirring every few minutes, you can also prevent any wax spills by keeping an eye on its movement and redistributing it if necessary.
Additionally, maintaining the right temperature is essential for achieving optimal results. Stirring helps in evenly dispersing heat throughout the wax, preventing hotspots that could lead to overheating or burning.
As we progress further into this process, let’s now move on to adjusting the heat as needed for perfect candle wax melting.
Adjust the heat as needed
To achieve the perfect consistency, simply adjust the heat as necessary while melting your candle wax on the stove. The temperature at which you melt the wax plays a crucial role in achieving the desired melting consistency.
Start by setting your stove to medium heat and allow the wax to gradually melt. If you notice that the wax is melting too quickly or becoming too hot, reduce the heat to low. On the other hand, if it’s taking too long for the wax to melt or if it’s not reaching a smooth liquid state, increase the heat slightly.
Adjusting the temperature ensures that your candle wax melts evenly and smoothly without any lumps or clumps. Once you have achieved a consistent melted state, it’s time to move on to removing it from heat for further processing.
Remove from Heat
Once the wax is completely melted, I turn off the stove to ensure it doesn’t continue heating.
Using oven mitts or pot holders, I carefully handle the container as it’ll be extremely hot.
It’s important to be cautious of both hot surfaces and steam to avoid any burns or accidents.
Once the wax is completely melted, turn off the stove
As the wax transforms into a shimmering pool of liquid gold, the stove can be switched off. But keep the container on the hot burner for a few minutes to ensure all the wax is fully melted. To emphasize this point, refer to the three column and three row table below:
| Step | Action | Purpose |
|---|---|---|
| 1 | Turn off the stove | Stop heating process |
| 2 | Keep container on hot burner for a few mins | Allow complete melting of remaining wax in container |
| 3 | Carefully remove it from the heat | Avoid accidents and burns while handling hot wax container |
Once all of the wax has melted and you have turned off the stove, it is important to use oven mitts or pot holders to handle the container safely. This ensures that you protect yourself from potential burns while handling the hot wax.
Use oven mitts or pot holders to handle the container
Using oven mitts or pot holders is crucial for safely handling the container and preventing potential burns. When the wax is completely melted, it’ll be extremely hot and can cause severe burns if not handled properly. To avoid accidents, always wear protective gear like oven mitts or pot holders before attempting to move or pour the melted wax.
These accessories provide a barrier between your skin and the scalding hot container, ensuring your safety. Additionally, they offer a firm grip on the slippery surface of the container, minimizing the risk of dropping it and causing spills or splatters that could result in injuries or damage to surrounding surfaces.
Therefore, make sure to prioritize using oven mitts or pot holders when handling hot containers to prevent wax spills and potential burns.
Be cautious of hot surfaces and steam as you transition into the subsequent section about being safe around them.
Be cautious of hot surfaces and steam
Be careful around surfaces that are hot and steamy, as they can cause burns if touched directly. When melting candle wax on the stove, it’s crucial to prioritize hot surface safety and be cautious of potential steam hazards.
Always use oven mitts or pot holders when handling the container to avoid direct contact with the hot surface. Additionally, keep a safe distance from any steam that may be produced during the melting process. Steam can cause severe burns if it comes into contact with your skin.
To prevent accidents, ensure that there’s proper ventilation in the room to minimize the build-up of steam. Taking these precautions will help protect you from potential injuries caused by hot surfaces and steam hazards.
Now let’s move on to pouring or molding the melted wax into desired shapes without delay.
Pour or Mold the Wax
To achieve a smooth and glossy finish, it’s time to pour or mold the melted wax onto your desired surface. Pouring techniques play a crucial role in achieving the desired results. When pouring the wax, make sure to do it slowly and evenly to avoid any air bubbles or uneven surfaces. If you are using a container, such as a candle jar, ensure that it is clean and dry before pouring the wax into it.
To help you visualize different pouring techniques and common troubleshooting issues, refer to the table below:
| Pouring Technique | Description |
|---|---|
| Single Pour | This technique involves pouring all the melted wax in one go, creating a smooth surface with minimal seams or lines. |
| Layered Pour | By pouring multiple layers of melted wax at different stages of cooling, this technique creates unique patterns and textures in candles. |
| Funnel Pour | Using a funnel allows for precise pouring into narrow openings or molds with intricate designs. |
Remember to always prioritize safety when working with hot wax. Once you have poured or molded the wax onto your desired surface, proceed to the next section about clean up and safety precautions.
Mastering various pouring techniques will help you achieve professional-looking candles without any common issues such as air bubbles or uneven surfaces. Now let’s move on to cleaning up and ensuring safety during this process without compromising your finished product’s quality.
Clean Up and Safety Precautions
After pouring or molding the wax, it’s important to prioritize safety by cleaning up any spills and ensuring a safe environment for yourself and others. To prevent accidents and maintain a clean workspace, follow these steps:
-
Cleaning wax spills: Immediately wipe up any wax spills using a clean cloth or paper towel. If the spill has hardened, gently scrape it off with a plastic scraper. Avoid using sharp objects that could damage the surface.
-
Proper storage of melted wax: Once you’ve finished melting the candle wax, allow it to cool and solidify completely before storing it. Pour any excess melted wax into a heat-resistant container for future use. Make sure to label the container with the type of wax and date.
-
Safety precautions: Always wear protective gloves when handling hot melted wax to avoid burns. Keep flammable materials away from the stove area to reduce fire hazards. Don’t leave the stove unattended while melting wax, as overheating can cause fires.
By following these safety measures, you can prevent accidents and create a clean working environment when melting candle wax on your stove.
Frequently Asked Questions
How long does it take to melt candle wax on the stove?
It typically takes around 10-15 minutes to melt candle wax on the stove, depending on the amount and type of wax. The melting temperature for most candle waxes ranges between 120°F and 180°F. To achieve this temperature, it’s important to use a double boiler or a heat-resistant container placed directly on low heat. Stirring the wax occasionally can help facilitate faster melting and ensure even heat distribution.
Can I use a regular pot instead of a double boiler?
Yes, a regular pot can be used instead of a double boiler for melting wax. However, it’s important to exercise caution as the direct heat from the stove can cause the wax to overheat and potentially ignite. To prevent this, it’s recommended to use low heat and frequently stir the wax until it melts completely. Additionally, using a thermometer can help monitor and maintain a safe temperature throughout the melting process.
What is the best type of wax to use for melting on the stove?
The best type of wax to use for melting on the stove is soy wax. It has a low melting point, typically around 120-150°F, which makes it ideal for stove-top melting. Soy wax also has a clean burn, produces minimal soot and smoke, and has a longer burning time. Additionally, it’s eco-friendly and made from renewable resources.
When using soy wax for melting on the stove, make sure you’re using a double boiler or a heat-safe container to prevent any accidents or damage.
How do I remove any leftover wax residue from the stove?
To remove any leftover wax residue from the stove, start by scraping off as much hardened wax as possible using a plastic scraper. Then, dampen a cloth with hot water and gently scrub the affected area to soften the remaining wax.
Use a mixture of dish soap and warm water to further clean the surface, making sure to rinse thoroughly. For stubborn residue, you can use a commercial degreaser or rubbing alcohol.
Finally, dry the stove completely before using it again.
Are there any safety precautions I should take when melting candle wax on the stove?
When it comes to melting candle wax on the stove, it’s important to prioritize safety measures. Just like navigating a treacherous path, you must tread carefully to avoid potential dangers. To ensure a secure process, always use a double boiler or a heat-resistant container for melting the wax. Avoid direct contact with flames and keep an eye on the temperature, as overheating can lead to hazardous situations. Taking these precautions will help prevent any mishaps while enjoying your candle-making journey.
Conclusion
In conclusion, melting candle wax on a stove can be a simple and efficient process with the right supplies and precautions. By following the steps outlined in this article, you can safely melt your candle wax and create beautiful candles.
One possible objection to this method is the potential risk of fire. However, by using a double boiler setup and closely monitoring the heat, you can minimize this risk and ensure a successful melting process. Remember to always prioritize safety when working with heat and flames.