
Are you interested in transforming ordinary candle wax into beautiful, fragrant candles? Get ready to be amazed, as I am about to reveal the secrets of melting candle wax!
Picture this: a cozy room filled with the soft glow and comforting scent of your favorite candles. Imagine being able to create these magical moments yourself. It’s easier than you think!
In this informative guide, I’ll take you through each step of the process, from gathering your supplies to enjoying your finished candles. We’ll explore different melting methods and learn how to prepare the wax for melting. Once melted, we’ll pour it into containers and let it cool and set. And don’t worry – I’ll even show you how to trim those wicks for a perfect burn every time.
So grab your apron and let’s dive into the art of melting candle wax together!
Key Takeaways
- It is important to familiarize yourself with candle making techniques and safety precautions before melting candle wax.
- The necessary supplies for melting candle wax include a double boiler or heat-resistant container, candle wax flakes or blocks, wicks, wick stickers, fragrance oils or essential oils, dye chips, and a thermometer.
- Different melting methods, such as the double boiler method and the microwave method, can be used depending on the type of wax being melted.
- Safety precautions, such as working in a well-ventilated area, wearing protective gloves and goggles, and monitoring the temperature, should be followed when melting candle wax.

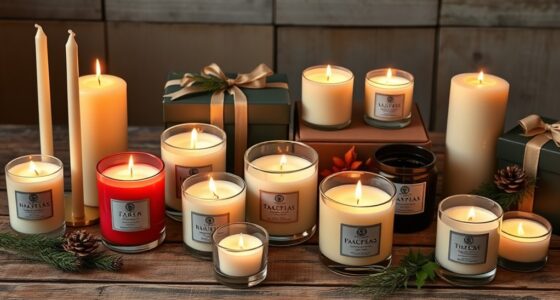
Scented Candles for Home,8 Pack Soy Wax Candle Set,Scented Candles Gift Set,Aromatherapy Candles, Amber Jar Vintage Apothecary Style, 8 Scents Gift Set
8 Pack Scented Candle Set – Great Value & Variety:Enjoy 8 different scented candles in one set, offering...
As an affiliate, we earn on qualifying purchases.
Gather Your Supplies
Now, you’re going to gather all your supplies so that you can start melting the candle wax. Before we begin, it’s important to familiarize yourself with some candle making techniques and candle wax safety precautions. This will ensure a smooth and safe process.
To start, you’ll need the following supplies: a double boiler or a heat-resistant container, such as a glass measuring cup or a metal can; candle wax flakes or blocks; wicks; wick stickers; fragrance oils or essential oils (if desired); dye chips (optional for colored candles); and a thermometer.
When choosing your candle wax, opt for high-quality options like soy wax, beeswax, or paraffin wax. These types of waxes are known for their clean burns and longevity.
Next, make sure you have proper tools for handling hot materials safely. Heat-resistant gloves are essential to protect your hands from potential burns. Additionally, having a fire extinguisher nearby is always wise in case of any accidents.
With all the necessary supplies gathered and safety precautions in mind, you’re ready to move on to preparing your work area. This step ensures an organized space where you can comfortably melt the candle wax without any hindrances.
Transitioning into the next section about ‘prepare your work area,’ let’s discuss how to create an ideal space for melting your candle wax without any distractions.

Scented Candles for Home,4 Pack Soy Candle Gift Set with 4 Fragrance Scents,Aromatherapy Lavender Floral & Wood Candles for Relaxation,Long Lasting Spa Candles for Bedroom Bathroom Gifts for Women
4 Pack Scented Candle Gift Set: Enjoy a beautifully designed 4 pack scented candle gift set featuring four...
As an affiliate, we earn on qualifying purchases.
Prepare Your Work Area
Before you begin, make sure to clear a designated area for your candle-making process, ensuring that it’s free from any potential hazards like flammable materials or clutter. It’s crucial to have a clean and organized work surface to prevent accidents and maintain efficiency throughout the melting process.
Choose a spacious table or countertop that provides enough room for all your supplies and equipment.
In addition to clearing your work area, it’s essential to take proper safety precautions. Place a heat-resistant mat or tray on the surface where you’ll be melting the wax to protect it from any potential damage. Keep a fire extinguisher nearby in case of emergencies and never leave an open flame unattended.
Furthermore, consider wearing protective gear such as heat-resistant gloves and safety goggles to shield yourself from hot wax splatters or accidental spills. These simple measures can go a long way in preventing injuries during the candle-making process.
Now that your work area is ready and safety measures are in place, let’s move on to choosing a melting method.

Scented Candles Gift Set, Long Lasting 6 Pack Aromatherapy Candles for Home, 42 oz 300 Hour Burn, Lavender Jasmine Vanilla Sage Sandalwood Rose Eucalyptus Mint, Gifts for Women
6 Pack Scented Candles Gift Set – This value candle set includes 6 popular scents: Lavender, Jasmine, Vanilla,...
As an affiliate, we earn on qualifying purchases.
Choose a Melting Method
To start the candle-making process, you’ll want to decide how you’ll transform your solid ingredients into a liquid form, and there are several methods available for you to choose from. The method you choose will depend on the type of candle wax you have and personal preference.
There are different types of candle waxes, such as soy wax, beeswax, and paraffin wax. Each type has its own melting point and characteristics.
One common method is using a double boiler. This involves placing your candle wax in a heat-safe container and then placing that container in a pot filled with water. The water is heated gently, which melts the wax without direct heat exposure.
Another option is using a microwave. Simply place your candle wax in a microwave-safe container and heat it in short intervals until melted.
Each melting method has its pros and cons. The double boiler method provides even heating and reduces the risk of overheating or burning the wax. However, it can be time-consuming. On the other hand, using a microwave is quick but requires careful monitoring to prevent overheating or uneven melting.
Now that we’ve discussed choosing a melting method, let’s move on to preparing the wax for melting by gathering all necessary materials.

4 Pack Scented Candles Gifts for Women: 28oz Natural Soy Candles for Home Scented, Up to 200H Burning, Aromatherapy Candle Set, Jar Candle Gift Set for Spa Bath Meditation Birthday Valentine's Gifts
🎁 PERFECT GIFT-READY CANDLES FOR WOMEN - This beautiful scented candle comes with a pretty package, creating a...
As an affiliate, we earn on qualifying purchases.
Prepare the Wax for Melting
Start by gathering all the materials you’ll need to prepare your wax for melting. This includes a double boiler or a heat-resistant container, a thermometer, a stirring tool, and of course, the candle wax itself.
Wax melting techniques vary depending on the type of wax you’re using. For example, if you’re working with soy wax, it’s best to use a double boiler to ensure even heat distribution and prevent scorching. If you prefer using beeswax, melting it in a heat-resistant container directly on low heat works well.
Safety precautions are important when preparing wax for melting. Always work in a well-ventilated area to avoid inhaling any fumes. It’s also advisable to wear protective gloves and goggles to protect yourself from potential burns or splashes. Keep an eye on the temperature using a thermometer to ensure it doesn’t exceed the recommended melting point for your specific type of wax.
Once you have gathered all your materials and taken necessary safety precautions, you’re ready to move on to the next step—melting the wax.
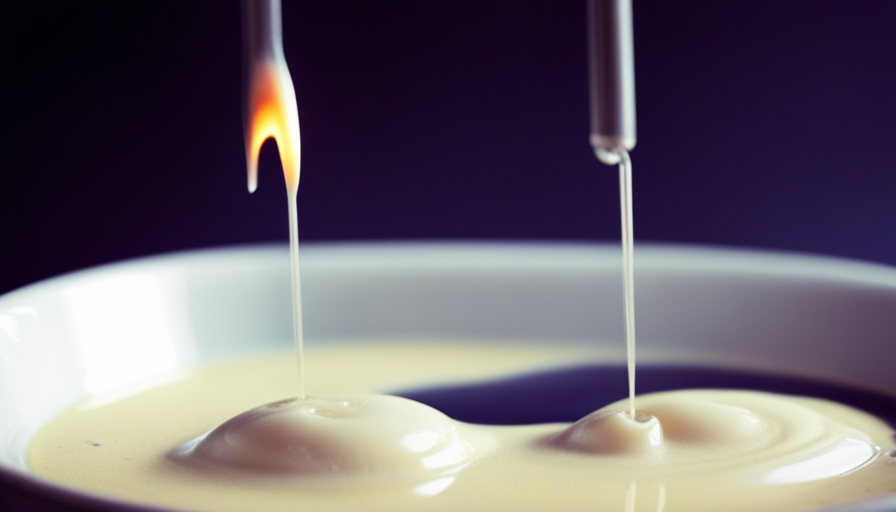
Melt the Wax
Once all your materials are gathered and safety precautions have been taken, it’s time to dive into the mesmerizing process of transforming solid blocks into a molten masterpiece.
There are several different techniques you can use to melt candle wax, depending on what equipment you have available. One common method is using a double boiler. Fill the bottom pot with water and place it on the stove over medium heat. Place the chunks of wax in the top pot and gently stir until it melts completely.
Another option is using a microwave-safe container. Cut or break up the wax into smaller pieces and place them in a microwave-safe bowl. Heat in short bursts, stirring between each one, until the wax is fully melted.
Regardless of which method you choose, it’s important to always follow safety precautions when melting candle wax. Never leave melting wax unattended and make sure to keep flammable items away from your workspace. Use oven mitts or heat-resistant gloves when handling hot containers or pots.
Once your wax has melted to a smooth consistency, you can transition into adding fragrance or color (optional) by carefully pouring the molten wax into another container and proceeding with the next steps.
Add Fragrance or Color (Optional)
Now that you’ve successfully melted the wax, it’s time to add some fragrance or color to your candle. This step is optional, but it can enhance the overall aesthetic and scent of your finished product. Here are a few candle making tips for selecting and incorporating fragrance:
-
Choose high-quality fragrance oils: Look for oils specifically formulated for candle making. They should be strong, long-lasting, and safe to use.
-
Test different scents: Experiment with various fragrances to find the perfect one for your candle. Consider seasonal scents or personal favorites.
-
Measure carefully: Add the fragrance oil according to the recommended usage rate provided by the manufacturer. Too much or too little can affect how well the scent is dispersed when burning.
-
Mix thoroughly: Stir the fragrance oil into the melted wax using a wooden spoon or disposable stirrer until well combined.
Adding fragrance or color is a creative way to personalize your candles and make them unique. Once you’re satisfied with your scented wax mixture, it’s time to move on to pouring the melted wax into containers.
Transition Sentence: With our beautifully scented wax ready, let’s now proceed to pour it into containers for further setting.
Pour the Melted Wax into Containers
Pour your beautifully scented melted wax into your chosen containers, allowing them to set and take shape into stunning candles. When it comes to container options, there are a variety of choices available that you can use to create unique and personalized candles. From glass jars and ceramic pots to tin cans and tea cups, the possibilities are endless. Consider the size of your container and make sure it can withstand heat without cracking or shattering.
To help you visualize the different container options, here is a table showcasing some ideas:
| Container Options | Size | Material |
|---|---|---|
| Glass Jars | Small/Medium | Glass |
| Ceramic Pots | Medium/Large | Ceramic |
| Tin Cans | Small | Aluminum |
Before pouring the melted wax, it’s important to take safety precautions. Ensure that your workspace is clean and free from any flammable objects. Place a protective layer such as newspaper or a heat-resistant mat on the surface where you will be working. This will help protect both your countertop and prevent any spills from causing damage.
Once you have poured the melted wax into your chosen containers, allow them to cool and set for several hours. The cooling process will depend on various factors such as the size of the candle and room temperature. It’s essential not to disturb the candles during this time as they need uninterrupted cooling in order to solidify properly.
Transitioning seamlessly into the next step of ‘letting the candles cool and set,’ we want to ensure that our hard work pays off with perfectly formed candles ready for enjoyment.
Let the Candles Cool and Set
Be patient and let the candles cool and set for several hours, allowing them to transform into perfectly solidified masterpieces ready to be enjoyed. During this cooling time, it’s important to prioritize candle safety to avoid any accidents or mishaps.
Here are a few key points to keep in mind:
- Place the candles on a heat-resistant surface. This will prevent any damage or potential fire hazards.
- Keep the candles away from drafts. Air circulation can cause uneven cooling and may lead to lopsided candles.
- Avoid touching the candles. The wax will be hot during this stage, so refrain from handling them until they’ve completely cooled down.
- Don’t move the containers. Moving the containers while the wax is still liquid can disrupt the setting process and ruin your finished product.
- Allow ample time for cooling. It’s crucial not to rush this step. Letting the candles sit undisturbed for several hours ensures that they solidify properly.
Once you’ve given your candles enough time to cool and set, it’s time to move on to the next step of trimming their wicks.
Trim the Wicks
After the candles have cooled and set, it’s time to give their wicks a trim. Trimming the wicks is an important step in candle maintenance as it helps ensure a clean and efficient burn.
When trimming the wicks, you want to aim for a length of about ¼ inch. This allows the flame to burn steadily without producing excess smoke or soot.
To start, gather a pair of sharp scissors or a wick trimmer. Hold the candle securely and carefully snip off any excess wick, making sure to leave just enough length for easy lighting. It’s best to trim the wick before each use, as this promotes an even burn and prevents mushrooming.
By keeping your wicks trimmed to the appropriate length, you can extend the life of your candles and enjoy cleaner burning sessions. With proper care, your candles will continue to provide hours of soothing ambiance and delightful fragrance.
Now that you’ve learned how to trim your candle wicks like a pro, it’s time to sit back, relax, and enjoy your new candles!
Enjoy Your New Candles!
After trimming the wicks of your homemade candles, it’s time to sit back, relax, and enjoy the fruits of your labor!
There’s something truly satisfying about creating your own candles. Not only do they provide a warm and inviting ambiance to any space, but they also make excellent gifts for friends and family.
When it comes to candle making tips, one important thing to remember is that you have complete control over the ingredients used in your homemade candles. Unlike store-bought candles that may contain harmful chemicals or artificial fragrances, crafting your own allows you to choose natural and eco-friendly options. This means you can create a healthier atmosphere in your home while indulging in delightful aromas.
Another benefit of homemade candles is their versatility. You can experiment with different scents, colors, and containers to suit your personal style and preferences. Whether you prefer soothing lavender for relaxation or invigorating citrus for an energy boost, there are endless possibilities when it comes to customizing your creations.
So go ahead and embrace the art of candle making! With these simple tips and tricks at hand, you’ll be able to enjoy the warm glow and comforting scent of homemade candles whenever you desire.
Frequently Asked Questions
How long does it take for the melted wax to cool and set in the containers?
The cooling time for melted wax depends on the container size. Generally, smaller containers cool faster than larger ones. The cool-down period can range from a few minutes to several hours.
It’s important to allow ample time for the wax to completely harden and set before moving or using the candles. Patience is key in ensuring a beautiful, long-lasting candle that’ll bring warmth and ambiance to any space.
Can I use any type of fragrance or color in the melted wax?
Yes, you can use various types of fragrances and colors in melted wax. It’s important to consider the type of wax you’re using and its melting point. Some waxes are better suited for holding color and fragrance, while others may not work as well. Experimenting with different methods of melting candle wax can also affect how well the fragrance and color blend into the wax. It’s always a good idea to do some research or consult a professional before adding any additives to your melted wax.
How do I know if the wax is fully melted?
To check if the wax is fully melted, it’s like solving a mystery! I become Sherlock Holmes with my trusty kitchen thermometer. Plunge it into the molten wax and wait for the magic number: 180°F (82°C).
Once achieved, I know my candle wax is ready for action. But beware of overheating! It can lead to a waxy disaster. So folks, keep an eye on that temperature gauge and avoid turning your tranquil melting session into a fiery chaos!
Are there any safety precautions I need to take while melting the wax?
When melting candle wax, it’s important to take safety measures to avoid accidents. First and foremost, ensure proper ventilation in the area where you’ll be working. Use a double boiler or a heat-resistant container on low heat to control the temperature. Never leave the wax unattended and always keep a fire extinguisher nearby.
Additionally, wear protective gloves and use caution when working with hot wax to prevent burns or spills.
What is the best method to use if I want to make scented candles?
When it comes to making scented candles, there’s a method that really sets the stage for success: choosing the right candle making techniques and selecting the perfect wick.
These two factors can make all the difference in creating a beautifully scented candle that burns evenly and provides a long-lasting fragrance. By experimenting with different techniques such as layering fragrances or adding essential oils, you can create unique and delightful scented candles that’ll fill your space with warmth and ambiance.
Conclusion
After following these simple steps, you’ll be able to effortlessly transform your old candles into beautiful new creations.
With the flickering flame and gentle glow of your handmade masterpieces, you’ll feel a sense of satisfaction that can only come from creating something with your own two hands.
The process may seem daunting at first, but once you dive in and let the wax melt like liquid gold, you’ll be hooked.
So why wait? Let your creativity flow and immerse yourself in the mesmerizing world of candle making today!