If you accidentally spill candle wax on your wall, don’t worry at all—we’ve got your back!
In this guide, we’ll show you how to get candle wax out of your wall like a pro. With just a few simple steps, you’ll have your wall looking good as new in no time.
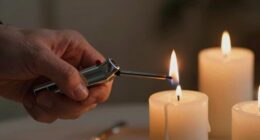
First, gather the necessary materials.
Then, scrape off the excess wax using a gentle touch.

Next, use a heat source to melt the remaining wax, making it easier to remove.
Absorb the melted wax with paper towels, ensuring a clean surface.
Finally, remove any remaining residue with a cleaning solution, rinse the wall, and dry it thoroughly.
By following these steps, you’ll be able to tackle any candle wax mishap with confidence.
Let’s get started!
Key Takeaways
- Consider using a hairdryer, heat gun, or warm iron to heat the wax before removal
- Use a plastic scraper or credit card to scrape off excess wax, applying moderate pressure
- Test a small area first to avoid damage, and use rubbing alcohol to remove any remaining residue
- Absorb melted wax with paper towels, gently pressing the pad against the wax until no more transfers
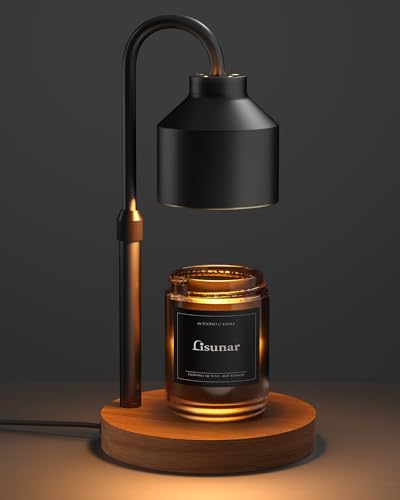
LISUNAR Electric Candle Warmer Lamp Black, Candle Lamp Warmer with Timer, Wax Warmer Lamp for Jar Candles, Adjustable Height Candle Light Warmer with 2 Bulbs
Artistic Minimalism: The candle warmer lamp features a simple black shade and a solid wood base with non-slip...
As an affiliate, we earn on qualifying purchases.
Gather Necessary Materials
To gather the necessary materials for removing candle wax from a wall, we’ll need a few items.
First, let’s consider the heating alternatives. A hairdryer is a great option for melting the wax and making it easier to remove. It provides focused heat and is easy to control. Another alternative is using a heat gun, which produces a higher temperature and can be more effective for larger wax spills.
Now, let’s talk about removing wax from different surfaces. For painted walls, you’ll need a plastic scraper or a credit card to gently scrape off the wax. Be careful not to damage the paint.
For wallpaper, use a warm iron with a clean cloth to absorb the melted wax. Remember to always test a small area first to ensure it won’t damage the wallpaper.

Marycele Candle Warmer Lamp with Timer & Dimmer - Mothers Day Gifts for Women Mom Her, Aesthetic Office Home Decor, Adjustable Height Wax Melter for Candle Jar & 3-Wick Candles (2 Bulbs Included)
Flameless Bliss, Pet & Kid Friendly: Reclaim the joy of scents without the worry. Our electric candle warmer...
As an affiliate, we earn on qualifying purchases.
Scrape off Excess Wax
To remove the excess wax from the wall, we’ll start by gently scraping it off using a plastic scraper or a credit card. Ensure that the tool you choose is made of a non-abrasive material to avoid damaging the wall’s surface. Begin by holding the scraper at a slight angle and carefully scrape the wax off the wall. Apply moderate pressure, being cautious not to gouge or scratch the paint.
If the wax is particularly stubborn, you can use a heat gun or candle warmers to soften it. Hold the heat gun a few inches away from the wax and move it back and forth until the wax becomes pliable. Then, proceed to scrape it off as before.

CANDLE WARMERS ETC 2-in-1 Candle and Fragrance Warmer for Warming Scented Candles or Wax Melts and Tarts with to Freshen Room, Midas
Clean and bold gold touches accent this gray 2-in-1 Fragrance Warmer, which melts both wax melts in its...
As an affiliate, we earn on qualifying purchases.
Use a Heat Source to Melt the Wax
Now let’s explore two effective methods for using heat to remove candle wax from walls: the blow dryer method and the ironing technique.
These techniques can help soften and melt the wax, making it easier to remove.
Blow Dryer Method
We can effectively remove candle wax from a wall using the blow dryer method, which involves using a heat source to melt the wax. The blow dryer method is a safe and convenient way to remove wax without causing any damage to the wall. However, it is important to follow blow dryer safety guidelines to prevent accidents. Always keep the blow dryer at least 6 inches away from the wall to avoid overheating or scorching the surface. Additionally, be cautious not to touch the hot nozzle or allow it to come in contact with flammable materials. If you don’t have a blow dryer, you can consider alternative heat sources such as a heat gun or an iron on a low setting. Ensure you maintain a safe distance and test the heat intensity before applying it to the wax.
| Pros | Cons |
|---|---|
| Quick and easy method | Risk of overheating the wall |
| Does not damage the wall | Requires caution to avoid accidents |
| Convenient to use | May not be effective for large wax spills |
| Can be done with household items | May take some time to completely remove the wax |
| No need for special tools | Requires patience and careful application |
Ironing Technique
With the ironing technique, we can effectively remove candle wax from a wall by using a heat source to melt the wax. This method is particularly useful when dealing with larger wax spills or when the blow dryer method isn’t available.
To start, place a clean, lint-free cloth or paper towel over the wax stain. Set your iron to a low heat setting, ensuring that it doesn’t produce steam. Gently press the iron onto the cloth, moving it in circular motions. The heat from the iron will cause the wax to melt and transfer onto the cloth.

Be careful not to apply too much pressure or leave the iron in one spot for too long to avoid damaging the wall. Repeat the process with a fresh cloth until all the wax has been removed.

calary Candle Wick Trimmer, Candle Snuffer and Wick Dipper & Candle Accessory Set, 3 in 1 Candle Care Kit for Candle Lover (Gold)
Material: This candle snuffers are made of stainless steel, it is not easy to rust, not easy to...
As an affiliate, we earn on qualifying purchases.
Absorb the Melted Wax With Paper Towels
After allowing the melted wax to cool, carefully press paper towels against the wall to absorb the wax. Here’s how to effectively use paper towels to remove candle wax from your wall:
- Fold a few paper towels into a thick pad.
- Gently press the pad against the wax. Apply slight pressure to help the paper towels absorb the melted wax.
- Continue pressing and absorbing until no more wax transfers onto the paper towels.
- If the wax has seeped into the wall, you may need to repeat the process or try alternative methods like using a hairdryer or applying heat with an iron (covered with a cloth) to melt the wax and then absorb it with paper towels.
Remove Any Remaining Residue With a Cleaning Solution
Now that we’ve absorbed the melted wax with paper towels, it’s time to tackle any remaining residue.
The effectiveness of the cleaning solution we choose is crucial in ensuring a successful removal process. Additionally, we can explore alternative options for removing the residue if the cleaning solution doesn’t yield desired results.
Lastly, we should discuss preventative measures to avoid future wax spills and keep our walls clean.
Cleaning Solution Effectiveness
Our chosen cleaning solution proved effective in removing any remaining wax residue from the wall. Here are four tips to ensure the best results:
- Use dish soap and warm water: Create a mixture of warm water and a few drops of dish soap. Dip a clean cloth or sponge into the solution and gently scrub the affected area. The soap helps break down the wax while the warm water aids in lifting it off the wall.
- Try vinegar: Mix equal parts white vinegar and water. Apply the solution to the wax residue and let it sit for a few minutes. Then, use a cloth or sponge to wipe away the wax. Vinegar’s acidic properties help dissolve the wax and make it easier to remove.
- Utilize baking soda: Make a paste by mixing baking soda with water. Apply the paste to the wax residue and let it sit for a few minutes. Scrub the area with a cloth or sponge, and then rinse with warm water. Baking soda’s abrasive nature helps to lift the wax off the wall.
- Consider using a hairdryer: Set your hairdryer on a low heat setting and direct the airflow towards the wax residue. The heat will melt the wax, making it easier to wipe away. Be sure to use a cloth or paper towel to catch the melted wax as it drips.
With these effective cleaning solutions, you can easily remove any remaining wax residue from your wall.
Alternative Residue Removal Options
To remove any remaining residue, we can use a cleaning solution. While there are various commercial cleaning products available, there are also alternative cleaning methods that can effectively remove wax residue from walls. One option is to use natural ingredients that are gentle yet powerful. For instance, a mixture of vinegar and water can be used as a homemade cleaning solution. The acidity of the vinegar helps break down the wax while the water helps dilute it. Another alternative is to use rubbing alcohol or isopropyl alcohol. These substances can dissolve the wax residue without damaging the wall’s surface. It’s important to test these solutions on a small, inconspicuous area first to ensure they don’t cause any discoloration or damage. Here is a table summarizing these alternative cleaning methods:

| Cleaning Solution | Ingredients | Method |
|---|---|---|
| Vinegar and Water | White vinegar | Mix equal parts vinegar and water in a spray bottle. Apply to the residue and gently scrub with a soft cloth or sponge. Rinse with clean water. |
| Rubbing Alcohol | Rubbing alcohol | Apply a small amount of rubbing alcohol to a clean cloth or sponge. Gently rub the residue until it dissolves. Wipe clean with a damp cloth. |
Preventing Future Wax Spills
To prevent future wax spills and ensure thorough removal of any remaining residue, we can continue the cleaning process with a suitable solution. Here are some alternative prevention methods to consider:
- Use candle holders or trays: Place your candles in holders or trays to catch any drips or spills, preventing them from reaching the wall.
- Opt for flameless candles: Consider using flameless candles, which eliminate the risk of wax spills altogether.
- Trim candle wicks: Keep the wicks of your candles trimmed to a quarter of an inch. This helps prevent excessive melting and dripping.
- Monitor burning candles: Never leave burning candles unattended, and keep them away from drafts or flammable objects.
By implementing these preventive measures, you can minimize the chances of future wax spills and protect your walls from damage.
Now, let’s move on to the next step: rinsing the wall with warm water.
Rinse the Wall With Warm Water
We frequently rinse the wall with warm water to remove the candle wax. After using the blotting technique to remove as much wax as possible, it’s important to rinse the area thoroughly.

Warm water helps to melt any remaining wax residue, making it easier to remove. To rinse the wall, fill a bucket with warm water and dip a clean cloth or sponge into it. Wring out any excess water and gently wipe the affected area in a circular motion. Repeat this process as needed until all the wax is gone.
For stubborn wax stains, you can also try using a steam cleaner. The hot steam will help to loosen the wax, making it easier to wipe away. Remember to let the wall dry completely before proceeding with any further cleaning or repairs.
Dry the Wall Thoroughly
After thoroughly rinsing the wall with warm water, it’s important to ensure that it’s dried completely. Properly drying the wall will prevent any moisture from seeping into the surface and causing further damage. Here are some cleaning techniques to help you dry the wall thoroughly:
- Use a clean, dry cloth or towel to gently pat the wall dry. Avoid rubbing, as this can spread the wax residue or create streaks.
- Open windows or use fans to improve air circulation in the room. This will help speed up the drying process.
- Consider using a hairdryer on a low heat setting to gently dry the wall. Keep the dryer at a safe distance to avoid overheating or damaging the surface.
- Allow sufficient time for the wall to air dry naturally. This may take a few hours or overnight, depending on the size of the affected area.
By following these cleaning techniques, you can avoid common mistakes and ensure that the wall is thoroughly dried before proceeding.

Once the wall is completely dry, it’s time to assess it for any remaining stains or damage.
Assess the Wall for Any Remaining Stains or Damage
Once the wall has been thoroughly dried, we can now proceed to assess it for any remaining stains or damage. Assessing the damage is crucial to determine the extent of the problem and plan the appropriate course of action. Additionally, preventing stains from setting in is essential to maintain the wall’s appearance. To help you in this process, we have prepared a table that outlines common types of wall damage and stains, along with possible solutions:
| Type of Damage/Stain | Possible Causes | Solutions |
|---|---|---|
| Discoloration | Wax residue | Use a mild detergent and sponge to gently scrub |
| Scratches | Scrubbing too hard | Apply touch-up paint or use a wall repair solution |
| Grease marks | Wax residue | Use a degreaser and a clean cloth to remove |
Frequently Asked Questions
Can I Use a Hairdryer Instead of a Heat Source to Melt the Wax?
Yes, using a hairdryer as an alternative heat source can effectively melt candle wax off walls. However, be cautious of the heat setting and keep the hairdryer at a safe distance to prevent damage. Explore alternative cleaning solutions for best results.
What Type of Cleaning Solution Should I Use to Remove the Remaining Residue?
We have several cleaning solution options for removing the residue. However, let’s not forget the alternative cleaning methods that can also be effective. It’s important to choose the right solution and method for a successful outcome.

Is It Safe to Use a Razor Blade to Scrape off the Excess Wax?
Using alternative tools for scraping wax is recommended to avoid potential risks associated with using a razor blade. It’s safer to use a plastic scraper or a credit card to gently remove the excess wax from the wall.
Can I Use a Cloth Instead of Paper Towels to Absorb the Melted Wax?
Yes, we can use a cloth instead of paper towels to absorb the melted wax. It’s a great alternative method that works effectively. Simply place the cloth over the wax, apply heat, and gently blot until the wax is absorbed.
How Long Should I Let the Cleaning Solution Sit on the Wall Before Rinsing It off With Warm Water?
We should let the cleaning solution sit on the wall for about 15-20 minutes before rinsing it off with warm water. It will give the solution enough time to break down the wax.
Conclusion
So there you have it! By following these simple steps, you can easily remove candle wax from your walls and have them looking as good as new.

Remember, a little heat and some absorbent materials can go a long way in tackling this pesky problem. As the saying goes, ‘Where there’s a will, there’s a way!’
Now go forth and conquer those wax stains with confidence.