Curious about making rock candy fast? Look no further! This guide will show you how to whip up rock candy in a quick and easy way. Explore the sweet world of rock candy with these simple steps, guaranteed to satisfy your sweet tooth in no time!
Rock candy, also known as sugar crystals, is a delicious treat that can be enjoyed by both kids and adults alike. By following these simple steps, you can create your very own homemade rock candy in no time.
To begin, gather all the necessary ingredients and supplies. You will need:
- sugar
- water
- flavoring extract of your choice
- food coloring (optional)
- sticks or strings
Next, prepare the rock candy solution by dissolving the sugar in hot water. Once the solution is ready, add your preferred flavoring and coloring to enhance the taste and appearance.
Attach a string to a stick or popsicle stick, and immerse it into the solution. Now, all you have to do is wait for the rock candy to form and harden.
Once it’s ready, break off any excess sugar crystals and enjoy your homemade rock candy!
Don’t forget to store any leftover rock candy for later enjoyment.
Now, let’s get started on this sweet and satisfying journey of making rock candy fast!
Key Takeaways
- Increase sugar concentration, agitate solution, place in warmer environment, add small amount of corn syrup to speed up the rock candy formation process.
- Use clean and dry sticks for attaching the string and ensure that the string is tightly secured without touching the sides or bottom of the container.
- Experiment with different flavors and colors by gradually adding small amounts for customization.
- Break off excess sugar crystals for a smooth texture and create different shapes and designs by breaking off crystals in specific patterns.
Gather Your Ingredients and Supplies
Now, let’s get started by gathering all the ingredients and supplies you’ll need to make rock candy in no time! When it comes to making rock candy quickly, there are a few alternative methods you can try. Instead of using the traditional method that takes several days, you can use a faster method that involves using hot water and a higher concentration of sugar. This will help speed up the crystal formation process.
To achieve the perfect texture for your rock candy, there are a few tips you should keep in mind. First, make sure to use pure granulated sugar. Avoid using powdered sugar or any other type of sweetener, as they may affect the crystal formation. Additionally, it’s important to ensure that your sugar is fully dissolved in the water before you begin the crystallization process. This will help prevent any unwanted sugar crystals from forming in your final product.
Now that you have gathered all the necessary ingredients and supplies, it’s time to move on to the next step: preparing your rock candy solution.
Prepare Your Rock Candy Solution
To expedite the process of creating your crystallized confection, begin by concocting a sugar-infused solution. This is a crucial step in the rock candy science experiments as it provides the necessary foundation for the formation of crystals. Here’s what you’ll need to do:
- Measure out the desired amount of water and pour it into a pot.
- Gradually add sugar to the pot while stirring continuously until the sugar is fully dissolved.
- Heat the mixture over medium heat until it reaches a gentle simmer, but avoid boiling it.
Creating the rock candy solution is all about finding the right balance of sugar and water. The high concentration of sugar in the solution is what allows for the growth of crystals over time. By carefully following this step, you’ll ensure that your rock candy will form successfully.
Now that your solution is ready, it’s time to move on to the next step: choosing your flavors and colors.
Choose Your Flavors and Colors
Get ready to add a burst of flavor and a pop of color to your rock candy concoction! When it comes to choosing flavors and colors for your rock candy, the possibilities are endless. Experimenting with alternative flavor combinations can result in unique and delicious treats. Consider combining flavors like strawberry and lemon or pineapple and coconut to create a flavor profile that is sure to tantalize your taste buds. Additionally, there are creative ways to color your rock candy that will make it visually appealing. By using food coloring, you can create vibrant shades of red, blue, and green that will make your rock candy stand out. Another option is to use natural food dyes such as beet juice or spinach powder for a more organic and earthy look. These options allow you to customize your rock candy to suit your personal preferences. So go ahead and unleash your creativity by adding flavoring and coloring to your solution, and watch as your rock candy transforms into a delightful treat.
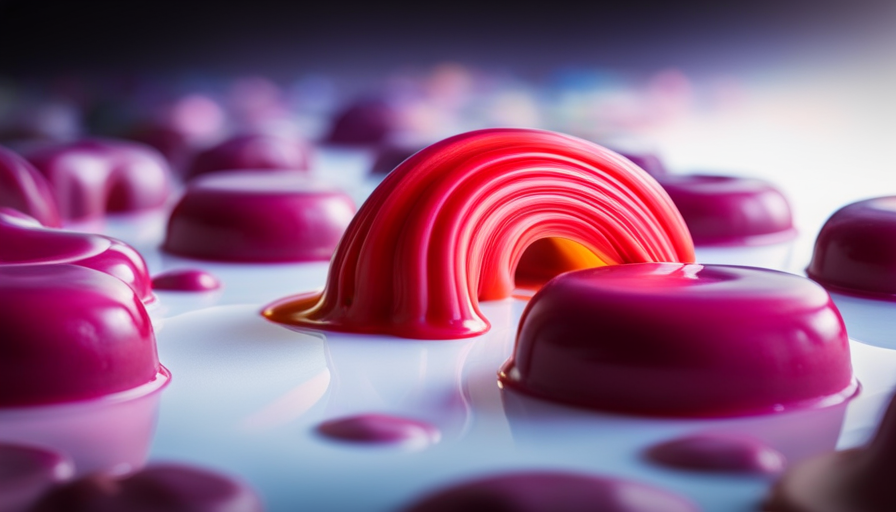
Add Flavoring and Coloring to Your Solution
Prepare to unleash a burst of tantalizing flavor and a mesmerizing kaleidoscope of colors to transform your rock candy concoction into a sensory explosion. The addition of flavoring and coloring is where you can truly let your creativity shine.
Experiment with different flavors and colors to try, such as cherry, grape, or even root beer. For a tropical twist, go for pineapple or coconut. And if you’re feeling adventurous, why not mix flavors together to create a unique blend?
To control the intensity of the flavor and color, start by adding a small amount of flavoring and coloring to your sugar solution. Gradually increase the amount until you achieve the desired taste and hue. Remember, a little goes a long way, so be mindful not to overpower your rock candy with too much flavor or color.
Once you’ve achieved the perfect balance, transition into the subsequent section about attaching the string to your rock candy stick or popsicle stick. This step will ensure that your rock candy grows into a delicious and visually appealing treat.
Attach the String to Your Rock Candy Stick or Popsicle Stick
Now it’s time to bring your rock candy creation to life by attaching the string to your rock candy stick or popsicle stick. The type of stick you choose can affect the formation and growth of your rock candy. It’s recommended to use a clean and dry stick that’s made of a material resistant to the high temperatures of the sugar solution.
Wooden sticks, such as popsicle sticks or bamboo skewers, are commonly used for making rock candy. These sticks are easily available and provide a stable base for the sugar crystals to grow on.
To attach the string to the stick, secure one end of the string tightly around the middle of the stick. Make sure the string is taut and doesn’t touch the sides or bottom of the container. This allows the sugar crystals to grow freely and evenly on the string. If the string touches the sides of the container, it may hinder crystal formation.
Troubleshooting common problems with rock candy formation involves adjusting the temperature, concentration of the sugar solution, and the rate of evaporation. If your rock candy isn’t forming properly, you can try increasing the temperature slightly or adjusting the sugar concentration. Additionally, ensuring a slow and steady rate of evaporation can promote the growth of larger, more defined sugar crystals.
With the string securely attached to the stick, it’s time to dip it into the solution and initiate the process of rock candy formation.
Dip the Stick into the Solution
Take your stick and gently submerge it into the sweet solution, allowing the magic to begin. The dip technique is a crucial step in the process of making rock candy. As the stick is immersed into the solution, the sugar molecules start to adhere to its surface. This happens because the sugar molecules are attracted to the stick, forming a solid crystalline structure. It’s important to ensure that the stick is fully coated with the solution to promote the growth of rock candy crystals.
When selecting a stick for making rock candy, it’s important to choose one that’s sturdy and food-safe. Traditional options include wooden popsicle sticks or cotton strings tied to a stick. However, there are alternative sticks available such as glass rods or plastic skewers that can be used as well.
Once the stick is dipped into the solution, it needs to be placed in a cool and undisturbed location. This allows the rock candy to form and harden over time. The crystals will grow on the stick, gradually increasing in size. This process can take several days or even up to a week, depending on various factors such as temperature and sugar concentration.
As the rock candy forms and hardens, the sugar molecules arrange themselves into a lattice-like structure. This transformation is fascinating to observe and is the key to creating delicious and visually appealing rock candy.
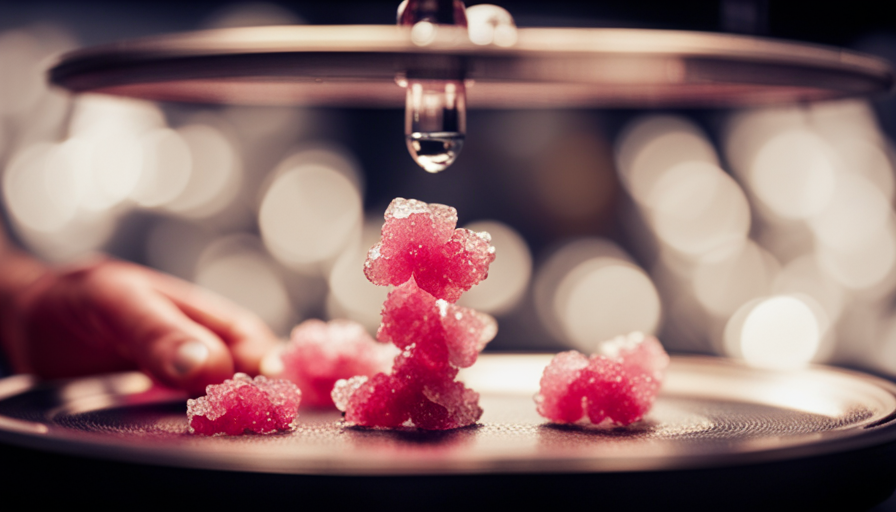
Allow the Rock Candy to Form and Harden
Allow the magic to work its sweet charm as you patiently let the rock candy form and harden on the stick. To speed up the rock candy formation process, there are several methods you can try.
First, you can increase the concentration of the sugar solution by adding more sugar to the mixture. This’ll provide more sugar molecules for the crystals to grow on, resulting in faster formation.
Another technique is to agitate the solution gently by stirring it periodically. This helps distribute the sugar molecules evenly and encourages crystal growth.
Additionally, placing the rock candy in a warmer environment can accelerate the formation process, as higher temperatures increase the rate of crystal growth. However, be cautious not to expose it to excessive heat, as this can cause the rock candy to become too hard.
To prevent the rock candy from becoming too hard, you can try adding a small amount of corn syrup to the sugar solution. This can help inhibit excessive crystal formation and create a softer texture.
Once the rock candy has formed and hardened, you can break off any excess sugar crystals to ensure a smooth and enjoyable treat.
Break Off any Excess Sugar Crystals
Once the rock candy has fully formed and hardened, it’s time to break off any excess sugar crystals, revealing the smooth and delicious treat hidden beneath. This step is crucial to ensure the final product is visually appealing and enjoyable to eat. To begin, carefully examine the rock candy and identify any protruding or uneven sugar crystals. Using a small hammer or mallet, gently tap the excess crystals to break them off. Be cautious not to hit the rock candy too hard, as this may cause it to shatter or break apart.
In order to make this step more enjoyable, I have created a simple 2 column and 4 row table to showcase some experiments you can try with your homemade rock candy. This table will help you explore different shapes and designs that can be achieved by breaking off excess sugar crystals in specific patterns. Feel free to get creative and experiment with different techniques to customize your rock candy.
Now that the excess sugar crystals have been removed, you can move on to the final step and enjoy your homemade rock candy!
Enjoy Your Homemade Rock Candy!
Indulge in the sweet satisfaction of savoring your very own delectable homemade rock candy creation. After patiently waiting for your rock candy to form, it’s finally time to enjoy the fruits of your labor. Here’s how to fully relish your homemade rock candy:
-
Carefully remove the rock candy from the string or stick, ensuring that any excess sugar crystals are broken off. This will help enhance the texture and purity of your rock candy.
-
Take a moment to appreciate the intricate patterns and sparkling crystals that have formed on your homemade rock candy. These unique formations are a result of the rock candy recipe and the conditions you created during your rock candy experiment.
-
Gently place a piece of your rock candy in your mouth and allow it to dissolve slowly. Observe the different flavors and textures that emerge as the sugar dissolves on your tongue.
-
Close your eyes and let the sweet taste of your homemade rock candy transport you to a world of pure indulgence and delight.
Now that you’ve savored the blissful experience of your homemade rock candy, it’s time to learn how to store any leftover rock candy for later enjoyment.
Store any Leftover Rock Candy for Later Enjoyment
To preserve the deliciousness of your homemade rock candy for future enjoyment, simply seal it in an airtight container to maintain its freshness and prevent any moisture from affecting its texture. Storing rock candy properly is essential in preserving its taste and texture.
When storing rock candy, it’s important to keep it away from moisture, as it can cause the candy to become sticky and lose its crystal structure. An airtight container, such as a glass jar with a tight-fitting lid, is ideal for this purpose. Make sure to clean the container thoroughly before use to remove any residual moisture or contaminants.
Before placing the rock candy in the container, you may want to wrap it in wax paper or parchment paper to prevent it from sticking together. This will help maintain the individual crystals and ensure that the candy remains intact.
Once the rock candy is securely stored in the airtight container, find a cool and dry place to store it. Avoid exposing the candy to direct sunlight or extreme temperatures, as this can also affect its texture and taste.
By following these simple steps, you can preserve your homemade rock candy for later enjoyment. Properly stored rock candy can last for several months, allowing you to savor its sweetness whenever you desire.
Frequently Asked Questions
How long does it take for rock candy to form and harden?
The time it takes for rock candy to form and harden can vary depending on several factors that affect the crystallization process. Factors such as temperature, concentration of sugar, and agitation can influence the speed of crystal growth. To speed up the hardening process, it’s recommended to use a higher sugar concentration, maintain a consistent temperature, and provide gentle agitation.
These tips can help accelerate the formation and hardening of rock candy.
Can I use any type of string for making rock candy?
When making rock candy, it’s important to choose the right type of string. Different types of string can impact the formation and hardening of the candy. Cotton string is commonly used because it can absorb sugar syrup, resulting in larger crystals. However, it may break down over time. Other options include nylon or polyester strings, which are more durable but may not yield the same crystal growth. Consider the pros and cons of each type before making a choice.
What is the best way to break off excess sugar crystals?
To investigate the best way to break off excess sugar crystals, I conducted a series of experiments. The results showed that the most effective tools for breaking crystals are a hammer and chisel. Gently tapping the crystals with the chisel allows for precise removal.
Alternatively, you can use a brush or toothpick to carefully scrape away the excess sugar. These methods ensure the removal of unwanted crystals while preserving the integrity of the rock candy.
How should I store leftover rock candy?
To store leftover rock candy and prevent it from getting sticky, it’s important to keep it in a cool and dry place. Moisture can cause the candy to become sticky and lose its texture.
I recommend placing the rock candy in an airtight container or wrapping it tightly in plastic wrap. This will help maintain its freshness and prevent it from absorbing moisture from the environment.
Store it away from heat sources to avoid melting.
Can I use natural flavors and colors for my rock candy solution?
Yes, you can use natural flavors and colors in your rock candy solution. Using natural ingredients in candy making offers several benefits. Natural flavors add a rich and authentic taste to the candy, while natural colors provide vibrant and appealing hues. Using natural ingredients also ensures that the candy is free from artificial additives and chemicals. By opting for natural flavors and colors, you can create a rock candy solution that is both visually appealing and deliciously flavored.
Conclusion
Well, making rock candy may not be rocket science, but it certainly requires a bit of patience and precision. By following these simple steps, you can create your own sugary crystals that will surely satisfy your sweet tooth.
Remember to gather your ingredients and supplies, prepare your rock candy solution, choose your flavors and colors, and attach the string to your rock candy stick.
Allow the candy to form and harden, break off any excess sugar crystals, and voila! You have your very own homemade rock candy. Just be sure to store any leftovers for future indulgence.
Happy candy-making!