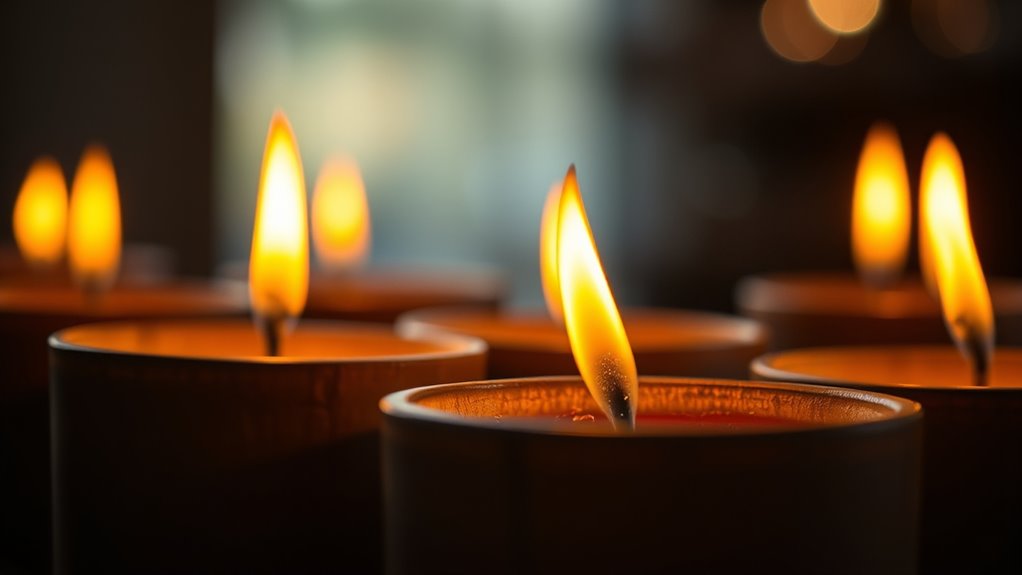

To create DIY wooden wick candles that evoke a cozy, crackling fire ambiance, gather quality wax, wooden wicks, fragrance oils, and tools like a double boiler and thermometer. Prepare a clean, well-ventilated workspace, melt your wax carefully, and add color and scent for a personalized touch. Secure the wick properly and pour your wax into containers, then allow them to cool undisturbed. If you keep exploring, you’ll discover more tips to perfect your candle craft and enhance that comforting glow.
Key Takeaways
- Select high-quality wax and wooden wicks designed for crackling effects to ensure proper burn and sound.
- Attach and center the wooden wick securely using appropriate adhesive before pouring the wax.
- Melt wax carefully in a double boiler, add fragrance and color, then pour slowly into containers to avoid bubbles.
- Allow candles to cool undisturbed at room temperature for a smooth, crackling surface.
- Decorate with personal touches and display to enhance ambiance and create cozy, crackling fire effects.
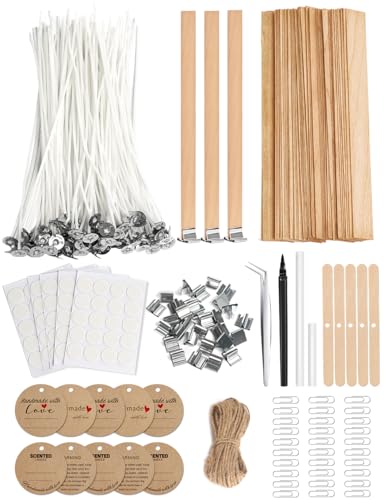
Multiwins 130 Pcs Candle Wicks for Candle Making Kit: 100 Cotton & 30 Wood Wicks with Complete Tool Set (Wick Holders, Wick Stickers, Candle Tabs, Tweezers, Pen), for Soy Beeswax DIY Candles
Ultimate Candle Making Kit – Includes 100 pre-waxed cotton wicks (4"), 30 wooden wicks (5"), 5 wick holders,…
As an affiliate, we earn on qualifying purchases.
As an affiliate, we earn on qualifying purchases.
Gathering Your Supplies and Tools
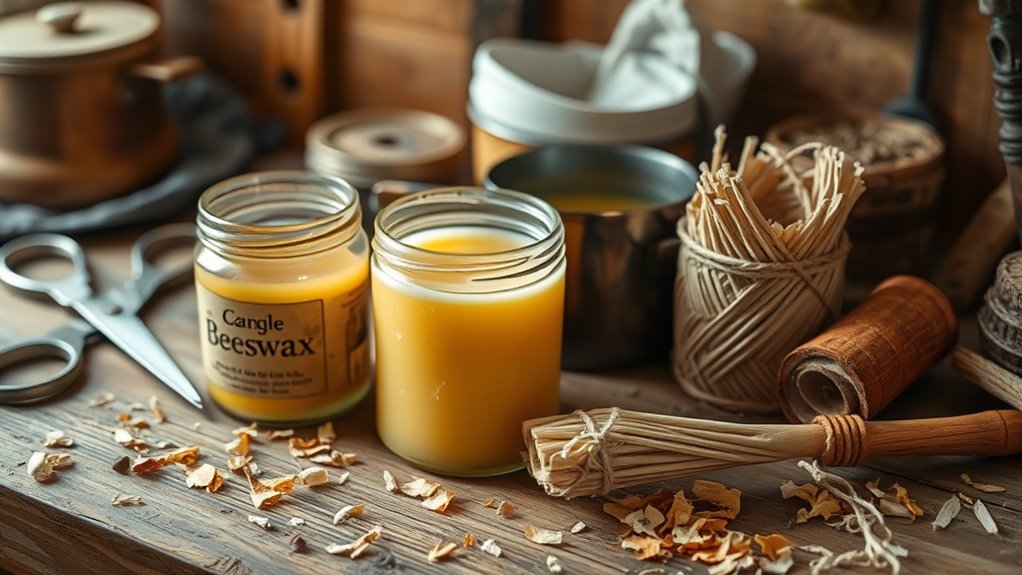
Before you start making your DIY wooden wick candles, it’s important to gather all the necessary supplies and tools. Start with quality candle wax, wooden wicks, and fragrance oils to enhance your decorating ideas. You’ll also need a double boiler or melting pot, thermometer, stirring sticks, and containers for pouring. Don’t forget safety precautions—wear gloves and work in a well-ventilated area to avoid fumes or spills. Keep a cloth handy for cleanup and ensure your workspace is stable. Choosing the right tools helps you create clean, attractive candles while minimizing accidents. Additionally, understanding website privacy and cookie management can help you maintain a secure and comfortable workspace while browsing online resources related to candle making. For those interested in alimony laws, being informed can also help you plan your finances during the crafting process. It’s also beneficial to familiarize yourself with essential oil properties, which can inspire you to add natural scents that complement the cozy ambiance of your candles. Knowing about fire safety tips is crucial to prevent accidents while working with hot wax and open flames. With everything in place, you can focus on customizing your candles with unique decorating ideas, making the process safe and enjoyable from start to finish.

Bakery Essential Oils Set – Fragrance Oil for Diffusers, Candle Making – Pumpkin Pie, Coffee Cake, Oatmeal Cookie, Gingerbread, Cinnamon Apple Aromatherapy Scented Oils (5ml)
🍪【Set Of 14 Bakery Essential Oils】 This essential oils set includes Chocolate Chip Cookie, Coffee Cake, Oatmeal Cookie,…
As an affiliate, we earn on qualifying purchases.
As an affiliate, we earn on qualifying purchases.
Choosing the Perfect Candle Wax and Fragrance

Selecting the right candle wax and fragrance is essential to achieving the desired burn quality and scent throw for your DIY wooden wick candles. Your choice of wax affects wax consistency, which influences how smoothly the candle melts and how evenly it burns. Look for waxes like soy, beeswax, or paraffin, depending on your preferences for clean burning or eco-friendliness. When choosing fragrances, consider scent blending to create a balanced aroma — combining floral, woody, or spicy notes can enhance the overall experience. Use high-quality fragrance oils designed for candle making to ensure strong scent throw without affecting wax consistency. Testing small batches helps refine your choice, ensuring your candles burn beautifully and fill your space with inviting fragrance. Additionally, understanding the color accuracy of your chosen wax can help you achieve a more appealing visual aesthetic in your finished candles. To further optimize your candles, consider the wick type to ensure proper combustion and a consistent crackling sound that enhances the ambiance. Incorporating scent strength testing can help you find the ideal fragrance load for your candles, maximizing aroma without compromising burn quality.
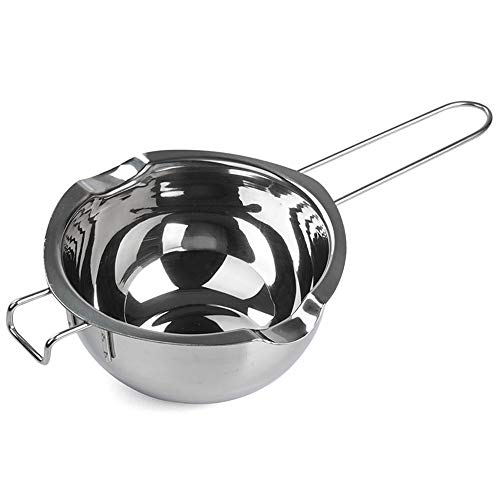
Stainless Steel Double Boiler Pot for Melting Chocolate, Candy and Candle Making (18/8 Steel, 2 Cup Capacity, 480ML)
【Superior Material 】- Made of 18/8 Stainless steel, Rust Resistant, Sturdy,and proper temperature to melt things but not…
As an affiliate, we earn on qualifying purchases.
As an affiliate, we earn on qualifying purchases.
Preparing and Setting Up Your Workspace

Start by gathering all the supplies you’ll need, like wax, wicks, and tools, so everything’s ready to go. Make sure your workspace is well-ventilated to keep fumes safely away. Keep your tools organized nearby to make the candle-making process smooth and efficient. Remember to choose the appropriate wax types for your project to ensure the best results. Additionally, consider air quality considerations to ensure a safe and comfortable environment while working. Incorporating proper ventilation can also help disperse any fumes generated during the melting process, promoting a healthier workspace. Being aware of industry trends can help you select the latest materials and techniques for your candles.
Gather Necessary Supplies
Gathering all your necessary supplies is the first step to creating beautiful DIY wooden wick candles. Start by selecting your scent options—choose essential oils or fragrance oils that suit your mood. Next, consider your wick types; wooden wicks come in various sizes and styles, so pick one that fits your candle container and desired crackling effect. You’ll also need wax, a pouring pitcher, a thermometer, and a heat source. Don’t forget to gather tools like scissors, a stirring stick, and safety equipment such as gloves and goggles. Having everything ready guarantees a smooth process. Double-check your supplies before starting to avoid interruptions. With your scent selection, wick choices, and essential tools in place, you’re ready to proceed confidently with your candle-making project. Also, ensure your workspace is clean and well-ventilated to safely handle hot wax and fragrances for proper safety precautions. Additionally, preparing your workspace with fire safety measures can help prevent accidents during melting and pouring. It’s important to be aware of the benefits of proper workspace setup to ensure a safe and successful candle-making experience. Taking the time to organize your supplies and workspace can enhance efficiency and make the entire process more enjoyable.
Choose a Well-Ventilated Area
Creating candles involves working with hot wax and fragrances, so choosing a well-ventilated area is essential for safety and comfort. Proper ventilation importance cannot be overstated—it helps disperse fumes and prevents buildup of potentially harmful vapors. By setting up in a space with good airflow, you reduce the risk of accidents and create a safer environment. Consider these safety precautions to keep your workspace secure:
- Keep windows open to allow fresh air in
- Use a fan to circulate air efficiently
- Avoid working near open flames or sparks
- Wear protective gear like masks and gloves
- Store flammable materials away from heat sources
- Understanding vehicle tuning principles can help you optimize your workspace setup for safety and efficiency. Additionally, ensuring proper ventilation techniques can significantly improve your overall safety during the candle-making process. Proper airflow can also help in controlling fume dispersal, which is crucial when working with fragrances and hot wax. Developing a good understanding of airflow management can further enhance safety and comfort during your candle-making projects. Creating in a well-ventilated space not only safeguards your health but also ensures a smoother, more enjoyable candle-making experience.
Organize Your Tools
Before you begin assembling your candles, take a few moments to organize your tools and set up your workspace. Proper workspace organization ensures candle safety and makes the process smoother. Gather all necessary tools, such as a hot glue gun, scissors, thermometer, and stirring sticks, and keep them within easy reach. Clear the area of any clutter that could cause accidents or contamination. Use protective surfaces to prevent damage to tables or countertops. Label your supplies if needed, so you don’t waste time searching. Well-organized tools help you work efficiently and safely, reducing the risk of spills or mishaps. Recognizing divorce residency requirements can also guide you in understanding the significance of your environment and the energies present during your craft session. Remember, a tidy workspace contributes to a safer candle-making experience and a more enjoyable crafting process.

VVIVID Candle Making Thermometer, Measure Temperature of Wax
ESSENTIAL CANDLE MAKING TOOL: For candles that look great, and smell heavenly, the VViViD wax thermometer lets you…
As an affiliate, we earn on qualifying purchases.
As an affiliate, we earn on qualifying purchases.
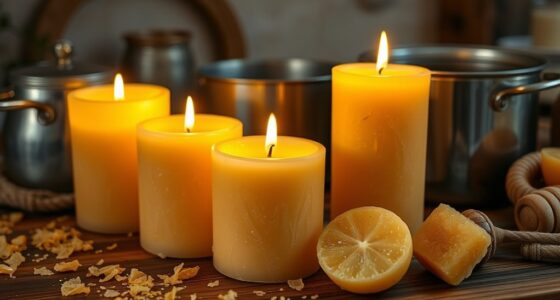
Melting and Coloring the Wax
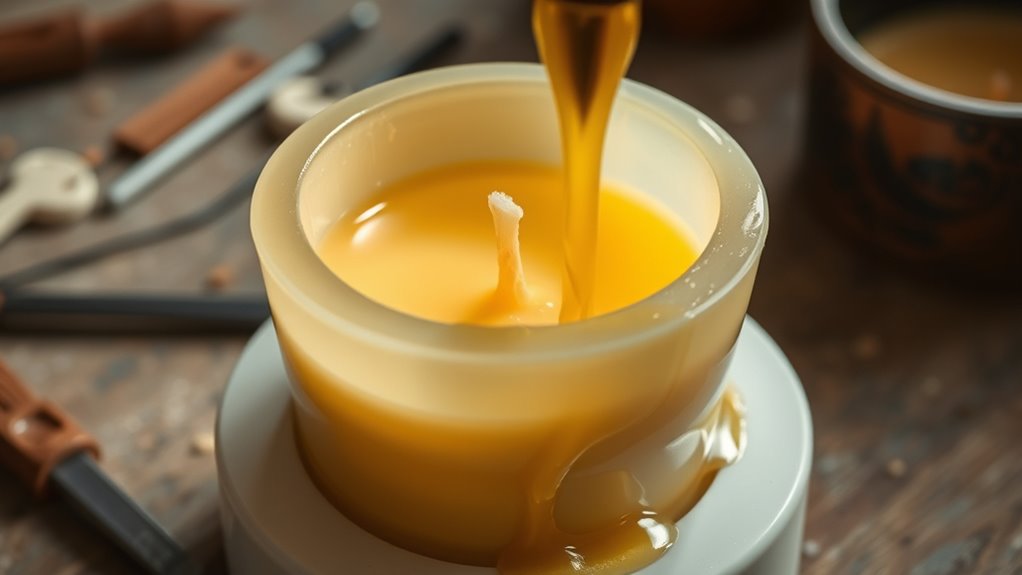
To melt the wax effectively, place it in a double boiler or a heat-safe container set over a pot of simmering water, ensuring you don’t overheat it. Keep an eye on the wax melting points to prevent burning or uneven melting. Once melted, you can explore various coloring techniques to make your candle truly unique. As you add color, imagine how your chosen shades will set the mood in your space. Stir gently to blend the color evenly, avoiding streaks or clumps. Here are some tips to enhance your coloring process:
Gently melt wax in a double boiler, then blend colors gradually for a vibrant, even finish.
- Use high-quality wax dyes for vibrant results
- Add color gradually to control intensity
- Mix thoroughly for an even hue
- Consider layering colors for a unique look
- Test small amounts before full mixing
- Remember that traditional butter-making techniques relied on manual churning methods, which required physical effort and regional variations. Additionally, selecting the right dye types can influence the vibrancy and stability of your candle colors. Incorporating layer concepts into your design can further elevate the visual appeal of your candles.
Attaching and Securing the Wooden Wicks

To guarantee your wooden wick stays centered and secure, start by properly aligning it before attaching. Use adhesive carefully to hold the wick in place without mess, applying just enough to secure it firmly. Double-check that the wick is firmly secured so it doesn’t shift when you pour the wax.
Proper Wick Centering
Have you ever struggled with keeping your wooden wicks centered while pouring wax? Proper wick centering is key to achieving that perfect crackling fire ambiance. To guarantee ideal wick alignment and wick stability, you need to secure the wick straight and upright.
Here’s how to do it:
- Use a wick centering device or a simple chopstick across the container’s top.
- Gently hold the wick in place while pouring hot wax.
- Double-check that the wick remains centered before the wax cools.
- Avoid moving the wick once the wax starts to set.
- Keep the wick straight and upright throughout the process.
Using Adhesive Effectively
Securing wooden wicks with the right adhesive guarantees they stay firmly in place during pouring and setting. Choose adhesive types suitable for candle making, such as hot glue, soy adhesive, or specialized wick adhesive. Hot glue is quick and easy but may be less durable over time, while soy adhesives offer a more natural bond. Apply a small amount of adhesive to the bottom of the wick or directly to the wooden wick base, avoiding excess that could interfere with the candle’s appearance. Use securing techniques like pressing the wick firmly into the container’s center or taping it temporarily until the adhesive *assures* the wick remains centered and stable, providing a safe, even burn once the wax hardens.
Ensuring Secure Placement
When attaching wooden wicks, it’s essential to guarantee they stay firmly in place during the pouring and setting process. Achieving wick stability relies on using an adhesive with strong adhesive strength, ensuring the wick remains centered and upright. Properly securing the wick prevents wobbling, uneven burning, and potential safety hazards. To boost confidence in your setup, consider these tips:
- Choose a high-quality, heat-resistant adhesive for secure attachment
- Keep the wick straight and centered during application
- Apply adhesive evenly for consistent adhesion
- Allow sufficient drying time before pouring wax
- Test the wick’s stability gently before proceeding
Pouring and Cooling Your Candles
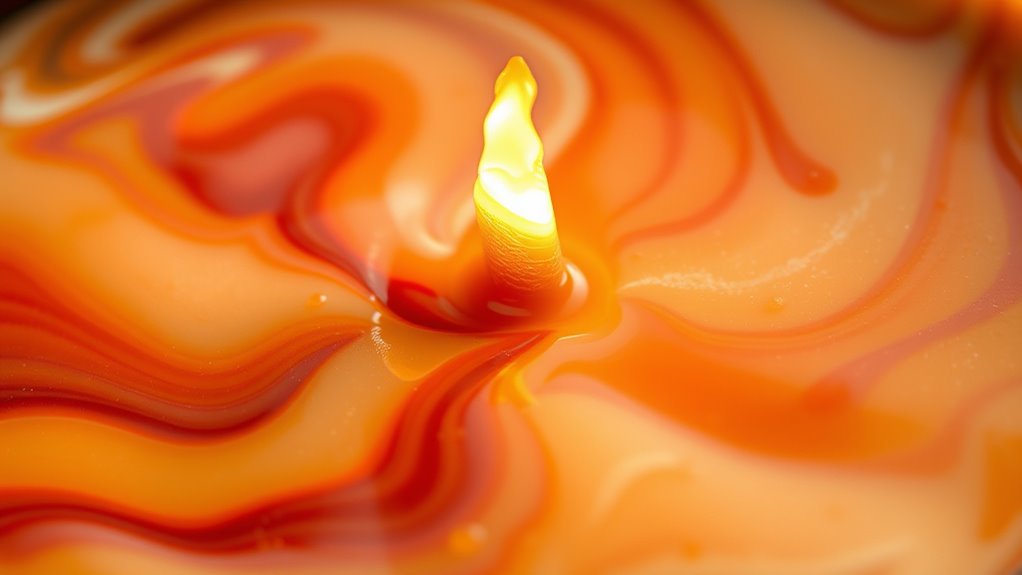
Once you’ve poured the melted wax into your prepared container, the key to a smooth finish is controlling how it cools. As the wax begins to set, keep the temperature steady and avoid moving the container. This helps prevent cracks and surface imperfections. When choosing your fragrance, add it during the wax melting process for even scent distribution. Pour slowly to reduce air bubbles, and leave a small amount of wax in the melting pot to top off if needed. Let the candle cool at room temperature; rapid cooling can cause imperfections. Resist the urge to refrigerate or move the container prematurely. Proper cooling guarantees a level, glossy surface, showcasing your wooden wick and creating that inviting crackling fire ambiance.
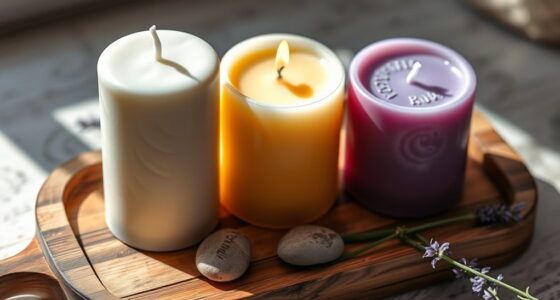
Adding Final Touches and Displaying Your Creations

After your candles have cooled and set properly, it’s time to add those final touches that make each piece truly unique. You can enhance their charm with decorative accents like ribbons, dried flowers, or small charms that reflect your style. Consider scent layering by adding subtle essential oils or fragrant herbs on the surface for a multi-dimensional aroma. Display your candles thoughtfully—on rustic trays, elegant shelves, or cozy mantels—to showcase their beauty. Personal touches evoke emotion and make your creations memorable. Remember, your attention to detail transforms simple candles into heartfelt gifts or charming home decor. Let your creativity shine through, making each candle a reflection of your personality and craftsmanship.
Frequently Asked Questions
How Long Does a DIY Wooden Wick Candle Typically Burn?
Your DIY wooden wick candle typically burns for about 20 to 40 hours, depending on its size and wax type. The burn time can vary, but with proper care, your wick lifespan remains longer, ensuring consistent crackling sounds and ambiance. To maximize burn time, trim the wick regularly and avoid burning the candle for too long each session. This way, you enjoy your cozy, crackling fire ambiance longer.
Can I Use Recycled Containers for My Candles?
Yes, you can use recycled containers for your candles. Just make sure to recycle glass properly and clean the containers thoroughly to prevent any residual odors or contaminants. Check container safety—ensure they’re heat-resistant and won’t crack when heated. Remove any labels carefully, and avoid containers with cracks or chips. Using recycled containers adds a personal touch to your candles and supports eco-friendly practices.
What Safety Precautions Should I Take During Candle Making?
Think of candle making as walking a tightrope—you need focus and care. To stay safe, you should always keep fire hazards in check by never leaving melting wax unattended. Make certain proper ventilation to avoid inhaling fumes and reduce fire risks. Use heat-resistant containers, wear gloves, and keep a fire extinguisher nearby. These precautions are your safety net, helping you craft beautiful candles without accidents.
How Do I Fix a Wick That’s Not Standing Upright?
To fix a wick that’s not standing upright, first make certain proper wick alignment by straightening it gently. You can use a wick centering device or hold it steady with tweezers until the wax cools and hardens, providing wick stability. If the wick leans, re-melt the wax around it and reposition the wick, holding it upright until it sets. Consistent wick alignment guarantees a safe, even burn and a beautiful crackling fire ambiance.
Are There Eco-Friendly Alternatives to Traditional Candle Dyes?
Yes, you can use eco-friendly alternatives like natural dyes or plant-based pigments for coloring your candles. These options are made from ingredients like beetroot, turmeric, or spirulina, which add vibrant colors without harmful chemicals. By choosing plant-based pigments, you not only create beautiful, sustainable candles but also reduce environmental impact. Simply melt your wax, stir in your natural dye, and pour—enjoy eco-conscious crafting with stunning results.
Conclusion
Now that you’ve crafted your own wooden wick candles, you’re about to create a cozy ambiance that’s nothing short of magical. With each crackle and flicker, your space will transform into a warm haven, rivaling the glow of a thousand fires. Keep experimenting and refining your technique—you’re capable of mastering this art and lighting up lives with your beautiful, handcrafted candles. Get ready to impress everyone with your incredible, crackling fire ambiance!