
To fix candle tunneling at home, gently re-melt the wax along the edges using a heat source like a hairdryer on low, then let it cool and solidify. You can also create a wax “pillow” by burning just enough to soften the surface, then tilt the candle to distribute wax outward. Trimming the wick and practicing proper burning habits helps prevent future tunneling. Keep exploring these simple tricks to boost your candle’s life and performance.
Key Takeaways
- Gently re-melt the wax edges with a heat source to fill in the tunnel and promote an even burn.
- Create a wax “pillow” by burning just enough to soften the surface, then tilt to distribute wax outward.
- Trim the wick to about a quarter inch to ensure a controlled, even flame and prevent uneven burning.
- Use a heat gun or hairdryer on low to carefully soften wax without damaging the candle.
- Practice proper burning habits, including burning long enough to melt the entire surface, to prevent future tunneling.
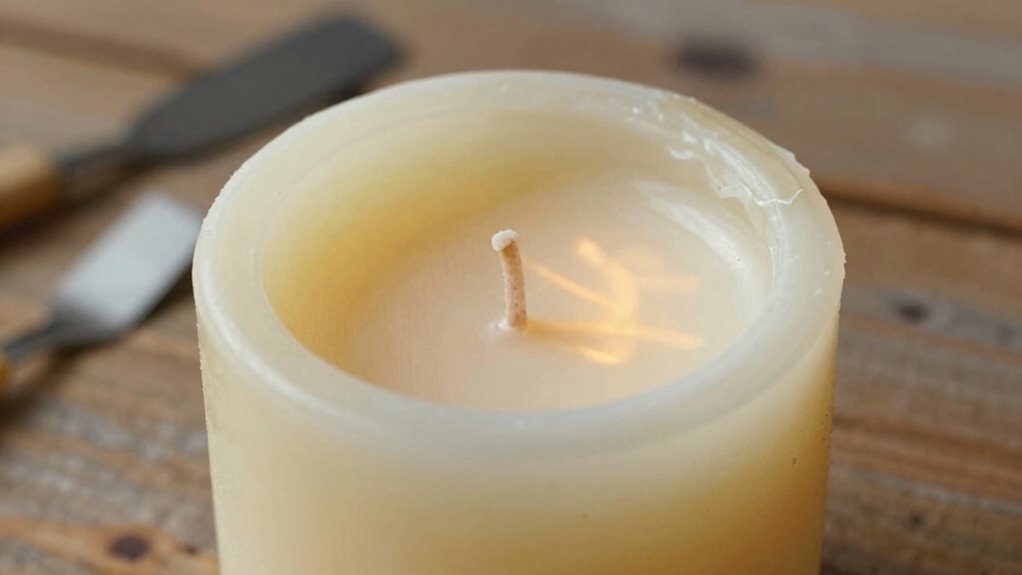
Have you ever lit a candle only to find it burns down the middle, leaving wax on the edges? This common problem, known as tunneling, can be frustrating because it wastes wax and makes your candle less effective. Luckily, there are simple DIY fixes you can try at home to address this issue. When fixing tunneling, always prioritize candle safety—never leave a burning candle unattended, and keep it away from drafts, flammable objects, or anything that could cause accidents. Proper candle safety helps prevent mishaps while you work on fixing the wax.
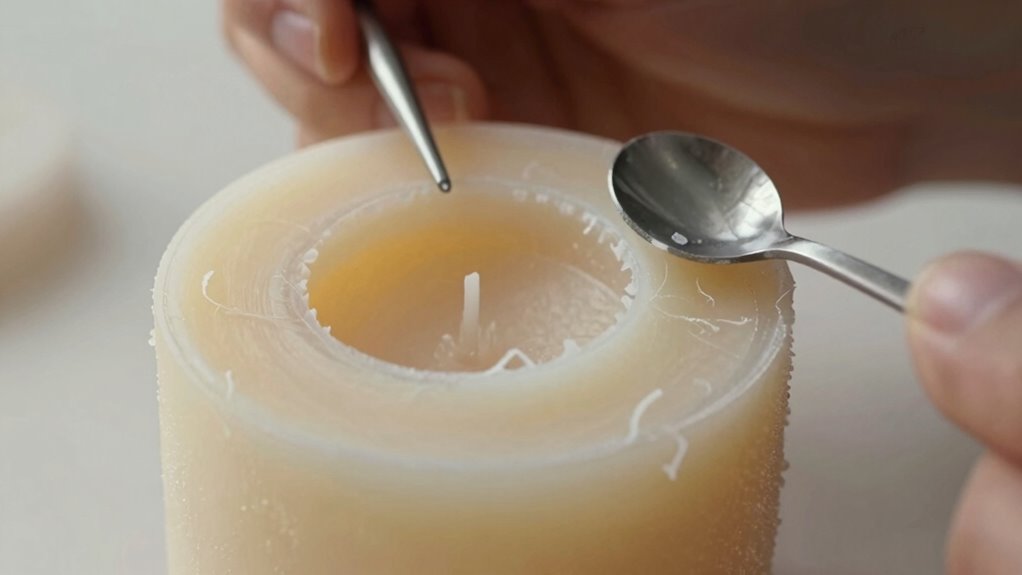
To start, if your candle has already tunneled, you can gently re-melt the wax on the edges. Use a heat source like a hairdryer on a low setting or carefully apply gentle heat with a heat gun, keeping it at a safe distance to avoid overheating or damaging the container. This method helps soften the wax on the outer edges, allowing it to melt and fill in the tunnel. Once the wax softens, extinguish the flame, and let the candle cool slightly before trimming the excess wick. This process preserves wax, making your candle last longer and burn more evenly in the future. Recognizing how burning habits impact candle performance can help you prevent tunneling in future uses. Additionally, understanding candle design can guide you in selecting the most durable candles that resist tunneling.
Another effective trick involves creating a makeshift “pillow” of wax. Light the candle and let it burn just enough to melt the wax on the surface, then blow it out. While the wax is still warm and liquid, gently tilt the candle to distribute the wax toward the edges, helping to fill in the tunnel. Afterward, let it cool and solidify, which will improve the burn pattern and reduce tunneling over time. Understanding the design of candles can assist in choosing candles that are less prone to tunneling, especially those with wider or specially designed wicks. Additionally, practicing proper burning techniques can significantly enhance the candle’s performance and longevity. If you want a more permanent solution, consider trimming the wick to about a quarter inch before each burn. A shorter wick prevents the candle from burning too quickly or unevenly, which can lead to tunneling. Also, ensure you burn the candle long enough for the wax to melt across the entire surface during each use. This habit encourages an even burn, reducing the chances of tunneling and maximizing wax preservation. Remember, preventing tunneling from the start is the best way to get the most out of your candles.
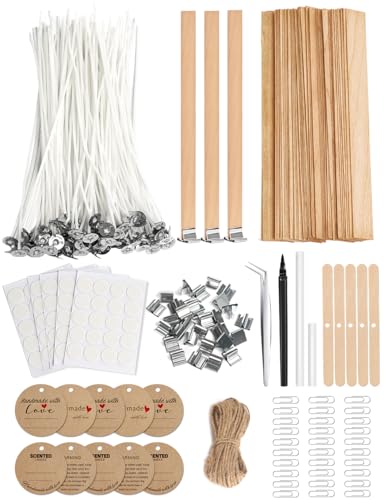
Multiwins 130 Pcs Candle Wicks for Candle Making Kit: 100 Cotton & 30 Wood Wicks with Complete Tool Set (Wick Holders, Wick Stickers, Candle Tabs, Tweezers, Pen), for Soy Beeswax DIY Candles
- Complete Candle Making Kit: Includes wicks, tools, and accessories
- Pre-waxed Cotton Wicks: 100 cotton wicks for clean burning
- Wooden Wicks Included: 30 wooden wicks with crackling sound
As an affiliate, we earn on qualifying purchases.
As an affiliate, we earn on qualifying purchases.
Frequently Asked Questions
How Do I Prevent Candle Tunneling From Happening in the First Place?
To prevent candle tunneling, you should start with proper candle wick adjustments to guarantee an even burn. Keep the wick trimmed to about a quarter inch before each burn. Use wax layering techniques by allowing the wax to melt evenly across the surface during each burn, preventing the formation of a deep hole. These steps promote a consistent melt pool, reducing the chances of tunneling from happening in the first place.
Are There Specific Candle Types Less Prone to Tunneling?
Think of choosing candles like selecting a well-tended garden. Scented candles with soy wax are less prone to tunneling because they burn evenly, like a garden with balanced watering. These candles melt uniformly, reducing tunnel formation. Opt for high-quality soy wax candles, especially those labeled “long-lasting” or “tunneling-resistant.” They’re designed to burn evenly, ensuring your candle’s glow remains beautiful and consistent, much like a thriving, well-cared-for garden.
Can I Reuse a Tunneled Candle After Fixing It?
Yes, you can reuse a tunneled candle after fixing it. First, recycle the wax by melting the remaining wax and pouring it into a new container, guaranteeing a clean, even surface for better candle aesthetics. This process not only extends your candle’s life but also lets you enjoy its scent again. Just make sure to remove any burnt or uneven wax to ensure a smooth, attractive finish.
What Safety Precautions Should I Take During Candle Repair?
Your safety is more essential than traversing a minefield! When repairing a candle, always wear fire-resistant gloves to prevent burns, and guarantee proper ventilation to avoid inhaling harmful fumes. Keep a fire extinguisher nearby, work on a heat-resistant surface, and never leave the candle unattended while fixing it. These precautions protect you from potential hazards, making your DIY project safe, successful, and even a bit more sophisticated.
How Long Does a Typical Candle Tunneling Fix Last?
A typical candle tunneling fix lasts as long as the candle’s wax remains properly melted and evenly distributed. When you fix tunneling, you’re encouraging consistent wax melting, which helps preserve your candle scent and prevents waste. Usually, a good fix can extend your candle’s life by several burns, but keep an eye on the wax level. Regularly trimming the wick also ensures an even burn and longer-lasting candle enjoyment.
Conclusion
Now that you’ve uncovered these simple fixes, you’re ready to conquer candle tunneling for good. But beware—what if the next burn reveals a new, unexpected challenge? Each flicker of your candle might hold a secret, waiting to test your skills. Keep experimenting, stay vigilant, and don’t let tunneling win. The secret to perfect candles lies just beyond your reach—will you find it before your next glow fades? The solution’s waiting, if you dare to look closer.