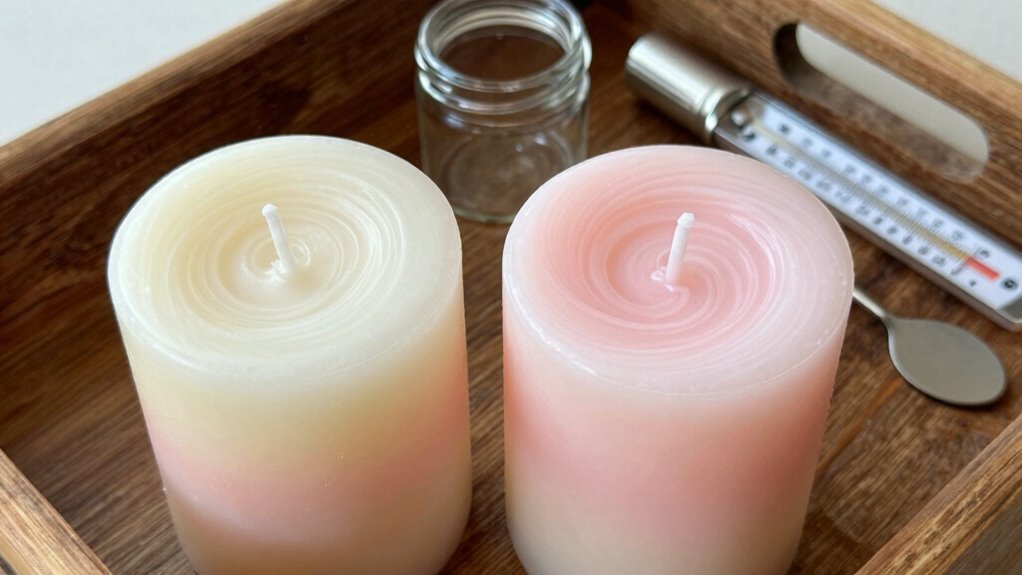
DIY double-pour candles let you create elegant, layered designs with clean lines and smooth finishes. You pour the wax twice—adding color, decorations, or scents between layers—and guarantee each layer cools to the right temperature for a seamless look. This technique is perfect for special gifts, personalized décor, or intricate designs. Mastering the process requires patience and attention to detail, but once you get it right, you’ll produce stunning candles. Keep going to discover more tips and tricks.
Key Takeaways
- Double-pour candles create layered, decorative effects, adding visual interest and a polished finish ideal for gifts or special occasions.
- Use the technique when embedding objects or achieving precise color layering for a professional, refined look.
- It involves pouring a wax layer, letting it partially set, then adding a second layer for a seamless, sharp design.
- Proper temperature control and patience are essential for flawless adhesion and avoiding cracks or bubbles.
- Ideal for DIY projects aiming for a high-quality appearance without expensive equipment or complex methods.
Have you ever wondered how to create stunning, professional-looking candles at home? The double-pour technique is a fantastic way to elevate your candle-making game, especially when you want a polished, refined finish. It involves pouring your wax twice: first to create a base layer and then filling the top layer after the initial pour has firmed up. This method is particularly useful when you want a clean, sharp look or to add decorative elements that need a smooth surface. To succeed, you need to pay close attention to scent infusion and wick placement. When adding fragrance, it’s best to infuse the scent into the wax during the first pour, making certain it’s evenly distributed throughout the candle. This way, your candle will emit a consistent, lovely aroma when lit. Just be careful not to overheat the wax, as high temperatures can diminish the scent’s potency. Once the first layer has cooled but remains slightly tacky—about the right firmness to hold the second pour—you can proceed with the top layer. This step is essential because pouring at the right temperature ensures a seamless finish, with no cracks or sinkholes. Before pouring the second layer, double-check your wick placement. It’s vital that the wick remains centered and upright throughout the process. You might want to anchor it with a wick centering device or a simple pencil laid across the container’s top. Proper wick placement guarantees an even burn and prevents the wick from leaning or drifting during the second pour. When pouring the top layer, use a slow, steady stream to avoid disturbing the first layer. If you want to incorporate decorative elements, like embedded objects or different wax colors, the double-pour technique gives you the perfect opportunity. You can embed items into the top layer or create layered color effects by pouring different colored waxes in succession. The key is patience—allow each layer to set properly before adding the next. This method is ideal for special occasions, gift candles, or when you want a professional finish without investing in expensive equipment. Mastering wax temperature control** is crucial for achieving flawless layers, as it directly influences layer adhesion and overall finish. Paying attention to temperature regulation during the process can significantly improve your results. Additionally, understanding how layering techniques affect the final appearance can help you plan more intricate designs. For example, controlling the cooling rate** can help prevent cracks and bubbles from forming. So take your time and monitor the heat carefully. With practice, you’ll master the timing and temperature control needed to achieve flawless layers. The result will be a beautifully crafted candle with a crisp, smooth surface that looks as good as it smells. Whether you’re making candles for personal use or as gifts, mastering the double-pour technique guarantees your candles stand out with a refined, professional touch.

BBAXI Candle Making Pouring Pot, 32oz Double Boiler Wax Melting Pot, 304 Stainless Steel Candle Making Pitcher with Heat-Resistant Handle and Dripless Pouring Spout Design
- Ideal Capacity: Holds 32oz of molten wax
- Premium Material: Made of durable 304 stainless steel
- Heat-Resistant Handle: Plastic handle stays cool during use
As an affiliate, we earn on qualifying purchases.
As an affiliate, we earn on qualifying purchases.
Frequently Asked Questions
Can Double-Pour Candles Be Made With Any Wax Type?
Yes, you can make double-pour candles with many wax types, but some are better suited for candle layering. When doing wax melting, choose waxes that melt smoothly and harden well, like soy or beeswax. Avoid softer or more brittle waxes that might crack. Using the right wax guarantees your layers stay distinct and look professional, giving your candle a beautiful double-pour effect.
How Long Should I Wait Between Pours?
You should wait at least 4-6 hours between pours to master perfect candle layering! Rushing this step can turn your beautiful creation into a melted mess. The key is to wait until the wax reaches the ideal pouring temperature, usually around 135°F to 145°F, depending on your wax. Patience here transforms your double-pour candle into a stunning, professional-looking masterpiece, avoiding cracks and uneven layers.
Is Double-Pouring Suitable for Scented Candles?
Yes, double-pouring is suitable for scented candles. It helps guarantee better fragrance retention and scent dispersion, as you can top off the candle to fill in any gaps or uneven surfaces. When you pour the second layer at the right temperature, the scent molecules integrate well, enhancing the overall aroma. This technique also prevents scent loss, giving you a more fragrant and evenly dispersed candle.
What Safety Precautions Are Necessary During Double Pouring?
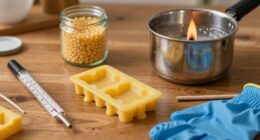
You should wear heat-resistant gloves to protect your hands when double pouring candles, especially when handling hot wax. Make sure your workspace has proper ventilation to avoid inhaling fumes, which can be harmful. Always pour the wax carefully and avoid spills. Keep a fire extinguisher nearby and never leave hot wax unattended. These precautions help keep you safe while achieving perfect double pours.
Can I Fix a Double-Pour Candle if It Sinks or Cracks?
Think of your candle as a living artwork—you can fix it! If your double-pour candle sinks or cracks, gently reheat the surface with a heat gun or hairdryer. Use precise pouring techniques to fill in cracks and even out the wax, restoring your candle’s aesthetics. Patience is key; carefully blending the new wax with the old preserves the smooth, beautiful finish you desire, making your candle look flawless again.
Conclusion
Now that you’ve learned how to make double-pour candles, you’re ready to create stunning, professional-looking pieces at home. Remember, patience is key—good things come to those who wait. With practice, you’ll perfect your technique and craft beautiful candles for any occasion. So, don’t rush the process; as the saying goes, “Haste makes waste.” Enjoy the journey, and soon, your handmade candles will be the highlight of your space or gift-giving.