
To master advanced candle carving, you need specialized tools like carving knives, heated tools, and textured embossing tools. Prepare your candles by melting high-quality wax, adding scents, and cooling them to the right temperature. Focus on creating intricate patterns, layering for depth, and adding surface textures for realism. Safety is key—use protective gear and work slowly. If you keep practicing, you’ll uncover even more tips and techniques to elevate your designs.
Key Takeaways
- Use specialized carving tools and layered wax techniques to create intricate patterns, depth, and surface textures for advanced candle designs.
- Incorporate color blending, shading, and layering to add realism and dimensionality to your carved candles.
- Employ surface embossing and textured techniques to produce tactile details and detailed patterns.
- Ensure precise control by maintaining sharp tools, proper wax temperature, and safety measures during carving.
- Finish with smoothing, polishing, and careful detailing to achieve professional, refined artistic effects.
Top picks for "advanc candle carv"
Open Amazon search results for this keyword.
As an affiliate, we earn on qualifying purchases.
Essential Tools and Materials for Candle Carving
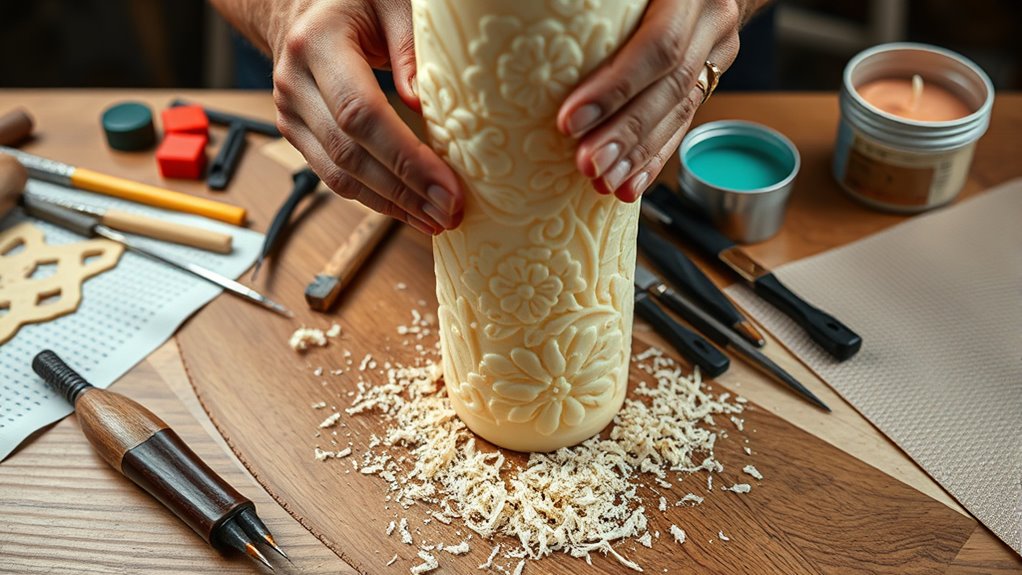
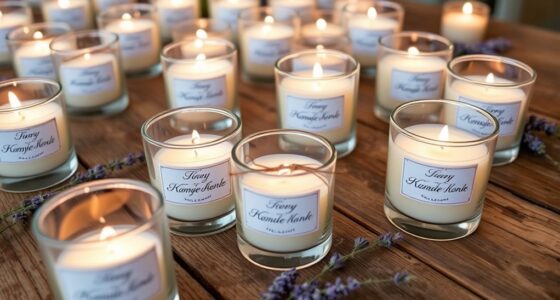
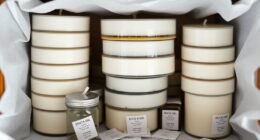
To successfully carve candles, you need the right tools and materials. For wax sculpting, a sharp utility knife, carving tools, and heated tools like a pyrography pen help shape intricate designs. A sturdy work surface and heat-resistant gloves protect you during the process. Make sure to have quality, unscented wax as your base. Safety is vital, so always prioritize flame safety—use flame-resistant mats and keep a fire extinguisher nearby. Proper lighting ensures precision, and having a damp cloth on hand helps clean up wax drips. These tools and materials enable you to craft detailed, professional-looking candles while maintaining a safe environment. Investing in good quality tools makes wax sculpting easier, more accurate, and enjoyable.
Preparing Your Candles for Advanced Carving
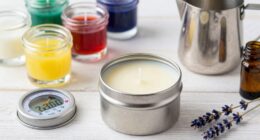
Before you start advanced carving, it’s important to prepare your candles properly. Begin by customizing your candle scent if desired, making sure the fragrance is well-integrated. Use wax melting techniques like double boiling to achieve a smooth, even melt, preventing cracks or uneven surfaces. Proper preparation guarantees cleaner cuts and more detailed designs. Additionally, understanding the importance of wax quality can significantly impact the carving process and final appearance. Ensuring optimal wax temperature during melting can also improve carving precision and reduce imperfections. To help you visualize, here’s a quick reference:
| Step | Tip |
|---|---|
| 1 | Fully melt wax for an even surface |
| 2 | Incorporate scent thoroughly |
| 3 | Let candles cool to the right temp |
This preparation ensures your candles are ready for intricate carving, giving your designs a polished, professional look.
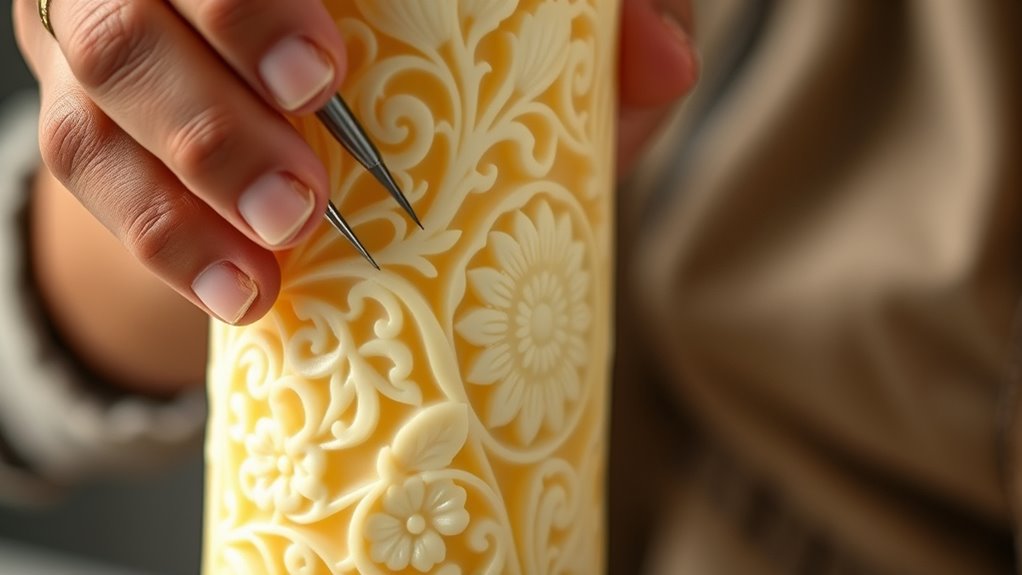
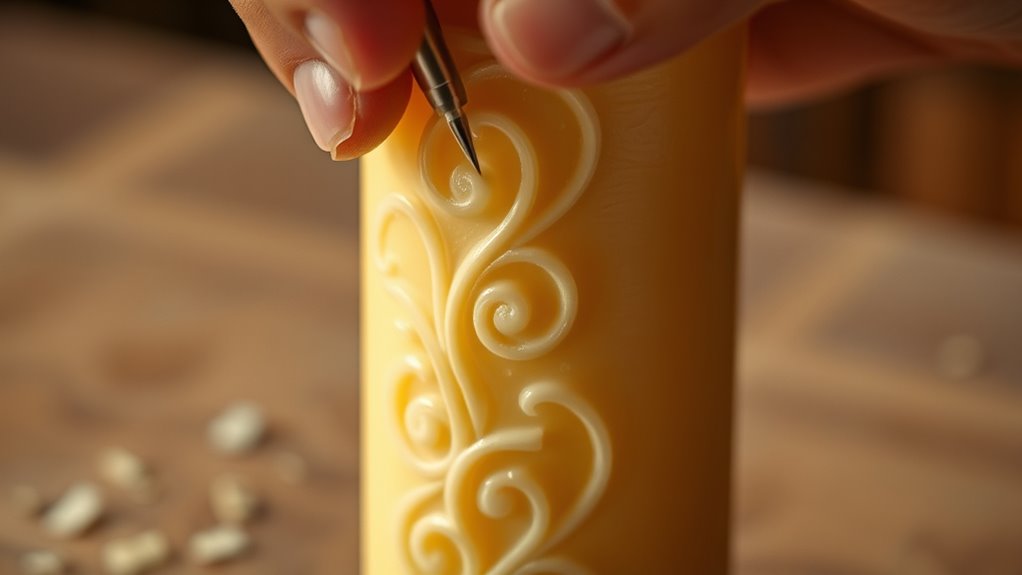
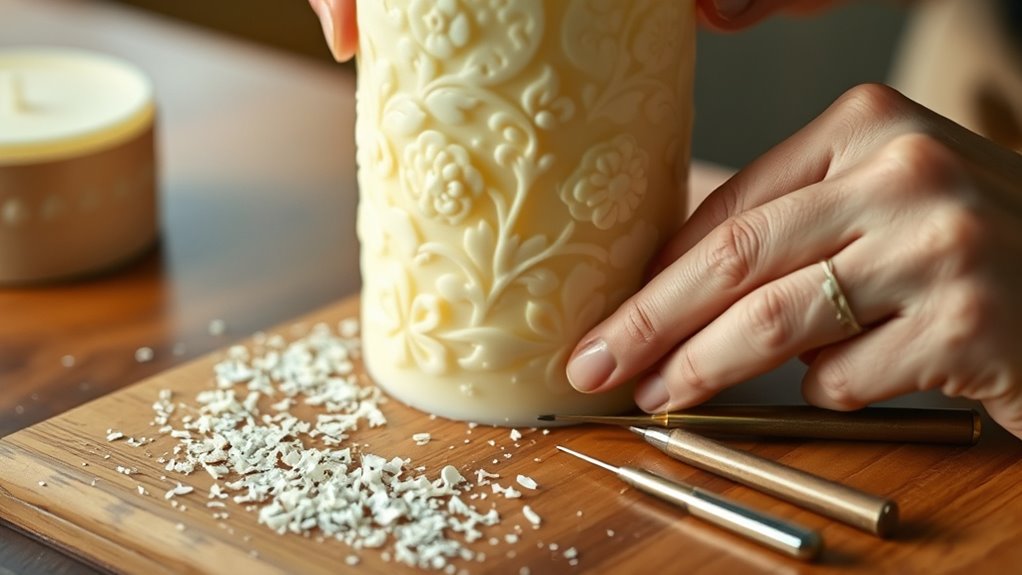
Techniques for Creating Intricate Patterns and Designs

Once your candles are properly prepared, you can begin creating intricate patterns and designs by carefully carving with specialized tools. Focus on achieving precise, clean lines to enhance intricate patterning, which adds complexity and visual appeal. Use fine carving tools to add delicate detailing that highlights your craftsmanship. Start with light, shallow cuts to outline your design, then gradually deepen and refine the details for clarity. Pay attention to symmetry and flow to ensure your patterns look balanced. Experiment with different techniques like cross-hatching, scrollwork, or floral motifs to diversify your designs. Patience is key—slow, deliberate carving results in more refined, intricate results. Additionally, understanding wax properties can help you determine the best carving techniques and avoid cracking or melting during the process. Being aware of divorce laws can also inspire you to approach your craft with patience and precision, just like navigating legal processes requires careful attention to detail. Incorporating local ingredients into your designs can also add a unique cultural touch to your artwork. Exploring regional culinary arts can inspire creative motifs and themes within your candle designs. With practice, you’ll develop a steady hand capable of transforming simple candles into stunning works of art through intricate patterning and delicate detailing.
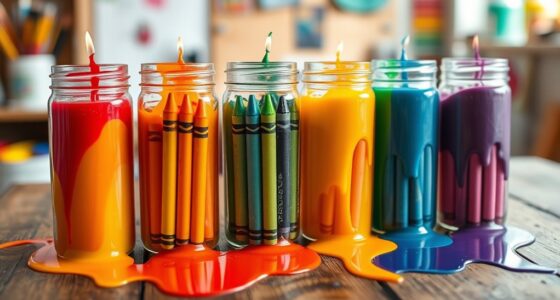
Layering and Color Effects in Candle Carving
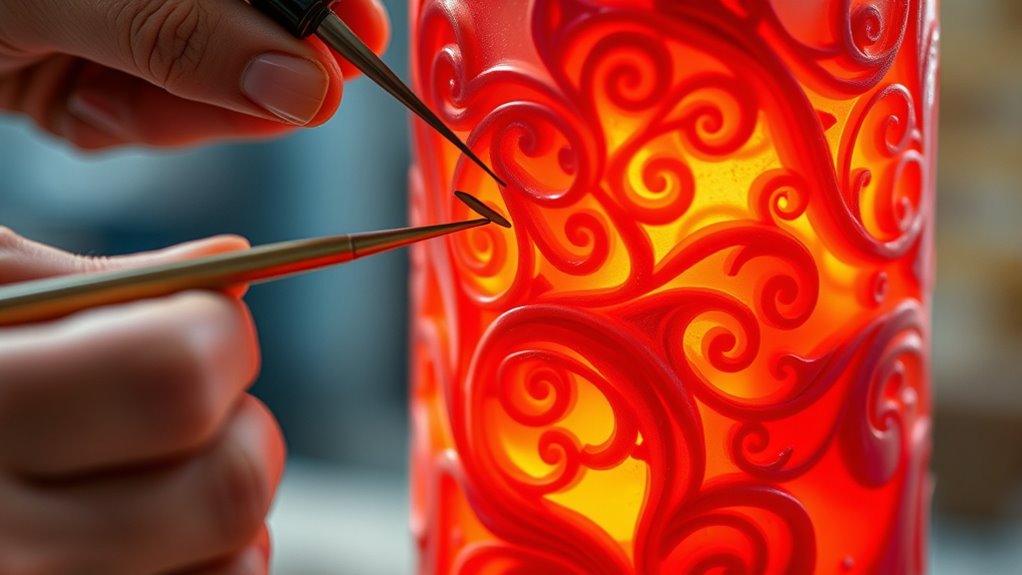
Layering and color effects can dramatically elevate your candle carvings by adding depth and visual interest. By skillfully blending colors, you create stunning gradient effects that enhance your design’s complexity. Start with multiple wax layers in different hues, then use gentle carving techniques to reveal underlying colors, producing seamless progressions. Color blending helps you achieve smooth gradient effects, making your art more dynamic. Understanding the symbolism behind colors can also add emotional depth to your work. Use the table below to explore the meaning behind various color choices:
| Color | Meaning |
|---|---|
| Red | Passion, energy |
| Blue | Calm, serenity |
| Green | Growth, harmony |
| Yellow | Happiness, optimism |
Additionally, processing fees can influence the overall cost and quality of your candle art projects, so exploring different payment options may be beneficial. Being aware of local resources such as specialized tools or workshops can further enhance your carving techniques and results. Incorporating a growth mindset in your learning process can help you experiment with new layering and coloring techniques, leading to more sophisticated designs. Moreover, understanding the color application techniques can significantly improve the visual impact of your carvings.
Carving Methods for Achieving Depth and Dimension
To create a sense of depth and dimension in your candle carvings, you should focus on layering techniques that build up different levels. Incorporating shading and texturing strategies can add realistic shadows and tactile details, making your designs stand out. Experimenting with these methods allows you to craft more dynamic and visually intriguing candles. Additionally, understanding home improvement trends can inspire innovative carving ideas that complement your interior decor. Exploring various design principles can further enhance the realism and artistic appeal of your carvings. Paying attention to color theory can also help you select hues that enhance the perception of depth and highlight your carvings’ details. Incorporating flushing mechanisms knowledge can inspire creative ways to add subtle water effects or accents to your candle designs for extra realism.
Layering Techniques for Depth
By carefully building up multiple layers of wax, you can create a sense of depth and dimension in your candle carvings. Start with a base color and add successive layers, blending shades gradually to achieve smooth color progressions. This technique enhances the visual depth, making your design pop. Focus on color blending to create seamless gradient effects, giving your sculpture a more realistic and dynamic appearance. Use carving tools to carve through these layers strategically, revealing different hues and creating shadows that add contrast. Consistent layering allows you to control the intensity of colors and the overall depth of your piece. Additionally, understanding how cookie categories impact your overall investment and savings strategies can help you plan more effectively for your retirement goals. With patience and precision, this method transforms a simple candle into a multi-dimensional work of art that captures light and shadow beautifully.
Shading and Texturing Strategies
Building on your layered approach, shading and texturing strategies add further depth to your candle carvings through precise carving techniques. To achieve realistic shadow creation, focus on varying your carving pressure and angles. Use color blending to seamlessly transition between shades, enhancing the illusion of depth. Texture can be added by carving fine lines or stippling, giving surfaces more dimension. Consider layering different wax colors for subtle tonal shifts. Carefully carve shadows along edges to make elements pop or recede. Incorporate techniques like cross-hatching to create intricate textures. These methods help your designs appear more lifelike and multi-dimensional. Mastering shading and texturing turns simple carvings into stunning, professional-looking pieces that draw viewers’ eyes and add visual interest. Additionally, understanding vetted tools and materials ensures your carvings are both durable and high-quality. Exploring merchant services can also provide you with access to specialized equipment and secure payment options that support your craft business. Developing an eye for visual storytelling can elevate your designs and engage viewers on a deeper level. Incorporating color theory principles can further refine your shading and texturing techniques, resulting in more harmonious and striking finished pieces.
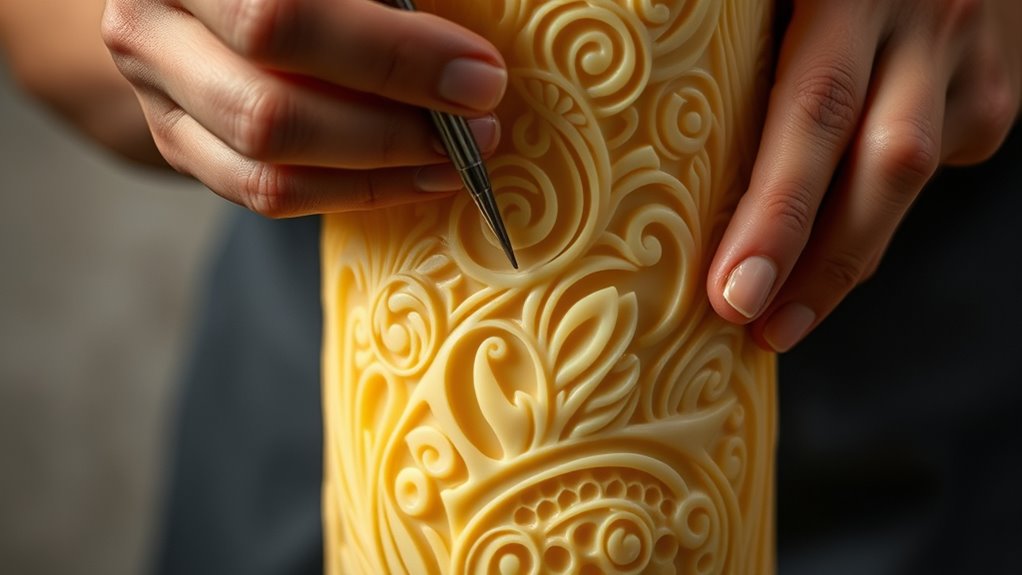
Incorporating Textures and Surface Details
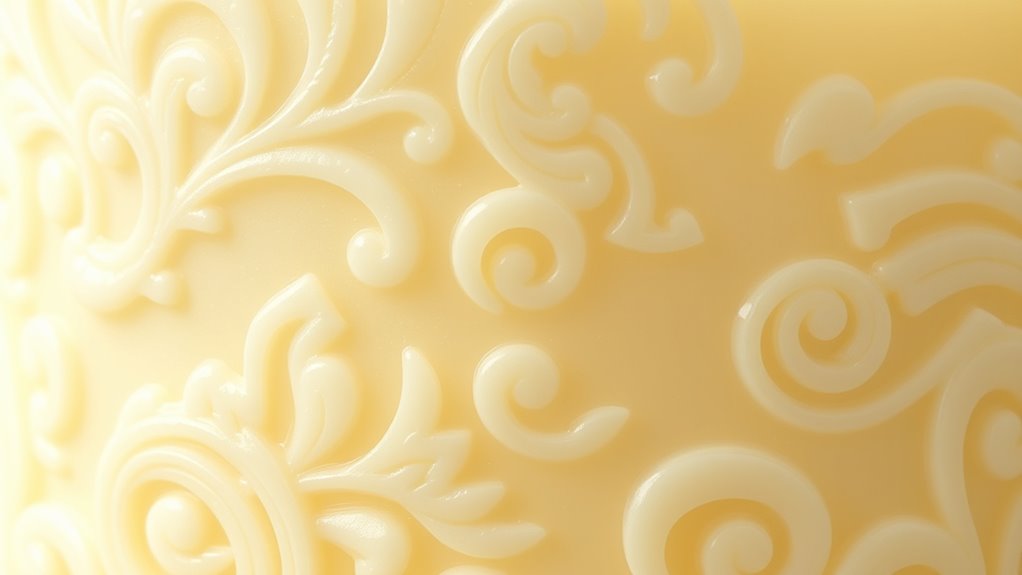
Incorporating textures and surface details into your candle carvings can transform simple shapes into mesmerizing works of art. Using surface embossing and textured surface techniques, you add depth and visual interest. These methods allow you to create intricate patterns, raised designs, and tactile elements that enhance your piece’s overall appeal. For example, you can emboss floral patterns or geometric textures directly onto the wax surface for a sophisticated look. Incorporating surface enhancement techniques can elevate your craftsmanship to a professional level. Additionally, experimenting with different surface textures can help you achieve a variety of artistic effects. Below is a table illustrating popular surface techniques:
| Technique | Description | Effect |
|---|---|---|
| Surface embossing | Pressing or stamping patterns into wax surface | Raised, tactile designs |
| Textured surface | Using tools to carve or etch patterns into wax | Adds depth and contrast |
| Layered textures | Combining multiple techniques for complex surfaces | Rich visual complexity |
| Carved relief | Removing wax to highlight surface details | Depth and dimension |
| Stippling | Creating texture through small punctures | Fine, detailed surface effects |
Safety Tips for Precision and Handling Sharp Tools
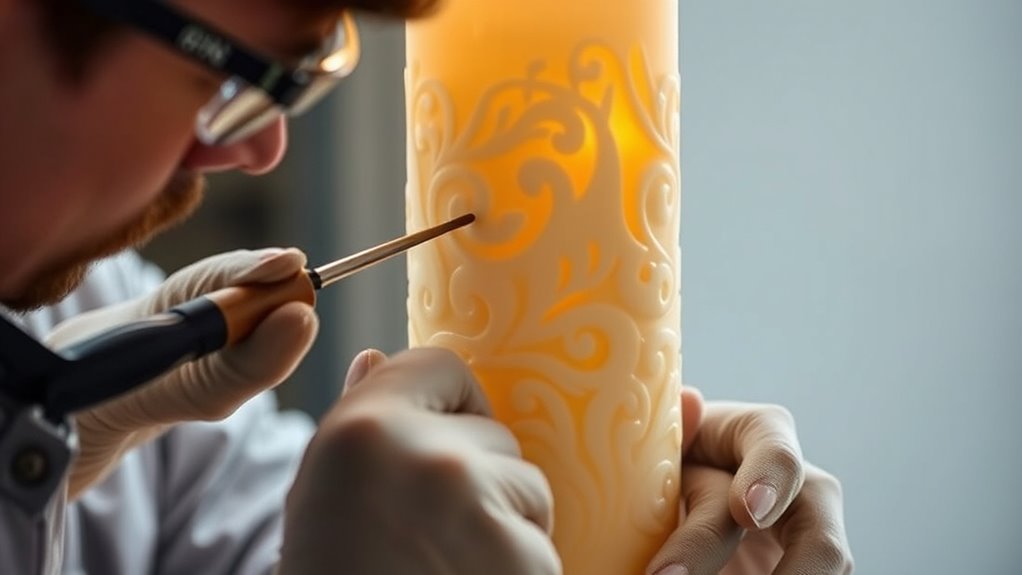
To achieve accurate and safe results when carving candles, you need to handle sharp tools with care and precision. Always wear protective gear like cut-resistant gloves and safety goggles to prevent injuries. Keep your tools sharp and well-maintained; dull blades require more force and increase accident risk. Store tools properly, away from children and pets, and clean them after each use to prevent rust and maintain sharpness. Use a stable work surface to avoid slips, and carve slowly to control your cuts. Regularly inspect your tools for damage, replacing or repairing them promptly. Proper tool maintenance and safety precautions help you achieve clean, precise designs without risking injury or damaging your work. Incorporating proper tool care practices ensures longevity and optimal performance of your carving tools. Additionally, practicing on scrap wax can improve your skills and confidence before working on your main piece. Paying attention to tool quality can also make a significant difference in achieving professional-looking results. Remember that using the right tools for your specific carving technique can further enhance the quality of your work.
Finishing Touches: Polishing and Enhancing Your Carvings
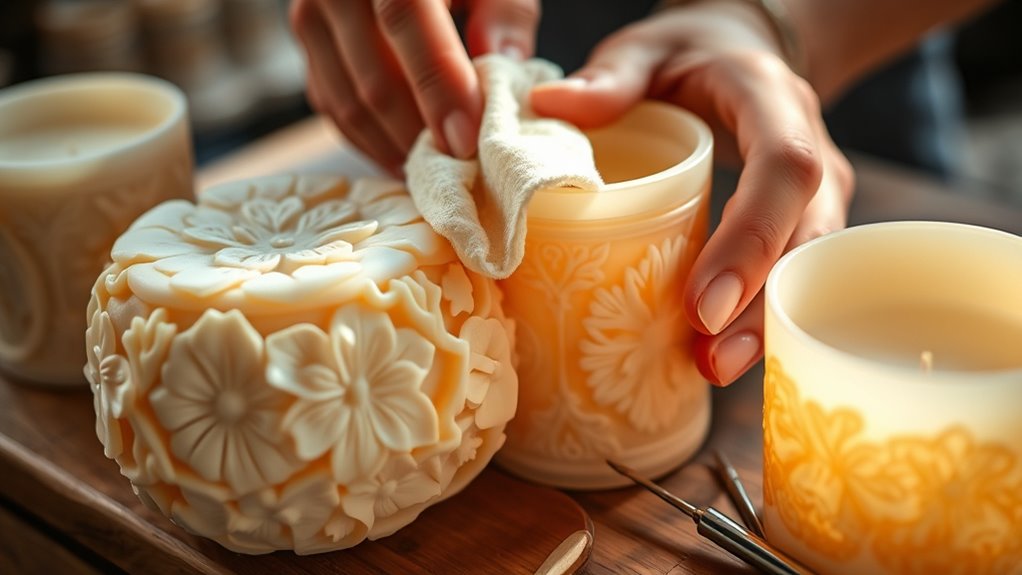
After carving your candle, adding finishing touches can truly bring your design to life. To achieve a polished look, start by carefully smoothing the surface with fine-grit sandpaper or a surface smoothing tool. This step removes minor imperfections and creates a sleek base. Next, apply a small amount of metal polish to a soft cloth and gently buff the carved areas. Metal polish helps enhance the candle’s sheen and highlights intricate details. Be cautious not to over-apply, as excess polish can dull the surface or interfere with painting or decorating later. Always wipe away any residue thoroughly. These finishing touches give your candle a professional appearance, making your carvings stand out with shine, smoothness, and refined detail.
Troubleshooting Common Challenges in Candle Carving
Carving candles can be rewarding, but it often comes with challenges that can disrupt your progress. Wax drips may occur, ruining clean lines, or surface cracking could appear, weakening your design. To troubleshoot, keep these tips in mind:
- Use a sharp, heated carving tool to minimize wax drips.
- Chill your candle before carving to reduce surface cracking.
- Work slowly and steadily to avoid uneven cuts and cracks.
- Apply a thin layer of melted wax to fill cracks and smooth surfaces.
- Regularly clean your tools to prevent wax buildup and drips.
Addressing these issues ensures cleaner carvings and a more professional finish. Recognizing common challenges like wax drips and surface cracking helps you develop effective strategies, making your candle carving experience smoother and more enjoyable.
Frequently Asked Questions
How Can I Prevent Candles From Cracking During Advanced Carving?
To prevent candles from cracking during advanced carving, you should focus on temperature control and gradual carving. Keep the candle cool by working in a cool environment, and avoid applying too much pressure at once. Use a heated tool carefully, warming it gradually before carving, which helps prevent stress on the wax. Take your time, carve slowly, and make small, precise cuts to maintain the candle’s integrity.
What Types of Wax Are Best for Detailed Carving?
Oh, surely you want your candle to be a delicate masterpiece, not a crumbling mess, right? Paraffin wax is your best friend for detailed carving, thanks to its smooth texture and durability. Soy wax, while eco-friendly, tends to be softer and less precise. So, if you crave intricate designs, stick with paraffin—your carving will thank you. After all, patience and quality materials make art, not compromise.
How Do I Achieve Smooth, Clean Edges in Complex Designs?
To achieve smooth, clean edges in complex designs, you should carefully select the right tools, like precision carving knives and fine gouges, ensuring they are sharp for clean cuts. Proper surface preparation is essential—start with a well-melted, evenly cooled wax base, and lightly sand or smooth the surface before carving. Take your time with steady, controlled movements, and clean your tools regularly for the best, crisp results.
Can I Carve Designs Into Scented or Layered Candles?
Sure, you can carve designs into scented or layered candles—because who wouldn’t want personalized engravings on fragrant, multi-tiered masterpieces? Just keep in mind that scented candles might lose some aroma when carved, and layered candles can be tricky to avoid breaking the design. Use sharp tools and gentle pressure to add decorative motifs or personalized engravings, ensuring your artwork stays intact and beautiful.
How Should I Store Carved Candles to Preserve Their Details?
To preserve your carved candles’ intricate details, store them in a cool, dry place away from direct sunlight. Wrap them gently in tissue paper or bubble wrap to prevent dust and damage. Use airtight containers or boxes to keep out moisture and maintain candle preservation. Follow these storage tips consistently, and your carved designs will stay sharp and beautiful for future display or gifting.
Conclusion
Mastering advanced candle carving transforms simple wax into stunning art. Did you know that the global candle market is expected to reach $13.6 billion by 2028? Your skills not only create beautiful decor but also tap into a lucrative industry. Keep practicing, experimenting with techniques, and refining your craftsmanship. With dedication, you can turn your passion into a rewarding craft that captivates and inspires others. Happy carving!