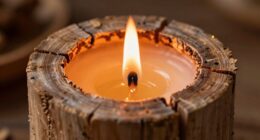

To create DIY floating candles for decoration, gather materials like wax, wicks, dye, fragrance oils, and heat-safe containers. Melt the wax carefully, add color and scent, then pour it into wide, heat-resistant glass bowls or vases, ensuring the wicks are well-placed. Let the candles cure overnight before adding decorative touches. Arrange them on a water-filled tray at your event for a stunning effect—continue exploring for detailed steps to perfect your decor.
Key Takeaways
- Select heat-resistant containers like glass bowls or vases that complement your decor and are suitable for floating candles.
- Melt and color wax using a double boiler, then pour carefully into containers, ensuring proper wick placement for safety and even burning.
- Add fragrance oils during pouring to enhance ambiance and trim wicks to ¼ inch once wax starts to set for a professional finish.
- Allow candles to cure in a cool, draft-free area for at least 24 hours to ensure safety, durability, and a smooth surface.
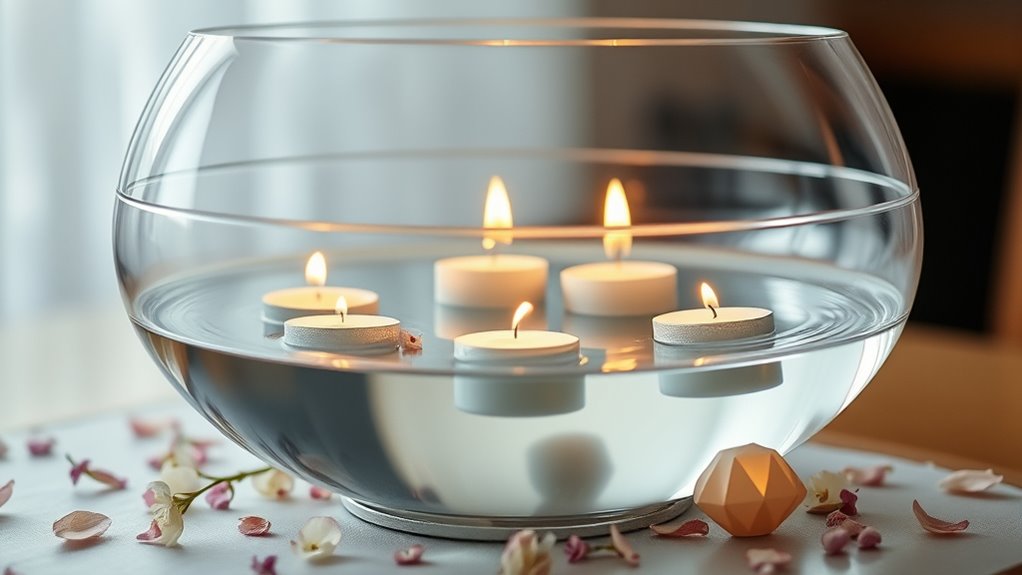
- Arrange floating candles on water-filled trays at varying heights, creating an elegant display while following fire safety guidelines.

CasaCulina 2025 New Candle Making Kit with Hot Plate, Candle Making Supplies with Wax Melting Pot, Stirring Spoon, Anti-Scalding Pad, Candle Wicks, Wooden Wick Holders, Candle Making Pouring Pot
Tips: The heat-resistant temperature of the anti-scalding mat is below 80℃/176℉. Do not put the furnace on it…
As an affiliate, we earn on qualifying purchases.
As an affiliate, we earn on qualifying purchases.
Gathering Materials and Tools
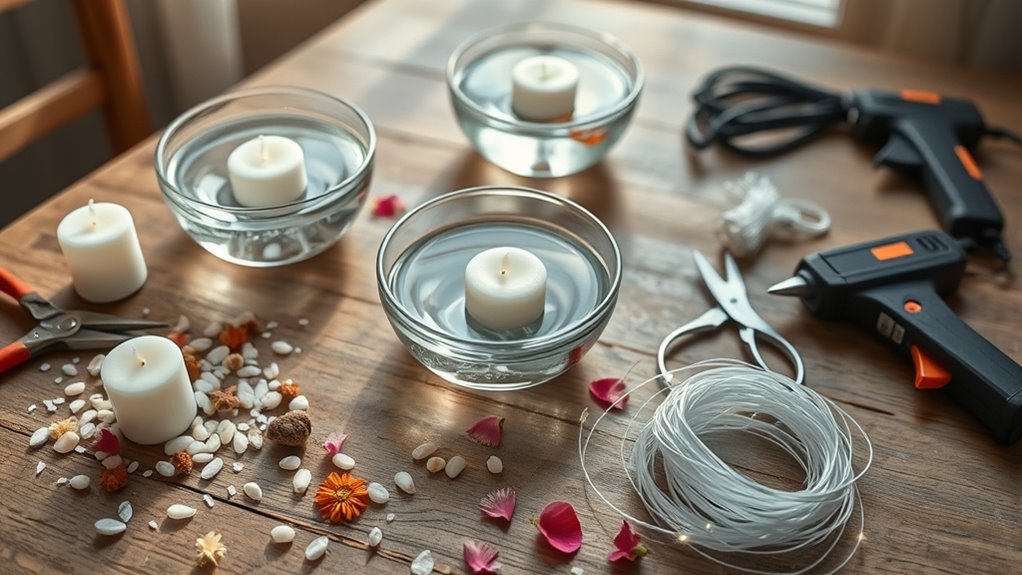
Before you begin crafting your floating candles, gather all the necessary materials and tools to guarantee a smooth process. Start with the basics: wax, wicks, and candle dye or color options to match your decor. Consider the scent choices you prefer—essential oils or fragrance oils—if you want scented candles. You’ll also need a heat-safe container or mold, a double boiler or melting pot, and stirring tools. Don’t forget to have scissors, a thermometer, and a pouring pitcher ready. Choosing the right color options and scent choices allows you to customize your candles for any occasion. Having everything prepared beforehand ensures your candle-making experience is seamless, allowing you to focus on creating beautiful, floating candles that perfectly suit your style. Additionally, understanding asset division laws can help you plan for future expenses and arrangements if you’re incorporating these candles into an event related to legal or financial planning. Moreover, consulting home improvement resources can provide tips on safe candle placement and environmental considerations during your project. To ensure safety and optimal results, familiarize yourself with fire safety guidelines specific to candle use and placement. Planning your workspace with knowledge of proper ventilation can also help prevent any issues with fumes or smoke during melting and pouring.

SUPMIND 15 Pack Glass Candle Jars, 7oz Clear Candle Containers with Bamboo Lids and Labels, Empty Candle Jars for Making Candles – Dishwasher Safe, 7 fl.oz
【Candle Making Supplies In Bulk】15 Pcs small glass jars, 7 fl oz empty candle making jars with lids,…
As an affiliate, we earn on qualifying purchases.
As an affiliate, we earn on qualifying purchases.
Selecting the Perfect Candle Containers

Choosing the right candle containers is vital for creating stunning floating candles that look both elegant and functional. Candle container styles vary widely, from simple glass bowls to ornate glass vases, so select one that complements your decor. Material considerations are important; glass is popular because it’s transparent and heat-resistant, allowing the candle’s glow to shine through beautifully. You might also consider acrylic or plastic containers for added durability, especially if they’re less fragile or safer around children. Make certain the container is wide enough to hold enough wax and water, yet not so deep that the flame is obscured. Think about the ambiance you want to create and choose a style that enhances your overall decoration theme. Additionally, understanding AI security and safety measures can help prevent accidents or malfunctions during your event. Proper ventilation and fire safety precautions are essential to ensure a safe and enjoyable celebration. Also, selecting containers that are compatible with decorative themes can elevate the overall aesthetic of your setup. To ensure the best results, consider seasonal trends in decor to match your event’s mood.

Complete Candle Making Kits for Adults Beginners, DIY Candle Making Supplies Include Soy Wax,Wax Melter,Scents,Dyes,Wicks,Wicks Sticker,Candle Tins & More-Full Candle Maker Set – Arts & Crafts Kits
All-IN-ONE Complete Premium DIY Candle Making Kit: The candle making supplies are suitable for all levels and contain…
As an affiliate, we earn on qualifying purchases.
As an affiliate, we earn on qualifying purchases.
Preparing the Candle Wicks
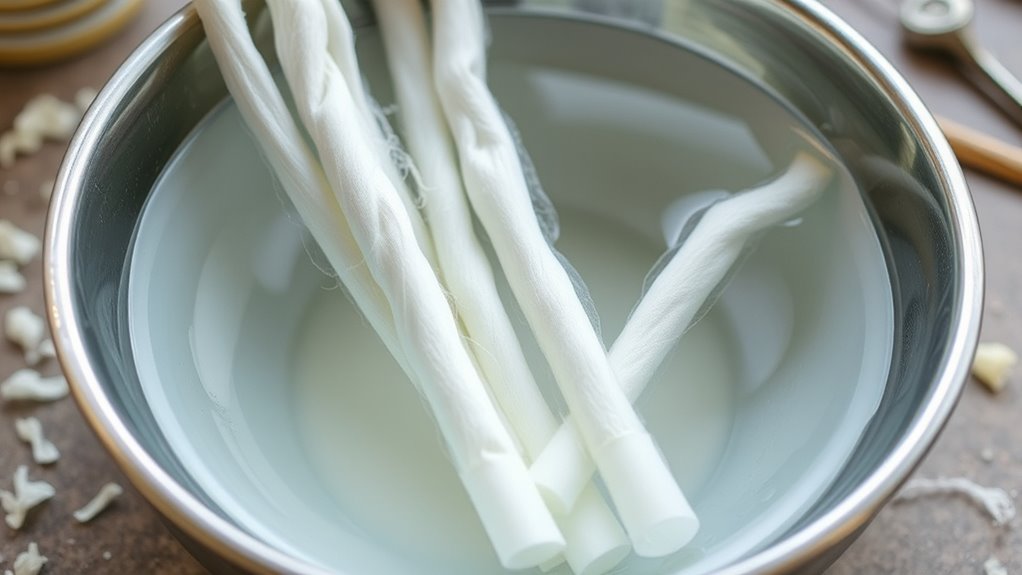
Once you’ve selected your candle containers, it’s time to prepare the wicks that will bring your floating candles to life. Proper wick preparation ensures your candles burn evenly and safely. Start by choosing the right wick thickness; a thinner wick might struggle to stay lit, while a thicker one provides a steady flame. Cut the wicks slightly longer than the height of your container to allow for trimming later. To prevent the wick from shifting, dip the wick in hot wax before placing it in the container—it helps secure it in place. Keep in mind, a well-prepared wick can evoke feelings of pride and anticipation, knowing your craft will glow beautifully. Selecting the appropriate candle technology can also influence burn quality and safety. Additionally, using proper wick placement is crucial for an even burn and to prevent tunneling. Proper wick trimming during burning can extend the life of your candle and improve safety. Focus on these essentials to set the stage for stunning floating candles. Fokos offers helpful tips on choosing the right materials for your DIY projects.

Tuyai (Set of 36) Floating Candles, 3 inch White Dripless Wax Burning Candles, for Weddings, Party, Special Occasions and Home Decorations
PACKAGING: Pack of 36 candles – carefully wrapped to prevent damage.
As an affiliate, we earn on qualifying purchases.
As an affiliate, we earn on qualifying purchases.
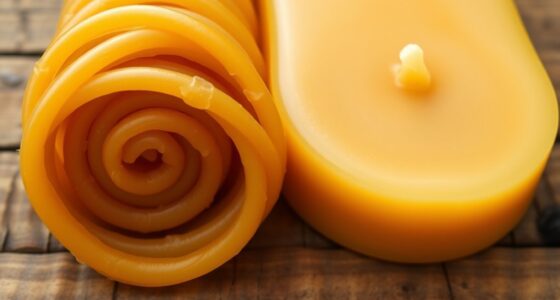
Melting and Coloring the Wax
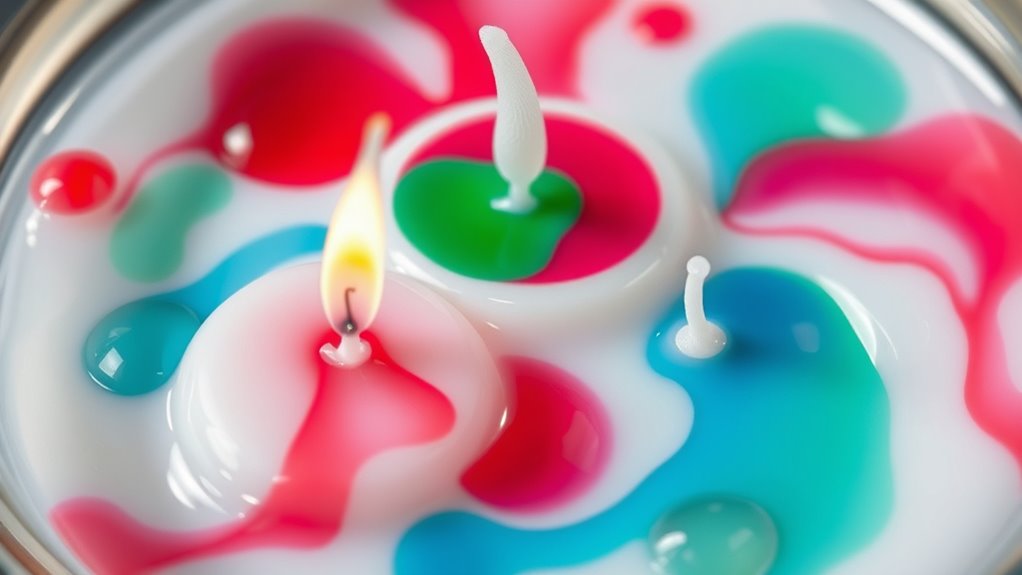
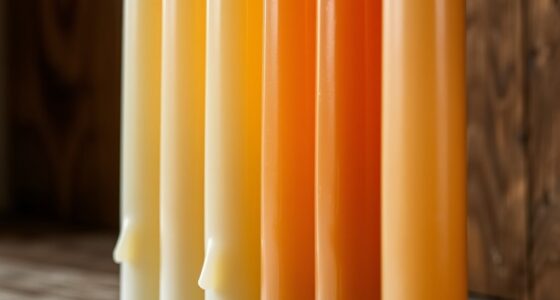
Have you ever wondered how to achieve a smooth, vibrant wax for your floating candles? Start by melting your wax using proper wax melting techniques—use a double boiler or microwave in short bursts, stirring frequently to prevent burning. Once melted, you can begin color mixing; add dye chips or liquid color slowly, stirring constantly to ensure even distribution. For bold hues, add more dye gradually, but avoid over-coloring, which can affect the wax’s clarity. Keep in mind that different waxes respond differently to coloring agents, so test small amounts first. Achieving a consistent, vibrant color requires patience and careful mixing. When you’re satisfied with the hue, proceed to the next step, ensuring the wax remains at the right temperature for pouring.
Pouring the Wax Into Containers
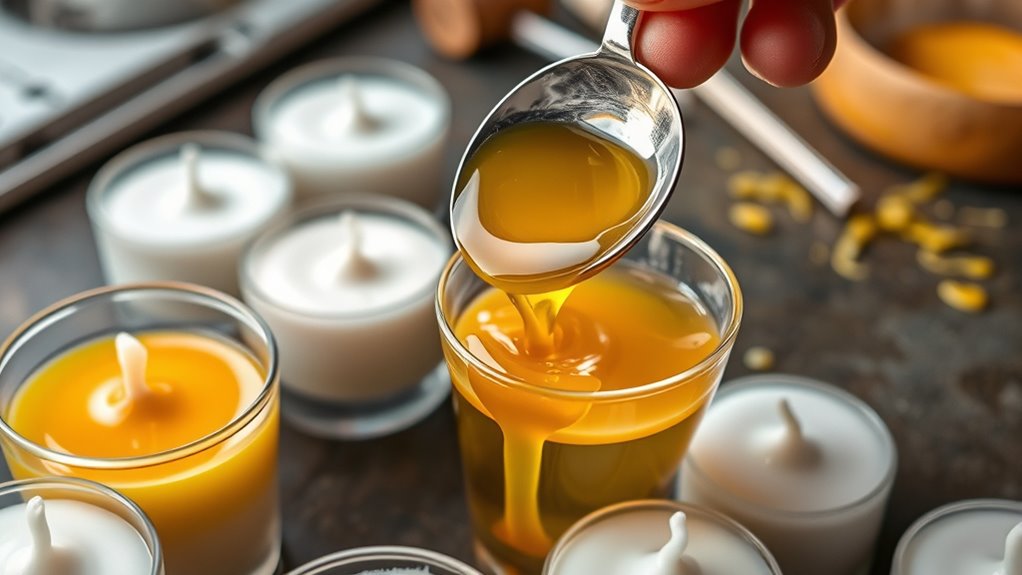
Before pouring, make sure your wax mixture is well-prepared and smooth. Position your containers securely on a flat surface to prevent spills. When pouring, do it slowly and steadily to avoid air bubbles and uneven surfaces. Additionally, controlling the temperature of the wax can help achieve a more even finish. Ensuring proper payment security measures can also prevent issues if you’re selling or displaying your candles publicly. To enhance the appearance and safety, consider using quality ingredients that are known for their consistent melting properties. Regularly monitoring market trends can help you adjust your techniques for better results.
Prepare Wax Mixture
To prepare the wax mixture, start by melting your chosen wax in a double boiler or heat-safe container over low heat. Always prioritize wax safety by handling hot wax carefully and keeping a fire extinguisher nearby. As the wax melts, consider fragrance options—adding a few drops of essential oils can create a lovely aroma. Stir gently to evenly distribute the scent. Once fully melted, remove the container from heat and prepare to pour. Remember, patience is key to avoid splashes or spills. When ready, pour the warm wax into your prepared containers, filling them to the desired level. This step transforms simple wax into a beautiful, fragrant base for your floating candles, making your decorations both charming and inviting. Using an airless paint sprayer can make the process of coating surfaces more efficient if you plan to add decorative elements or paint accents around your candles. Additionally, ensuring proper filtration during the process can help achieve a smoother finish and prevent debris from settling in the wax. Being aware of indoor air quality and ensuring proper ventilation during the melting and pouring process can also help maintain a safe environment. Proper temperature control during melting and pouring can also prevent issues like cracking or uneven surfaces, enhancing the overall appearance of your candles.
Secure Container Placement
Once your wax is fully melted and ready, carefully position your containers on a stable, heat-resistant surface. Ensuring container stability is essential to prevent spills or tipping as you pour. Check that each container is level and secure, so the wax maintains an even surface as it cools. Pay attention to weight distribution; if some containers are lighter or uneven, add a small amount of sand or gravel underneath to stabilize them. This additional support helps prevent spills and maintains the overall appearance of your candles. Incorporating protective styling benefits from techniques like crochet can also help keep your candles looking neat and intact. Keep your workspace steady and clear of distractions. Proper container placement now guarantees a smooth pouring process and a professional-looking finished product. Ensuring container stability is crucial for successful candle-making. Once everything is secure, you can confidently pour the wax into each container without concern for shifting or spilling. Additionally, using quality wax can help achieve a more even and attractive surface for your floating candles.
Pour Slowly and Steadily
As you begin pouring the melted wax, do so slowly and steadily to prevent splashing or air bubbles from forming. This careful approach guarantees your candles will have a smooth, professional appearance. As you pour, consider adding your favorite candle fragrance to create an inviting aroma that enhances the ambiance. Keep an eye on the wick, and once the wax begins to set, trim it neatly to about ¼ inch for a clean burn. Incorporating good lighting elements such as soft, ambient lamps can further enhance the cozy farmhouse atmosphere as your candles come to life. Using durable, safe materials in your candle-making process can ensure long-lasting and safe results. Feel the anticipation as your candles take shape, promising cozy evenings ahead. Enjoy the calming process of creating something beautiful with your own hands. Anticipate the warm glow and delightful scent filling your space, transforming your environment.
Allowing Candles to Set and Cure
Once you’ve poured your wax, it’s important to let your candles set in the right environment. Maintaining ideal conditions like a stable temperature and minimal disturbances helps the wax cure properly. Give your candles enough time—usually at least 24 hours—for the best results before you use them.
Subheading 1: Optimal Setting Conditions
To achieve the best results, you need to give your floating candles ample time to set and cure in ideal conditions. Proper curing enhances their aesthetic appeal and guarantees safe use. Place your candles in a cool, draft-free area away from direct sunlight, which can cause uneven curing or cracking. Maintain consistent temperature and humidity levels to prevent imperfections. This patience allows the wax to fully harden, reducing fire safety risks during lighting. As your candles cure, you’ll notice their surface becomes smoother and more polished. Creating the right environment fosters confidence in your DIY project, making your floating candles not only beautiful but also safe to use. Remember, a well-cured candle is a safer, more stunning addition to your decor.
Subheading 2: Time for Cure
How long should you wait before using your floating candles? You should allow a proper cure duration, typically at least 24 to 48 hours, before handling or placing them in water. During this time, the candles need to set fully, ensuring the wax solidifies and the scent stabilizes. Proper storage conditions are essential; keep your candles in a cool, dry place away from direct sunlight to prevent melting or discoloration. Avoid exposing them to humidity, as moisture can compromise their structure. Patience during this curing period ensures your candles will burn evenly and last longer. Once the cure duration passes, you can confidently use your floating candles for decoration, knowing they’ve had enough time to set and achieve ideal quality.
Adding Finishing Touches and Decorations
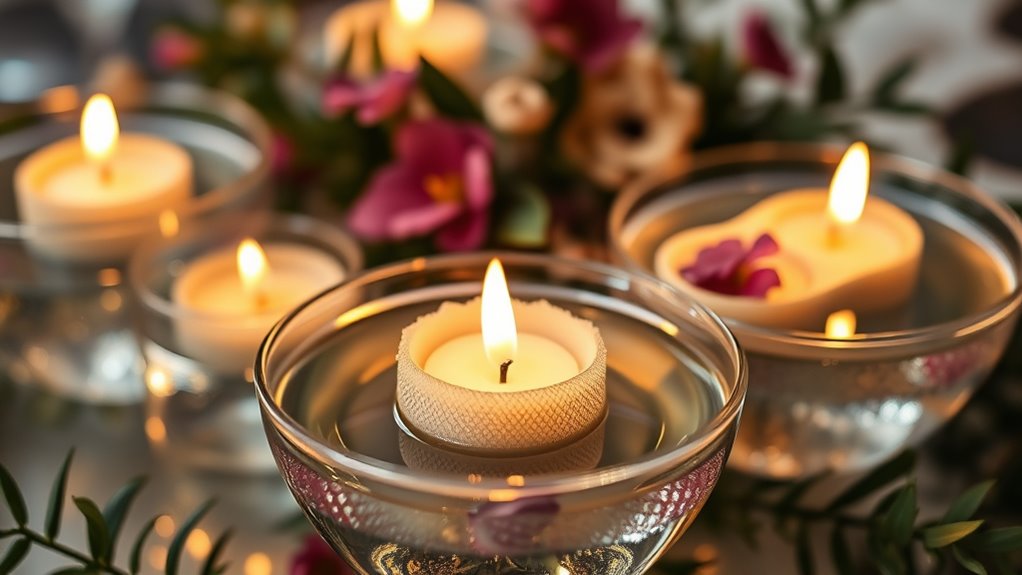
After assembling your floating candles, it’s time to add finishing touches that enhance their appearance and create a cohesive display. Focus on color coordination to match your theme, making your setup feel intentional and harmonious. Consider adding subtle decorative elements like flower petals or small crystals around the candles to evoke elegance and serenity. Scent enhancement is also key—incorporate essential oils or fragrant additives into the water to create a calming atmosphere. To truly elevate your display, think about these touches:
- Using complementary colors for a unified look
- Adding a few aromatic accents for sensory delight
- Incorporating delicate decorative items to evoke emotion and charm
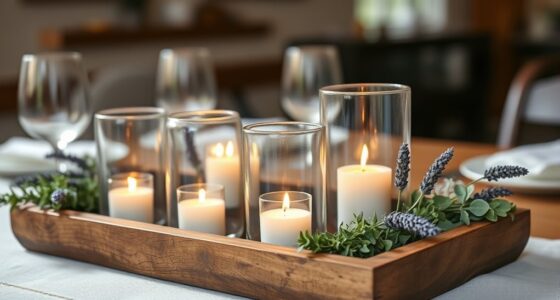
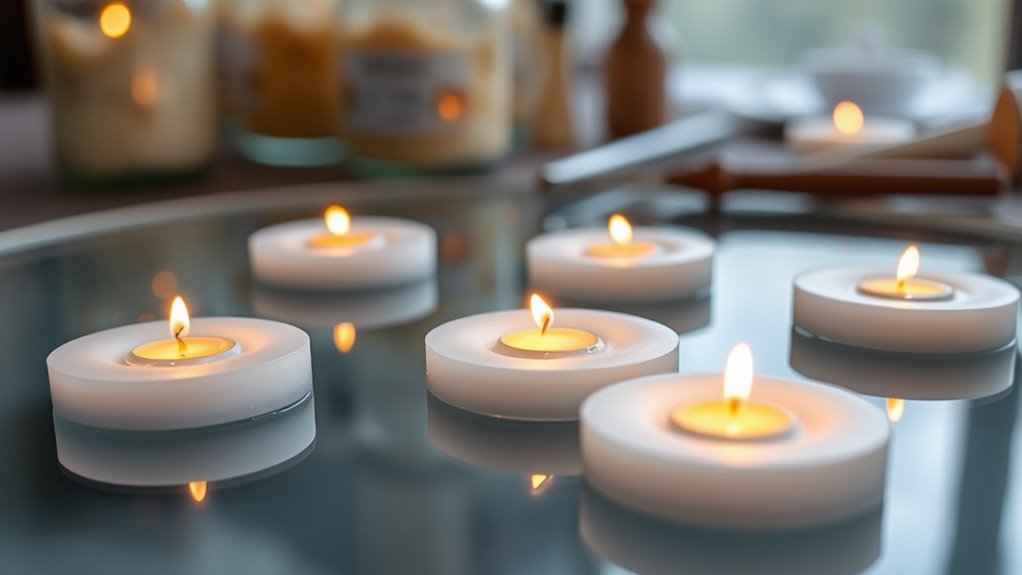
Setting Up Your Floating Candle Display
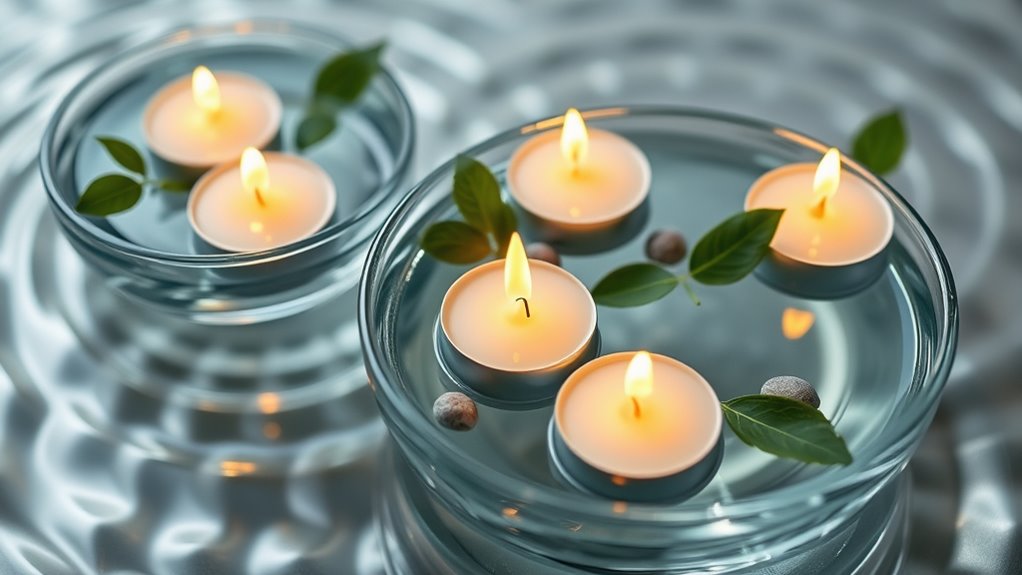
Setting up your floating candle display requires careful placement to guarantee a balanced and visually appealing arrangement. Begin by choosing a color scheme that complements your overall decor, whether it’s soft pastels for a calming vibe or bold hues for a striking look. Position the candles at varying heights to create depth and dimension, ensuring none are too close or too far apart. Pay attention to ambient lighting; soft, warm glows from the candles enhance the atmosphere and highlight your chosen color scheme. Use a clear, stable container or a decorative bowl filled with water to anchor the candles. Balance the display by arranging the candles symmetrically or asymmetrically based on your style preference, always prioritizing a harmonious and inviting appearance.
Safety Tips for Candle Making and Use

To guarantee your candle-making experience is safe and enjoyable, always prioritize proper handling and precautions. Fire hazards are real, so never leave burning candles unattended or near flammable materials. Ensure your workspace is well-ventilated to disperse fumes and avoid inhaling harmful vapors. Keep a fire extinguisher nearby and know how to use it in case of emergencies. Remember, safety isn’t just about preventing accidents; it’s about creating a peaceful atmosphere.
Prioritize safety by never leaving candles unattended and keeping a fire extinguisher nearby.
- Feel confident knowing you’re protecting loved ones and your home from potential hazards
- Experience the joy of crafting with peace of mind
- Celebrate your creativity safely, knowing you’ve taken the right precautions
Frequently Asked Questions
How Long Do DIY Floating Candles Typically Last When Lit?
DIY floating candles typically last between 4 to 8 hours when lit, depending on candle wax types used. Paraffin wax tends to burn longer, offering a lifespan closer to 8 hours, while soy wax usually lasts around 4-6 hours. To maximize your floating candle lifespan, make sure the wick is trimmed properly and avoid drafts. With the right wax choice, your candles can beautifully glow for several hours at your event.
Can I Use Scented Oils in My Floating Candles?
Yes, you can use scented oils in your floating candles to add a lovely candle fragrance. Just be sure to use oils that are safe for candles and avoid adding too much, as excess scents can affect the candle’s burn quality. Carefully mix the scented oils into the wax before pouring, and test your candles to make sure they burn well while providing the desired aroma.
What Are Eco-Friendly Alternatives for Candle Containers?
Did you know that over 300 million tons of plastic are produced globally each year? You can choose eco-friendly alternatives like biodegradable materials or recycled containers for your floating candles. These options reduce waste and environmental impact, making your decorations sustainable. Using recycled jars, tins, or biodegradable holders not only looks beautiful but also supports eco-conscious living. So, opt for these greener choices to enjoy your candles guilt-free.
How Do I Prevent Water From Extinguishing the Flame?
To prevent water from extinguishing the flame, make sure the wick is properly placed, sitting just above the water surface for easy ignition. Manage the water level carefully, keeping it low enough so the wick remains dry when lit. You can also use a wick holder or a small float to keep the wick upright and away from water, ensuring a steady flame and preventing it from being drowned.
Are There Specific Safety Precautions for Outdoor Floating Candles?
Think of outdoor floating candles as tiny fires dancing on water’s surface. To keep them safe, always follow fire safety rules, like never leaving them unattended, and make sure they’re on a stable, non-flammable surface. Weather considerations are essential—avoid windy days, as gusts can blow out flames or cause accidents. Keep a fire extinguisher nearby, and check wind conditions before lighting to prevent mishaps.
Conclusion
As you light your floating candles, let their gentle glow symbolize hope and new beginnings. Each flame, softly dancing on the water’s surface, reminds you of the warmth and serenity you’ve created through your own hands. These candles aren’t just decorations—they’re tiny beacons of your creativity and care, illuminating your space and spirit. Embrace the calm and inspiration they bring, knowing you’ve crafted something truly special that will shine brightly in your life.