
To create colorful marbled candles with swirled wax techniques, start by melting your wax in a double boiler, adding dyes gradually for vibrant colors. Pour a thin base layer, then add more melt and pour colored wax in layers. Use tools like toothpicks or spatulas to swirl and blend the colors gently before letting the candle cool undisturbed. Continuing with more tips will help you master beautiful, intricate designs.
Key Takeaways
- Melt different colored wax layers separately at 170-180°F, then pour them sequentially into the container for layered effects.
- Use tools like toothpicks, spatulas, or fingers to swirl and blend wax colors while still warm for marbled patterns.
- Experiment with circular or sweeping motions to create intricate or broad marbling designs.
- Incorporate contrast and complementary colors guided by a color wheel to enhance swirl visibility and depth.
- Allow candles to cool undisturbed for 1-2 hours to set the marbled effects clearly and prevent smudging.

Mar Lau Soy Candle Making Kit for Adults – Complete DIY Candle Making Kit with 5 Fragrance Oils, Wax Melting Pot, Metal Tins, Beginner Candle Supplies
SOY CANDLE MAKING KIT FOR ADULTS — Complete DIY kit with soy wax, melting pot, thermometer, wicks, fragrance…
As an affiliate, we earn on qualifying purchases.
As an affiliate, we earn on qualifying purchases.
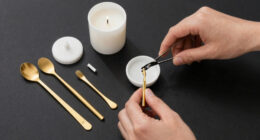
Gathering Your Materials and Preparing Your Workspace

Before you begin creating your marbled candles, it’s important to gather all the necessary materials and set up a clean, organized workspace. Prioritize safety precautions by keeping flammable items away from heat sources and having a fire extinguisher nearby. Make sure your workspace is clutter-free to prevent accidents and make your process smoother. Gather your wax, dyes, wicks, containers, and tools beforehand so everything is within reach. An organized workspace helps you work efficiently and reduces mistakes. Use a heat-resistant surface for melting wax and lay out towels or paper towels to catch drips. Taking a few moments to prepare your environment ensures a safe, streamlined crafting experience, allowing you to focus on creating beautiful marbled candles without unnecessary interruptions. Additionally, considering remote work options can give you more flexibility to set up your creative space at your own pace. Being aware of candlemaking safety practices can further help prevent accidents and ensure a successful project. It’s also helpful to familiarize yourself with crafting organization tips to keep your supplies orderly and accessible throughout the process. Incorporating knowledge of AI-powered virtual reality in e-learning can inspire innovative ways to visualize your candle designs and experiment with colors before starting your actual project.

Candle Dye Set, 16 Colors Candle Wax Dye for Candle Making, Bulk Soy Wax Dyeing, DIY Candle Making Kit
【Multi Color】 This wax dye set for candle making contains 16 packages of individually colored chips. They are…
As an affiliate, we earn on qualifying purchases.
As an affiliate, we earn on qualifying purchases.
Choosing and Melting Your Wax Colors

Once you’ve gathered your materials and set up your workspace, it’s time to choose and melt your wax colors. To achieve vibrant, swirling effects, select multiple dyes with consistent dyeing properties to ensure smooth color blending. Melt your wax in a double boiler, stirring gently to maintain even heat. Keep the dye consistency uniform by adding dye chips gradually, avoiding clumps or overly dark patches. For a clear picture of your options:
| Color Choice | Dye Consistency | Effect Desired |
|---|---|---|
| Bright Red | Thick and smooth | Bold swirls |
| Deep Blue | Thin and fluid | Gentle blending |
| Lime Green | Medium | Earthy tones |
| Purple | Slightly thick | Rich contrast |
| Yellow | Light | Bright accents |
Proper melting and dye consistency are key to achieving seamless color blending in your marbled candles. Additionally, understanding the importance of color accuracy can help you select dyes that produce true and vivid hues, enhancing your overall design. Maintaining the right filter maintenance ensures your workspace remains clean and safe during the candle-making process.

Phinicco Candle Making Pouring Pot, 44oz 1.3L Wax Melting Pot and Spoon 304 Stainless Steel Candle Making Pitcher Heat-Resistant Handle
Larger Capacity: Candle Pouring Pot size 5.12inch* 5.04inch* 4.45inch. It can hold 44oz/1300ml of molten wax. Which is…
As an affiliate, we earn on qualifying purchases.
As an affiliate, we earn on qualifying purchases.
Pouring the Base Layer for Your Candle
Start by pouring a small amount of melted wax into your prepared mold to create the base layer. Make certain the wax temperature is appropriate—usually around 170-180°F—to prevent accidents and achieve a smooth pour. Candle safety is vital; always work in a well-ventilated area and keep a fire extinguisher nearby. Pour slowly to avoid air bubbles and uneven layers. This initial layer establishes the foundation for your marbled design, so aim for a thin, even coating. Let the wax cool slightly before adding additional layers, which helps prevent mixing and preserves the distinct swirls. Proper wax temperature throughout the process is essential for both safety and achieving a professional-looking finish. Keeping the wax at the right temperature throughout the process guarantees a clean, professional-looking finish and safer crafting experience. Additionally, maintaining a consistent temperature helps prevent color bleeding and ensures the marbled effect remains vibrant and well-defined. To further enhance your design, consider experimenting with different color combinations to create unique and eye-catching patterns. Recent advances in AI-driven discoveries have shown that precise temperature control can be optimized through technology, leading to better results in crafts like candle-making.

Double Boiler Pot Set, Stainless Steel Melting Pot with Silicone Spatula for Melting Chocolate, Soap, Wax, Candle Making (600ml and 1600ml)
【 Great Quality & Perfect Size】The double boiler is made of high quality 18/8 stainless steel, rust resistant….
As an affiliate, we earn on qualifying purchases.
As an affiliate, we earn on qualifying purchases.
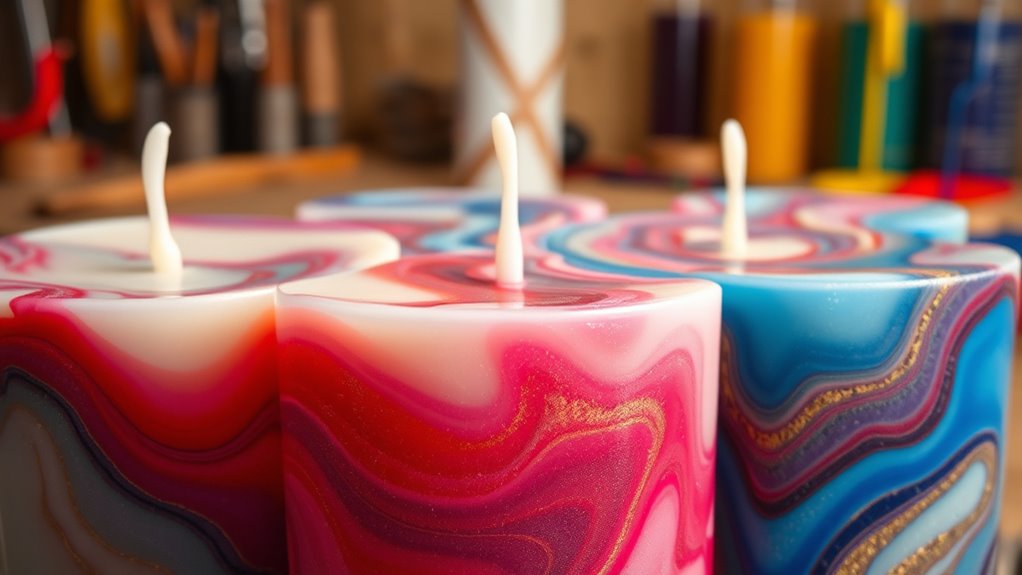
Creating the Marbled Effect With Swirling Techniques
To create stunning marbled effects, start by melting your wax and pouring it in layers. Then, use swirling techniques to blend the colors, experimenting with different motions for unique patterns. Keep in mind how your color combinations interact to achieve vibrant, eye-catching results. For best results, choose appropriate dyes that mix well and do not cause uneven coloring. Additionally, understanding space and organization can help you set up a clutter-free workspace that enhances your creative process.
Melting and Pouring
When creating the marbled effect, melting your wax and pouring it carefully are essential steps that set the stage for swirling magic. Begin by warming your wax to the recommended temperature, ensuring it’s fully melted without overheating. As you prepare to pour, pay attention to wick placement; secure the wick straight in the center of your container to maintain evenness. If you want a scented candle, add your chosen scent infusion at the right moment, stirring gently to distribute the fragrance evenly. Pour the melted wax slowly into the container, doing so in layers if you’re working with multiple colors. This careful pouring process helps prevent colors from blending prematurely, allowing you to later swirl and create stunning marbled patterns. Additionally, understanding color theory can help you select harmonious hues that enhance your marbled design.
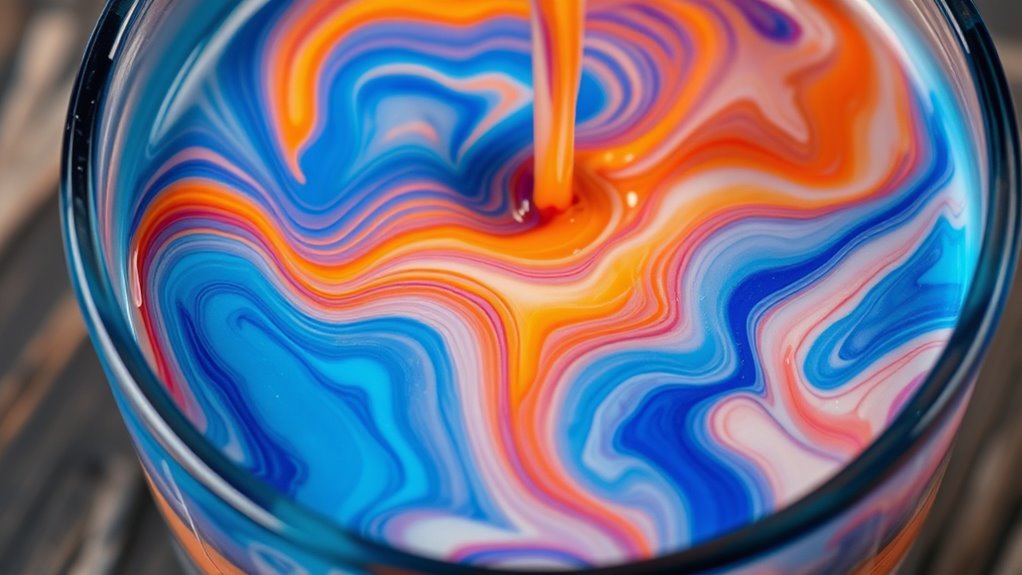
Swirling Methods Overview
Once your layers of colored wax have cooled slightly but are still malleable, you can begin creating the marbled effect through swirling. This step involves manipulating the wax to develop unique swirl patterns and blend colors beautifully. To achieve this, you can try different swirling techniques:
- Gently drag a toothpick or skewer through the wax in circular motions, creating intricate swirl patterns that blend the colors smoothly.
- Use a small spatula or craft stick to make broad, sweeping motions, producing larger, more dramatic swirls.
- Lightly tap or swirl the wax surface with a finger or tool to introduce subtle color blending and soft, organic patterns.
- Understanding the marbling techniques helps you control the degree of color mixing, resulting in vibrant, eye-catching marbled candles. Exploring different color blending methods can also enhance your creative process and achieve more complex patterns.
- Applying these methods can also improve your conflict resolution skills as you experiment with different patterns and techniques to achieve your desired look. Additionally, practicing wax manipulation can help refine your overall candle-making skills for more precise and artistic designs.
Color Combination Tips
Choosing the right color combinations is key to achieving stunning marbled effects with your candles. Focus on color harmony to create a cohesive look, selecting shades that complement each other or belong to the same color family. For more dynamic effects, incorporate contrast balancing by pairing bold, vibrant hues with softer, muted tones. This contrast enhances the swirling technique, making the marbled pattern stand out. Consider using a color wheel to guide your choices—complementary colors provide striking contrast, while analogous colors offer a smooth, harmonious blend. Keep in mind that less is often more; limiting your palette prevents the design from becoming cluttered. With thoughtful color pairing, your swirling techniques will produce eye-catching, professional-looking marbled candles. Additionally, understanding how predictive analytics can inform trend predictions may help you choose color schemes that are currently popular or emerging in design. Exploring color psychology can also inspire choices that evoke specific moods or feelings in your candle designs. Utilizing color theory principles can further refine your selections, ensuring your marbled candles have a balanced and appealing visual impact. Using spiritual energy insights can also deepen your creative connection and enhance the emotional impact of your candles.
Adding Additional Colors and Layering for Depth
Adding additional colors and layering your marbled candles can create stunning visual effects that add depth and complexity. To enhance your design, consider these techniques: 1. Use contrasting colors to emphasize the swirl patterns and make the decorative accents pop. 2. Layer wax in varying shades, allowing some to partially blend for smooth color blending or remain distinct for bold contrasts. 3. Add small decorative accents, like metallic flakes or tiny beads, between layers for texture and visual interest. Incorporating variety of materials can also personalize your candles and elevate their aesthetic appeal. Exploring wax types can further enhance the visual and textural qualities of your finished candles. Additionally, experimenting with different wicks can influence how the wax flows and mixes during layering, creating more dynamic marbled effects. For even more striking results, consider incorporating natural colorants to achieve unique hues and subtle color variations.
Allowing the Candle to Set and Achieving the Final Swirl

After completing the layering and swirling of your wax, it’s essential to let the candle sit undisturbed to set properly. This step ensures the wax cools evenly, helping you achieve a smooth, professional-looking swirl. Always monitor your wax temperature during this period to maintain candle safety; too hot or cold can affect the final appearance. Resist the urge to move or touch the candle, as disturbance may ruin the swirl. Patience is key for a clean, vibrant marbled effect. During this time, keep the environment free of drafts. Use the table below to guide your setting process:
| Step | Duration | Tips |
|---|---|---|
| Let wax cool | 1-2 hours | Keep away from drafts and vibrations |
| Check wax temp | Before pouring | Use a thermometer to ensure proper temp |
| Avoid disturbance | Entire setting time | Prevent accidental smudges or cracks |
| Observe final swirl | Once set | Confirm swirl is distinct and vibrant |
| Safety reminder | N/A | Always handle hot wax with care |
Additionally, referring to FAQs about candle making can help troubleshoot common issues during the setting process.
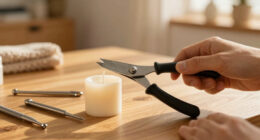
Finishing Touches and Tips for Perfect Marbled Candles
To guarantee your marbled candle looks flawless, focus on the finishing touches that enhance its vibrant swirls. First, consider adding decorative accents like tiny charms or metallic threads around the base or top edge to elevate its visual appeal. Second, think about scent infusion—carefully melt a small amount of scented wax or add essential oils during cooling to give your candle a delightful aroma that complements its colorful design. Third, trim the wick to about a quarter inch for a clean, even burn and a polished look. These simple steps can transform your candle from beautiful to stunning, ensuring every detail enhances the marbled effect while making it uniquely yours.
Frequently Asked Questions
What Types of Wax Are Best for Marbled Candles?
You should choose soy or paraffin wax for marbled candles, as they blend well with candle dye and create smooth swirls. Soy wax melts easily and holds vibrant colors, making it ideal for marbling. Paraffin wax also works great because it allows for detailed swirling effects. Both types melt smoothly, so you can easily mix in your wax melt or candle dye to achieve stunning, colorful marbled patterns.
Can I Use Scented Dyes or Fragrances in Marbled Candles?
Think of your candle as a symphony, where scents and colors harmonize perfectly. Yes, you can use scented dyes or fragrance oils, but guarantee scented dye compatibility and fragrance oil safety. Always check that your dyes are designed for candle-making and that your fragrance oils won’t compromise the wax’s integrity. When done carefully, your marbled candles will not only look stunning but also fill the room with delightful aroma.
How Do I Prevent Colors From Bleeding Into Each Other?
To prevent colors from bleeding into each other, you should focus on wax separation and control color blending. Allow each wax layer to cool slightly before adding the next, which helps maintain distinct swirls. Use a thermometer to monitor temperature, keeping it consistent for each color. Stir dyes gently, and avoid overmixing, as this can cause color blending. Patience guarantees crisp, vibrant marbled effects without bleeding.
What Safety Precautions Should I Take During the Process?
You should prioritize workplace safety by working in a well-ventilated area and wearing heat-resistant gloves when handling hot wax. Always keep a fire extinguisher nearby and avoid distractions to prevent accidents. Use a thermometer to monitor wax temperature and avoid overheating. Keep flammable materials away from your workspace. These precautions assure safe handling of hot wax and help prevent burns, fires, and other hazards during your candle-making process.
How Can I Fix Mistakes or Uneven Swirls in My Design?
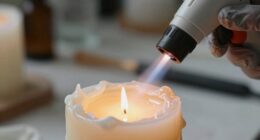
Did you know that 65% of candle makers improve their designs with simple fixes? To fix mistakes or uneven swirls, use a heat gun or hot tool to gently melt the wax and blend the colors for better color correction. For swirl adjustment, carefully re-melt and manipulate the wax with a skewer or toothpick, then let it cool. Patience and gentle touches help perfect your marbled design effortlessly.
Conclusion
Now that you’ve learned how to gather your materials, melt your wax, pour your base, create stunning marbled swirls, layer vibrant colors, and finish with perfect touches, you’re ready to craft beautiful, personalized candles. Embrace your creativity, experiment with different colors and techniques, enjoy the process, and watch your unique masterpieces come to life. With patience and practice, you’ll turn simple wax into stunning works of art—so light up your imagination and let your candles shine.