To create DIY wood wick candles in containers, start by choosing a heat-resistant container that matches your style, then prepare smooth, treated wooden wicks with adhesive to secure them centrally. Melt your wax, add fragrance if desired, and carefully pour it into the container, embedding the wick. Let the candle cool and cure for at least 24 hours to develop a strong scent throw and crackle. Keep exploring for tips on perfecting your craft and adding personal touches.
Key Takeaways
- Select heat-resistant containers that are durable and appropriately sized to support safe burning and prevent overflow.
- Smooth and treat wooden wicks with a wick solution, then embed them centrally using hot glue or adhesive for stability.
- Pour wax carefully into prepared containers, embedding the wick securely, and allow sufficient cooling and curing time for optimal scent and burn quality.
- Personalize your candle with decorative labels, ribbons, or dried flowers to enhance aesthetic appeal and make it unique.
- Use high-quality wooden wicks and maintain proper placement for consistent crackling sounds, longer burn time, and an attractive appearance.

TIKI Citronella Candle 28-Ounce – Triple Wick Metal Bucket with Lid (Silver) – Long-Lasting Outdoor Candle for Patio, Deck, Garden, Backyard & Camping
LONG-LASTING BURN TIME: This 28-ounce citronella wax candle provides up to 32 hours of burn time, creating a...
As an affiliate, we earn on qualifying purchases.
Gathering Supplies and Materials

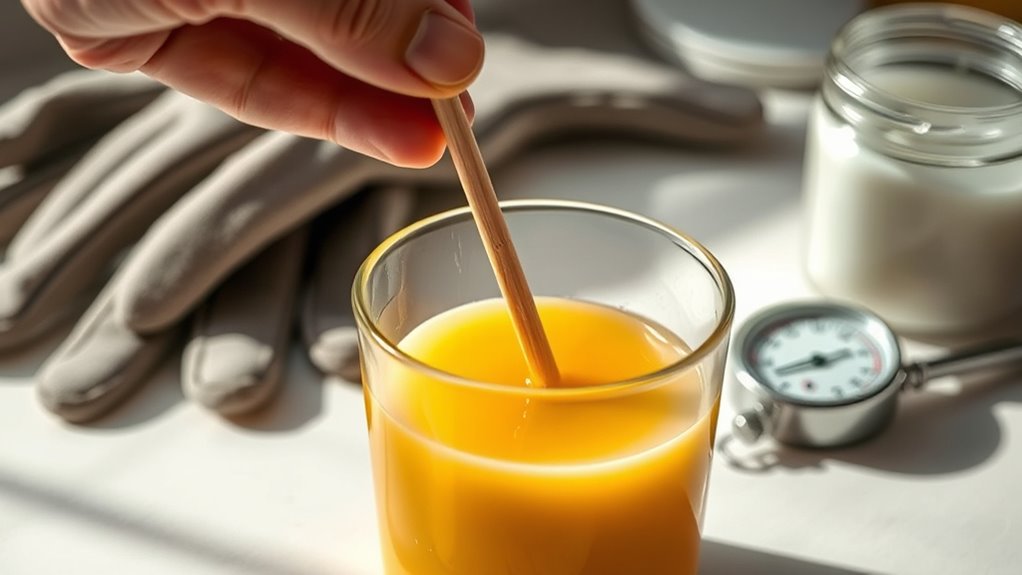
Before you start making your DIY wood wick candles, it’s important to gather all the supplies and materials you’ll need. First, select your wax, such as soy or beeswax, and make certain you have enough for your desired candle size. You’ll also need wooden wicks, a hot glue gun, and a container to hold the candle. For fragrance blending, choose your preferred essential oils or fragrance oils and measure carefully for a balanced scent. Don’t forget to have wick trimming scissors ready to keep your wick at the ideal length, which helps prevent soot and ensures a clean burn. Make sure all tools, like a pouring pitcher and thermometer, are within reach. Preparing everything beforehand makes the candle-making process smoother and more enjoyable. Additionally, understanding the candle-making process can help you troubleshoot common issues and create a high-quality finished product. To ensure consistent results, consider selecting appropriate containers that are heat-resistant and well-suited for candles.

Dawhud Direct Decorative Votive Candle Holders, Vintage Decor Flameless Candlescape Set, 3 LED Tea Light Candles, Rocks and Tray - Fall Table Decor (Earth Tones)
Warm Seasonal Centerpiece: Add cozy charm to fall gatherings with this candlescape; doubles as centerpiece table decorations that...
As an affiliate, we earn on qualifying purchases.
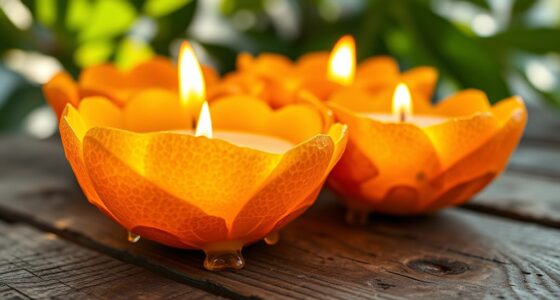
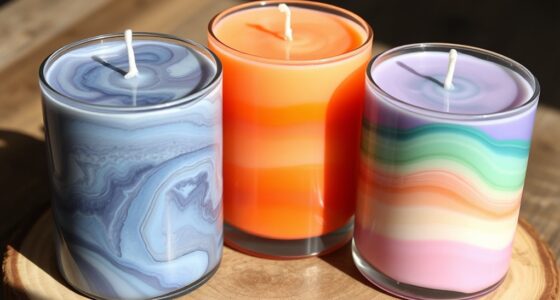
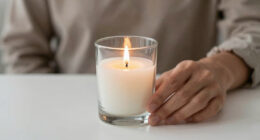
Selecting the Perfect Container

Choosing the right container is essential for a safe and attractive candle. Make sure it’s the right size to hold enough wax without overflowing, and consider how the style and material match your decor. By paying attention to these details, your candle will look great and burn safely. Additionally, selecting a container that complements your farmhouse bedroom decor can create a cohesive and charming ambiance. Remember that selecting a heat-resistant material ensures safety during burning and prevents accidental damage. Furthermore, understanding trust issues can help you choose a container that reflects stability and security in your space. Considering the durability of materials can also enhance the longevity of your candle container, especially if it’s used frequently or moved around.
Size Compatibility Tips
Selecting the right container is essential for guaranteeing your wood wick candle burns safely and evenly. To achieve this, focus on size compatibility between the container and your wick diameter. A wick that’s too small for the container will result in a weak flame and tunneling, while an oversized wick can cause excessive soot and uneven burning. Measure your container’s diameter and choose a wick with an appropriate diameter that matches or slightly exceeds it. Keep in mind that the wick should be centered and have enough surface area to create a proper melt pool. Always test burn your candle to verify that the wick size provides a steady flame and even wax consumption. Proper size compatibility ensures a safe, attractive, and functional candle. Additionally, understanding effectiveness of eye patches can help inform your choices for skincare routines that complement your candle-making environment. When selecting wicks, consider the material quality to ensure durability and consistent performance over time. Using high-quality wick materials can also improve burn efficiency and safety, especially when considering the traditional practices that influence the design and function of Indigenous wellness products.
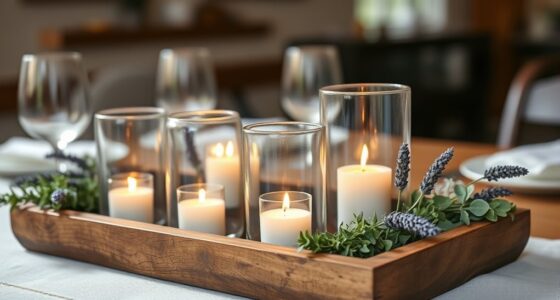
Style and Material Choices
The style and material of your container play a crucial role in the overall look and safety of your wood wick candle. Choose a container that complements your fragrance selection, whether it’s a sleek glass jar or a rustic ceramic pot. Consider heat resistance to guarantee safe wick maintenance and prevent accidents. The material also affects how the candle burns; for instance, metal or thick glass can help contain the heat and maintain the integrity of the wooden wick. The style should match your decor, but don’t forget practicality—assure the container is sturdy and well-sealed to avoid spills. Proper selection enhances the candle’s aesthetic appeal while supporting safe, consistent burning and maintaining your wooden wick’s performance. Regularly reviewing your container choice ensures it aligns with your safety and design goals, personal goal tracking, to improve your candle-making process over time. Additionally, understanding city dynamics can inspire container choices that reflect local styles and materials, making your candles uniquely suited to your environment. Choosing containers made from heat-resistant materials can further ensure safety and durability during burning.

Citronella Candles in Coarse Pottery Container, Natural Soy Wax Candle Outdoor and Indoor
Pure handmade lead-free lamp core woven with 100% environmentally friendly soy wax and 100% cotton thread
As an affiliate, we earn on qualifying purchases.
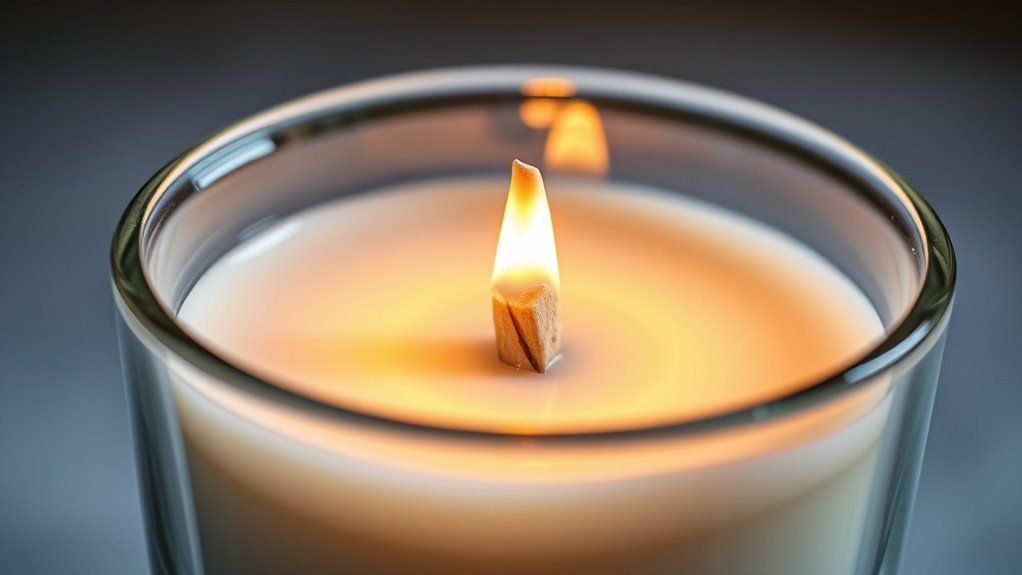
Preparing the Wooden Wicks

Before you start pouring your wax, it’s important to prepare your wooden wicks properly. Begin by inspecting each wick for any roughness or splinters—smooth them if needed. Next, consider your fragrance options; some scents can affect how the wick burns, so choose appropriately. To guarantee a clean and steady burn, treat the wick with a wick treatment solution, which helps improve combustion and reduces sooting. Dip the wick into the treatment, then let it dry completely before use. This step not only enhances the wick’s performance but also prolongs the lifespan of your candle. Properly prepared wooden wicks will give you a consistent, crackling burn that complements your chosen fragrance options perfectly. Additionally, automotive water spot removers can be useful for cleaning any wax spills on your work surface, ensuring a tidy workspace. Incorporating hydrocolloid in skincare routines can also help keep your skin smooth and radiant, which is especially beneficial if you’re handling candles frequently. Ensuring your wooden wicks are properly prepared aligns with the importance of quality standards in achieving a reliable and enjoyable candle-burning experience.
Hanobe Candle Plate Holder Tray: Round Wood Decorative Candle Plate - Rustic Farmhouse CoffeeTable Decor - Tealight Pillar Trays for Home Decor (Distressed)
Decorative Table Centerpiece: Our small candle tray is a a lovely table centerpiece for any table, placed it...
As an affiliate, we earn on qualifying purchases.
Melting and Pouring the Wax

Once your wooden wicks are properly prepared, it’s time to melt the wax. Use a double boiler or microwave in short bursts, stirring gently until fully melted. While the wax melts, consider fragrance blending—add your desired scents gradually, mixing well to achieve the perfect aroma. Confirm the temperature remains steady, typically around 170-180°F, for ideal pouring. Before pouring, trim your wick to the recommended length, which helps maintain a steady burn and prevents uneven melting. Pour the wax slowly into your container, avoiding air bubbles. Let the wax cool undisturbed, setting the stage for a smooth, even finish when it solidifies. Proper melting and pouring are essential for a professional-looking candle with balanced fragrance and a clean burn. Additionally, ensuring your workspace is safe and well-ventilated can help manage fumes and temperature control during the process. Maintaining optimal projector settings can enhance your candle-making environment by reducing distractions and ensuring safety.
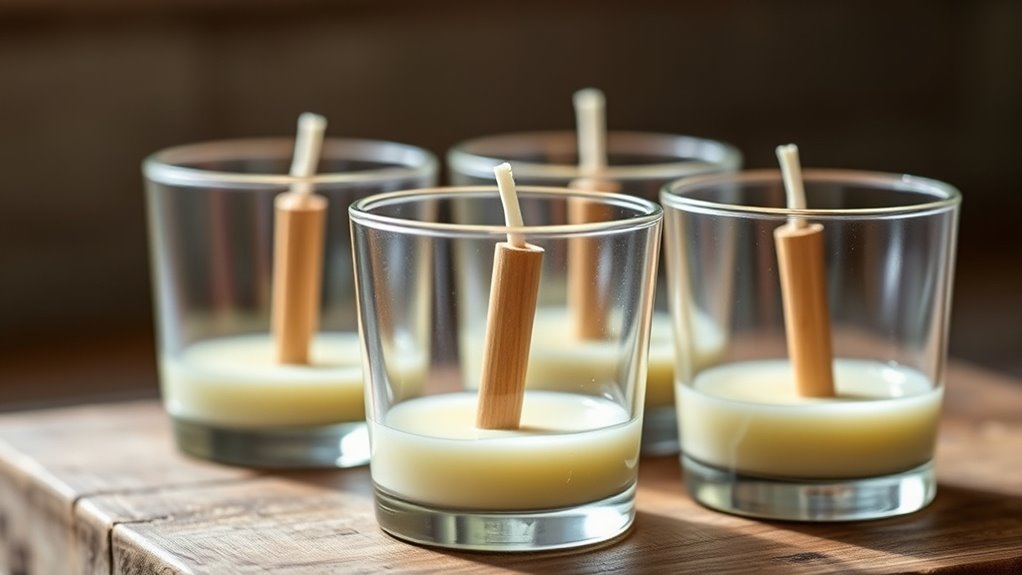
Securing the Wooden Wicks in the Container
To guarantee your wooden wick stays centered and secure during pouring and cooling, you need to anchor it properly in the container. Embedding techniques like using a glue dot, hot glue, or a specialized adhesive help keep the wick upright. Choose adhesive options that are heat-resistant and safe for candle making, making certain they won’t interfere with the burn or scent. Before pouring, position the wick in the center of the container and apply your chosen adhesive around the base or at the top, depending on your method. Press the wick firmly into place and hold briefly if necessary. This ensures stability and prevents shifting as the wax cools. Properly securing your wick now simplifies subsequent steps and results in a well-centered, professional-looking candle. Additionally, considering the dog names that reflect personality traits can be a fun way to personalize your craft space or gift presentation. Using adhesive techniques that are compatible with candle wax is crucial for a secure and durable hold. Exploring adhesive options designed specifically for candles can further enhance the stability and safety of your finished project, especially when you consider the safety considerations essential in candle making.
Allowing the Candle to Cure and Set
After pouring your candle, give it enough time to cool and harden completely. This proper cooling time helps make certain a clean, smooth top and better scent throw. Be sure not to disturb the set candle, as movement can cause imperfections or cracking. Incorporating data analytics can also help monitor your candle-making process and improve results over time. Additionally, maintaining a consistent temperature during cooling can prevent cracking or imperfections, ensuring a professional appearance. Recognizing the importance of spiritual guidance during the process can also help you stay attuned to subtle cues that indicate optimal curing conditions.
Proper Cooling Time
Allowing your candle to cool and cure properly is essential for achieving the best burn and scent throw. During this time, temperature control plays a key role, preventing cracks and ensuring the fragrance infusion settles evenly. Patience here enhances both fragrance strength and burn quality.
| Time Frame | Significance |
|---|---|
| 24-48 hours | Initial cooling, prevents surface cracks |
| 1-2 weeks | Full curing, maximizes fragrance throw |
| 1 month+ | Ideal scent development and burn |
Waiting ensures the wax solidifies completely and the scent bonds well, resulting in a cleaner, longer-lasting candle. Don’t rush this step—proper cooling and curing guarantee a more satisfying candle experience.
Avoid Disturbing Set
It’s tempting to check on your candle or move it around while it’s setting, but doing so can cause imperfections or disrupt the curing process. To guarantee your candle develops the best fragrance options and a smooth finish, resist the urge to disturb it. Keeping the candle undisturbed allows the wax to evenly set and the fragrance to fully integrate. Proper curing enhances scent throw and overall appearance, making wick maintenance easier later on. Avoid touching or moving the container during this critical period; patience is key. Once set, your wooden wick candle will burn cleaner, and the fragrance will be richer. Giving it time to cure ensures a more professional-looking, enjoyable candle that performs beautifully.
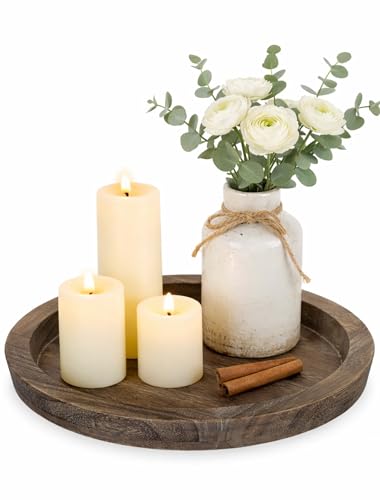
Adding Finishing Touches and Personalization

Adding finishing touches and personalization allows you to make your wood wick candles uniquely yours. Start by choosing a scent selection that reflects your style or mood, whether it’s calming lavender or energizing citrus. Next, focus on label design; a creative label adds a professional and personal touch to your candle. Consider using elegant fonts, meaningful graphics, or handwritten notes to make it special. Finally, you can add decorative elements like ribbons, dried flowers, or stickers to enhance the visual appeal. These details not only elevate your candle’s look but also make it a thoughtful gift or a charming addition to your space. Personalization transforms a simple candle into a memorable, handcrafted piece.
Safety Tips for Candle Making
Candle making involves working with heat, wax, and potentially hazardous materials, so prioritizing safety is essential to prevent accidents. To reduce fire hazards, always keep a fire extinguisher nearby and never leave melting wax unattended. Use heat-resistant containers and tools to avoid spills or breakage. Be mindful of allergen considerations; work in a well-ventilated area and wear gloves if you have sensitivities to certain waxes or scents. Keep flammable objects away from your workspace. Never overheat wax—aim for the recommended temperature—and always handle hot materials with caution. Properly trim your wicks and never leave a burning candle unattended. Following these safety tips helps guarantee a safe, enjoyable candle-making experience while minimizing risks.
Frequently Asked Questions
How Do I Prevent the Wooden Wick From Curling or Twisting During Burning?
To prevent your wooden wick from curling or twisting during burning, guarantee proper wick alignment before lighting. Make sure the wick is centered and straight in the container. Applying a wick coating can help keep it stiff and stable, reducing twisting. Also, trim the wick to the recommended length and avoid drafts that might disturb its position. These steps help maintain a steady burn and prevent curling or twisting throughout your candle’s life.
What Are the Best Types of Wood for Making Durable, Steady Wicks?
The best types of wood for making durable, steady wicks are hardwoods like oak, maple, or cherry because they resist curling and twisting. You should also consider proper wood treatment—soaking or sealing the wood can improve durability and burn performance. Avoid softwoods like pine, which tend to warp easily. Selecting well-seasoned, dry wood and applying appropriate treatments guarantees your wicks stay steady and burn cleanly.
How Can I Troubleshoot Uneven Burning or Soot Issues With Wooden Wicks?
Ever wondered why your wooden wick candle burns unevenly or produces soot? Start by checking your wick size—too large or small can cause trouble. Experiment with wax additives like vying agents that promote cleaner burns. Also, trim your wick regularly to prevent excess soot and irregular flames. Adjustments like these can transform your candle’s performance, revealing a mesmerizing, steady glow that keeps you captivated until the very last flicker.
Are There Specific Wax Blends Recommended for Optimal Wooden Wick Performance?
For ideal wooden wick performance, you should choose wax blends that guarantee wax compatibility and promote consistent burning. Look for soy, coconut, or beeswax blends, as they burn evenly and support wooden wicks well. Additionally, selecting a wax that allows fragrance infusion without compromising burn quality enhances your candle experience. Testing different blends helps you find the perfect balance for a clean, steady flame and minimal soot.
How Do I Maintain Safety When Replacing or Trimming the Wooden Wick?
When replacing or trimming your wooden wick, always prioritize fire safety and tool safety. Use sharp scissors or wick trimmers carefully, keeping your hands clear of the flame. Make sure the candle is completely cool before handling it. Work in a well-ventilated area, and keep a fire extinguisher nearby. Remove the wick carefully, avoiding any wax spillage, and dispose of trimmed wick pieces safely.
Conclusion
Creating your own wooden wick candles is a rewarding craft that adds a cozy touch to any space. Did you know that the candle industry has seen a 20% increase in DIY candle making in recent years? By following these simple steps, you can craft beautiful, personalized candles safely and confidently. Enjoy the process and the warm glow of your handmade creation, knowing you’ve made something truly special with your own hands.